This tutorial was translated with PSPX3 but it can also be made using other versions of PSP.
Since version PSP X4, Image>Mirror was replaced with Image>Flip Horizontal,
and Image>Flip with Image>Flip Vertical, there are some variables.
In versions X5 and X6, the functions have been improved by making available the Objects menu.
In the latest version X7 command Image>Mirror and Image>Flip returned, but with new differences.
See my schedule here
French translation here
Your versions here
For this tutorial, you will need:
Material here
Tube Belscrap_Magical Christmas
Imagen HighFour_Winter_Joy_Paper2
Imagen RDACH_bkgRedFloral
Tube N_40/SL by SussuLuz
Tube Poes_Doos by Jv.d.E.
Decoro 1 y 2 by Clo
Deco lazes
Deco bombones
Bastoncito_navidad_nines
GTD CHRISTMAS MUSICAL 18
C-MASWORDART1ABCOHDIDIT

1. Open a new transparent image 900 x 700 pixels.
2. Selections>Select All.
Open HighFour_Winter_Joy_Paper2 - Edit>Copy.
Go back to your work and go to Edit>Paste into selection.
Selections>Select None.
3. Open the tube N_40/SL de Sussuluz - Edit>Copy.
Go back to your work and go to Edit>Paste as new layer.
Move  the tube to the right side.
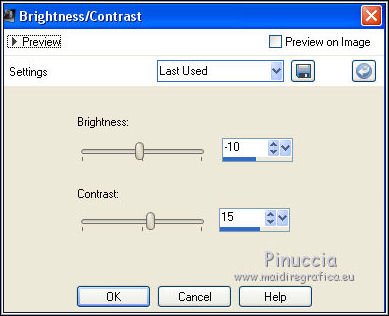
4. Adjust>Brightness and Contrast>Brightness and Contrast.
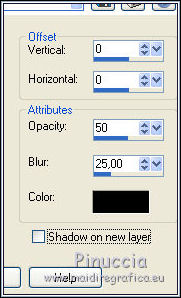
5. Effects>3D Effects>Drop Shadow, color black.
6. Open Déco lazes_ac - Edit>Copy.
Go back to your work and go to Edit>Paste as new layer.
Move the tube at the upper left.
7. Effects>3D Effects>Drop Shadow, color black.

8. Open the tube Belscrap_Magical Christmas - Edit>Copy.
Go back to your work and go to Edit>Paste as new layer.
Image>Resize, 2 times to 80%, resize all layers not checked.
Move the tube at the bottom left.
9. Effects>3D Effects>Drop Shadow, color black.

10. Adjust>Brightness and Contrast>Brightness and Contrast.

11. Open the tube Poes_Doos by Jv.d.E. - Edit>Copy.
Go back to your work and go to Edit>Paste as new layer.
Image>Resize, 2 times to 80% and 1 time to 90%, resize all layers not checked.
Move the tube at the bottom right.
12. Effects>3D Effects>Drop Shadow, color black.
13. Open Bastoncito_navidad_nines - Edit>Copy.
Go back to your work and go to Edit>Paste as new layer.
Image>Mirror.
Image>Free Rotate - 90 degrees to left.

Move the tube at the bottom left.
14. Effects>3D Effects>Drop Shadow, color black.
15. Open Decoro 2 y 3 by Clo - Edit>Copy.
Go back to your work and go to Edit>Paste as new layer.
Image>Resize, 2 times to 80%, resize all layers not checked.
Move the tube over the candy.
Effects>3D Effects>Drop Shadow, same settings.
16. Open GTD CHRISTMAS MUSIC 18 - Edit>Copy.
Go back to your work and go to Edit>Paste as new layer.
Open "bombones" - Edit>Copy.
Go back to your work and go to Edit>Paste as new layer.
Place the elements at the bottom.

On the two layers: Effects>3D Effects>Drop Shadow, same settings.
17. Open C-MASWORDART1ABCOHDIDIT - Edit>Copy.
Go back to your work and go to Edit>Paste as new layer.
Move the wordart at the middle top.
Effects>3D Effects>Drop Shadow, same settings.
18. Layers>New Raster Layer.
Selections>Select All.
Calques>Nouveau calque raster.
19. Open RDACH_bkgRedFloral - Edit>Copy.
Go back to your work and go to Edit>Paste into Selection.
20. Selections>Modify>Contract - 30 pixels.
Press CANC on the keyboard 
Selections>Select None.
21. Layers>Merge>Merge All.
22. Image>Resize, 95%, resize all layers checked.
23. Image>Add borders, 2 pixels, symmetric, color white.
Image>Add borders, 1 pixel, symmetric, #91000e.
Image>Add borders, 30 pixels, symmetric, color white.
Image>Add borders, 1 pixel, symmetric, #91000e.
24. Sign your work and save as jpg.

If you have problems or doubt, or you find a not worked link, or only for tell me that you enjoyed this tutorial, write to me.
29 November 2016