This tutorial was translated with PSPX3 but it can also be made using other versions of PSP.
Since version PSP X4, Image>Mirror was replaced with Image>Flip Horizontal,
and Image>Flip with Image>Flip Vertical, there are some variables.
In versions X5 and X6, the functions have been improved by making available the Objects menu.
In the latest version X7 command Image>Mirror and Image>Flip returned, but with new differences.
See my schedule here
French translation here
Your versions here
For this tutorial, you will need:
Material here
Tube Easter_cute_bunny_CibiBijoux
Tube Berna_Easter_06_2011
Tube Lize-DP-JF-026
Tube Lize-DP-JF-031
mask_Marge_TopFade
maskyawey01_camerontags

You can change Blend Modes according to your colors.
In the newest versions of PSP, you don't find the foreground/background gradient (Corel_06_029).
You can use the gradients of the older versions.
The Gradient of CorelX here
Copy the preset Emboss 3 in the Presets Folder.
Copy the mask 20-20 in the Masks Folder.
Open the other masks in PSP and minimize them with the rest of the material.
1. Set your foreground color to #c2bae3.
Set your background color to #6f37b4.

Set your foreground color to a Foreground/Background Gradient, style Linear.
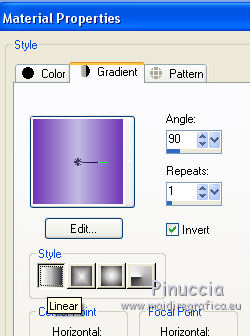
2. Open a new transparent image 600 x 500 pixels.
Flood Fill  the transparent image with your Gradient.
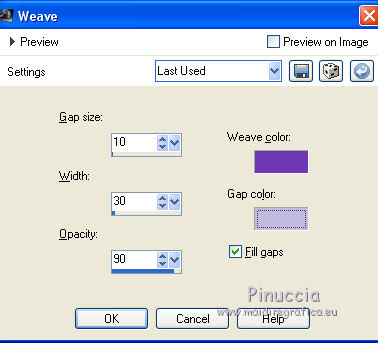
3. Effects>Texture Effects>Weave
wave color: background color #6f37b4,
gap color: foreground color #c2bae3.
4. Layers>Load/Save MAsk>Load Mask from Disk.
Look for and load the mask 20-20.
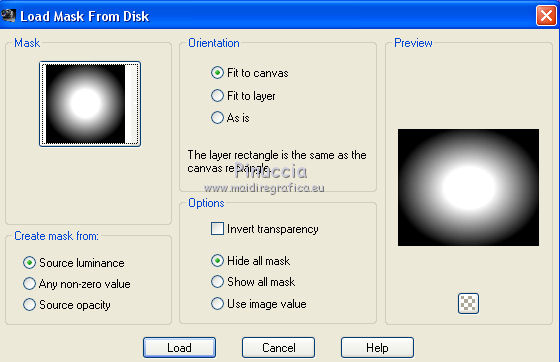
Layers>Merge>Merge Group.
5. Effects>Used Defined Filter - select the preset Emboss 3 and ok.

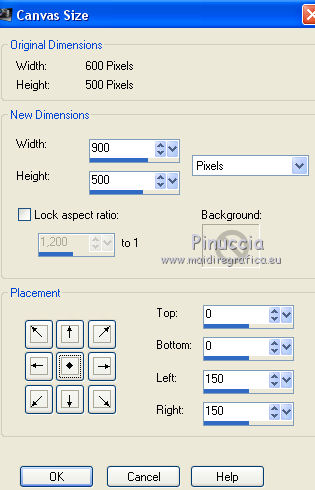
6. Image>Canvas Size - 900 x 500 pixels.
7. Layers>New Raster Layer.
Layers>Arrange>Send to Bottom.
Flood Fill  the layer with your Gradient.
8. Activate the top layer.
Open Easter_cute_bunny_CibiBijoux - Edit>Copy.
Go back to your work and go to Edit>Paste as new layer.
Image>Resize, to 80%, resize all layers not checked.
9. Effects>3D Effects>Drop Shadow, color black.

10. Open Berna_Easter_06_2011 - Edit>Copy.
Go back to your work and go to Edit>Paste as new layer.
11. Effects>Image Effects>Offset.

12. Layers>Duplicate.
13. Effects>Image Effects>Offset.
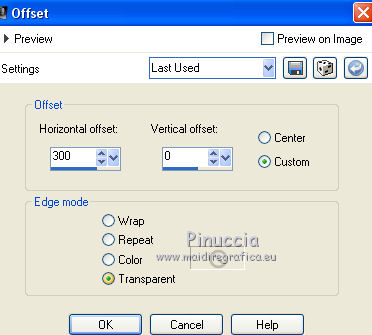
14. Layers>New Raster Layer.
Flood Fill  with your background color #6f37b4.
15. Selections>Select All.
Selection>Modify>Contract - 5 pixels.
Press CANC on the keyboard 
Selections>Select None.
16. Effects>3D Effects>Drop Shadow, color black.
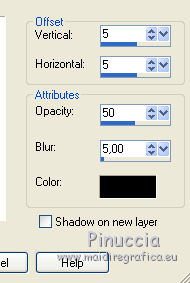
Repeat Drop Shadow, vertical et horizontal -5.
17. Layers>Merge>Merge visible.
18. Edit>Copy.
19. Image>Resize, 80%, resize all layers not checked.
20. Effects>3D Effects>Drop Shadow, color black.
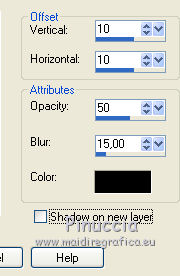
Repeat Drop Shadow, vertical and horizontal -10.
21. Layers>New Raster Layer.
Layers>Arrange>Send to Bottom.
22. Selections>Select All.
Edit>Paste into Selection.
Sélections>Désélectionner tout.
23. Effects>Image Effects>Seamless Tiling, default settings.

24. Adjust>Blur>Gaussian Blur - radius 50.

25. Effects>Art Media Effects>Brush Strokes, background color #6f37b4.
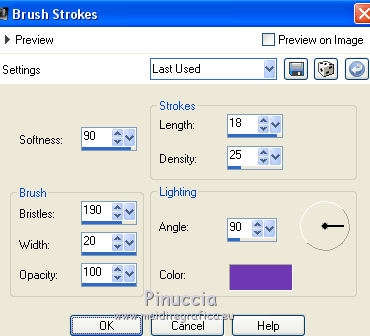
26. Layers>New Mask layer>From image
Open the menu under the source window and you'll see all the files open.
Select the mask mask_Marge_TopFade.
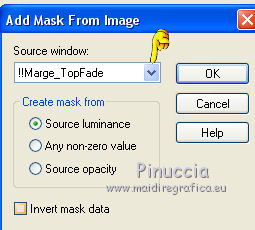
Layers>Merge>Merge Group.
27. Image>Canvas Size - 900 x 700 pixels.
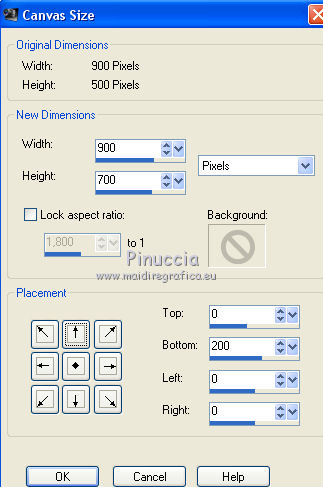
28. Layers>New Raster Layer.
Set your foreground color to Color
Flood fill  the layer with your foreground color #c2bae3.
29. Layers>New Mask layer>From image
Open the menu under the source window and select the mask maskyawey01_camerontags.
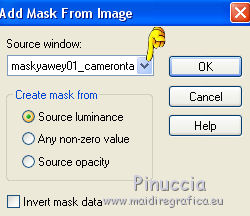
Layers>Merge>Merge Group.
30. Layers>New Raster Layer.
Layers>Arrange>Send to Bottom.
Flood Fill  with your background color #6f37b4.
31. Activate the top layer.
Open the tube Lize-DP-JF-026 - Edit>Copy.
Go back to your work and go to Edit>Paste as new layer.
Image>Resize, to 90%, resize all layers not checked.
Move  the tube to the right side.
32. Effects>3D Effects>Drop Shadow, color black.

33. Open the tube Lize-DP-JF-031 - Edit>Copy.
Go back to your work and go to Edit>Paste as new layer.
Image>Resize, 2 time to 80%, resize all layers not checked.
Move  the tube to the left side.
Effects>3D Effects>Drop Shadow, same settings.
34. Open Criss pascua 11 - Edit>Copy.
Go back to your work and go to Edit>Paste as new layer.
Image>Resize, to 70%, resize all layers not checked.
Place  rightly the tube.
Effects>3D Effects>Drop Shadow, same settings.
35. Layers>Merge>Merge All.
36. Image>Add borders, 2 pixels, symmetric, background color #6f37b4.
Image>Add borders, 10 pixels, symmetric, foreground color #c2bae3.
Image>Add borders, 2 pixels, symmetric, background color #6f37b4.
Image>Add borders, 30 pixels, symmetric, foreground color #c2bae3.
Image>Add borders, 1 pixel, symmetric, background color #6f37b4.
37. Image>Resize, 95%, resize all layers checked.
38. Sign your work and save as jpg.

If you have problems or doubt, or you find a not worked link, or only for tell me that you enjoyed this tutorial, write to me.
1 Avril 2017


