|
TAG FASHION
 ENGLISH VERSION ENGLISH VERSION
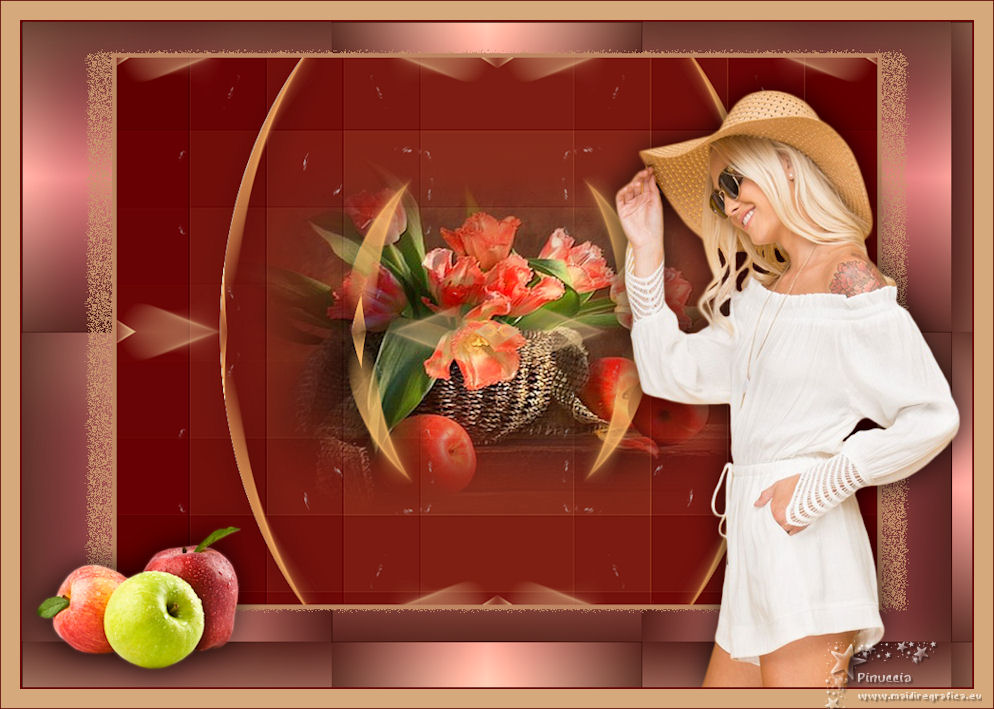
Here you find the original of this tutorial:

This tutorial was translated with PSPX2 but it can also be made using other versions of PSP.
Since version PSP X4, Image>Mirror was replaced with Image>Flip Horizontal,
and Image>Flip with Image>Flip Vertical, there are some variables.
In versions X5 and X6, the functions have been improved by making available the Objects menu.
In the latest version X7 command Image>Mirror and Image>Flip returned, but with new differences.
See my schedule here
French translation here
your versions ici
For this tutorial, you will need:
Material here
malackatube fashion183
Mist-2880-luzcristina
Tube Dani@1361
Forma 12_Nines
(you find here the links to the material authors' sites)
Plugins
consult, if necessary, my filter section here
Filters Unlimited 2.0 here
FM Tile Tools - Saturation Emboss here
VM Natural - Weave Distortion here
Simple - 4Way Average here
Filters Simple and VM Natural can be used alone or imported into Filters Unlimited.
(How do, you see here)
If a plugin supplied appears with this icon  it must necessarily be imported into Unlimited it must necessarily be imported into Unlimited

You can change Blend Modes according to your colors.
In the newest versions of PSP, you don't find the foreground/background gradient (Corel_06_029).
You can use the gradients of the older versions.
The Gradient of CorelX here
Copy the preset Emboss 3 in the Presets Folder.
1. Open a new transparent image 900 x 650 pixels.
2. Set your foreground color to #43030a,
and your background color to #8c5845.

Set your foreground color to a Foreground/Background Gradient, style Sunburst.

Flood Fill  the transparent image with your gradient. the transparent image with your gradient.
3. Effects>Distortion Effects>Pixelate.

4. Effects>User Defined Effects - select the preset Emboss 3 and ok.

5. Effects>Plugins>FM Tile Tools - Saturation Emboss.

6. Open Forma12_Nines - Edit>Copy.
Go back to your work and go to Edit>Paste as new layer.
7. Effects>Reflection Effects>Kaleidoscope.

8. Layers>Duplicate.
Layers>Merge>Merge Down.
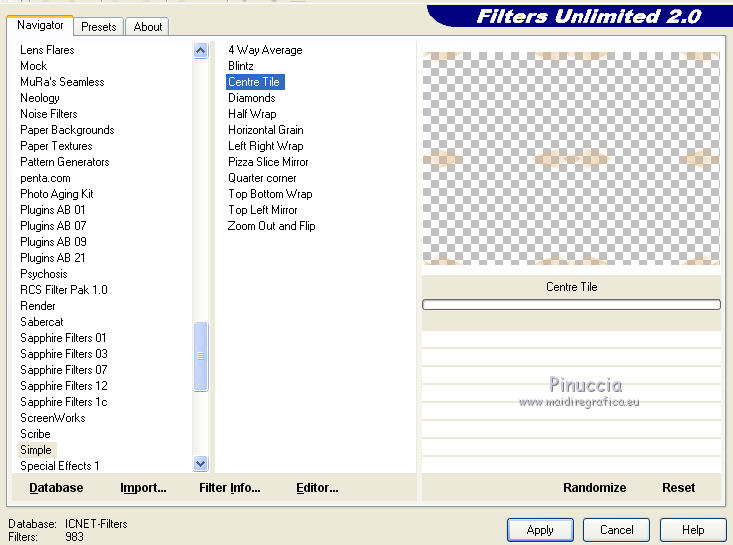
9. Effects>Plugins>Filters Unlimited 2.0 - Simple - Centre Tile.
10. Layers>Duplicate.
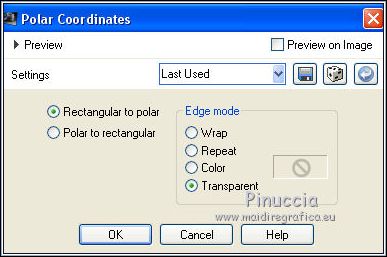
11. Effects>Distortion Effects>Polar Coordinates.
12. Image>Free Rotate - 90 degrees to right.

13. Layers>Duplicate.
Layers>Merge>Merge Down.
14. Effects>Plugins>FM Tile Tool - Saturation Emboss.

15. Effects>3D Effects>Drop Shadow, color #000000.

16. Open the tube 2880-luzcristina -Edit>Copy.
Go back to your work and go to Edit>Paste as new layer.
Image>Resize, to 90%, resize all layers not checked.
Move this layer over the background layer.

17. Activate the top layer.
Layers>New Raster Layer.
Set your foreground color to #be8763.
Flood Fill  with your foreground color #be8763. with your foreground color #be8763.
18. Selections>Select All.
Selections>Modify>Contract - 5 pixels.
Press CANC on the keyboard 
Selections>Invert.
19. Effects>Texture Effects>Weave.
Weave color #bc8360.

Selections>Select None.
20. Layers>Merge>Merge visible.
21.Edit>Copy.
22. Image>Resize, to 90%, resize all layers not checked.
23. Image>Canvas Size - 1000 x 700 pixels.

24. Effects>3D Effects>Drop Shadow, color #c7946b,
shadow on a new layer checked.

Change the Blend Mode of the shadow layer to Dissolve.
25. Layers>Duplicate.
Image>Mirror.
26. Layers>New Raster Layer.
Layers>Arrange>Send to Bottom.
26. Selections>Select All.
Edit>Paste into Selection.
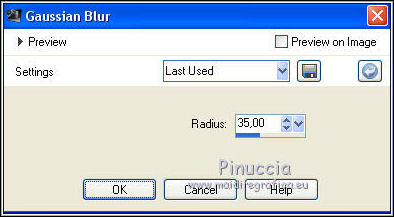
27. Adjust>Blur>Gaussian Blur - radius 35.
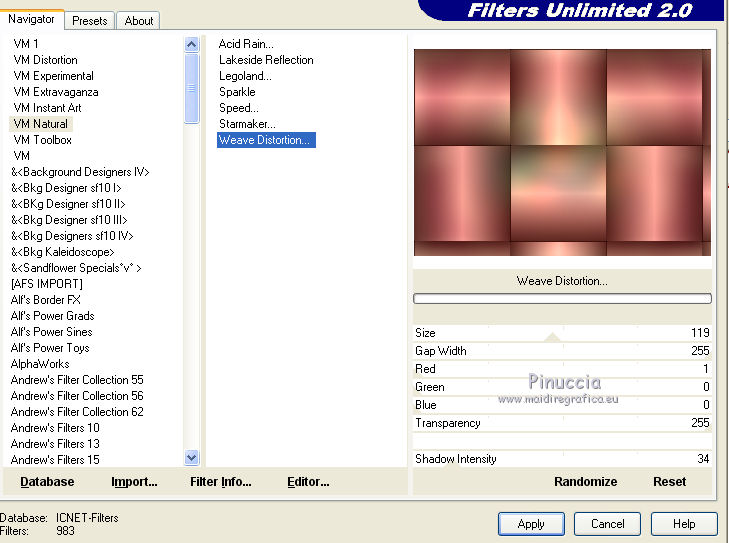
28. Effects>Plugins>Filters Unlimited 2.0 - VM Natural - Weave Distortion.
29. Open the tube Dani@1361 - Edit>Copy.
Go back to your work and go to Edit>Paste as new layer.
Image>Resize, to 50%, resize all layers not checked.
30. Effects>3D Effects>Drop Shadow, color #000000.

Move  the tube at the bottom left. the tube at the bottom left.
31. Open the tube malackatube fashion183 - Edit>Copy.
Go back to your work and go to Edit>Paste as new layer.
Image>Mirror.
Image>Resize, to 80%, resize all layers not checked.
Effects>3D Effects>Drop Shadow, same settings.
32. Layers>Merge>Merge All.
33. Image>Add borders, 2 pixels, symmetric, color #680305.
Image>Add borders, 20 pixels, symmetric, color #d5a97c.
Image>Add borders, 1 pixel, symmetric, color #680305.
34. Image>Resize, to 95%, resize all the layers checked.
35. Sign your work and save as.
Your versions here

If you have problems or doubts, or you find a not worked link, or only for tell me that you enjoyed this tutorial, write to me.
1 September 2018
|
 ENGLISH VERSION
