|
TAG EL LOBO
 ENGLISH VERSION ENGLISH VERSION
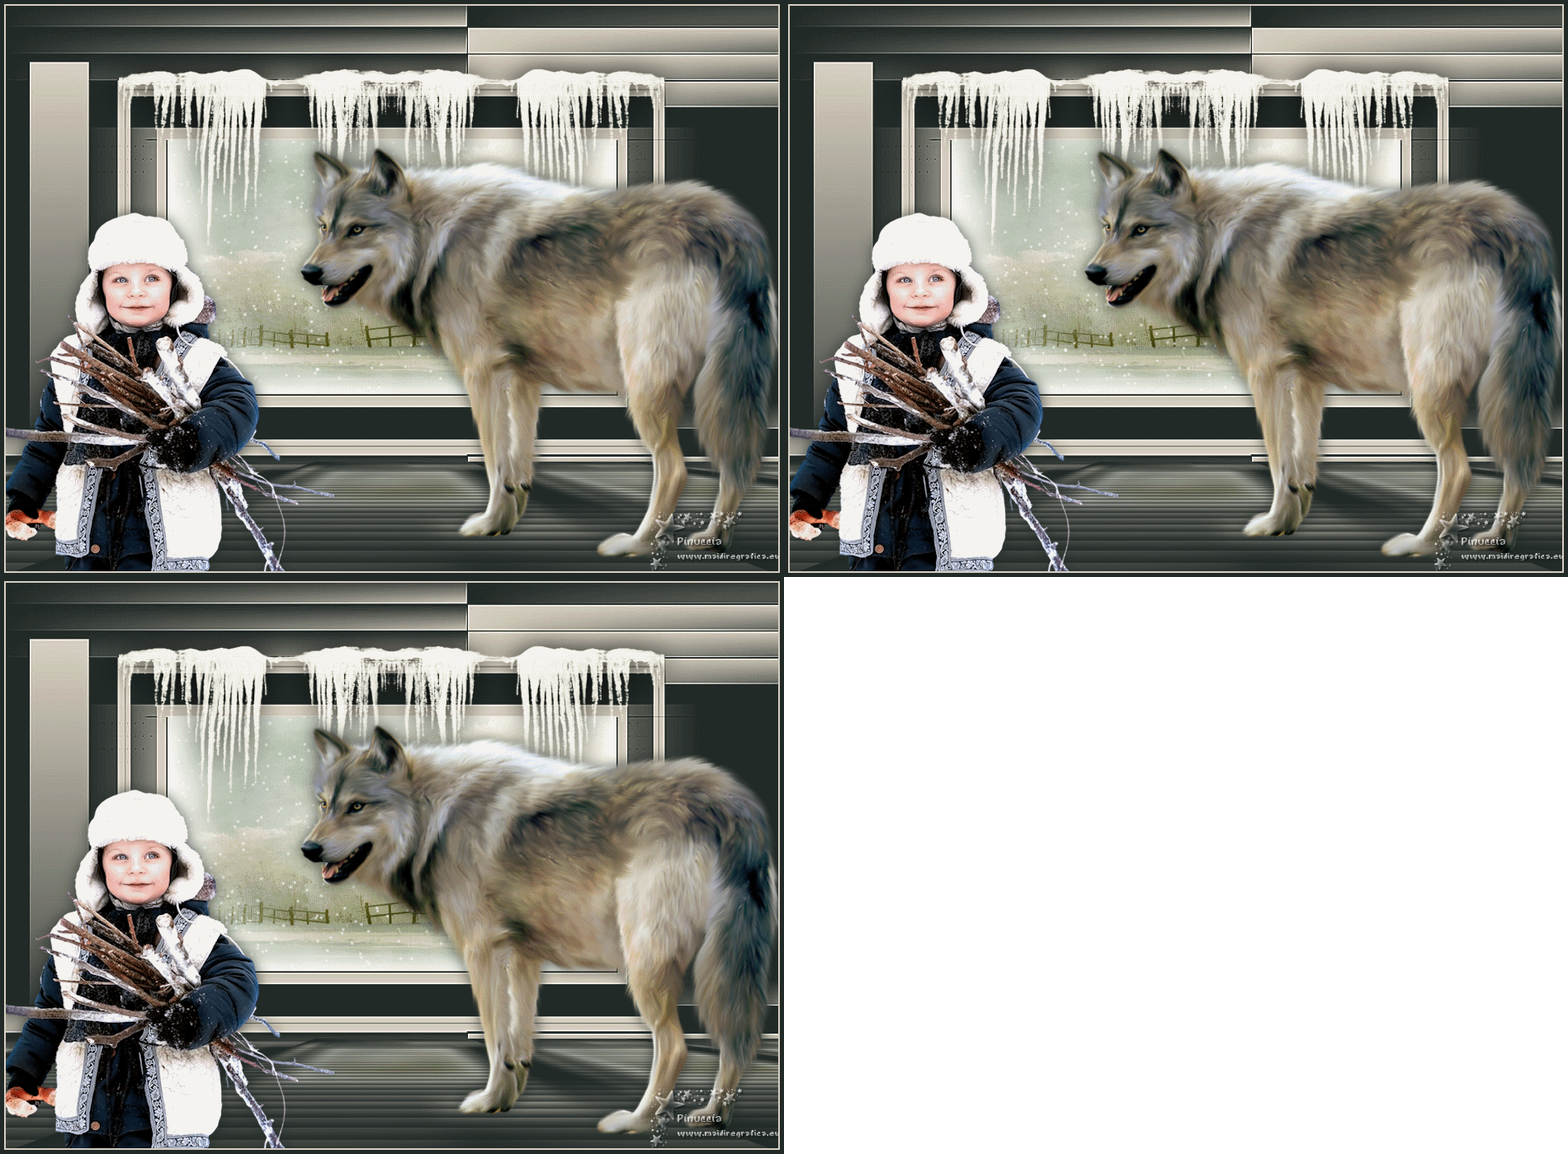
Here you find the original of this tutorial:

This tutorial was translated with PSPX7 but it can also be made using other versions of PSP.
Since version PSP X4, Image>Mirror was replaced with Image>Flip Horizontal,
and Image>Flip with Image>Flip Vertical, there are some variables.
In versions X5 and X6, the functions have been improved by making available the Objects menu.
In the latest version X7 command Image>Mirror and Image>Flip returned, but with new differences.
See my schedule here
French translation here
Your versions ici
For this tutorial, you will need:
Material here
Tube Enfant_premiers_frimas_CibiBijoux
Tube 8febfa37
BS16z-Fondo1
Maskj_Geometric_02_GB_2019
seleccion sel.lobo.nines
(you find here the links to the material authors' sites)
Plugins
consult, if necessary, my filter section here
Mura's Meister - Perspective Tiling here
VDL Adrenaline - Snowflakes here
Animation Shop here

You can change Blend Modes according to your colors.
Copy the selection in the Selections Folder.
Open the mask in PSP and minimize it with the rest of the material.
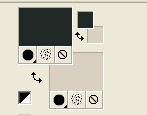
1. Set your foreground color to #222a27,
and your background color to #d9d0c1.
2. Open a new transparent image 950 x 650 pixels.
Flood Fill  the transparent image with your foreground color #222a27. the transparent image with your foreground color #222a27.
3. Layers>New Raster Layer.
Flood Fill  with your background color #d9d0c1. with your background color #d9d0c1.
4. Layers>New Mask layer>From image
Open the menu under the source window and you'll see all the files open.
Select the mask Maskj_Geometric_02_GB_2019.
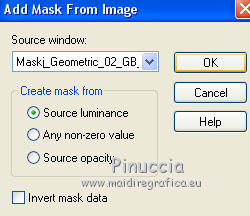
Layers>Merge>Merge Group.
Adjust>Sharpness>Sharpen More.
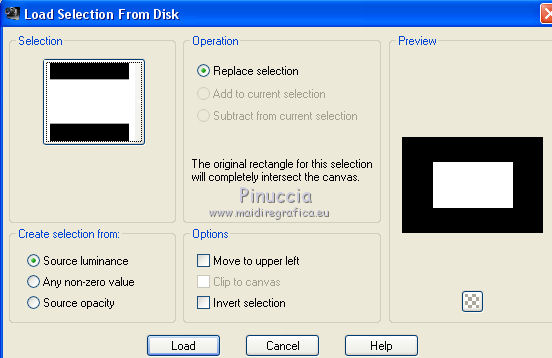
5. Selections>Load/Save Selection>Load Selection from Disk.
Look for and load the selection sel.lobo.nines
6. Layers>New Raster Layer.
Open BS16z-Fondo1 - Edit>Copy.
Go back to your work and go to Edit>Paste into Selection.
Selections>Select None.
7. Layers>Merge>Merge visible.
8. Layers>Duplicate.
9. Adjust>Blur>Gaussian Blur - radius 25.

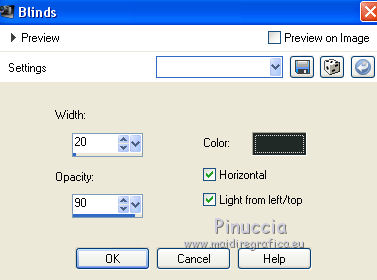
10. Effects>Texture Effects>Blinds - foreground color #222a27.
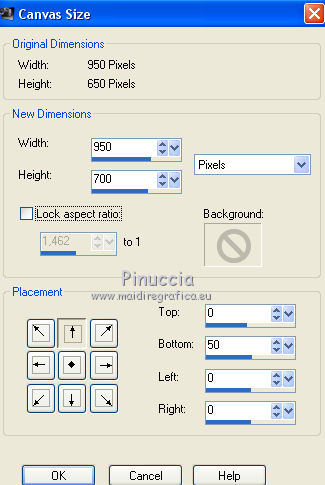
11. Image>Canvas Size - 950 x 700 pixels.
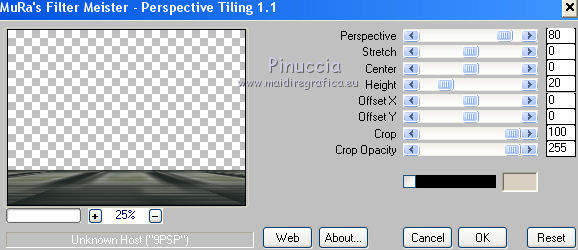
12. Effects>Plugins>Mura's Meister - Perspective Tiling.
13. Activate the layer below, Merged.
Selections>Load/Save Selection>Load Selection from Disk.
Load again the selection sel.lobo.nines

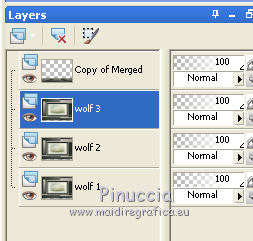
14. Layers>Duplicate - 2 times
and rename the layer from the bottom wolf1/wolf2/wolf3.
15. Activate the layer wolf 1.
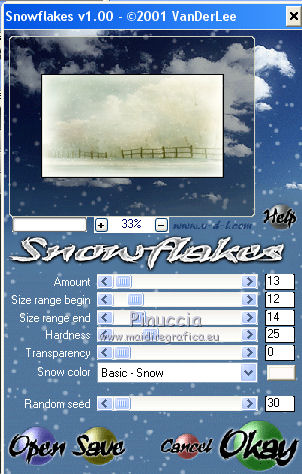
Effects>Plugins>VDL Adrenaline - Snowflakes.
16. Activate the layer above loup 2.
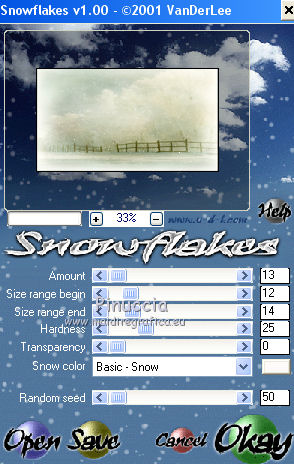
Repeat Effects>Plugins>VDL Adrenaline - Snowflakes, Random Seed 50.
Close this layer and activate the layer above wolf 3.
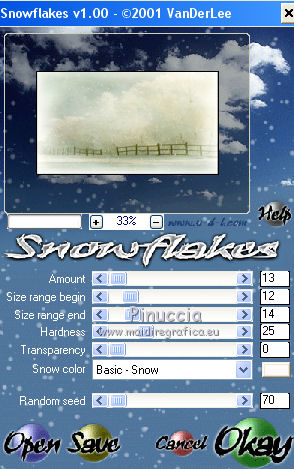
17. Effects>Plugins>VDL Adrenaline - Snowflakes, Random Seed 70.
Close this layer.
Selections>Select None.
18. Open the tube nieve_nines, erase the watermark and Edit>Copy.
Go back to your work and go to Edit>Paste as new layer.
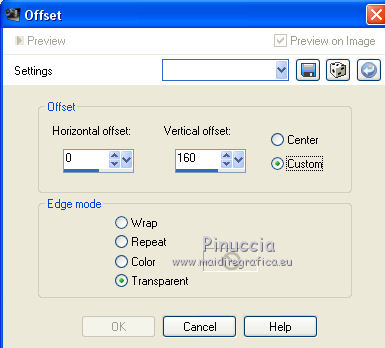
19. Effects>Image Effects>Offset.
20. Effects>3D Effects>Drop Shadow, color black.

21. Open the tube 8febfa37 and go to Edit>Copy.
Go back to your work and go to Edit>Paste as new layer.
Move  the tube to the right side, see my example. the tube to the right side, see my example.
22. Effects>3D Effects>Drop Shadow, foreground color #222a27.

23. Open the tube Enfant_premiers_frimas_ -Edit>Copy.
Go back to your work and go to Edit>Paste as new layer.
Erase the watermark.
Image>Resize, 1 time to 80% and 1 time to 90%, resize all layers not checked.
Move  the tube to the left side. the tube to the left side.
Effects>3D Effects>Drop Shadow, same settings.
24. Layers>New Raster Layer.
Flood Fill  with your foreground color #222a27. with your foreground color #222a27.
25. Selections>Select All.
Selections>Modify>Contract- 5 pixels.
Press CANC on the keyboard 
Flood Fill  with your background color #d3cbbb. with your background color #d3cbbb.
Selections>Modify>Contract - 2 pixels.
Press CANC on the keyboard.
Selections>Select None.
26. Sign your work on a new layer.
Animation
1. Your layers palette: the layer wolf 2 and wolf 3 are closed
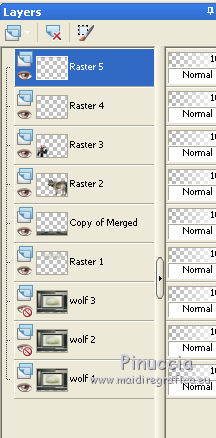
Edit>Copy Special>Copy Merged.
Open Animation Shop and go to Edit>Paste>Paste as new animation.
2. Go back to PSP.
Close the layer wolf 1 and open the layer wolf 2.
Edit>Copy Special>Copy Merged.
Go back to Animation Shop and Edit>Paste>Paste after the current frame.
3. On PSP.
Close the layer wolf 2 and open the layer wolf 3.
Edit>Copy Special>Copy Merged.
Go back to Animation Shop and Edit>Paste>Paste after the current frame.
4. Check the result clicking on View animation 
and save as gif.
Your versions here

If you have problems or doubts, or you find a not worked link, or only for tell me that you enjoyed this tutorial, write to me.
8 Janvier 2019
|
 ENGLISH VERSION

 ENGLISH VERSION
