This tutorial was translated with PSPX7 but it can also be made using other versions of PSP.
Since version PSP X4, Image>Mirror was replaced with Image>Flip Horizontal,
and Image>Flip with Image>Flip Vertical, there are some variables.
In versions X5 and X6, the functions have been improved by making available the Objects menu.
In the latest version X7 command Image>Mirror and Image>Flip returned, but with new differences.
See my schedule here
French translation here
your versions ici
For this tutorial, you will need:
Material here
2693-Paul Walker-LB TUBES
2761-blue eyes-MISTED-LB TUBES
Narah_Mask_1256
patron_colores_nines
Adorno_rectangulos_nines
Texto_Blue Eye_nines
(you find here the links to the material authors' sites)
Plugins
consult, if necessary, my filter section here
Filters Unlimited 2.0 here
Virtual Painter 4 here
AAA Frames - Foto Frame here
Simple - Top Left Mirror here
Mura's Meister - Cloud here
Mura's Meister - Perspective Tiling here
VM Instant Art - Tripolis here
Filters Simple and VM Instant Art can be used alone or imported into Filters Unlimited.
(How do, you see here)
If a plugin supplied appears with this icon  it must necessarily be imported into Unlimited

You can change Blend Modes according to your colors.
Copy the Preset Emboss 3 in the Presets Folder.
Open the masks in PSP and minimize them with the rest of the material.
1. Set your foreground color to #ffffff,
and your background color to #000000.
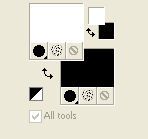
Open a new transparent image 900 x 650 pixels.
2. Selections>Select All.
Open the image patron_colores_nines - Edit>Copy.
Go back to your work and go to Edit>Paste into Selection.
Selections>Select None.
3. Adjust>Blur>Gaussian Blur - radius 15.

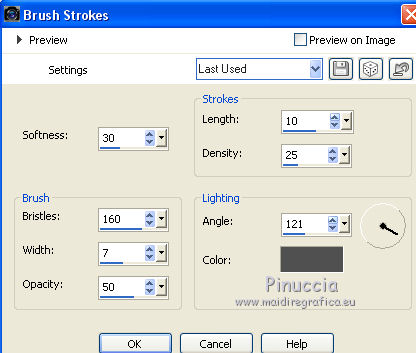
4. Effects>Art Media Effects>Brush Strokes - color #505050.
5. Effects>Plugins>Virtual Painter 4
Filter: Pastel - Material: Paper (Smooth)

6. Effects>Geometric Effects>Perspective Vertical.

Edit>Repeat Perspective Vertical.
7. Effects>Geometric Effects>Skew.

8. Effects>Plugins>Filters Unlimited 2.0 - Simple - Top Left Mirror.

9. Effects>User Defined Filter - select the preset Emboss 3 and ok.

10. Change the Blend Mode of this layer to Luminance (Legacy).
11. Layers>New Raster Layer.
Layers>Arrange>Send to Bottom.
Flood Fill  the layer with color black #000000.
12. Activate the top layer.
Open the tube 2761-blue eyes-MISTED-LB TUBES - Edit>Copy.
Go back to your work and go to Edit>Paste as new layer.
13. Layers>New Mask layer>From image
Open the menu under the source window and you'll see all the files open.
Select the mask 20-20
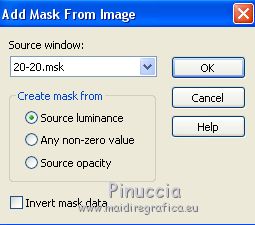
Layers>Merge>Merge group.
14. Place  the tube in the middle.
15. Layers>Merge>Merge visible.
16. Effects>Plugins>AAA Frames - Foto Frame.

17. Edit>Copy.
18. Image>Resize, to 90%, resize all layers not checked.
19. Image>Canvas Size - 950 x 700 pixels.
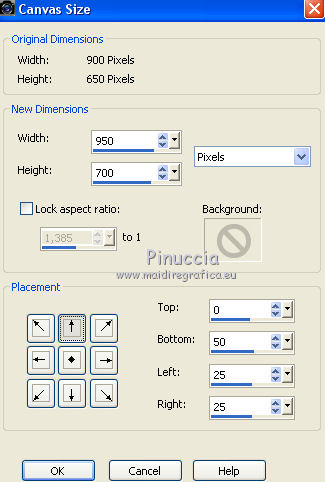
20. Effects>Image Effects>Offset.

21. Layers>New Raster Layer.
Layers>arrange>Send to Bottom.
22. Selections>Select All.
Edit>Paste into Selection.
Selections>Select None.
23. Adjust>Blur>Gaussian Blur - radius 15.

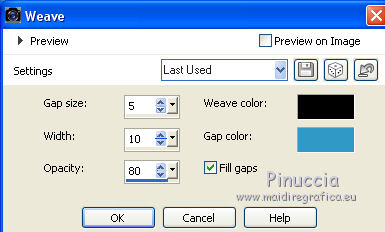
24. Effects>Texture Effects>Weave
weave color: #000000
gap color: #3199c6.
25. Effects>Plugins>Mura's Meister - Perspective Tiling.

26. Layers>New Raster Layer.
Layers>Arrange>Send to Bottom.
27. Effects>Plugins>Mura's Meister - Cloud

remember that this plugin works with the colors of your Materials,
but keeps in memory the first settings used after the opening of PSP.
Click on Reset to be sure to have your colors.
The result is random, for that your result will be different than mine).
To change the result, you can click on the preview window, until you'll see the result you like better
28. Effects>Plugins>Filters Unlimited 2.0 - VM Instant Art - Tripolis, default settings.

29. Activate the top layer.
Open Adorno_rectangulitos_nines - erase the watermark and go to Edit>Copy.
Go back to your work and go to Edit>Paste as new layer.
30. Effects>Image Effects>Offset.

31. Layers>New Raster Layer.
Reduce the opacity of the Flood Fill Tool to 50%.

Flood Fill  the layer with color white #ffffff.
(don't forget to set again the opacity to 100).
32. Layers>New Mask layer>From image
Open the menu under the source window and select the mask Narah_Mask_1256.

Layers>Merge>Merge Group.
33. Open the tube 2693-Paul Walker-LB TUBES - Edit>Copy.
Go back to your work and go to Edit>Paste as new layer.
Image>Resize, to 80%, resize all layers not checked.
Move  the tube to the left side.
34. Effects>3D Effects>Drop Shadow, color black.

35. Open the tube Texto_Blue Eye_nines - Edit>Copy.
Go back to your work and go to Edit>Paste as new layer.
Move  the tube at the bottom right.
36. Layers>Merge>Merge All.
37. Image>Add borders, 2 pixels, symmetric, color #000000.
Image>Add borders, 10 pixels, symmmetric, color #3278aa.
38. Sign your work and save as jpg.
Your versions here

If you have problems or doubts, or you find a not worked link, or only for tell me that you enjoyed this tutorial, write to me.
21 Juin 2018
 ENGLISH VERSION
