|
TOP VENUS
 ENGLISH VERSION ENGLISH VERSION
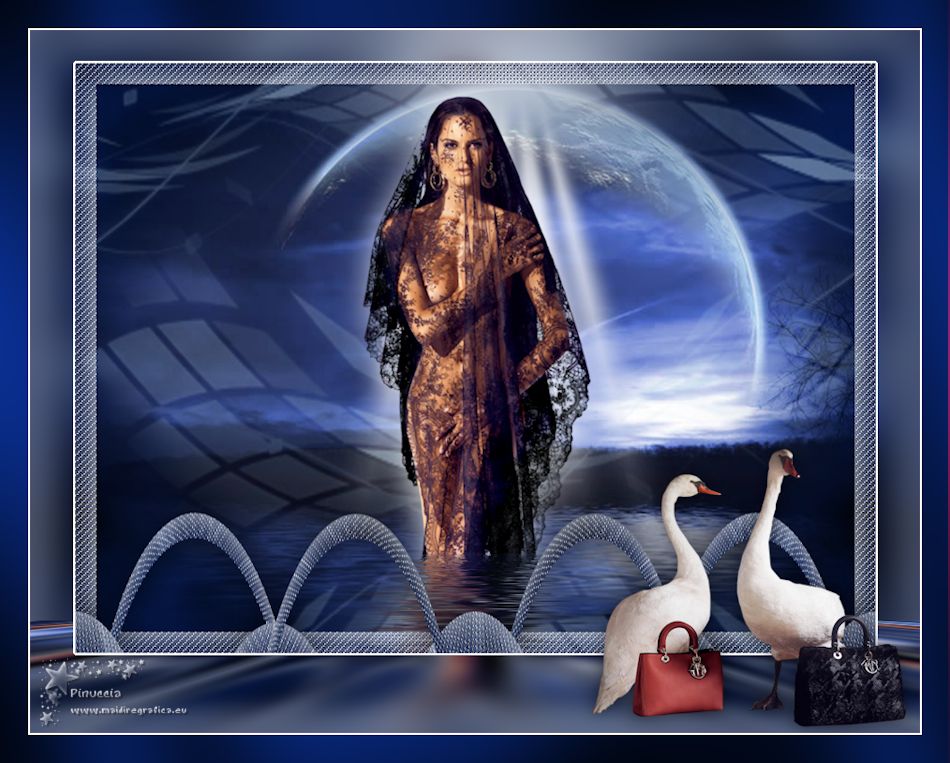
Here you find the original of this tutorial:

This tutorial was translated with PSPX7 but it can also be made using other versions of PSP.
Since version PSP X4, Image>Mirror was replaced with Image>Flip Horizontal,
and Image>Flip with Image>Flip Vertical, there are some variables.
In versions X5 and X6, the functions have been improved by making available the Objects menu.
In the latest version X7 command Image>Mirror and Image>Flip returned, but with new differences.
See my schedule here
French translation here
Your versions ici
For this tutorial, you will need:
Material
here
Tube Grisi_Woman_956
Grisi_Misted_Land_351
Tube calguisswan02102019 by Guismo
Adorno_decomask
masque_29_franiemargot
(you find here the links to the material authors' sites)
Plugins
consult, if necessary, my filter section here
Mura's Meister - Perspective Tiling here
Mura's Meister - Cloud here
Flaming Pear - Flood here
Tramages - Pool Shadow here
Filters Unlimited 2.0 here
Filters Tramages can be used alone or imported into Filters Unlimited.
(How do, you see here)
If a plugin supplied appears with this icon  it must necessarily be imported into Unlimited it must necessarily be imported into Unlimited

You can change Blend Modes according to your colors.
Open the Mask in PSP and minimize it with the rest of the material.
1. Open a new transparent image 950 x 700 pixels.
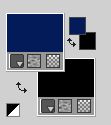
2. Set your foreground color to #061d59,
and your background color to black #000000.
3. Effects>Plugins>Mura's Meister - Cloud
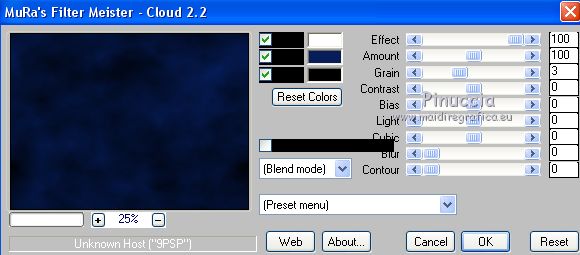
Remember that this filter works with the colors of your materials palette,
but keeps in memory the first settings from the opening of your PSP.
So if you have already used the filter, to make sure you have set the correct colors, press the Reset button.
The result is random and for this reason it will not be the same as mine.
If you want to change the appearance of the clouds, click on the preview window,
until you see what you prefer.
4. Open the tube Grisi_Misted_Land_351 and go to Edit>Copy.
Go back to your work and go to Edit>Paste as new layer.
Image>Resize, to 140%, resize all layers not checked.
5. Set your background color to #b1cfe7.
Reduce the opacity of your Flood Fill Tool to 50.
Layers>New Raster Layer.
Flood Fill  the layer with your background color #b1cfe7. the layer with your background color #b1cfe7.
Set again the opacity of your Flood Fill Tool to 100.
6. Layers>New Mask layer>From image
Open the menu under the source window and you'll see all the files open.
Select the mask masque_29_franiemargot.
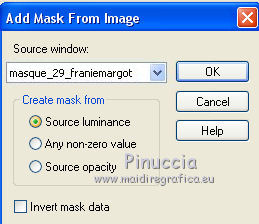
Layers>Merge>Merge Group.
7. Effects>Image Effects>Seamless Tiling, default settings.

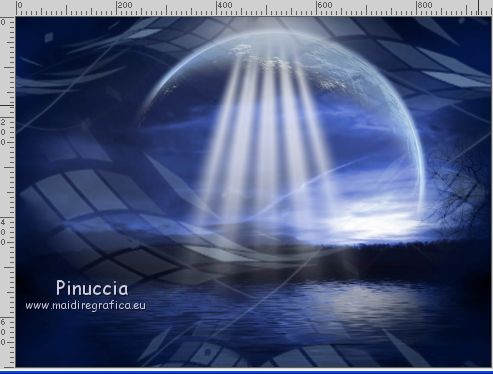
8. Open the image decomask and go to Edit>Copy.
Go back to your work and go to Edit>Paste as new layer.
Move  the tube a bit up, in the centre. the tube a bit up, in the centre.
9. Open the tube Grisi_Woman_956 and go to Edit>Copy.
Go back to your work and go to Edit>Paste as new layer.
Image>Resize, 2 times to 80%, resize all layers not checked.
Don't move the tube.
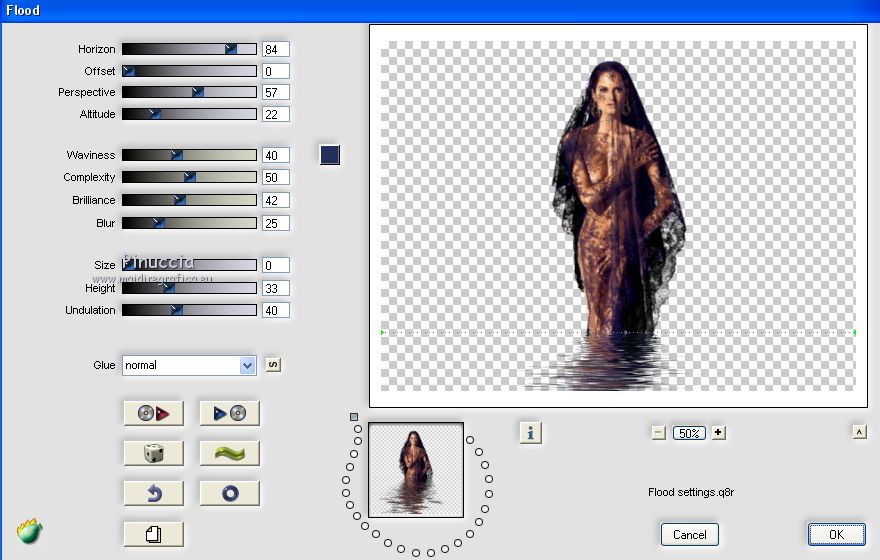
10. Effects>Plugins>Flaming Pear - Flood - color #212f5e.
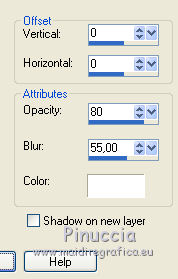
11. Effects>3D Effects>Drop Shadow, color #ffffff.
12. Layers>Merge>Merge visible.
13. Selections>Select All.
Selections>Modify>Contract - 25 pixels.
Selections>Invert.
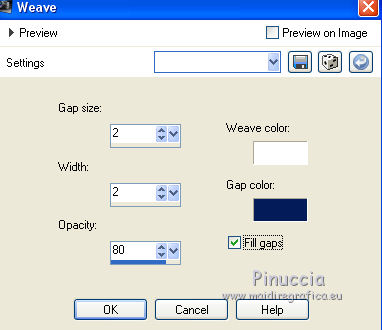
14. Effects>Texture Effects>Weave
Weave color #ffffff
Gap color: foreground color #061d59.
15. Selections>Invert.
Effects>3D Effects>Drop Shadow, same settings.

16. Again Selections>Invert.
Selections>Promote Selection to Layer.
17. Effects>Geometric Effects>Skew.
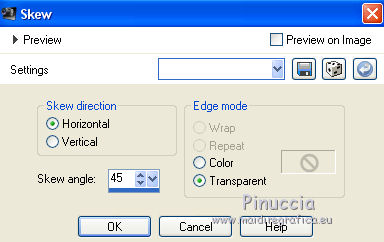
Selections>Select None.
18. Layers>Duplicate.
Image>Mirror.
Layers>Merge>Merge Down.
19. Effects>Distortion Effects>Polar Coordinates.

20. Effects>3D Effects>Drop Shadow, color black #000000.

21. Layers>Merge>Merge visible.
22. Layers>Duplicate.
Image>Resize, to 90%, resize all layers not checked.
23. Activate the layer below.
Adjust>Blur>Gaussian Blur - radius 20

24. Image>Canvas Size - 950 x 750 pixels.
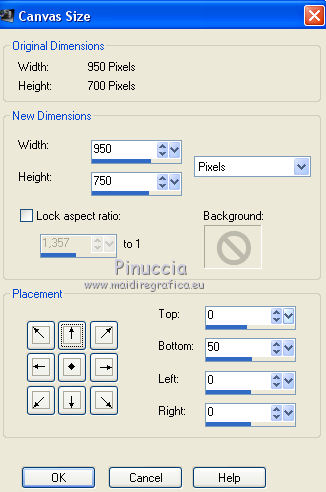
25. Layers>Duplicate.
Effects>Plugins>Mura's Meister - Perspective Tiling.
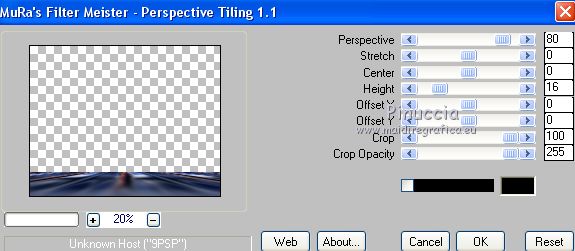
26. Activate the top layer.
Selections>Select All.
Selections>Float.
Selections>Defloat.
Selections>Modify>Select Selections Border.
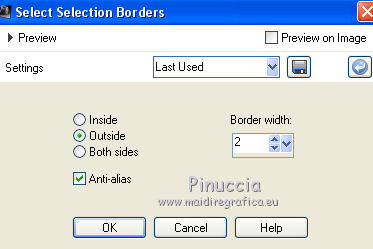
27. Set your background color to white #ffffff.
Flood Fill  the selection with color white. the selection with color white.
Selections>Select None.
28. Open the tube calguisswan02102019, erase the watermark and go to Edit>Copy.
Go back to your work and go to Edit>Paste as new layer.
Image>Resize, to 50%, resize all layers not checked.
Move  the tube at the bottom right. the tube at the bottom right.
29. Effects>3D Effects>Drop Shadow, color black #000000.
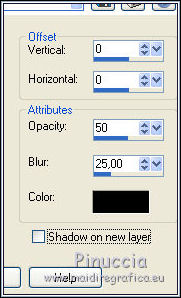
30. Layers>Merge>Merge All.
31. Image>Add borders, 2 pixels, symmetric, color #ffffff.
Image>Add borders, 30 pixels, symmetric, foreground color #061d59.
32. Activate your Magic Wand Tool 
and click on the 30 pixels border to select it.
33. Effects>Plugins>Tramages - Pool Shadow, default settings.
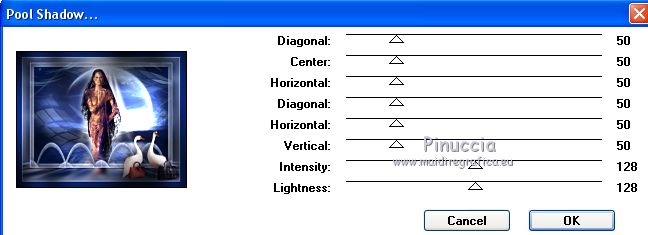
Selections>Select None.
34. Sign your work and save as jpg.
Your versions here

If you have problems or doubts, or you find a not worked link, or only for tell me that you enjoyed this tutorial, write to me.
5 January 2020
|
 ENGLISH VERSION
