|
TOP NOËL 2019
 ENGLISH VERSION ENGLISH VERSION
Here you find the original of this tutorial:

This tutorial was translated with PSPX7 but it can also be made using other versions of PSP.
Since version PSP X4, Image>Mirror was replaced with Image>Flip Horizontal,
and Image>Flip with Image>Flip Vertical, there are some variables.
In versions X5 and X6, the functions have been improved by making available the Objects menu.
In the latest version X7 command Image>Mirror and Image>Flip returned, but with new differences.
See my schedule here
 French translation here French translation here
Your versions ici

Una pallina-souvenir per il vostro Albero di Natale
Une boule-souvenir pour votre Arbre de Noël

For this tutorial, you will need:
Material
here
Renee_Tubes_Noel_2017
Tube calGuisPereNoel17112013 by Guismo
Tube 0_bd8a9_d358fecb_XL
Imagen casita 1587 de Internet
NoelVSP66 by Valy
Criss adorno Nav 33
Tube 8fca2c94 d/a
Tube e-Winter d/a
CHILI_DESINGS_Chistmas_Joy_rabbit
161-1615019_christmas-corner-border
patron estrellas_navidad
Monalekje mask 6
seleccion sel.nav80
(you find here the links to the material authors' sites)
Plugins
consult, if necessary, my filter section here
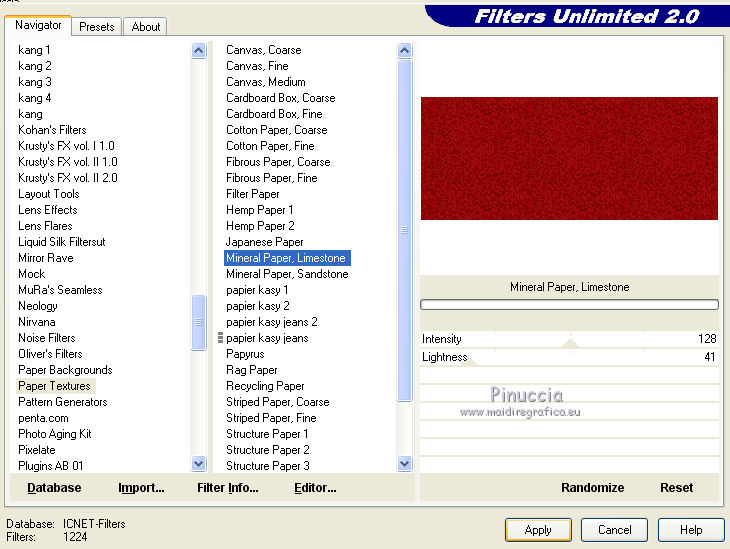
Filters Unlimited 2.0 here

You can change Blend Modes according to your colors.
Copy the Selection in the Selections Folder.
Open the Mask in PSP and minimize it with the rest of the material.
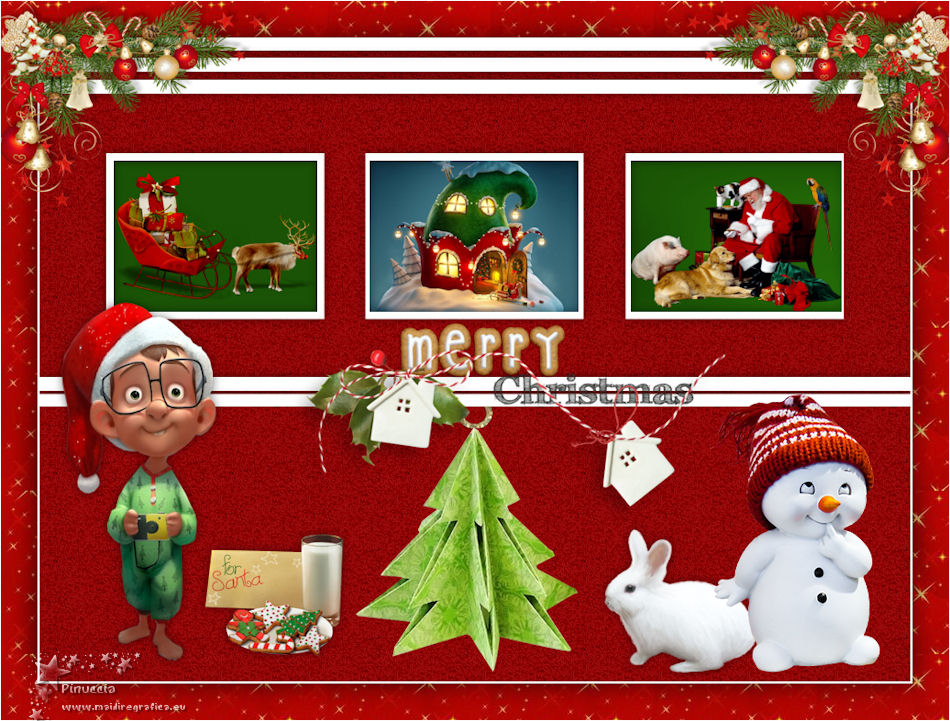
1. Open a new transparent image 950 x 400 pixels.
2. Set your foreground color to #8e0002,
and your background color to white #fffffff.
3. Effects>Plugins>Filters Unlimited 2.0 - Paper Textures - Mineral Paper,Limestone, default settings.
4. Layers>New Raster Layer.
Flood Fill  with color white #ffffff. with color white #ffffff.
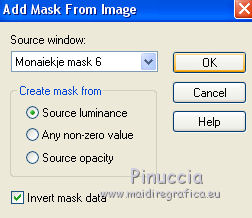
5. Layers>New Mask layer>From image
Open the menu under the source window and you'll see all the files open.
Select the mask Monaiekje mask 6.
Layers>Merge>Merge Group.
6. Selections>Load/Save Selection>Load Selection from Disk.
Look for and load the selection sel.nav80.nines.
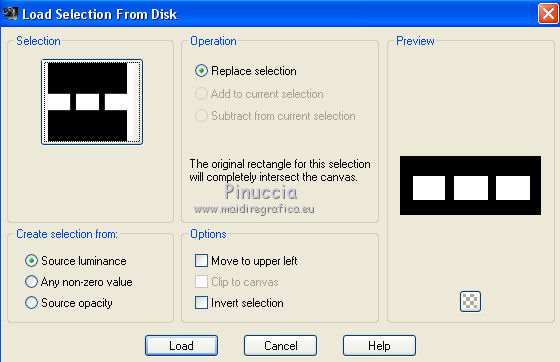
Press CANC on the keyboard 
Selections>Select None.
7. Activate your Magic Wand Tool 
and click on the first frame to select it.
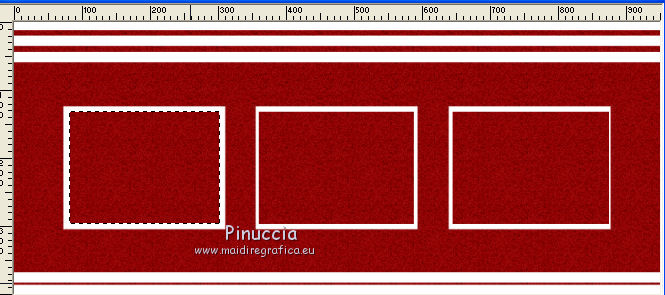
8. Layers>New Raster Layer.
Set your background color to #1a5305.

Flood Fill the selection with your background color.
Selections>Select None.
9. Open the tube 0_bd8a9_d358fecb_XL and go to Edit>Copy.
Go back to your work and go to Edit>Paste as new layer.
Image>Resize, 1 time to 50% and 1 time to 70%, resize all layers not checked.
Place  rightly the tube over the little frame. rightly the tube over the little frame.

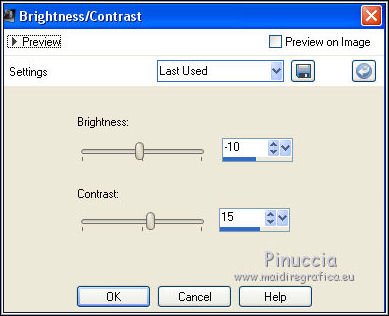
10. Adjust>Brightness and Contrast>Brightness and Contrast.
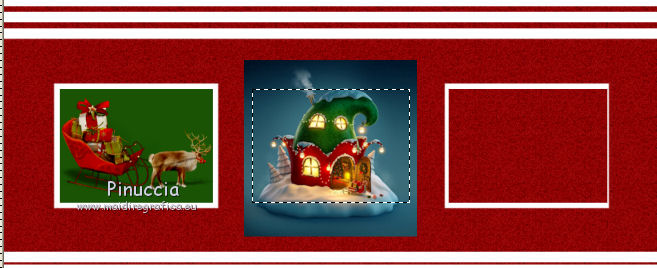
11. Activate the layer of the mask,
and click on the second frame with your Magic Want Tool
12. Open the image casita1587 and go to Edit>Copy.
Go back to your work and go to Edit>Paste as new layer.
Image>Resize, 2 times to 80%, resize all layers not checked.
Place rightly the image over the selection.
Selections>Invert.
Press CANC on the keyboard.
Selections>Select None.
13. Activate the layer of the mask.
Select the third frame with your Magic Wand Tool
Layers>New Raster Layer.
Flood Fill with your background color #1a5305.
Keep selected.
14. Layers>New Raster Layer.
Open the tube calGuisPereNoel17112013, erase the watermark and go to Edit>Copy.
Go back to your work and go to Edit>Paste into Selection.
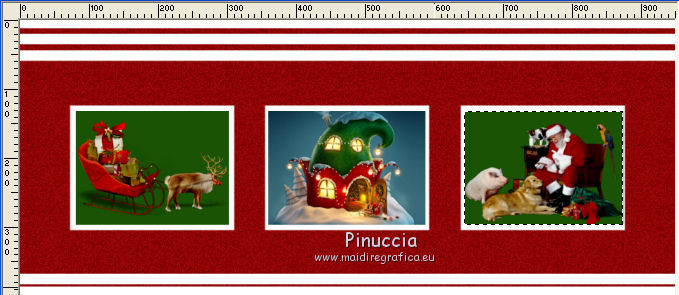
Selections>Select None.
15. Adjust>Brightness and Contrast>Clarify

16. Activate the layer of the mask.
Layers>Arrange>Bring to Top.
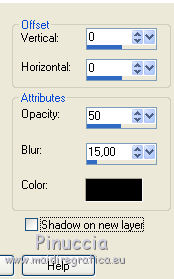
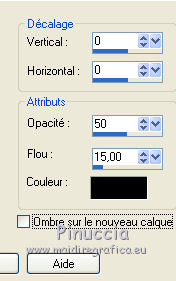
16. Effects>3D Effects>Drop Shadow, color black #000000.
17. Layers>Merge>Merge visible.
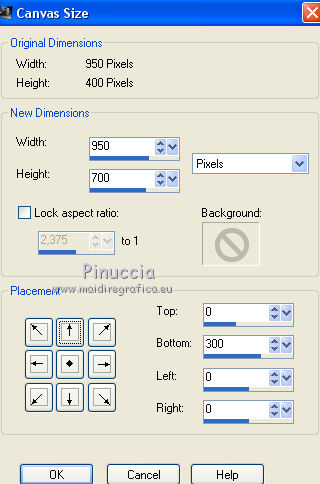
18. Image>Canvas Size - 950 x 700 pixels.
19. Layers>New Raster Layer.
Layers>Arrange>Send to Bottom.
Flood Fill the layer with your foreground color #8e0002.
20. Effets>Modules Externes>Filters Unlimited 2.0 - Paper Textures - Mineral Paper,Limestone, default settings.
21. Activate the top layer.
Open the tube 8fca2c94 and go to Edit>Copy.
Go back to your work and go to Edit>Paste as new layer.
Image>Resize, to 80%, resize all layers not checked.
Place the tube in the centre.
22. Effects>3D Effects>Drop Shadow, color #000000.
23. Open the tube NoelVSP66 and go to Edit>Copy.
Go back to your work and go to Edit>Paste as new layer.
Image>Resize, to 70%, resize all layers not checked.
Erase the watermark.
Place the tube at the bottom, in the centre.
Move the layer under the layer Merged.

24. Effects>3D Effects>Drop Shadow, same settings.
25. Activate the top layer.
Open the tube Renee_Tubes_Noel_2017 and go to Edit>Copy.
Go back to your work and go to Edit>Paste as new layer.
Image>Resize, 2 times to 70%, resize all layers not checked.
Move the tube at the bottom left.
Effects>3D Effects>Drop Shadow, same settings.
26. Open the tube Criss adorno Nav 33 and go to Edit>Copy.
Go back to your work and go to Edit>Paste as new layer.
Image>Resize, 2 times to 50%, resize all layers not checked.
Move the tube at the bottom left.

Effects>3D Effects>Drop Shadow, same settings.
27. Open CHILI_DESINGS_Chistmas_Joy_rabbit and go to Edit>Copy.
Go back to your work and go to Edit>Paste as new layer.
Image>Resize, to 50%, resize all layers not checked.
Move the tube at the bottom right.
Effects>3D Effects>Drop Shadow, same settings.
28. Open the tube e-Winter and go to Edit>Copy.
Go back to your work and go to Edit>Paste as new layer.
Move the tube at the bottom right.

Effects>3D Effects>Drop Shadow, same settings.
29. Layers>Merge>Merge All.
30. Image>Add borders, 2 pixels, symmetric, color #ffffff.
Image>Add borders, 40 pixels, symmetric, foreground color #8e0002.
31. Activate your Magic Wand Tool
and click on the red border to select it.
32. Set your foreground color to Pattern
and select the pattern estrellas_navidad
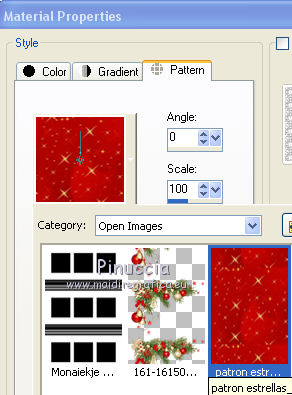
Flood Fill the selection with your pattern.
33. Selections>Invert.
Effects>3D Effects>Drop Shadow, color #000000.
Selections>Select None.
34. Open the tube 161-1615019_christmas-corner-border and go to Edit>Copy.
Go back to your work and go to Edit>Paste as new layer.
Image>Resize, to 50%, resize all layers not checked.
Move the tube in the corner, at the upper leftat the bottom left.
35. Effects>3D Effects>Drop Shadow, color black #000000.
36. Layers>Duplicate.
Image>Mirror.
37. Layers>Merge>Merge All.
38. Image>Add borders, 1 pixel, symmetric, color white #ffffff.
39. Image>Resize, to 95%, resize all layers checked.
40. Sign your work and save as jpg.
Your versions here

If you have problems or doubts, or you find a not worked link, or only for tell me that you enjoyed this tutorial, write to me.
10 November 2019
|


