|
TAG MARK NELSON
 ENGLISH VERSION ENGLISH VERSION
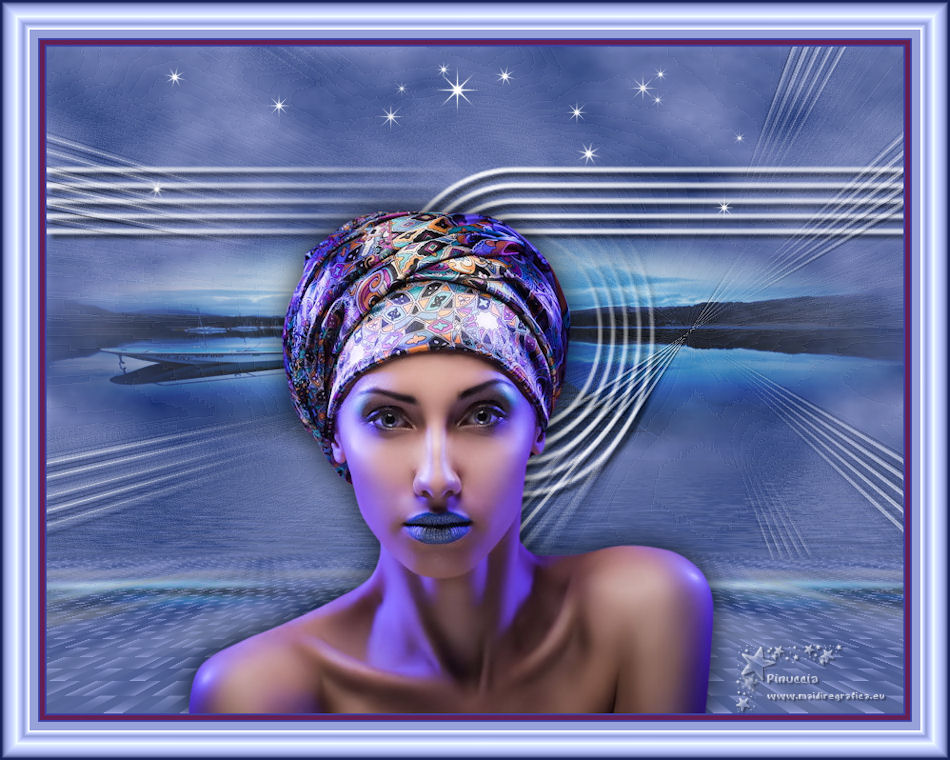
Here you find the original of this tutorial:

This tutorial was translated with PSPX7 but it can also be made using other versions of PSP.
Since version PSP X4, Image>Mirror was replaced with Image>Flip Horizontal,
and Image>Flip with Image>Flip Vertical, there are some variables.
In versions X5 and X6, the functions have been improved by making available the Objects menu.
In the latest version X7 command Image>Mirror and Image>Flip returned, but with new differences.
See my schedule here
French translation here
Your versions ici
For this tutorial, you will need:
Material
here
Tube Karine_dreams_Pretty_Woman_3556
Misted marknelson_coniston_jetty_tube_by_thafs
Narah_Mask_1401
cas_CarpeNoctem_Deco1
seleccion sel.314.nines
(you find here the links to the material authors' sites)
Plugins
consult, if necessary, my filter section here
Filters Unlimited 2.0 here
Mura's Meister - Cloud here
Mura's Meister - Perspective Tiling here
Flaming Pear - Flood here

You can change Blend Modes according to your colors.
In the newest versions of PSP, you don't find the foreground/background gradient (Corel_06_029).
You can use the gradients of the older versions.
The Gradient of CorelX here
Copy the selection in the Selections Folder.
Open the mask in PSP and minimize it with the rest of the material.
1. Open a new transparent image 900 x 600 pixels.
2. Set your foreground color to #011d67,
and your background color to #97a2da.
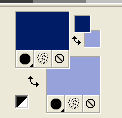
Set your foreground color to a Foreground/Background Gradient, style Linear.

Flood Fill  the transparent image with your gradient. the transparent image with your gradient.
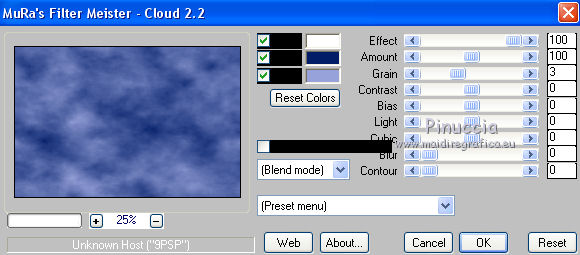
3. Effects>Plugins>Mura's Meister - Cloud, default settings.
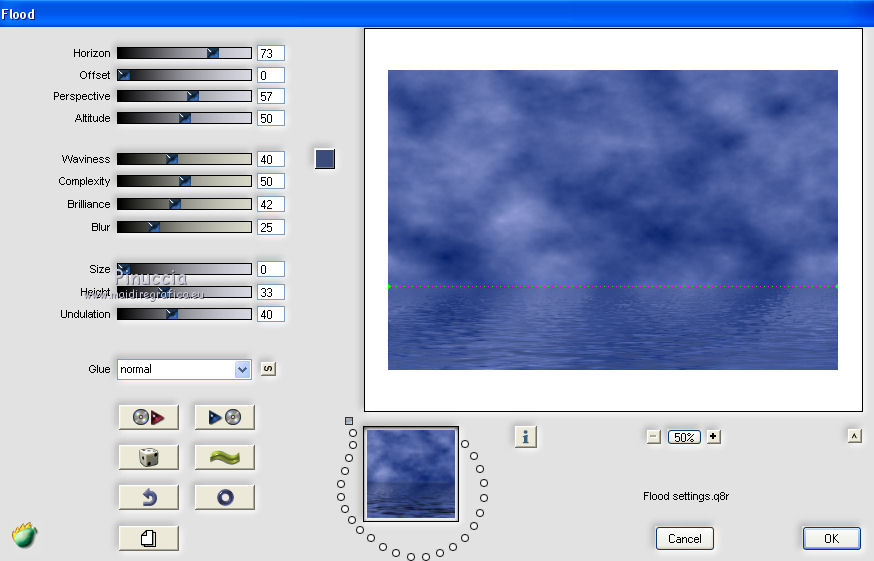
4. Effects>Plugins>Flaming Pear - Flood - color #3b4c7c.
5. Selections>Load/Save Selection>Load Selection from Disk.
Look for and load the selection sel314.nines

6. Layers>New Raster Layer.
Open marknelson_coniston_jetty_tube_by_thafs and go to Edit>Copy.
Go back to your work and go to Edit>Paste into Selection.
Selections>Select None.
Change the Blend Mode of this layer to Hard Light.
7. Set your foreground color to white #ffffff.
Layers>New Raster Layer.
Flood Fill  the layer with color #ffffff. the layer with color #ffffff.
8. Layers>New Mask layer>From image
Open the menu under the source window and you'll see all the files open.
Select the mask Narah_Mask_1401.

Layers>Merge>Merge Group.
9. Effects>3D Effects>Drop Shadow, color black.

10. Layers>Duplicate.
Effects>Image Effects>Seamless Tiling, default settings.

11. Adjust>Sharpness>Sharpen More.
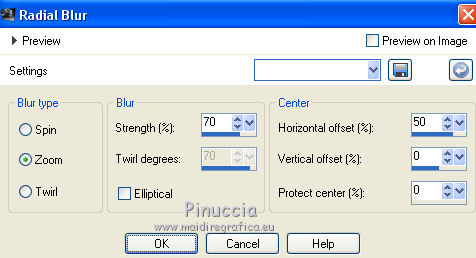
12. Adjust>Blur>Radial Blur.
13. Effects>Edge Effects>Enhance More.
Change the Blend Mode of this layer to Hard Light.
14. Layers>Merge>Merge visible.
15. Layers>Duplicate.
Adjust>Blur>Gaussian Blur - radius 15.

16. Effects>Texture Effects>Weave - gap color #011d67

17. Image>Canvas Size - 900 x 700 pixels.

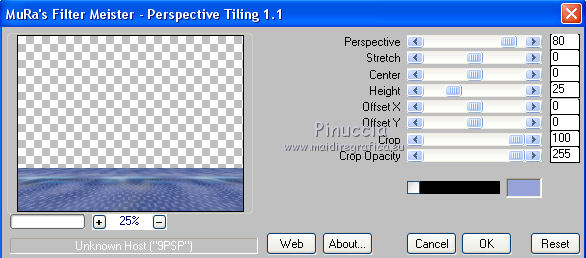
18. Effects>Plugins>Mura's Meister - Perspective Tiling.
19. Activate your Magic Wand Tool  , feather 20, , feather 20,

Click on the transparent zone to select it.
Press 5 times CANC on the keyboard 
Selections>Select None.
20. Open the tube Karine_dreams_Pretty_Woman_3556 and go to Edit>Copy.
Go back to your work and go to Edit>Paste as new layer.
Move  the tube a bit to the left and down. the tube a bit to the left and down.
21. Effects>3D Effects>Drop Shadow, color #000000.

22. Layers>Merge>Merge All.
23. Image>Add borders, 2 pixels, symmetric, color #3e42a4.
Image>Add borders, 5 pixels, symmetric, color #642052.
Image>Add borders, 2 pixels, symmetric, color #3e42a4.
24. Image>Add borders, 40 pixels, symmetric, color #97a2da.
Activate your Magic Wand Tool  , feather 0, , feather 0,
and click in this border to select it.
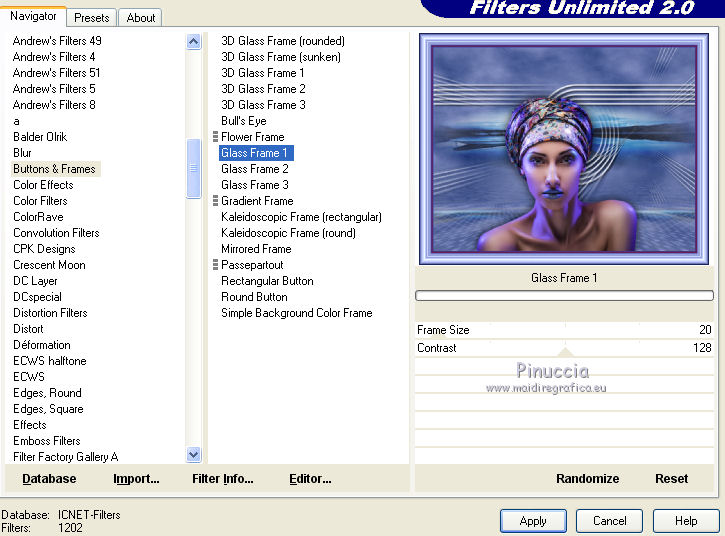
25. Effects>Plugins>Filters Unlimited 2.0 - Buttons & Frames - Glass Frame 1.
Selections>Select None.
26. Open the tube cas_CarpeNoctem_Deco1 and go to Edit>Copy.
Go back to your work and go to Edit>Paste as new layer.
27. Effects>Image Effects>Offset.

28. Sign your work on a new layer.
29. Layers>Merge>Merge All and save as jpg.
Your versions here

If you have problems or doubts, or you find a not worked link, or only for tell me that you enjoyed this tutorial, write to me.
12 June 2019
|
 ENGLISH VERSION
