|
TAG EL OSO
 THE BEAR THE BEAR
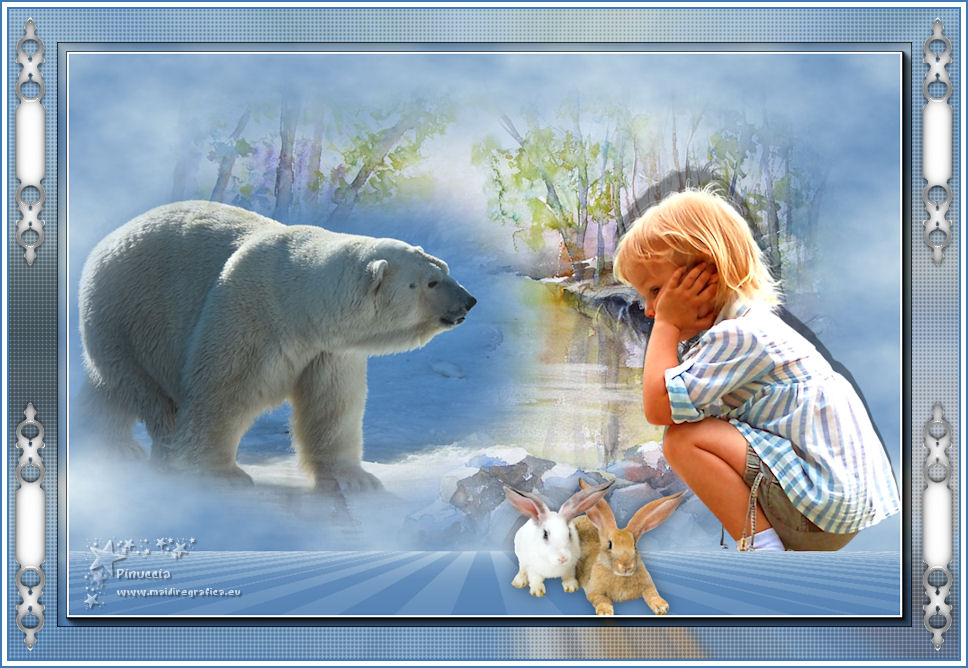

This tutorial was translated with PSPX7 but it can also be made using other versions of PSP.
Since version PSP X4, Image>Mirror was replaced with Image>Flip Horizontal,
and Image>Flip with Image>Flip Vertical, there are some variables.
In versions X5 and X6, the functions have been improved by making available the Objects menu.
In the latest version X7 command Image>Mirror and Image>Flip returned, but with new differences.
See my schedule here
French translation here
Your versions ici
For this tutorial, you will need:
Material
here
Tube enfants_0045_lisat
mentali-misted1919 by
Paysage misted jewel 027
lapin d/a
Adorno_336_Nines
(you find here the links to the material authors' sites)
Plugins
consult, if necessary, my filter section here
Mura's Meister - Cloud here
Mura's Meister - Perspective Tiling here
AAA Frames - Foto Frame here
DSB Flux - Linear Transmission here

You can change Blend Modes according to your colors.
In the newest versions of PSP, you don't find the foreground/background gradient (Corel_06_029).
You can use the gradients of the older versions.
The Gradient of CorelX here
1. Open a new transparent image 950 x 650 pixels.
2. Set your foreground color to #5583b5,
and your background color to #eff9f9.

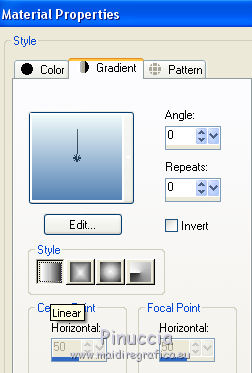
Set your foreground color to a Foreground/Background Gradient, style Linear.
3. Effects>Plugins>Mura's Meister - Cloud.
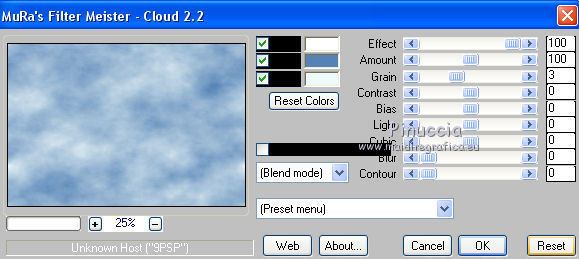
This plugin works with the colors of your Materials,
but keeps in memory the first settings used after the opening of PSP.
So, if you have already used the plugin, press Reset to be sure to have your colors.
To change the appearance of the clouds, which is random, click on the window preview,
until you'll see the result you like better
(for that, your result will be always different).
4. Open the tube du paysage misted jewel 027, erase the watermark and go to Edit>Copy.
Go back to your work and go to Edit>Paste as new layer.
5. Open the tube mentali-misted1919 and go to Edit>Copy.
Go back to your work and go to Edit>Paste as new layer.
Image>Resize, 2 times to 80%, resize all layers not checked.
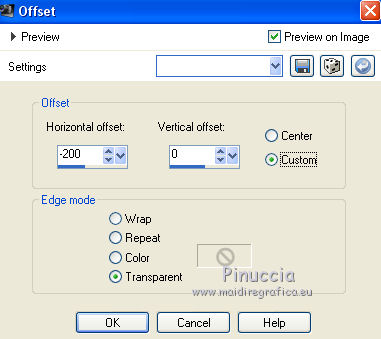
6. Effects>Image Effects>Offset.
7. Open the tube enfants_0045_lisat, erase the watermark and go to Edit>Copy.
Go back to your work and go to Edit>Paste as new layer.
Image>Resize, 2 times to 80%, resize all layers not checked.
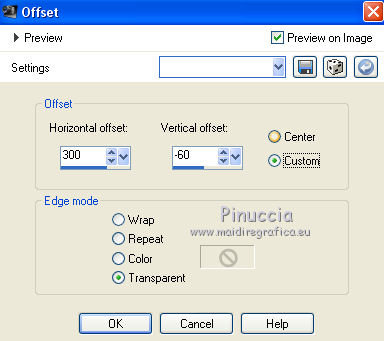
8. Effects>Image Effects>Offset.
9. Layers>Duplicate.
Close this layer for a moment and activate the layer below of the original
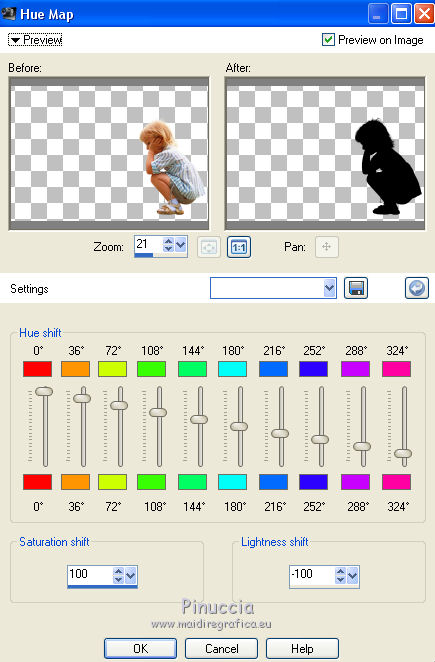
10. Adjust>Teinte et Saturation>Hue Map.
11. K key to activate your Pick Tool 
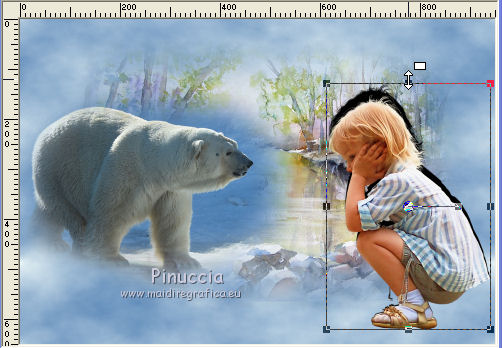
pull the central top node a bit higher
(open the layer of the copy to see better)
12. Reduce the opacity of this layer to 40%.
13. Activate the top layer of the copy.
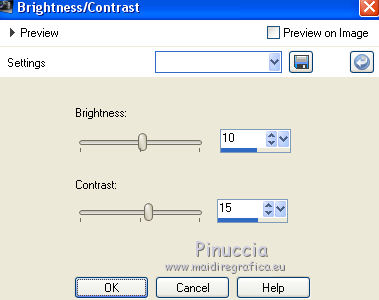
Adjust>Brightness and Contrast>Brightness and Contrast.
14. Layers>New Raster Layer.
Flood Fill  the layer with your gradient. the layer with your gradient.
15. Effects>Plugins>DSB Flux - Linear Transmission.
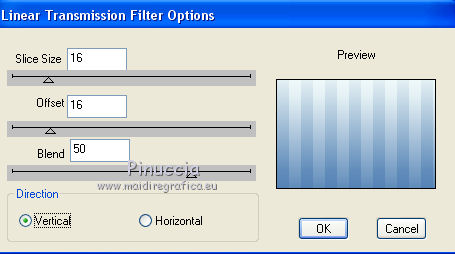
16. Effects>Plugins>Mura's Meister - Perspective Tiling.
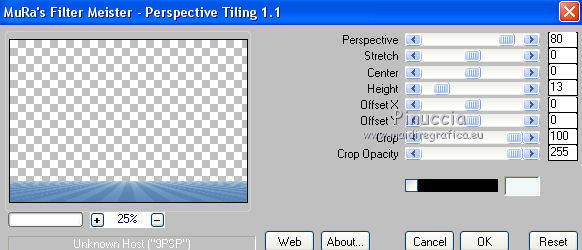
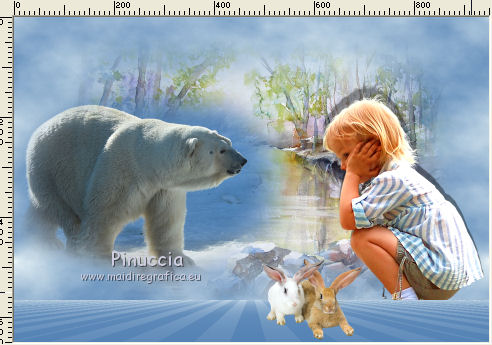
17. Open the tube lapin and go to Edit>Copy.
Go back to your work and go to Edit>Paste as new layer.
Move  the tube down. the tube down.
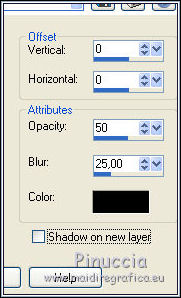
18. Effects>3D Effects>Drop Shadow, color #000000.
19. Layers>Merge>Merge visible.
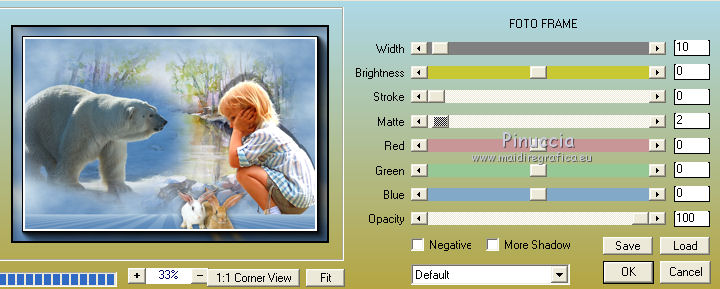
20. Effects>Plugins>AAA Frames - Foto Frame.
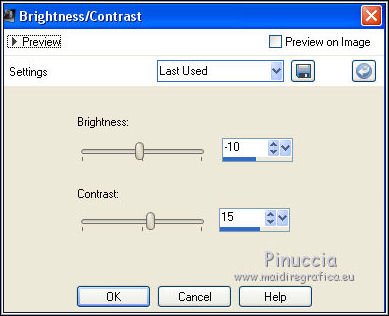
21. Adjust>Brightness and Contrast>Brightness and Contrast.
22. Edit>Copy.
Image>Resize, to 90%, resize all layers not checked.
23. Layers>New Raster Layer.
Layers>Arrange>Send to Bottom.
Selections>Select All.
Edit>Paste into Selection.
Selections>Select None.
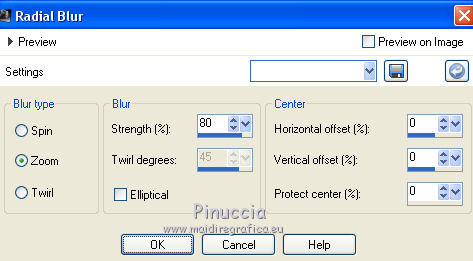
24. Adjust>Blur>Radial Blur.
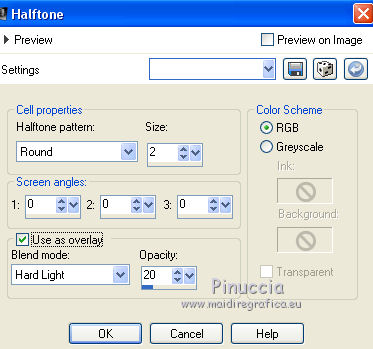
25. Effects>Artistic Effects>Halftone.
26. Open Adorno_336_Nines, erase the watermark and go to Edit>Copy.
Go back to your work and go to Edit>Paste as new layer.
27. Layers>Merge>Merge All.
28. Image>Add borders, 2 pixels, symmetric, color #3b7ab4.
Image>Add borders, 5 pixels, symmetric, color #ffffff.
Image>Add borders, 2 pixels, symmetric, color #3b7ab4.
29. Sign your work and save as jpg.
Your versions here

If you have problems or doubts, or you find a not worked link, or only for tell me that you enjoyed this tutorial, write to me.
26 February 2020
|
 THE BEAR
