|
TAG CROSCOMIA
 ENGLISH VERSION ENGLISH VERSION
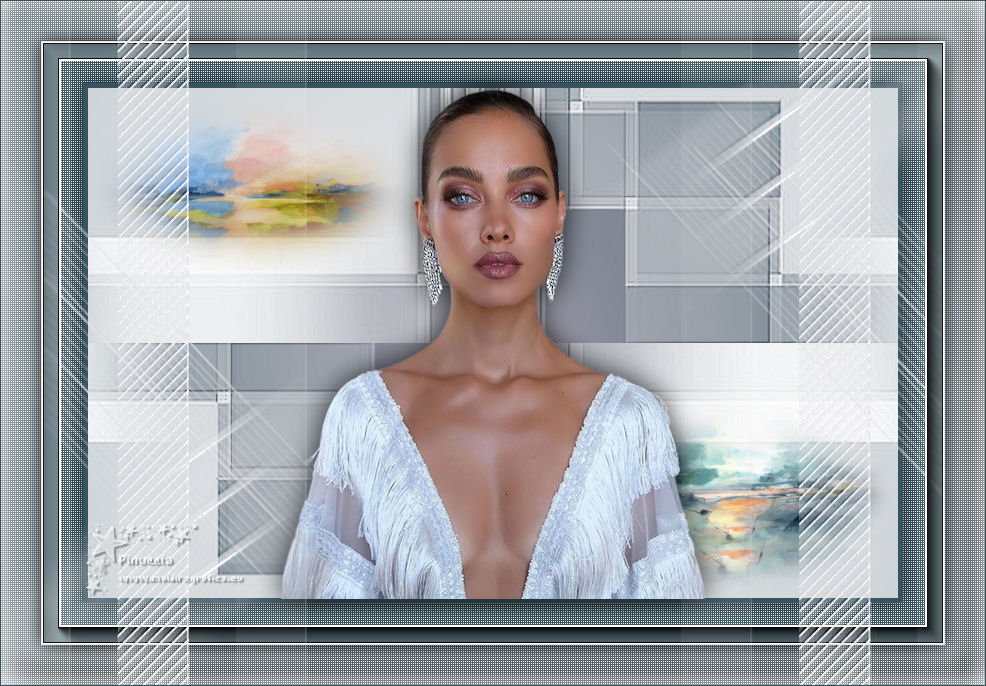

This tutorial was translated with PSPX7 but it can also be made using other versions of PSP.
Since version PSP X4, Image>Mirror was replaced with Image>Flip Horizontal,
and Image>Flip with Image>Flip Vertical, there are some variables.
In versions X5 and X6, the functions have been improved by making available the Objects menu.
In the latest version X7 command Image>Mirror and Image>Flip returned, but with new differences.
See my schedule here
French translation here
Your versions ici
For this tutorial, you will need:
Material
here
3098-woman-LB TUBES
12_abstrait_animabelle
2_abstrait_animabelle
Narah_Mask_1442
Narah_Mask_1469
Narah_Mask_1461
seleccion sel.331.nines/seleccion sel.331.1.nines
(you find here the links to the material authors' sites)
Plugins
consult, if necessary, my filter section here
Filters Unlimited 2.0 here
Simple - Half Wrap here
AAA Frames - Foto Frame here
AP Lines - Lines SilverLining here
Filters Simple can be used alone or imported into Filters Unlimited.
(How do, you see here)
If a plugin supplied appears with this icon  it must necessarily be imported into Unlimited it must necessarily be imported into Unlimited

You can change Blend Modes according to your colors.
In the newest versions of PSP, you don't find the foreground/background gradient (Corel_06_029).
You can use the gradients of the older versions.
The Gradient of CorelX here
Copy the preset Emboss 3 in the Presets Folder.
Copy the selections in the Selections Folder.
Open the masks in PSP and minimize them with the rest of the material.
1. Open a new transparent image 900 x 600 pixels.
2. Set your foreground color to #37535f.
Flood Fill  the transparent image with your foreground color. the transparent image with your foreground color.
3. Effects>Plugins>AP Lines - Lines SilverLining.

4. Selections>Select All.
Selections>Modify>Contract - 40 pixels.
5. Effects>3D Effects>Drop Shadow, color #000000.
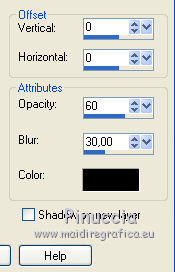
Keep selected.
6. Layers>New Raster Layer.
Flood Fill  with your foreground color #37535f. with your foreground color #37535f.
7. Selections>Modify>Contract - 5 pixels.
Press CANC on the keyboard 
Keep always selected.
8. Keep your foreground color to #37535f.
Set your background color to #a19dac.

Set your foreground color to a Foreground/Background Gradient, style Sunburst.
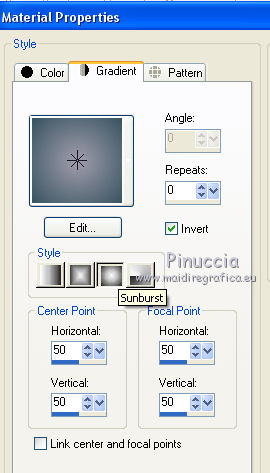
Flood Fill  the selection with your gradient. the selection with your gradient.
Keep still selected.
9. Set your foreground color to white #ffffff.
Layers>New Raster Layer.
Flood Fill  with color #ffffff. with color #ffffff.
10. Layers>New Mask layer>From image
Open the menu under the source window and you'll see all the files open.
Select the mask Narah_Mask_1442.
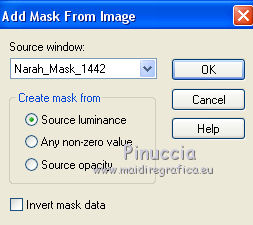
Layers>Merge>Merge Group.
11. Effects>Plugins>Filters Unlimited 2.0 - Simple - Half Wrap.

12. Adjust>Sharpness>Sharpen More.
Selections>Select None.
13. Selections>Load/Save Selection>Load Selection from Disk.
Look for and load the selection sel.331.nines
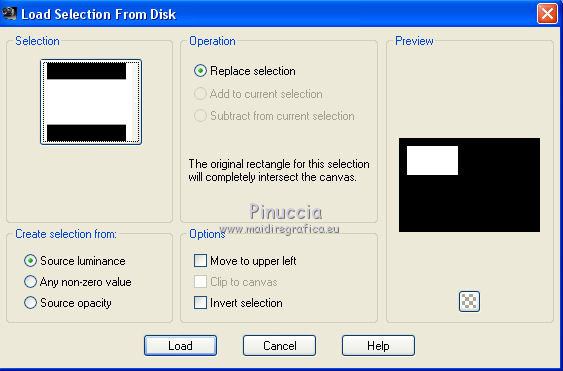
14. Layers>New Raster Layer.
Open the tube 12_abstrait_animabelle and go to Edit>Copy.
Go back to your work and go to Edit>Paste into Selection.
Selections>Select None.
15. Selections>Load/Save Selection>Load Selection from Disk.
Look for and load the selection sel.331.1.nines
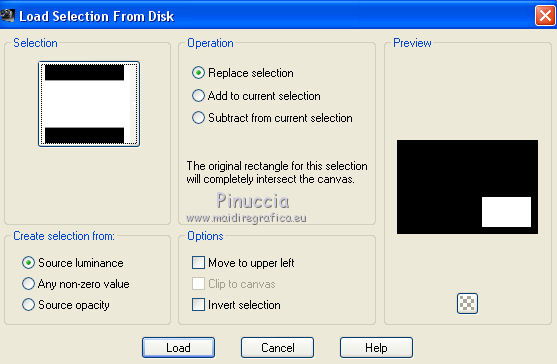
16. Layers>New Raster Layer.
Open the tube 2_abstrait_animabelle and go to Edit>Copy.
Go back to your work and go to Edit>Paste into Selection.
Selections>Select None.
17. Set your foreground color to #e4e4e8.
Layers>New Raster Layer.
Flood Fill  with color #e4e4e8. with color #e4e4e8.
18. Layers>New Mask layer>From image
Open the menu under the source window
and select the mask Narah_Mask_1469.
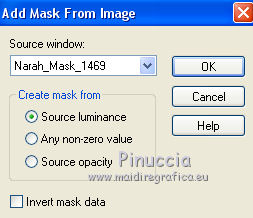
Layers>Merge>Merge Group.
19. Effects>User Defined Filters, select the preset Emboss 3 and ok.

20. Open the tube 3098-woman-LB TUBES and go to Edit>Copy.
Go back to your work and go to Edit>Paste as new layer.
Image>Resize, to 80%, resize all layers not checked.
21. Effects>3D Effects>Drop Shadow, color #000000.
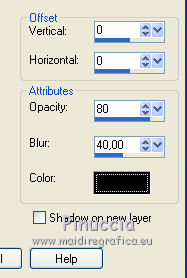
22. Layers>Merge>Merge visible.
23. Effects>Plugins>AAA Frames - Foto Frame.

24. Image>Add borders, 2 pixels, symmetric, color #ffffff.
25. Edit>Copy.
26. Image>Add borders, 40 pixels, symmetric, color #37535f.
Activate your Magic Wand Tool 
and click in the border to select it.
Edit>Paste into Selection.
27. Adjust>Blur>Gaussian Blur - radius 10.

Keep selected.
28. Effects>Plugins>AP Lines - Lines SilverLining.

29. Selections>Invert.
Effects>3D Effects>Drop Shadow, color #000000.
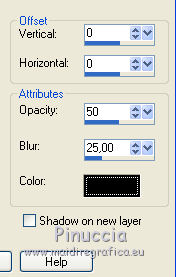
Edit>Repeat Drop Shadow.
Selections>Select None.
30. Layers>New Raster Layer.
Flood Fill  with color #e4e4e8. with color #e4e4e8.
31. Layers>New Mask layer>From image
Open the menu under the source window
and select the mask Narah_Mask_1461.
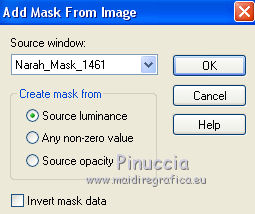
Layers>Merge>Merge Group.
32. Effects>User Defined Filters - Emboss 3.
33. Layers>Merge>Merge All.
34. Image>Add borders, 1 pixel, symmetric, color #37535f.
35. Sign your work and save as jpg.
Your versions here

If you have problems or doubts, or you find a not worked link, or only for tell me that you enjoyed this tutorial, write to me.
9 November 2019
|
 ENGLISH VERSION
