Here you find the original of this tutorial:

This tutorial was created with PSPX3 but it can also be made using other versions of PSP.
Since version PSP X4, Image>Mirror was replaced with Image>Flip Horizontal,
and Image>Flip with Image>Flip Vertical, there are some variables.
In versions X5 and X6, the functions have been improved by making available the Objects menu.
In the latest version X7 command Image>Mirror and Image>Flip returned, but with new differences.
See my schedule here
French translation here
Your versions here
For this tutorial, you will need:
Material here
111_animabelle_tubes_animaux
Tube calguisaigle22610 by Guismo
Misted paisaje cielo by Castorke
Plugins
consult, if necessary, my filter section here
AP 01 [Innovations] - Lines SilverLining here
Nik Software - Color Efex Pro here

Copy the selections in the Selection Folder.
1. Set your Foreground color to #b3c5a4,
and your Background color to #364a15.

Set the Foreground color to Foreground/Background Gradient, style Sunburst.

2. Open a new transparent image 900 x 650 pixels.
Flood Fill  with your Gradient.
You should have this:

but, according to your PSP version, you could have a different result.
If you want, you can begin your work with this image
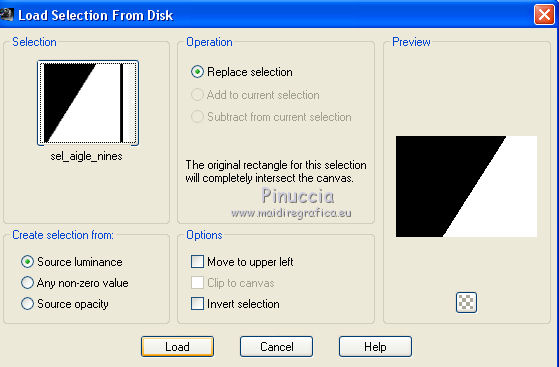
3. Selections>Load/Save selection>Load Selection from Disk.
Look for and load the selection sel_aigle_nines.

4. Effects>Plugins>AP 01 [Innovations] - Lines SilverLining

Selections>Select None.
5. Selections>Load/Save selection>Load Selection from Disk.
Look for and load the selection sel_aigle1_nines.

6. Layers>New Raster layer.
Open the landscape by Castorke - Edit>Copy.
Go back to your work and go to Edit>Paste into Selection.
Selections>Select None.
Change the blend mode of this layer to Luminance (L).
7. Open the tube calguisaigle22610 - Edit>Copy.
Go back to your work and go to Edit>Paste as new layer.
Image>Resize, 90%, resize all layers not checked.
Image>Mirror.
Move  the tube in the upper left side.
See my final result.
8. Effects>3D Effects>Drop Shadow, color #d3e5bf.

Edit>Repeat Drop Shadow.
9. Adjust>Brightness and Contrast>Brightness and Contrast.

10. Open the tube 111_animabelle_tubes_animaux - Edit>Copy.
Go back to your work and go to Edit>Paste as new layer.
11. Adjust>Blur>Radial blur.

12. Image>Free Rotate - 90 degrees to right.

13. Effects>Image Effects>Offset.

14. Selections>Load/Save selection>Load Selection from Disk.
Look for and load again the selection sel_aigle_nines.

Selections>Invert.
Press CANC on the keyboard 
Selections>Select None.
15. Change the Blend mode of this layer to Hard Light.
16. Effets>Plugins>Nik Software - Color Efex Pro
Bi-color Filters - to the right: Color set Green/Brown 3.

17. Edit>Paste as new layer (the tube 111_animabelle_tubes_animaux is still in memory).
Image>Resize - 3 times to 90%, resize all layers not checked.
Move  the tube at the bottom right.
18. Layers>Duplicate.
Layers>Merge>Merge down.
19. Layers>Merge>Merge All.
20. Image>Add borders, 5 pixels, symmetric, color #364a15.
Image>Add borders, 30 pixels, symmetric, color #daecc6.
Image>Add borders, 5 pixels, symmetric, color #364a15.
21. Sign your work and save as jpg.

If you have problems or doubt, or you find a not worked link, or only for tell me that you enjoyed this tutorial, write to me.
4 Juin 2015

