|
GABRIELLE


Here you find the original of this tutorial:

This tutorial was written with CorelX2 and translated with CorelX7, but it can also be made using other versions of PSP.
Since version PSP X4, Image>Mirror was replaced with Image>Flip Horizontal,
and Image>Flip with Image>Flip Vertical, there are some variables.
In versions X5 and X6, the functions have been improved by making available the Objects menu.
In the latest version X7 command Image>Mirror and Image>Flip returned, but with new differences.
See my schedule here
Your versions
For this tutorial, you will need:
Material here
Thanks for the woman tube Beatriz and for the flowers tube Tiram.
(The links of the tubemakers here).
Plugins:
consult, if necessary, my filter section here
Filters Unlimited 2.0 here
&<Bkg Designer sf10II> - Diamonds (to import in Unlimited) here
Mehdi - Wavy Lab 1.1 here
VM Instant Art - Tripolis here
AP Lines - Lines SilverLining here
Filters VM Instant art can be used alone or imported into Filters Unlimited.
(How do, you see here)
If a plugin supplied appears with this icon  it must necessarily be imported into Unlimited it must necessarily be imported into Unlimited

You can change Blend Modes according to your colors.
In the newest versions of PSP, you don't find the foreground/background gradient (Corel_06_029).
You can use the gradients of the older versions.
The Gradient of CorelX here
Copy the Selections in the Selections Folder.
Open the mask in PSP and minimize it with the rest of the material.
1. Set your foreground color to #ebf8da,
and your background color to #0b6025.
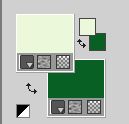
Set your foreground color to a Foreground/Background Gradient, style Sunburst.
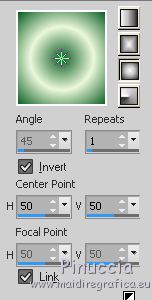
2. Open a new transparent image 900 x 600 pixels.
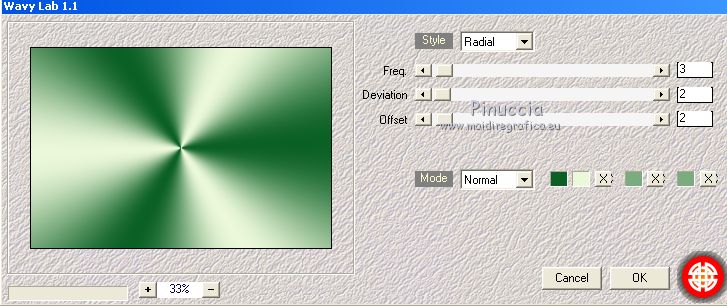
3. Effects>Plugins>Mehdi - Wavy Lab 1.1.
This filter creates gradients with the colors of your Materials palette:
the first is your background color, the second is your foreground color.
Keep the last two colors created by the filter
4. Adjust>Blur>Gaussian Blur - radius 20.

5. Effects>Plugins>Filters Unlimited 2.0 - &<Bkg Designer sf10II> - Diamonds.
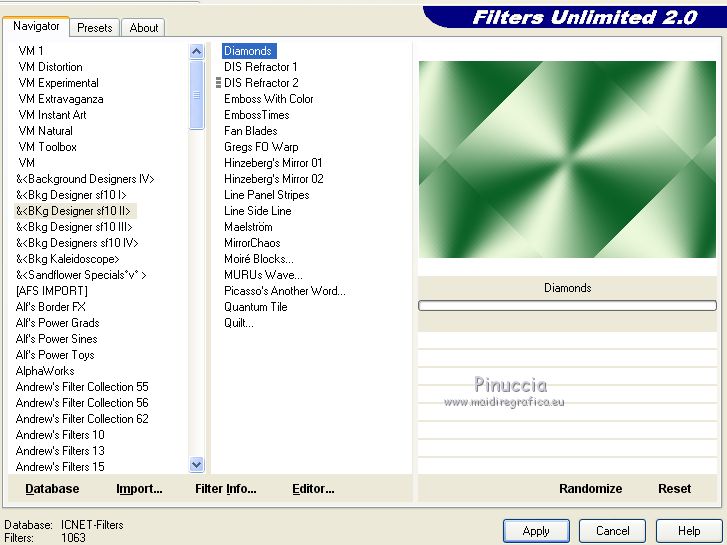
6. Selections>Load/Save Selection>Load Selection from Disk.
Look for and load the selection Nikki_Gabrielle
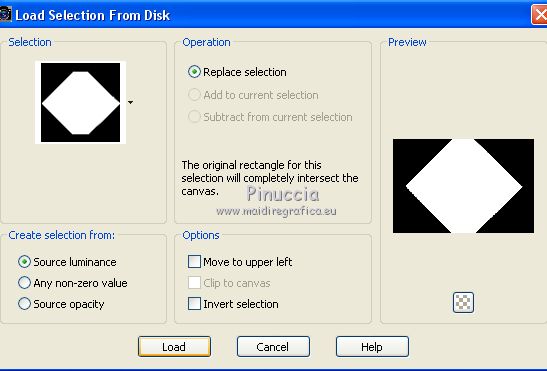
7. Effects>Plugins>Filters Unlimited 2.0 - VM instant Art - Tripolis
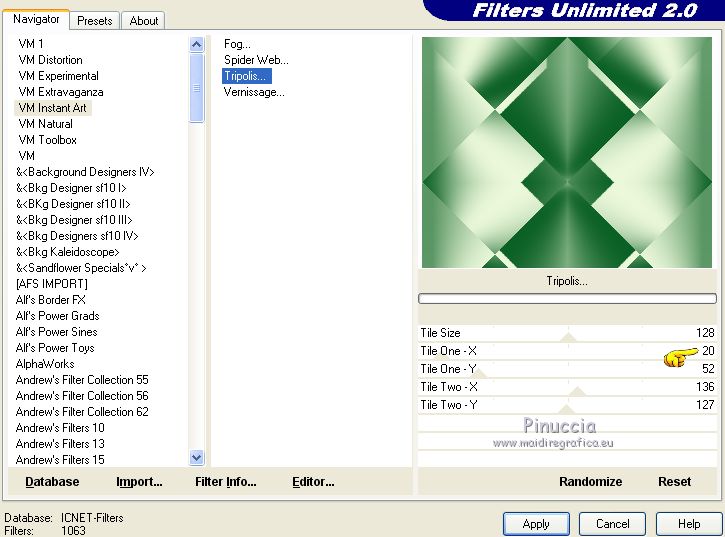
8. Selections>Load/Save Selection>Load Selection from Disk.
Look for and load the selection Nikki_Gabrielle 1
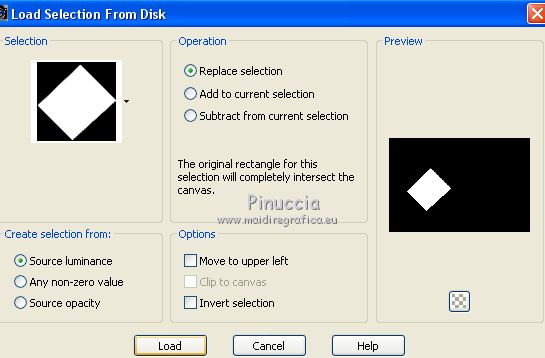
Selections>Promote Selection to Layer.
9. Effects>Plugins>Toadies - Ommadawn
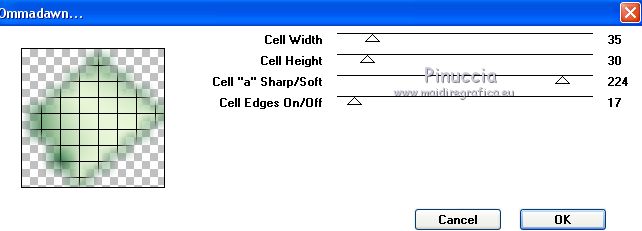
10. Selections>Modify>Select Selection Borders.
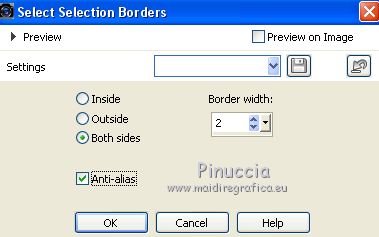
Layers>New Raster Layer.
Flood Fill  the layer with your Gradient. the layer with your Gradient.
Selections>Select None.
Layers>Merge>Merge Down.
11. Effects>3D Effects>Drop Shadow, color black.
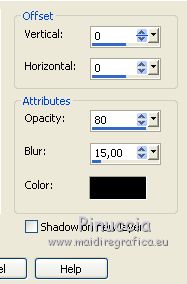
12. Layers>Duplicate.
Image>Mirror.
13. Effects>Image Effects>Seamless Tiling - side by side

14. Layers>Duplicate.
Image>Mirror.
15. Selections>Load/Save Selection>Load Selection from Disk.
Look for and load the selection Nikki_Mystérieuse 5
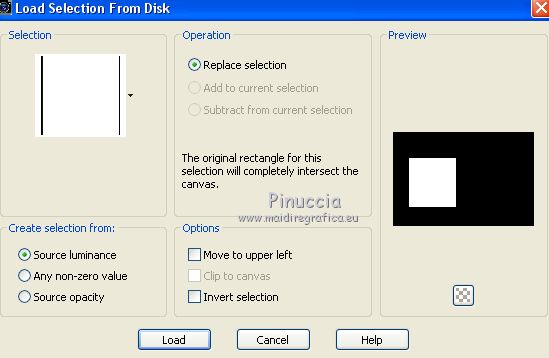
Press CANC on the keyboard 
Selections>Select None.
16. Activate the layer Raster 1.
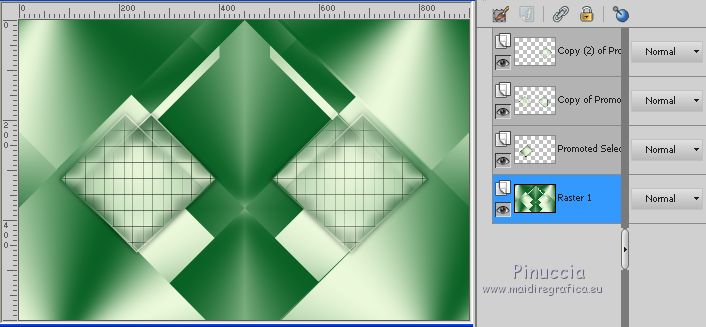
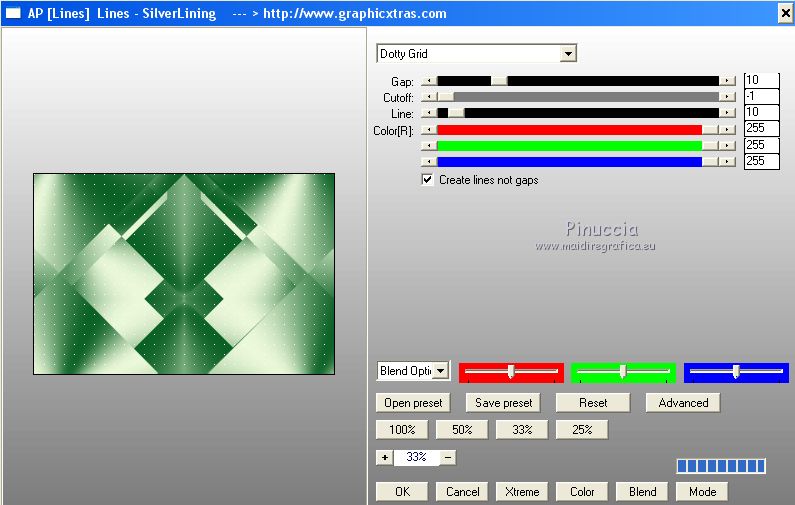
Effects>Plugins>AP Lines - Lines SilverLining.
17. Activate the top layer.
Layers>New Raster Layer.
Set your foreground color to white #ffffff.
Reduce the opacity of the Flood Fill Tool to 50
Flood Fill  with color white #ffffff. with color white #ffffff.
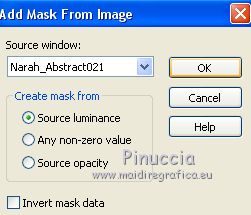
18. Layers>New Mask layer>From image
Open the menu under the source window and you'll see all the files open.
Select the mask Narah_Abstract021
Layers>Merge>Merge Group.
Effects>Edge Effects>Enhance More.
19. Activate the second layer from the bottom.
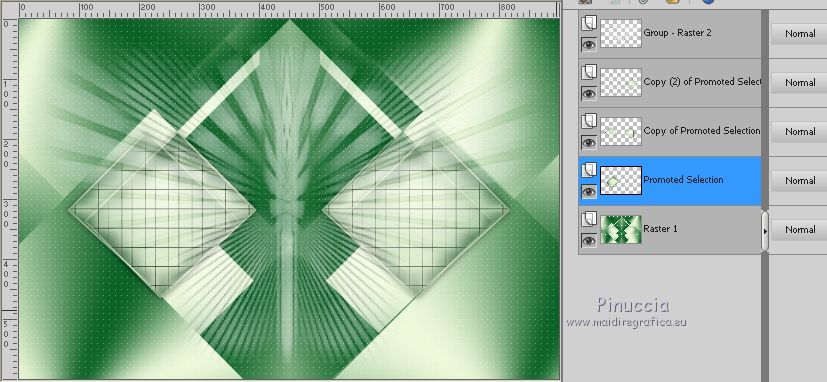
20. Layers>New Raster Layer.
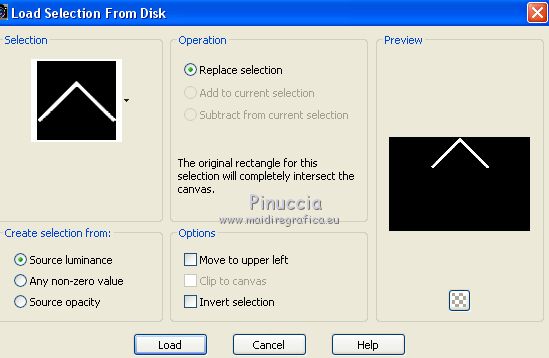
Selections>Load/Save Selection>Load Selection from Disk.
Look for and load the selection Nikki_Gabrielle 3
Set your foreground color the inizial Color (#ebf8da)

Set your foreground color to Gradient and change the style to Linear.
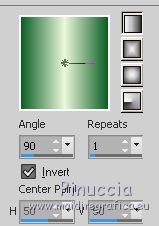
Set again the opacity of Flood Fill Tool to 100
Flood Fill  the layer with your Gradient. the layer with your Gradient.
21. Effects>Plugins>AP Lines - Lines SilverLining.
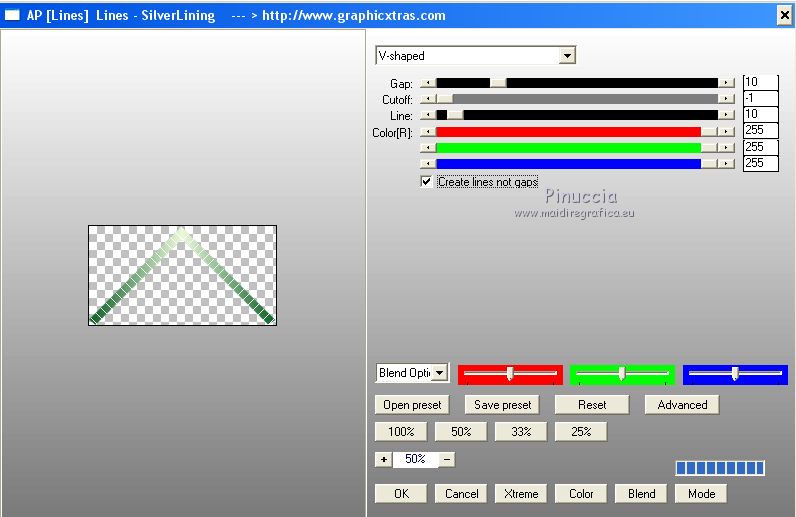
Selections>Select None.
22. Layers>Duplicate.
Image>Flip.
23. K key on the keyboard to activate the Pick Tool 
and set Position X: 265,00 and Posizione Y: 316,00.
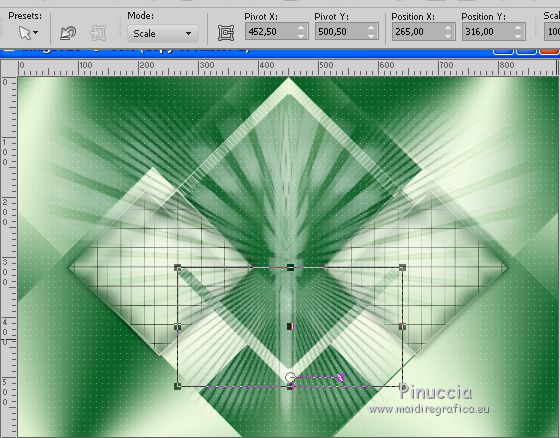
optional: for my example I did: Layers>Arrange>Move Down - 2 times
and with the Erase Tool 
I erased as below
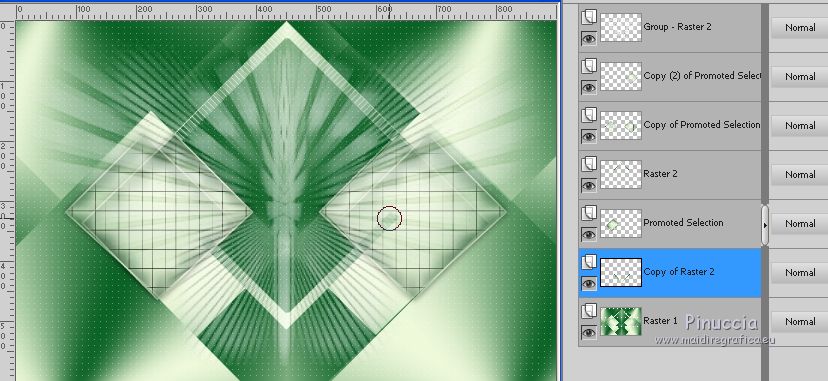
24. Activate the top layer.
Open the woman tube "3" and go to Edit>Copy.
Go back to your work and go to Edit>Paste as new layer.
Image>Resize, 80%, resize all layers not checked.
Move  the tube to the right side. the tube to the right side.
Effects>3D Effects>Drop Shadow, at your choice.
25. Layers>New Raster Layer.
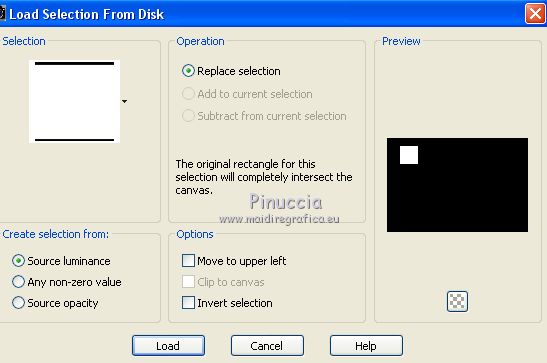
Selections>Load/Save Selection>Load Selection from Disk.
Look for and load the selection Nikki_Gabrielle 4
Set your foreground color to white #ffffff.
Flood Fill  with the color #ffffff. with the color #ffffff.
Selections>Modify>Contract - 1 pixels.
Press CANC on the keyboard 
Reduce the opacity of Flood Fill Tool to 40.
Flood Fill  with the color #ffffff. with the color #ffffff.
Selections>Modify>Contract - 10 pixels.
Set again the opacity to 100
Flood Fill  with the color #ffffff. with the color #ffffff.
Selections>Modify>Contract - 1 pixel.
Press CANC on the keyboard.
Opacity of Flood Fill Tool to 40
Flood Fill  with the color #ffffff. with the color #ffffff.
Selections>Modify>Contract - 10 pixels.
Opacity of Flood Fill Tool to 100
Flood Fill  with the color #ffffff. with the color #ffffff.
Selections>Modify>Contract - 1 pixels.
Press CANC on the keyboard.
Your should have this: 3 borders opacity 100 and 2 borders opacity 40
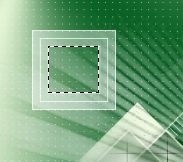
Activate the layer Raster 1.
Edit>Copy.
Go back to the top layer
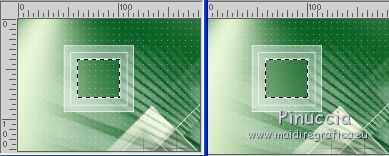
Edit>Paste into Selection.
26. Adjust>Blur>Gaussian Blur - radius 20.

This is optional; if you want, you can keep the original background
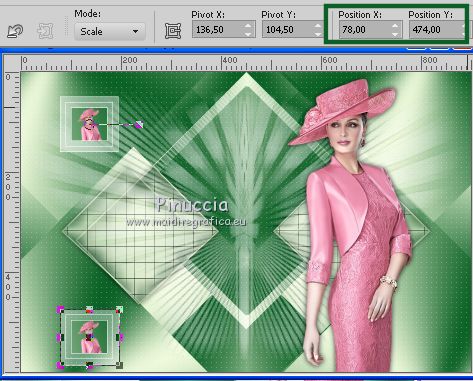
Activate again the woman tube.
Image>Resize, to 20%.
Edit>Copy.
Go back to your work and go to Edit>Paste as new layer.
Place  the tube on the frame. the tube on the frame.
(I resize again to 80%, resize all layers not checked)
Selections>Invert.
Press CANC on the keyboard.
Layers>Merge>Merge Down.
Selections>Select None.
27. Layers>Duplicate.
K key to activate the Pick Tool 
set Position X: 78,00 and Position Y: 474,00.
28. Image>Add borders, 10 pixels, symmetric, light color.
Image>Add borders, 50 pixels, symmetric, dark color.
Activate the Magic Wand Tool 
and clic on the last border to select it.
Effects>Plugins>Ap Lines - Lines SilverLining.
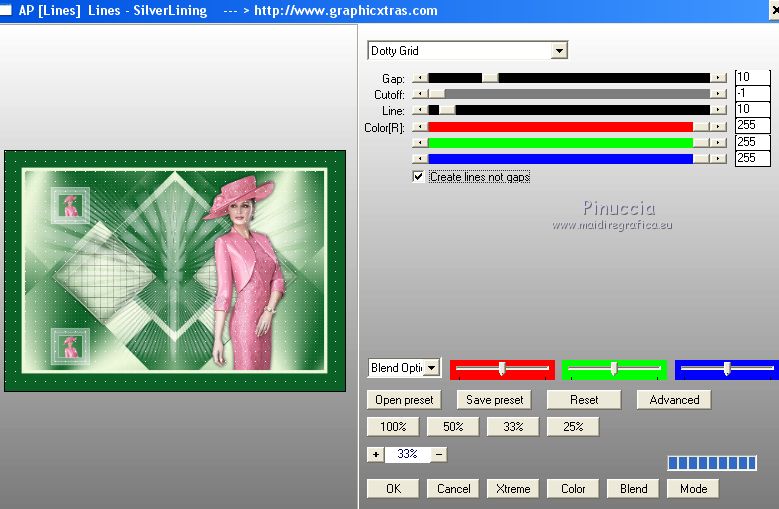
29. Image>Add borders, 1 pixel, symmetric, dark color.
30. Sign your work on a new layer.
Layers>Merge>Merge All and save as jpg.
Your versions
Thanks

If you have problems or doubts, or you find a not worked link, or only for tell me that you enjoyed this tutorial, write to me.
28 Septembre 2018
|


