|
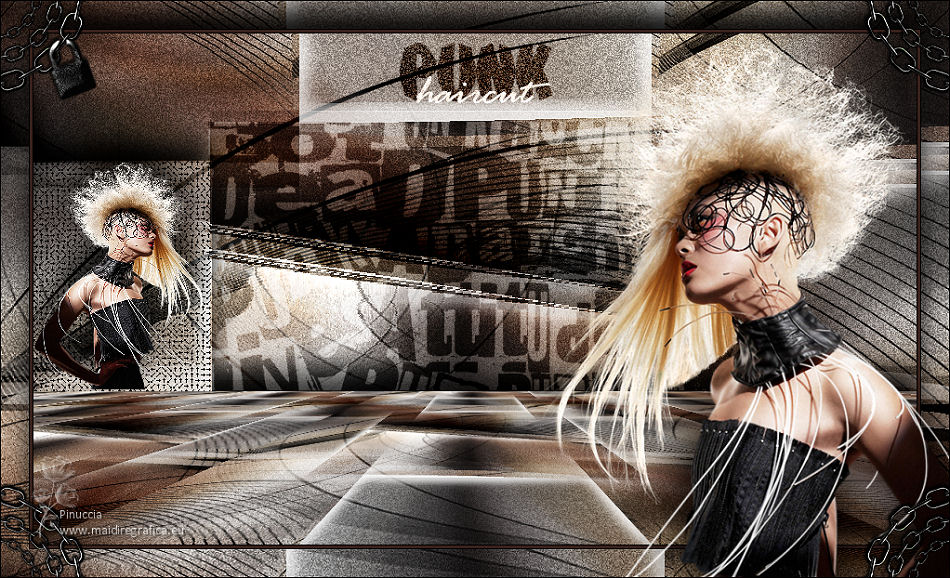
PUNK HAIRCUT


Thanks Irene for the invitation to translate your tutorials

This tutorial was written with PSPX8 and translated with PSPX7 and PSPX3, but it can also be made using other versions of PSP.
Since version PSP X4, Image>Mirror was replaced with Image>Flip Horizontal,
and Image>Flip with Image>Flip Vertical, there are some variables.
In versions X5 and X6, the functions have been improved by making available the Objects menu.
In the latest version X7 command Image>Mirror and Image>Flip returned, but with new differences.
See my schedule here
 italian translation here italian translation here
 your versions here your versions here
For this tutorial, you will need:
Material here
Thanks for the tube and the mask thanks LisaT and Nikita.
Image deco from the net.
The rest of the material is by Moi-Même.
(The links of material creators here).
consult, if necessary, my filter section here
Filters Unlimited 2.0 here
VM Toolbox - Brightness Noise here
VM Natural - Ripper here
VM Experimental - Magnetic Detection here
Mura's Meister - Perspective Tiling here
Filters of VM groups can be used alone or imported into Filters Unlimited.
(How do, you see here)
If a plugin supplied appears with this icon  it must necessarily be imported into Unlimited it must necessarily be imported into Unlimited

You can change Blend Modes according to your colors.

Open the mask in PSP and minimize it with the rest of the material.
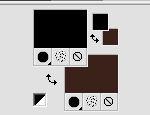
Set your foreground color to #000000,
and your background color to #3a221c.
1. Open a new transparent image 950 x 550 pixels.
Selections>Select All.
(if you want to accentuate one of your colors, fill the layer with the chosen color,
I didn't it).
Open the main tube (for me the woman) and go to Edit>Copy.
Go back to your work and go to Edit>Pasteinto Selection.
Selection Select None.
2. Effects>Image Effects>Seamless Tiling, default settings.

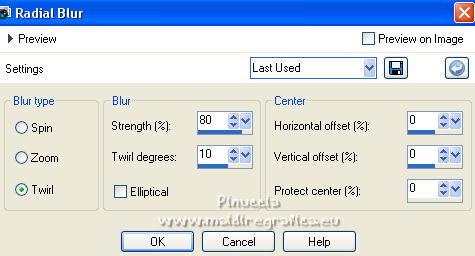
Adjust>Blur>Radial Blur.
Layers>Merge>Merge All.
Adjust>Blur>Gaussian Blur - radius 10.

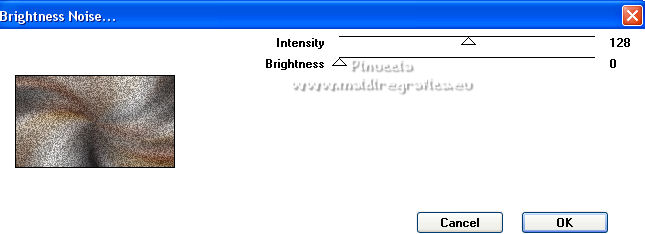
Effects>Plugins>VM Toolbox - Brightness Noise, default settings.
3. Layers>New Raster Layer.
Flood Fill  the layer with your black foreground color. the layer with your black foreground color.
Layers>New Mask layer>From image
Open the menu under the source window and you'll see all the files open.
Select the mask 1250182445_nikita_masque.
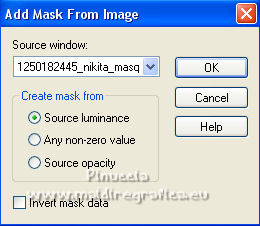
Effects>Edge Effects>Enhance.
Layers>Merge>Merge Group.
Selection Tool 
(no matter the type of selection, because with the custom selection your always get a rectangle)
clic on the Custom Selection 
and set the following settings.
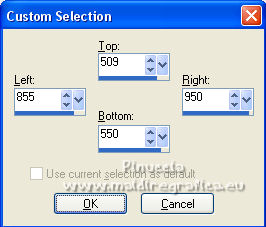
Press CANC on the keyboard CANC 
Selections>Select None.
Layers>Merge>Merge Down.
4. Layers>Duplicate.
Effects>Distortion Effects>Lens Correction.
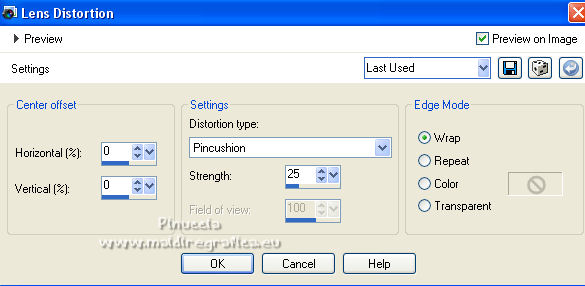
Image>Resize, to 60%, resize all layers not checked.
Effects>Image Effects>Seamless Tiling, default settings.

Change the Blend Mode of this layer to Hard Light.
Effects>3D Effects>Drop Shadow, color white.
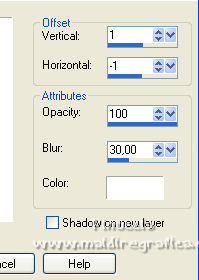
Effects>Plugins>VM Natural - Ripper.
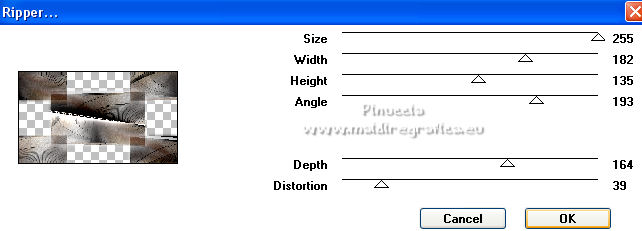
Effects>Image Effects>Seamless Tiling, Stutter vertical.

Adjust>Sharpness>Sharpen.
Effects>3D Effects>Drop Shadow, same settings.
Layers>Merge>Merge Down.
5. Layers>Duplicate.
Effects>Plugins>Mura's Meister - Perspective Tiling.
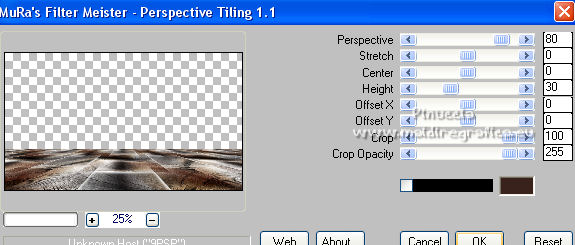
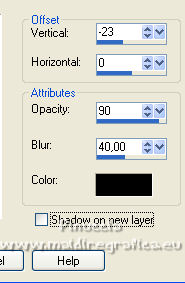
Effects>3D Effects>Drop Shadow, color black.
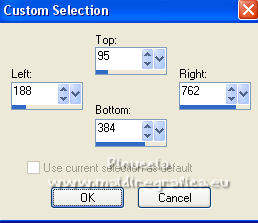
6. Custom Selection 
Layers>New Raster Layer.
Open the image punkRock1..., and go to Edit>Copy.
Go back to your work and go to Edit>Paste into Selection.
Change the Blend Mode of this layer to Soft Light and reduce the opacity to 70%.

Selections>Select None.
7. Activate your background layer.
Custom Selection 
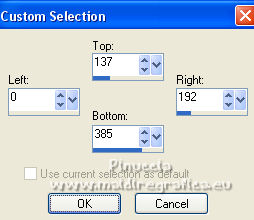
Selections>Promote Selection to Layer.
Layers>Arrange>Bring to Top.
Effects>Plugins>Filters Unlimited 2.0 - VM Experimental - Magnetic Detection, default settings.
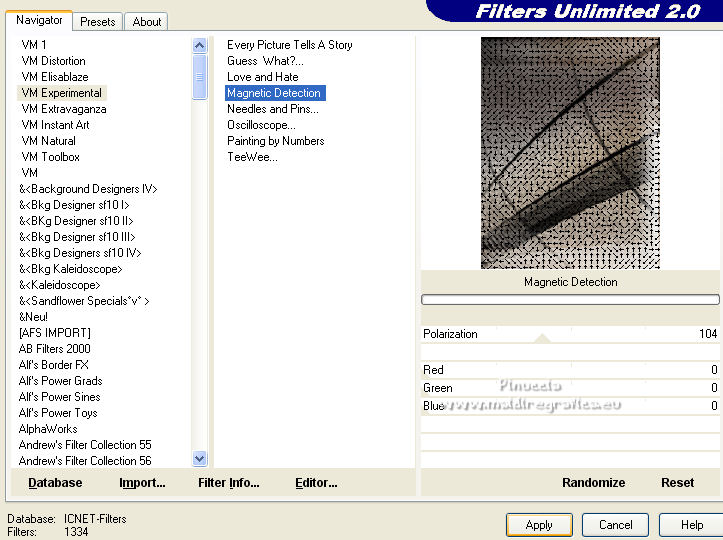
8. Layers>New Raster Layer.
Open the woman tube.
Image>Mirror.
Edit>Copy.
Go back to your work and go to Edit>Paste into Selection.
Adjust>Sharpness>Sharpen.
Selections>Select None.
Effects>3D Effects>Drop Shadow, color black.

9. Activate the layer below.
Effects>3D Effects>Drop Shadow, same settings.
10. Activate your background layer.
Edit>Copy.
11. Image>Add borders, 1 pixel, symmetric, foreground color (black).
Image>Add borders, 3 pixels, symmetric, background color.
Image>Add borders, 1 pixel, symmetric, foreground color (black).
Selections>Select All.
Image>Add borders, 30 pixels, symmetric, background color.
Selections>Invert.
Edit>Paste into Selection.
Adjust>Sharpness>Sharpen.
Selections>Invert.
Effects>3D Effects>Drop Shadow, same settings.
Selections>Select None.
12. Activate again the woman tube.
Image>Mirror (or Edit>Undo Mirror).
Edit>Copy.
Go back to your work and go to Edit>Paste as new layer.
Image>Resize, to 80%, resize all layers not checked.
K key to activate your Pick Tool 
and set Position X: 573,00 and Position Y: 42,00.

13. Layers>Duplicate, and activate the layer below of the original.
Adjust>Blur>Gaussian Blur, radius 30.

Change the Blend Mode of this layer to Multiply.
14. Activate your top layer.
Open the tube déco coins, and go to Edit>Copy.
Go back to your work and go to Edit>Paste as new layer.
Open the tube titre and go to Edit>Copy.
Go back to your work and go to Edit>Paste as new layer.
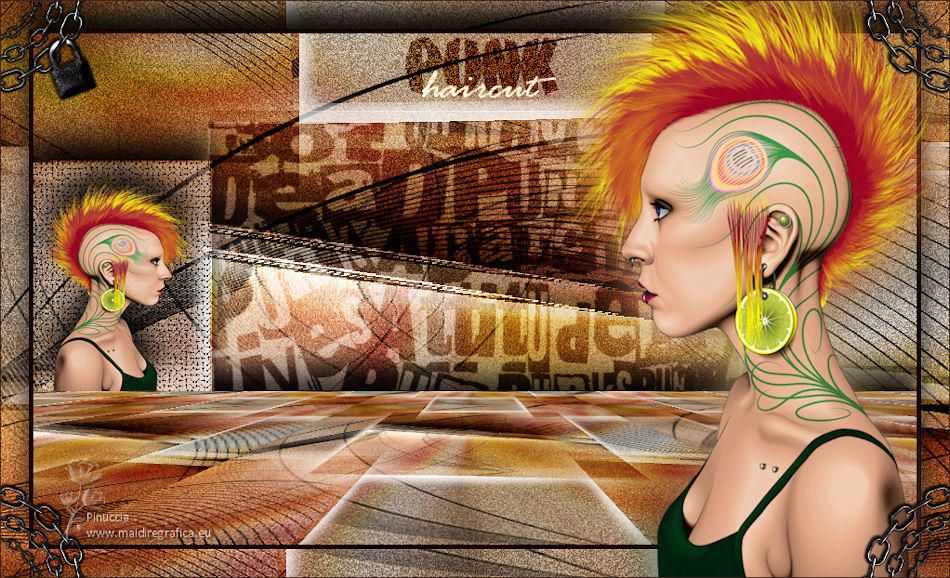
Place  the text up, see my example. the text up, see my example.
Change the Blend Mode of this layer to Overlay.
15. Sign your work on a new layer.
Add, if you want, the author and translator's watermarks.
16. Image>Add borders, 1 pixel, symmetric, color black.
Image>Resize, 950 pixels width, resize all layers checked.
Adjust>Sharpness>Sharpen, if necessary.
Save as jpg.
For the tubes of this version thanks Yoka

If you have problems or doubts, or you find a not worked link,
or only for tell me that you enjoyed this tutorial, write to me.
8 September 2022

|

