|
PINUCCIA

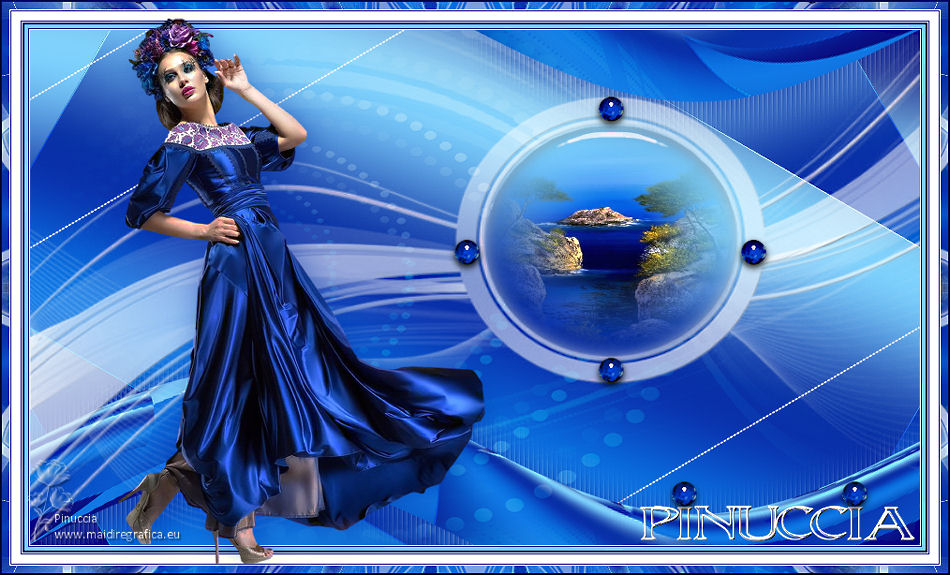
Thanks Irene for the invitation to translate your tutorials
 Merci beaucoup Irene, de m'avoir dédié ce jolie tutoriel
This tutorial was written with PSPX8 and translated with PSPX7 and PSPX3, but it can also be made using other versions of PSP.
Since version PSP X4, Image>Mirror was replaced with Image>Flip Horizontal,
and Image>Flip with Image>Flip Vertical, there are some variables.
In versions X5 and X6, the functions have been improved by making available the Objects menu.
In the latest version X7 command Image>Mirror and Image>Flip returned, but with new differences.
See my schedule here
 italian translation here italian translation here
 your versions here your versions here
For this tutorial, you will need:
Material here
Thanks for the woman tube Pink and for the mask Narah.
The rest of the material is by Moi-Même.
(The links of material creators here).
consult, if necessary, my filter section here
Filters Unlimited 2.0 here
Mehdi - Wavy Lab 1.1. here
Mura's Seamless - Emboss at alpha here
Mura's Meister - Perspective Tiling here
Alien Skin Eye Candy 5 Impact - Glass here
Filters Plugins AB can be used alone or imported into Filters Unlimited.
(How do, you see here)
If a plugin supplied appears with this icon  it must necessarily be imported into Unlimited it must necessarily be imported into Unlimited

You can change Blend Modes according to your colors.

(Don't forget to erase the watermarks of the tubes and don't save the modifications when you'll close them)
Open the mask in PSP and minimize it with the rest of the material.
Colors

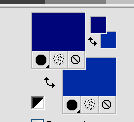
1. Set your foreground color to #00087a,
and your background color to #002ca4.
1. Open canal alpha Pinuccia.
Window>Duplicate or, on the keyboard, shift+D to make a copy.

Close the original.
The copy, that will be the basis of your work, is not empty,
but contains a selection saved to alpha channel.
(if you have problems with alpha channel, in the material you find the selection to copy in the Selection Folder,
and load from disk).
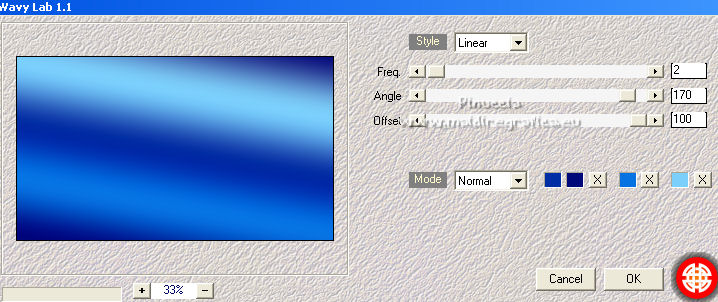
Effects>Plugins>Mehdi - Wavy Lab 1.1.
This filter creates gradients with the colors of your Materials palette.
The first is your background color, the second is your foreground color.
Change the last two colors created by the filtre:
the third color with color 3 #0773e3 and the forth color with color 4 #7bcffb.
Layers>Duplicate.
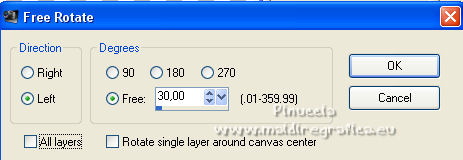
Image>Free Rotate - 30 degrees to left.
Effects>Edge Effects>Enhance.
Layers>Duplicate.
Image>Mirror.
Layers>Merge>Merge visible.
2. Set your foreground color to white.
Layers>New Raster Layer.
Flood Fill  the layer with color white. the layer with color white.
Layers>New Mask layer>From image
Open the menu under the source window and you'll see all the files open.
Select the mask Narah_Mask_1199-vi.
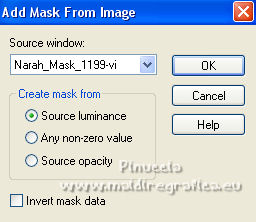
Layers>Merge>Merge group.
Effects>Plugins>Mura's Seamless - Emboss at alpha, default settings.
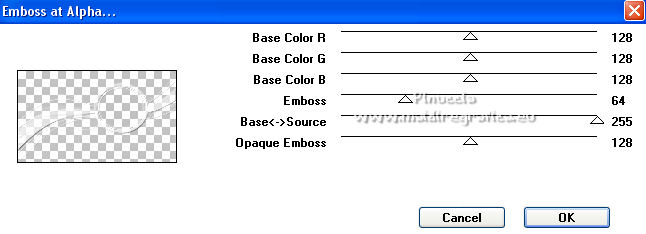
3. Layers>New Raster Layer.
Selections>Load/Save Selection>Load Selection from Alpha Channel.
The selection #1 is immediately available. You just have to click Load.
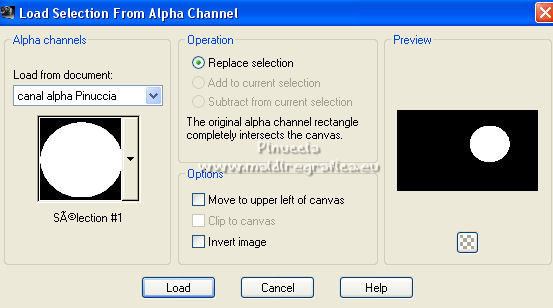
Open the landscape misted and go to Edit>Copy.
Go back to your work and go to Edit>Paste into Selection.
Effects>Plugins>Alien Skin Eye Candy 5 Impact - Glass.
Select the preset clear no drop shadow and ok.

(ou Copy/Paste into Selection the tube déco glass, in the material).
Layers>Arrange>Move Down.
Selections>Select None.
4. Activate your top layer.
Open the tube saphire_circle and go to Edit>Copy.
(colorize according to your colors).
Go back to your work and go to Edit>Paste as new layer.
K key on the keyboard to activate your Pick Tool 
and set Position X: 444,00 and Position Y: 65,00.
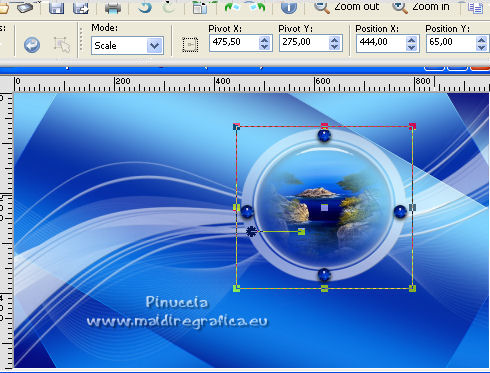
M key to deselect the Tool.
Activate the bottom layer (Merged).
Open the tube déco masque nikita and go to Edit>Copy.
Go back to your work and go to Edit>Paste as new layer.
Change the Blend Mode of this layer to Soft Light.
Selections>Load/Save Selection>Load Selection from Alpha Channel.
Load again the selection #1.

Press CANC on the keyboard 
Selections>Select None.
5. Activate again your bottom layer (Merged).
Layers>Duplicate.
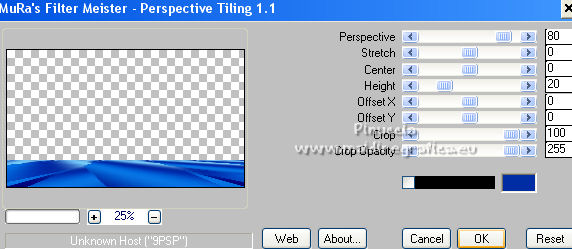
Effects>Plugins>Mura's Meister - Perspective Tiling.
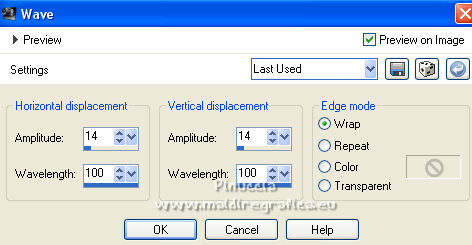
Effects>Distortion Effects>Wave
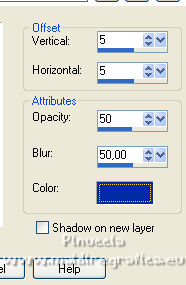
Effects>3D Effects>Drop Shadow, background color #002ca4.
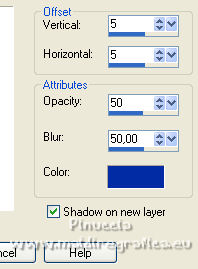
Repeat Drop Shadow, same setting but shadow on a new layer checked.
Effects>Texture Effects>Blinds.
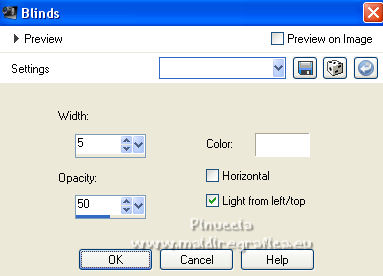
Effects>Edge Effects>Enhance.
6. Activate again your bottom layer, Merged.
Open the tube déco 1 and go to Edit>Copy.
Go back to your work and go to Edit>Paste as new layer.
7. For the borders, set your foreground color to color 1 #00087a 
and your background color to color 4 #7bcffb 
Image>Add borders, 1 pixel, symmetric, color white.
Image>Add borders, 1 pixel, symmetric, color 1 
Image>Add borders, 5 pixels, symmetric, color 4 
Image>Add borders, 1 pixel, symmetric, color 1  . .
Image>Add borders, 1 pixel, symmetric, color white.
Image>Add borders, 1 pixel, symmetric, color 1  . .
Image>Add borders, 10 pixels, symmetric, color white.
Image>Add borders, 1 pixel, symmetric, color 1  . .
Image>Add borders, 1 pixel, symmetric, color white.
Selections>Select All.
8. Image>Add borders, 10 pixels, symmetric, color white.
Selections>Invert.
Effects>Reflection Effects>Kaleidoscope.
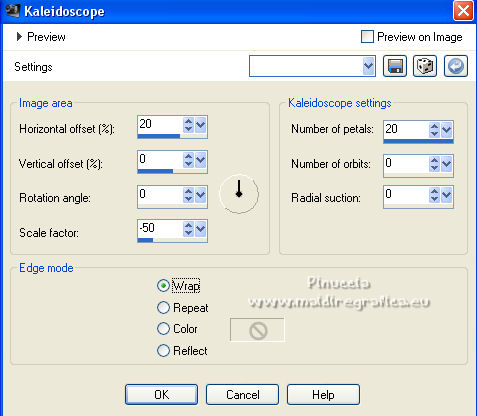
Effects>3D Effects>Buttonize, foreground color #00087a.
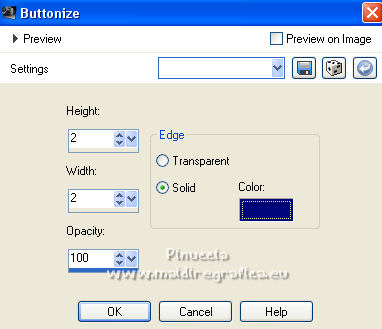
Selections>Select None.
Activate your Magic Wand Tool  , tolerance and feather 0, , tolerance and feather 0,
and click on the color 4 border to select it.
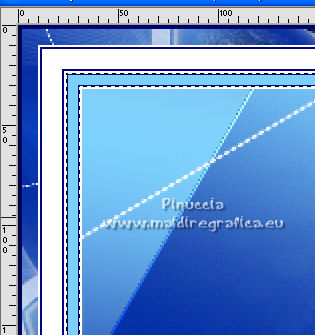
Repeat Effects>3D Effects>Buttonize, same settings.
9. Open the woman tube and go to Edit>Copy.
Go back to your work and go to Edit>Paste as new layer.
Image>Resize, to 80%, resize all layers not checked.
Image>Mirror.
K key to activate your Pick Tool 
and set Position X: 125,00 and Position Y: 19,00.

Repeat Effects>3D Effects>Drop Shadow, same settings, but shadow on a new layer not checked.

10. Open the tube titre and go to Edit>Copy.
Go back to your work and go to Edit>Paste as new layer.
Set Position X: 683,00 and Position Y: 540,00.

11. Open the tube décoration pour titre and go to Edit>Copy.
Go back to your work and go to Edit>Paste as new layer.
Set Position X: 708,00 and Position Y: 508,00.

M key to deselect the Tool.
12. Sign your work on a new layer.
Add, if you want, the watermarks of the author and of the translator.
13. Layers>Merge>Merge All.
Image>Resize, 950 pixels width, resize all layers checked.
14. Adjust>Sharpness>Unsharp mask - Soft.

Save as jpg.
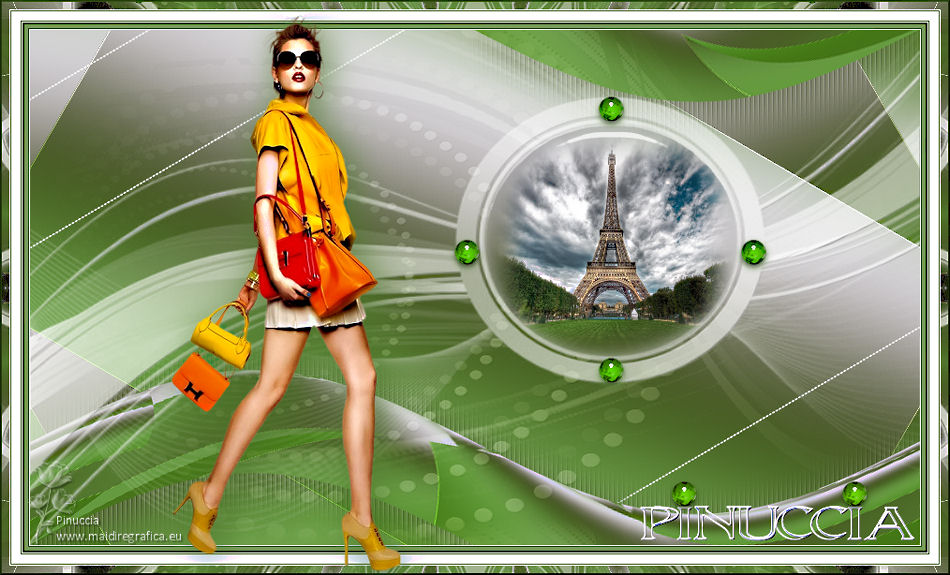
For the tubes of this version thanks Suizabella and Lana

If you have problems or doubts, or you find a not worked link,
or only for tell me that you enjoyed this tutorial, write to me.
6 June 2022

|


 Merci beaucoup Irene, de m'avoir dédié ce jolie tutoriel