|
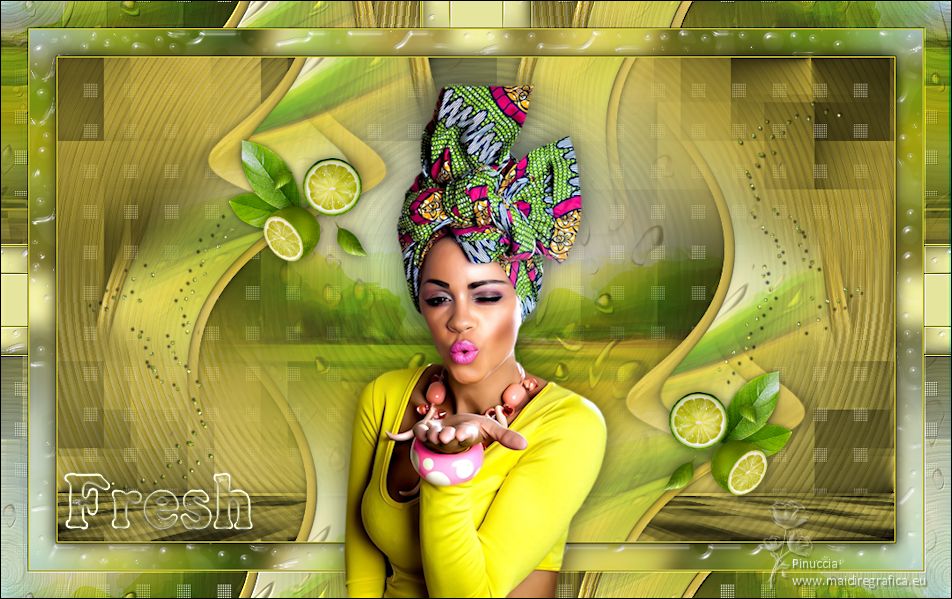
FRESH


Thanks Irene for the invitation to translate your tutorials

This tutorial was written with PSPX8 and translated with PSPX7 and PSPX3, but it can also be made using other versions of PSP.
Since version PSP X4, Image>Mirror was replaced with Image>Flip Horizontal,
and Image>Flip with Image>Flip Vertical, there are some variables.
In versions X5 and X6, the functions have been improved by making available the Objects menu.
In the latest version X7 command Image>Mirror and Image>Flip returned, but with new differences.
See my schedule here
 italian translation here italian translation here
 your versions here your versions here
For this tutorial, you will need:
Material here
Thanks for the woman EllyS and for the landscape Kahlan.
Fruits of the net.
The rest of the material is by Moi-Même.
(The links of material creators here).
consult, if necessary, my filter section here
Filters Unlimited 2.0 here
&<Bkg Designer sf10I> - Circle Pede (da importare in Unlimited) here
FM Tile Tools - Blend Emboss here
Alien Skin Eye Candy 5 Nature - Water Drops here
Alien Skin Eye Candy 5 Impact - Glass here

You can change Blend Modes according to your colors.

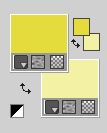
1. Set your foreground color to color 1 #e4dc3d,
and your background color to color 2 #f2f0a4.
Open canal alpha fresh.
Window>Duplicate or, on the keyboard, shift+D to make a copy.

Close the original.
The copy, that will be the basis of your work, is not empty,
but contains the selections saved to alpha channel.
2. Selections>Select All.
Open the image leaves-69999_960_720
The image has several different color layers: activate the layer with your color and go to Edit>Copy.
Go back to your work and go to Edit>Paste into Selection.
Selections>Select None.
Effects>Image Effects>Seamless Tiling, default settings.

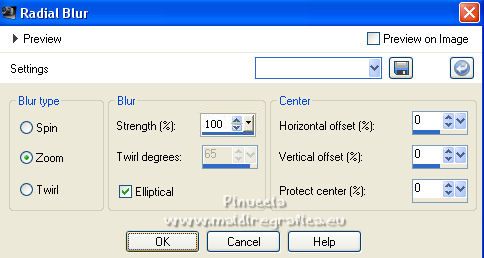
Adjust>Blur>Radial Blur.
Effects>Plugins>Filters Unlimited 2.0 - &<Bkg Designer sf10I> - Circle Pede, default settings.
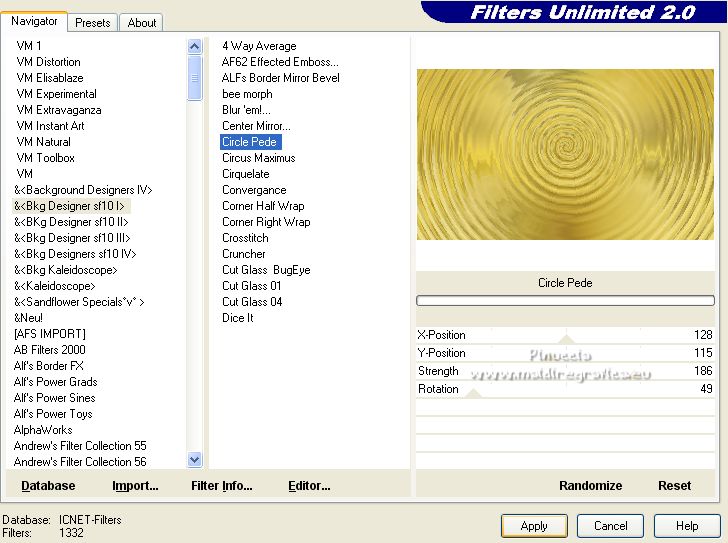
(colorize, if necessary).
3. Open the tube déco 1 Citrus, and go to Edit>Copy.
Go back to your work and go to Edit>Paste as new layer.
Effects>3D Effects>Drop Shadow, foreground color.
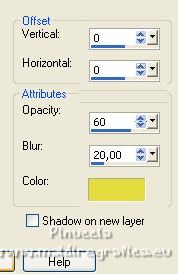
(according to your colors, reduce the opacity).
4. Open the landscape misted, erase the watermark.
Notes: to get the same kind of effects:
1. you have to use the same misted, you can change after its color,
for example with the filter Adjust,Variations.
2. Apply on the misted:
Effects>Plugins>Alien Skin Eye Candy 5 Nature - Water Drops, settings of your choice.
Edit>Copy.
Go back to your work and go to Edit>Paste as new layer.
5. Activate the bottom layer.
Selections>Load/Save Selection>Load Selection from Alpha Channel.
The selection #1 is immediately available. You just have to click Load.
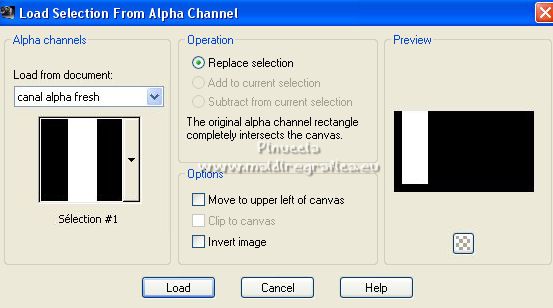
Selections>Promote Selection to layer.
Layers>Arrange>Bring to Top.
Selections>Select None.
Effects>Geometric Effects>Rotating Mirror.

Effects>Geometric Effects>Skew.
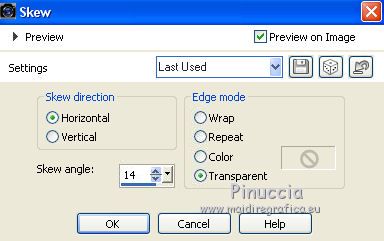
Repeat Effects>Geometric Effects>Rotating Mirror.

6. Layers>New Raster Layer.
Selections>Load/Save Selection>Load Selection from Alpha Channel.
Open the selections menu and load the selection #2.
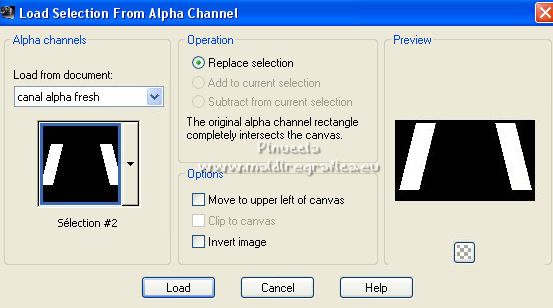
Edit>Paste into Selection (the landscape is still in memory).
Layers>Duplicate - 2 times.
Layers>Merge>Merge Down - 3 times.
Effects>Plugins>Alien Skin Eye Candy 5 Impact - Glass.
Basic: background color.
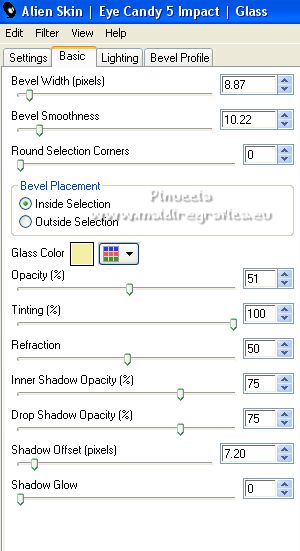
Again Edit>Paste into Selection (the landscape is always in memory).
Effects>3D Effects>Drop Shadow, color black.
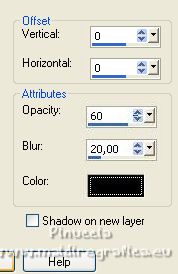
Selections>Select None.
Repeat Effects>3D Effects>Drop Shadow, same settings.
Stay on this layer
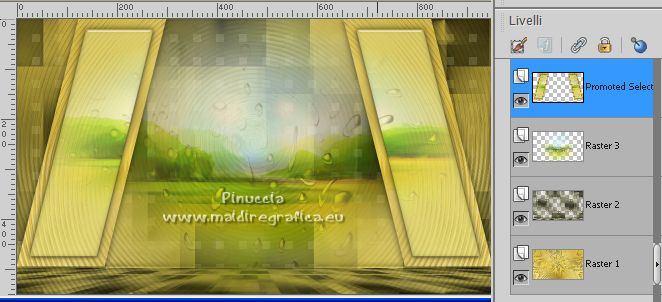
7. Effects>Distortion Effects>Twirl.
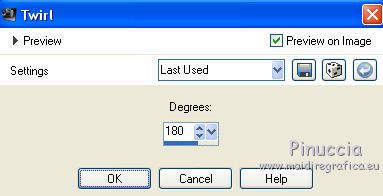
Effects>Image Effects>Seamless Tiling, default settings.

Effects>3D Effects>Drop Shadow, same settings.
Result
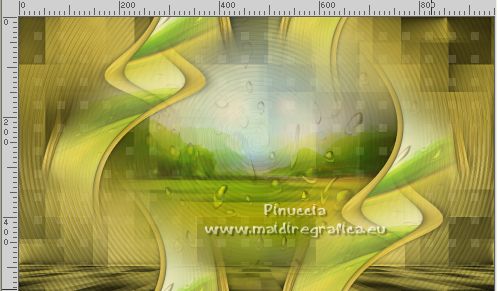
8. Image>Add borders, 1 pixel, symmetric, foreground color.
Image>Add borders, 1 pixel, symmetric, color black.
Selections>Select All.
Image>Add borders, 30 pixels, symmetric, background color.
Effects>Image Effects>Seamless Tiling, default settings.

Selections>Invert.
Adjust>Blur>Gaussian Blur - radius 10.

9. Open the tube déco cadre, and go to Edit>Copy.
Go back to your work and go to Edit>Paste into Selection.
10. Selections>Invert.
Effects>3D Effects>Drop Shadow, same settings.
Selections>Select None.
11. Image>Add borders, 1 pixel, symmetric, foreground color.
Image>Add borders, 1 pixel, symmetric, color black.
Selections>Select All.
Image>Add borders, 30 pixels, symmetric, background color.
Effects>Image Effects>Seamless Tiling, default settings.

Selections>Invert.
Effects>Plugins>FM Tile Tools - Blend Emboss, default settings.

Selections>Select None.
12. (You can use other decos, colorize mine, or use them as a marker).
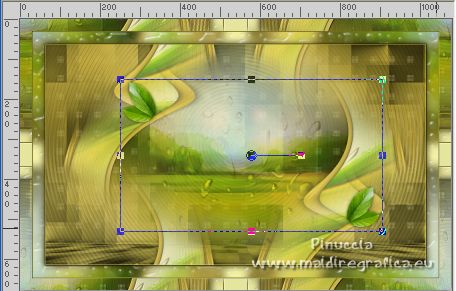
Open the tube déco feuilles citronnier, erase the watermark and go to Edit>Copy.
Go back to your work and go to Edit>Paste as new layer.
Place  the tube as below the tube as below
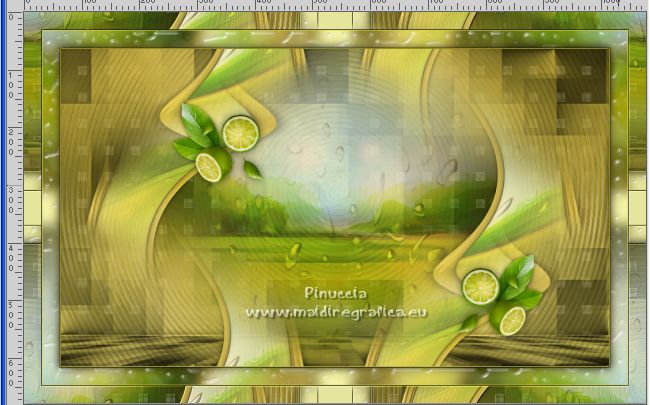
13. Open déco citrons, and go to Edit>Copy.
Go back to your work and go to Edit>Paste as new layer.
Place  the tube as below. the tube as below.
14. Open déco 2, and go to Edit>Copy.
Go back to your work and go to Edit>Paste as new layer.
Place  the tube as below. the tube as below.
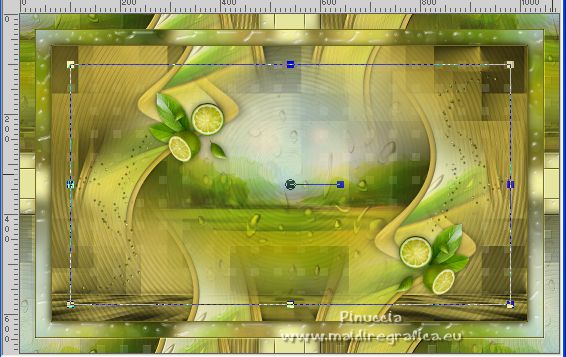
(Duplicate, if necessary).
15. Open the woman tube and go to Edit>Copy.
Go back to your work and go to Edit>Paste as new layer.
Image>Resize, to 90%, resize all layers not checked.
Objects>Align>Bottom,
or move  the tube down. the tube down.
Effects>3D Effects>Drop Shadow, color black.

16. Open the tube titre, and go to Edit>Copy.
Go back to your work and go to Edit>Paste as new layer.
(you can colorize it with one of your colors,
for example with your Change Color Tool 
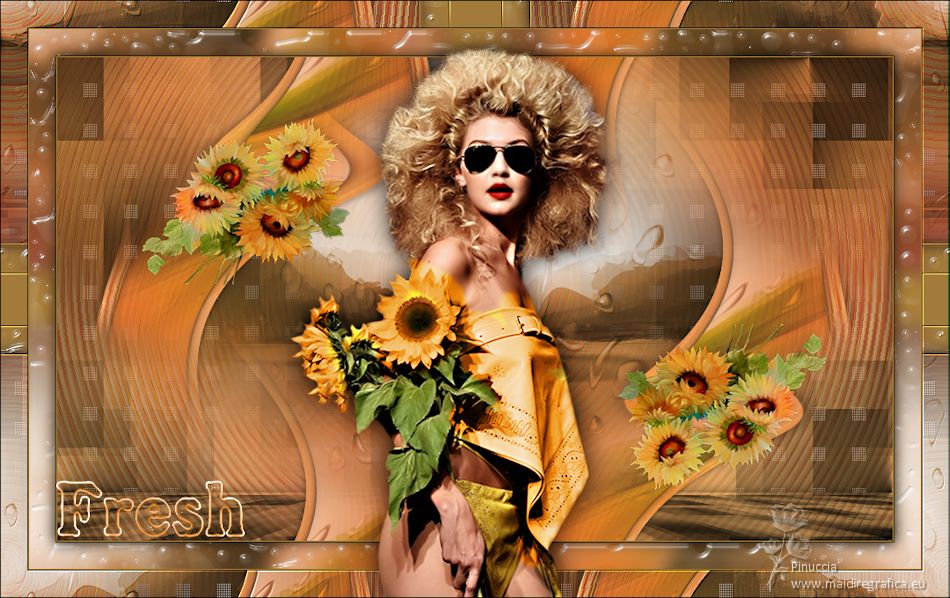
Move  the text at the bottom left, see my example. the text at the bottom left, see my example.
17. Sign your work on a new layer.
Add the author and the translators's watearmark.
18. Image>Add borders, 1 pixel, symmetric, color black.
Image>Resize, 950 pixels width, resize all layers checked.
Adjust>Sharpness>Unsharp Mask - Soft.

Save as jpg.
For the tube of this version thanks Luz Cristina

If you have problems or doubts, or you find a not worked link,
or only for tell me that you enjoyed this tutorial, write to me.
5 September 2022

|

