|
RAHIMA


Thanks Maria José for your invitation to translate your tutorial

This tutorial has been translated with PSPX2 and PSPX3, but it can also be made using other versions of PSP.
Since version PSP X4, Image>Mirror was replaced with Image>Flip Horizontal,
and Image>Flip with Image>Flip Vertical, there are some variables.
In versions X5 and X6, the functions have been improved by making available the Objects menu.
In the latest version X7 command Image>Mirror and Image>Flip returned, but with new differences.
See my schedule here
 French translation here French translation here
 your versions ici your versions ici
For this tutorial, you will need:

Thanks for the deco Manola and for the mask Tine.
The rest of the material is by Maria José.
(you find here the links to the material authors' sites)

consult, if necessary, my filter section here
Filters Unlimited 2.0 here
Mehdi - Wavy Lab 1.1. here
Mehdi - Sorting Tiles here
Simple - 4 Way Average here
AP 01 [Innovations] - Distort-Shift Mesh here
Andrew's Filters 15 - Many Ways To Do The Same here
Mura's Meister - Perspective Tiling here
Filters Andrew's and Simple can be used alone or imported into Filters Unlimited.
(How do, you see here)
If a plugin supplied appears with this icon  it must necessarily be imported into Unlimited it must necessarily be imported into Unlimited

You can change Blend Modes according to your colors.

Open the mask in PSP and minimize it with the rest of the material.
Set your foreground color to #c87241,
and your background color to #251307.

1. Open a new transparent image 1000 x 700 pixels.
2. Effects>Plugins Mehdi - Wavy Lab 1.1.
This filter creates gradients with the colors of your Materials palette.
The first is your background color, the second is your foreground color.
Change the last two colors created by the filtre:
the third color with #103547 and the forth color with #8ba8b8.

3. Adjust>Blur>Gaussian Blur - radius 30.

4. Effects>Plugins>Mehdi - Sorting Tiles.

5. Effects>Plugins>Simple - 4 Way Average.
6. Layers>Duplicate.
Change the Blend Mode of this layer to Overlay.
Layers>Merge>Merge visible.
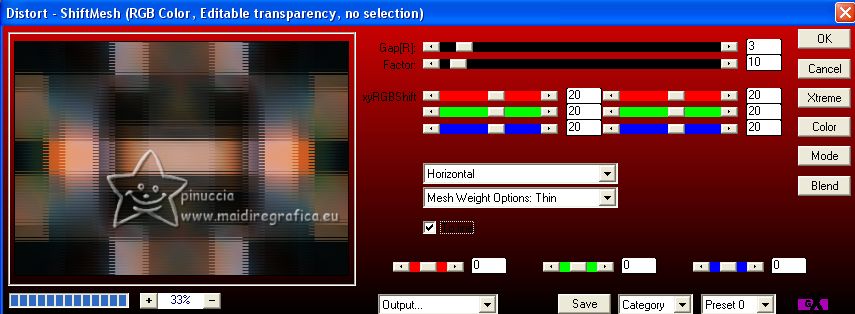
7. Effects>Plugins>AP 01 [Innovations] - Distort-ShiftMesh.

8. Adjust>Add/Remove Noise>Add Noise.

Adjust>Sharpness>Sharpen.
Layers>Duplicate.
9. Effects>Plugins>Andrew's Filters 15 - Many Ways To Do The Same, default settings.

10. Effects>Reflection Effects>Rotating Mirror, default settings.

11. Effects>Plugins>Mura's Meister - Perspective Tiling.

12. Activate your Magic Wand tool  , tolerance 0 and feather 50, , tolerance 0 and feather 50,
and click on the transparent part to select it.

Press +/-10 times CANC on the keyboard 
Selections>Select None.
don't forget to set again the feather of your Magic Wand Tool to 100
13. Open the tube deco-rahima-MJ 
Edit>Copy.
Go back to your work and go to Edit>Paste as new layer.
Change the Blend Mode of this layer to Luminance.
14. K key on the keyboard to activate your Pick Tool 
keep Position X: 0,00 and set Position Y: -80,00.

M key to deselect the Tool.
15. Layers>New Raster Layer.
Reduce the opacity of your Flood Fill Tool to 80%.
Flood Fill  the layer with your foreground color #c87241. the layer with your foreground color #c87241.
don't forget to set again your Flood Fill Tool to 100
16. Layers>New Mask layer>From image
Open the menu under the source window and you'll see all the files open.
Select the mask creation.tine_masque338

Effects>Edge Effects>Enhance More.
Layers>Merge>Merge Group.
17. Layers>Arrange>Move down - 2 times.
Change the Blend Mode of this layer to Screen.
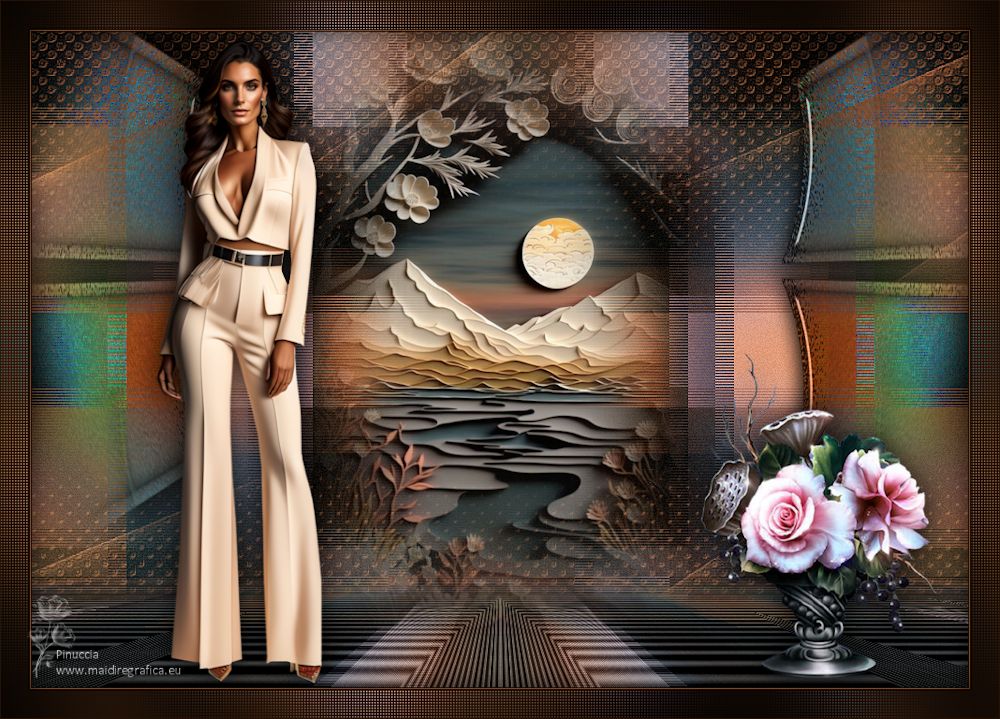
18. Your tag and the layers - adapt according to your colors.

19. Open the misted mistedtutorial-MJ 
Edit>Copy.
Go back to your work and go to Edit>Paste as new layer.
Place  correctly the tube. correctly the tube.
20. Open the woman's tube mariajoseMJ-340 
Erase the watemark and go to Edit>Copy.
Go back to your work and go to Edit>Paste as new layer.
Image>Mirror.
Image>Resize, to 75%, resize all layers not checked.
Move  the tube to the left side. the tube to the left side.
Effects>3D Effects>Drop Shadow, at your choice.
21. Open the tube BARNALI-B2944 
Erase the watermark and go to Edit>Copy.
Go back to your work and go to Edit>Paste as new layer.
Image>Mirror.
Image>Resize, to 70%, resize all layers not checked.
Move  the tube at the bottom right. the tube at the bottom right.
Effects>3D Effects>Drop Shadow, at your choice.

22. Image>Add borders, 1 pixel, symmetric, dark color.
Image>Add borders, 1 pixel, symmetric, light color.
Image>Add borders, 1 pixel, symmetric, dark color.
23. Selections>Select All.
Edit>Copy
Image>Add borders, 50 pixels, symmetric, color white.
24. Selections>Invert.
Edit>Paste into Selection.
25. Adjust>Blur>Gaussian blur - radius 30.

26. Effects>Texture Effects>Blinds
background color #251307.

27. Repeat Effects>Texture Effects>Blinds, horizontal not checked.

Adjust>Sharpness>Sharpen More.
28. Effects>3D Effects>Drop Shadow, color black.

29. Effects>Plugins>Graphics Plus - Cross shadow, default settings.

Selections>Select None.
30. Sign your work on a new layer.
Image>Add borders, 1 pixel, symmetric, dark color.
31. Image>Resize, 1000 pixels width, resize all layers checked.
Save as jpg.
For the tubes of this version thanks Suizabella


If you have problems or doubts, or you find a not worked link,
or only for tell me that you enjoyed this tutorial, write to me.
12 April 2023

|

