|
OUTONO

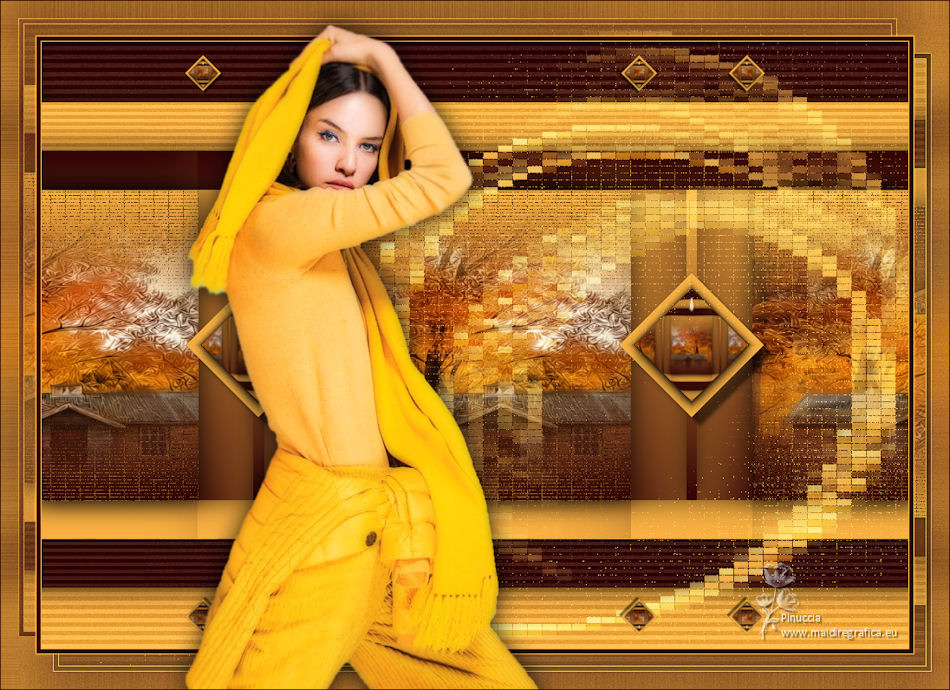
Thanks Maria José for your invitation to translate your tutorial

This tutorial has been translated with PSPX2 and PSPX3, but it can also be made using other versions of PSP.
Since version PSP X4, Image>Mirror was replaced with Image>Flip Horizontal,
and Image>Flip with Image>Flip Vertical, there are some variables.
In versions X5 and X6, the functions have been improved by making available the Objects menu.
In the latest version X7 command Image>Mirror and Image>Flip returned, but with new differences.
See my schedule here
 French translation here French translation here
 your versions ici your versions ici
For this tutorial, you will need:
Material here
The material is by Maria José.
(you find here the links to the material authors' sites)
Plugins
consult, if necessary, my filter section here
Filters Unlimited 2.0 here
AP 01 [Innovations] - Distort-ShiftMesh here
Simple - Top Left Mirror here
Mura's Seamless - Emboss at Alpha here
Carolaine and Sensibility - CS-HLines ici
Alien Skin eye Candy 5 Impact - Glass ici
Filters Simple and Mura's Seamless can be used alone or imported into Filters Unlimited.
(How do, you see here)
If a plugin supplied appears with this icon  it must necessarily be imported into Unlimited it must necessarily be imported into Unlimited

You can change Blend Modes according to your colors.
In the newest versions of PSP, you don't find the foreground/background gradient (Corel_06_029).
You can use the gradients of the older versions.
The Gradient of CorelX here
Copy the preset  in the folder of the plugin Alien Skin Eye Candy 5 Impact>Settings>Glass. in the folder of the plugin Alien Skin Eye Candy 5 Impact>Settings>Glass.
One or two clic on the file (it depends by your settings), automatically the preset will be copied in the right folder.
why one or two clic see here
Open the mask in PSP and minimize it with the rest of the material.
1. Set your foreground color to #fab242,
and your background color to #320406.

Set your foreground color to a Foreground/Background Gradient, style Linear.

Open Alphachannel_Outono_MJ.
Window>Duplicate or, on the keyboard, shift+D to make a copy.

Close the original.
The copy, that will be the basis of your work, is not empty,
but contains the selections saved to alpha channel.
Flood Fill  the transparent image with your Gradient. the transparent image with your Gradient.
2. Layers>Duplicate.
Image>Resize, to 80%, resize all layers not checked.
Image>Flip.
Effects>3D Effects>Drop Shadow, couleur noire.
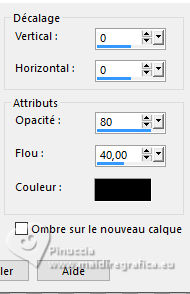
Repeat Layers>Duplicate.
Image>Resize, to 80%, resize all layers not checked.
Image>Flip.
Effects>3D Effects>Drop Shadow, same settings.
One more time Layers>Duplicate.
Image>Resize, to 80%, resize all layers not checked.
Image>Flip.
Effects>3D Effects>Drop Shadow, same settings.
3. Stay on the top layer.

4. Layers>Merge>Merge Down - 2 times.

5. Effects>Image Effects>Seamless Tiling.

6. Selections>Load/Save Selection>Load Selection from Alpha Channel.
The selection #1 is immediately available. You just have to click Load.

Selections>Promote Selection to Layer.
7. Effects>Texture Effects>Mosaic antique

8. Open the misted and go to Edit>Copy.
Go back to your work and go to Edit>Paste into Selection.
Selections>Select None.
9. Effects>Image Effects>Seamless Tiling, same settings.

10. Selections>Load/Save Selection>Load Selection from Alpha Channel.
Open the selections menu and load the selection #2.

Press CANC on the keyboard 
Selections>Select None.
Effects>3D Effects>Drop Shadow, same settings.

11. Activate the layer Copy of Raster 1.
Selections>Load/Save Selection>Load Selection from Alpha Channel.
Open the selections menu and load the selection #3.

Selections>Promote Selection to Layer.
12. Adjust>Add/Remove Noise>Add Noise.

13. Effects>Plugins>Carolaine and Sensibility - CS-HLines.

Selections>Select None.
14. Activate again the layer Copy of Raster 1.
Selections>Load/Save Selection>Load Selection from Alpha Channel.
Open the selections menu and load the selection #5.

Selections>Promote Selection to Layer.
15. Adjust>Add/Remove Noise>Add Noise, same settings.

16. Effects>Plugins>Carolaine and Sensibility - CS-HLines, same settings.

Selections>Select None.
Activate the layer Promoted Selection 1.

Layers>Merge>Merge Down.
Layers>Duplicate.
Layers>Arrange>Bring to Top.
17. Edit>Copy Special>Copy merged.
Stay on the top layer Copy of Promoted Selection 2.

18. Effects>Geometric Effects>Skew.

19. Effects>Plugins>Simple - Top Left Mirror.

20. Image>Resize, to 30%, resize all layers not checked.
21. Selections>Load/Save Selection>Load Selection from Alpha Channel.
Open the selections menu and load the selection #4.

22. Layers>New Raster Layer.
Edit>Paste into Selection (the image copied at step 17).
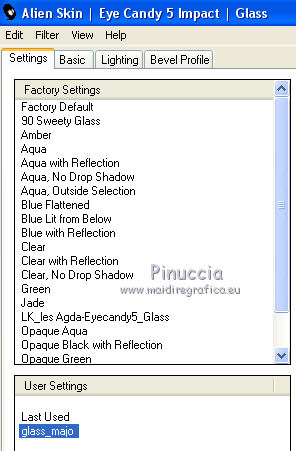
23. Effects>Plugins>Alien Skin Eye Candy 5 Impact - Glass.
Select the preset glass_majo and ok.
Layers>Merge>Merge Down.
Selections>Select None.
24. Effects>Image Effects>Offset.

Layers>Duplicate.
Image>Mirror.
Layers>Merge>Merge Down.
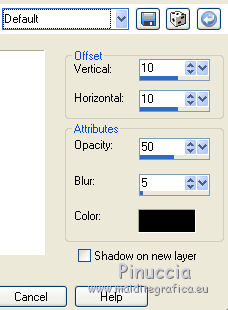
Effects>3D Effects>Drop Shadow, default settings.
25. Layers>Duplicate.
Image>Resize, to 25%, resize all layers not checked.
26. K key to activate your Pick Tool 
and set Position X: 165,00 and Position Y: 15,00.

M key to deselect the tool.
27. Layers>Duplicate.
Image>Mirror.
Layers>Merge>Merge Down.
Layers>Duplicate.
Image>Flip.
Layers>Merge>Merge Down.
28. Activate the layer Raster 1.
Adjust>Add/Remove Noise>Add Noise, same settings.

29. Effects>Plugins>Carolaine and Sensibility - CS-HLines.

30. Layers>New Raster Layer.
Layers>Arrange>Bring to Top.
Set your foreground color to Color.
Reduce the opacity of your Flood Fill to 80%.
Flood Fill  the layer with your foreground color #fab242. the layer with your foreground color #fab242.
(don't forget to set again the opacity of your Flood Fill tool to 100).
31. Layers>New Mask layer>From image
Open the menu under the source window and you'll see all the files open.
Select the mask 50-mask-MJ.

Layers>Merge>Merge Group.
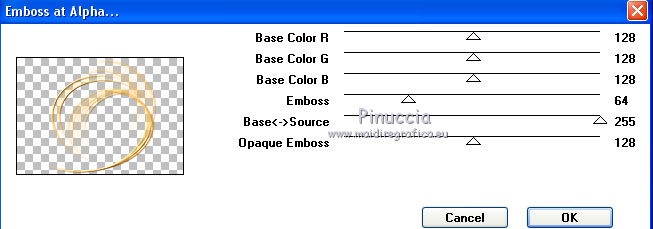
32. Effects>Plugins>Mura's Seamless - Emboss at Alpha, default settings.
33. Pick Tool 
and set Position X: 325,00 and Position Y: 5,00.

M key to deselect the Tool.
34. Effects>Texture Effects>Mosaic Antique, same settings.

Change the Blend Mode of this layer to Screen.
Layers>Arrange>Move Down.
Adapt Blend Modes and opacities to your liking.

35. Image>Add borders, 1 pixel, symmetric, light color.
Image>Add borders, 5 pixels, symmetric, dark color.
Image>Add borders, 1 pixel, symmetric, light color.
36. Selections>Select None.
Edit>Copy.
Image>Add borders, 40 pixels, symmetric, color white.
37. Selections>Invert.
Edit>Paste into Selection.
38. Adjust>Blur>Gaussian Blur - radius 30

39. Adjust>Add/Remove Noise>Add Noise, same settings.

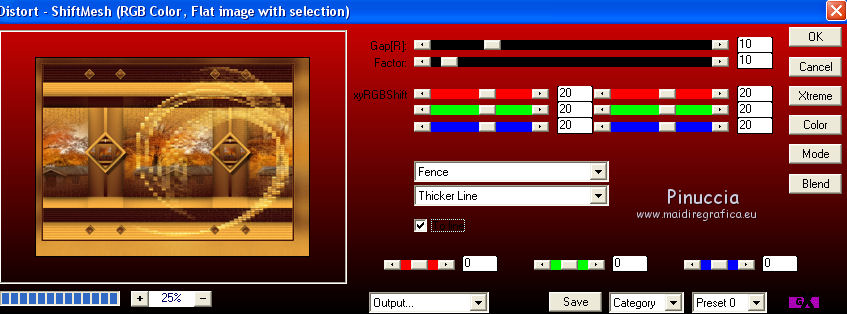
40. Effects>Plugins>AP 01 [Innovations] - Distort-Shift Mesh.
41. Selections>Promoted Selection to Layer.
Selections>Select None.
42. Image>Mirror.
Image>Flip.
Reduce the opacity of this layer to 50%.
43. Adjust>Sharpness>Sharpen More.
Layers>Merge>Merge visible.
44. Open the woman tube and go to Edit>Copy.
Go back to your work and go to Edit>Paste as new layer.
Image>Resize, to 88%, resize all layers not checked.
Move  the tube to the left side. the tube to the left side.
Effects>3D Effects>Drop Shadow, to your liking.
45. Sign your work on a new layer.
Image>Add borders, 1 pixel, symmetric, dark color.
46. Image>Resize, 1000 pixels width, resize all layers checked.
Save as jpg.
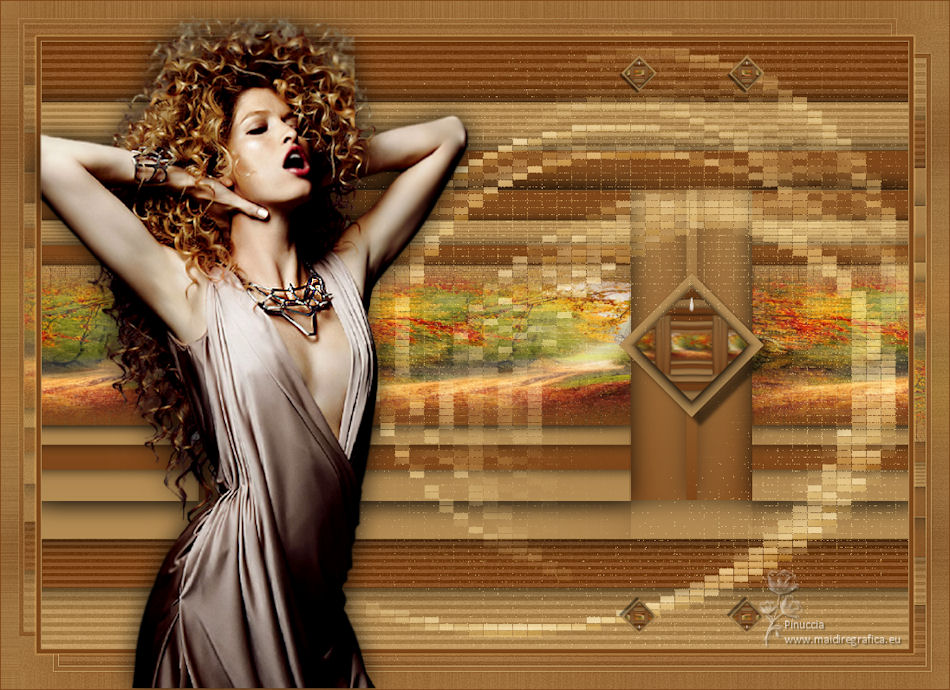
Version with tubes by Luz Cristina and Jewel
 Your versions here Your versions here

If you have problems or doubts, or you find a not worked link,
or only for tell me that you enjoyed this tutorial, write to me.
18 October 2021

|

