|
HELANK


Thanks Maria José for your invitation to translate your tutorial

This tutorial was created with PSPX9 and translated with PSPX2 and PSPX3, but it can also be made using other versions of PSP.
Since version PSP X4, Image>Mirror was replaced with Image>Flip Horizontal,
and Image>Flip with Image>Flip Vertical, there are some variables.
In versions X5 and X6, the functions have been improved by making available the Objects menu.
In the latest version X7 command Image>Mirror and Image>Flip returned, but with new differences.
See my schedule here
 French translation here French translation here
 your versions ici your versions ici
For this tutorial, you will need:
Material here
Thanks for the tube Suizabella and for a mask Ket.
The rest of the material is by Maria José
(you find here the links to the material authors' sites)
Plugins
consult, if necessary, my filter section here
Filters Unlimited 2.0 here
Kiwi Oelfilters - Videowand here
Carolaine and Sensibility - CS-LDots, CS-Linear-H, CS-DLines here
Photoeffex - Scanlines here
Simple - Top Left Mirror here
Mehdi - Edge FX here
Mura's Meister - Perspective Tiling here
Mura's Meister - Pole Transform here
Two Moon - TargetZone here
Alien Skin Eye Candy 5 Impact - Glass here
Mura's Seamless - Emboss at Alpha here
Horizonaus Mixed Bag here
Filters Kiwi, Simple, Two Moon, Mura's Seamless and Horizonaus can be used alone or imported into Filters Unlimited.
(How do, you see here)
If a plugin supplied appears with this icon  it must necessarily be imported into Unlimited it must necessarily be imported into Unlimited

You can change Blend Modes according to your colors.
In the newest versions of PSP, you don't find the foreground/background gradient (Corel_06_029).
You can use the gradients of the older versions.
The Gradient of CorelX here
Copy the preset  in the folder of the plugin Alien Skin Eye Candy 5 Impact>Settings>Glass. in the folder of the plugin Alien Skin Eye Candy 5 Impact>Settings>Glass.
One or two clic on the file (it depends by your settings), automatically the preset will be copied in the right folder.
why one or two clic see here
Copy the preset in the Presets Folder.
Copy the Selections in the Selections Folder.
Copy the Ket's mask in the Masks Folder.
Open the other two masks in PSP and minimize them with the rest of the material.
1. Set your foreground color to #d87534,
and your background color to #12142c.

Set your foreground color to a Foreground/Background Gradient, style Sunburst

Open a new transparent image 1000 x 700 pixels.
Flood Fill  the transparent image with your Gradient. the transparent image with your Gradient.
2. Effects>Plugins>Kiwi Oelfilters - Videowand.

3. Effects>Image Effects>Seamless Tiling.

4. Image>Mirror.
Image>Flip.
5. Effects>Plugins>Carolaine and Sensibility - CS-LDots

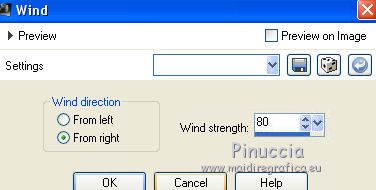
6. Effects>Distortion Effects>Wind - from right, intensity 80
7. Effects>Plugins>Photoeffex - Scanlines

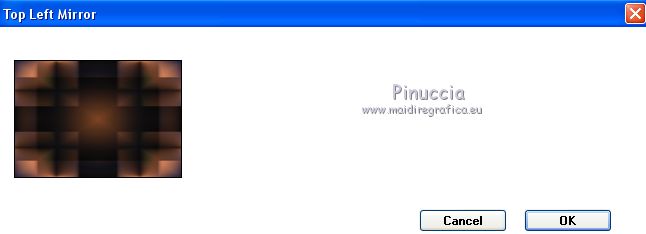
8. Effects>Plugins>Simple - Top Left Mirror.
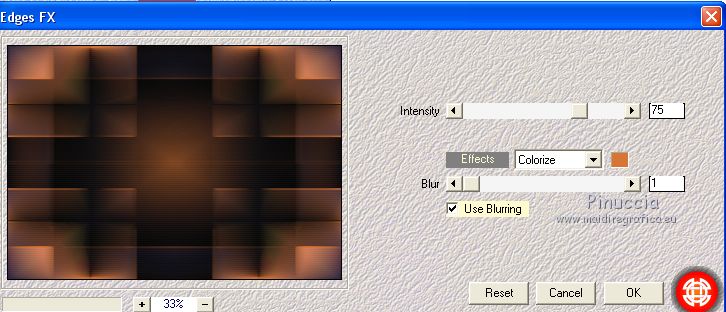
9. Effects>Plugins>Mehdi - Edges FX
Layers>Duplicate.
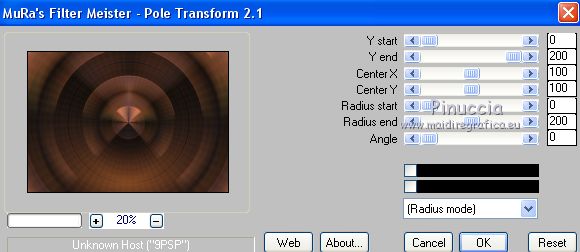
10. Effects>Plugins>Mura's Meister - Pole Transform, default settings.
11. Effects>Plugins>Mura's Meister - Perspective Tiling, default settings.
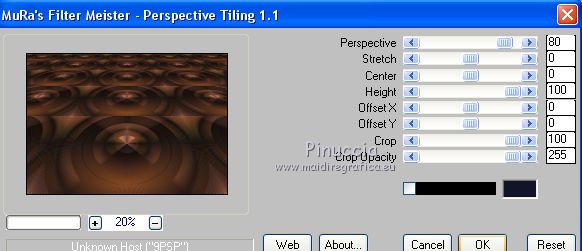
12. K key on the keyboard to activate your Pick Tool 
open the Preset's Menu and select the preset helank_mj


M key to deselect the tool.
13. Layers>Load/Save mask>Load Mask from Disk.
Look for and load the mask !!!!.mask.ket-fadesuave-1

Layers>Duplicate.
Layers>Merge>Merge Group.
14. Layers>New Raster Layer.
Set your foreground color to Color.
Flood Fill  the layer with the light foreground color #d87534. the layer with the light foreground color #d87534.
15. Layers>New Mask layer>From image
Open the menu under the source window and you'll see all the files open.
Select the mask 07_mask_mj.

Layers>Merge>Merge Group.
16. Effects>Plugins>Mura's Seamless - Emboss at Alpha, default settings.

17. Open deco_helank_mj and go to Edit>Copy.
Go back to your work and go to Edit>Paste as new layer.
Pick Tool 
keep Position X: 56,00 and set Position Y to 31,00

18. Selections>Load/Save Selection>Load Selection from Disk.
Look for and load the selection sel_helank_4_mj.

19. Layers>New Raster Layer.
Open the landscape misted and go to Edit>Copy.
Go back to your work and go to Edit>Paste into Selection.
Selections>Select None.
Layers>Arrange>Move Down - 2 times.
Reduce the opacity of this layer to +/- 77%.

20. Layers>New Raster Layer.
Layers>Arrange>Bring to Top.
Flood Fill  with your dark background color #12142c. with your dark background color #12142c.
21. Layers>New Mask layer>From image
Open the menu under the source window
and select the mask mask_helank.

Layers>Merge>Merge Group.
22. Effects>Plugins>Mura's Seamless - Emboss at Alpha, default settings.

23. Effects>Plugins>Mehdi - Edges FX

24. Selections>Load/Save Selection>Load Selection from Disk.
Look for and load the selection sel_helank_mj.

25. Layers>New Raster Layer.
Set again your foreground color to Gradient.
Flood Fill  the layer with your Gradient. the layer with your Gradient.
26. Effects>Plugins>Two Moon - TargetZone.
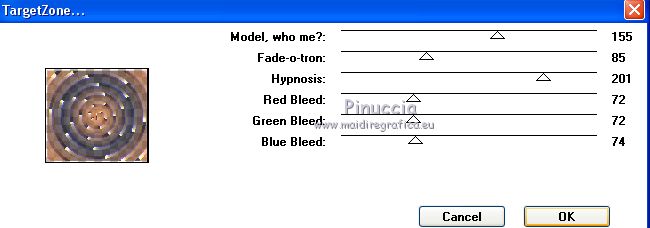
27. Effects>Plugins>Alien Skin Eye Candy 5 Impact - Glass.
Select the preset glass_helank_mj and ok.
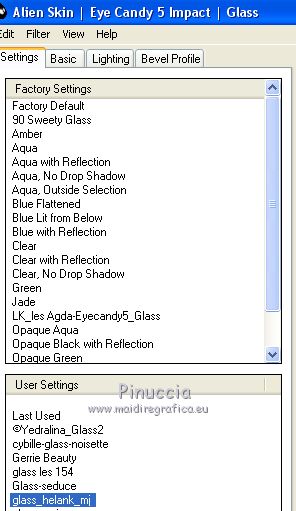
Selections>Select None.
28. Selections>Load/Save Selection>Load Selection from Disk.
Look for and load the selection helank_1_mj.

29. Layers>New Raster Layer.
Flood Fill  the layer with your Gradient. the layer with your Gradient.
30. Effects>Plugins>Carolaine and Sensibility - CS-LDots

31. Effects>Plugins>Alien Skin Eye Candy 5 Impact - Glass, preset glass_helank_mj.
Selections>Select None.
Layers>Merge>Merge Down.
Layers>Arrange>Move Down.
Activate your top layer, Group-Raster 4.

32. Selections>Load/Save Selection>Load Selection from Disk.
Look for and load the selection helank_2_mj.

33. Layers>New Raster Layer.
Flood Fill  the layer with your Gradient. the layer with your Gradient.
34. Effects>Plugins>Carolaine and Sensibility - CS-DLines.
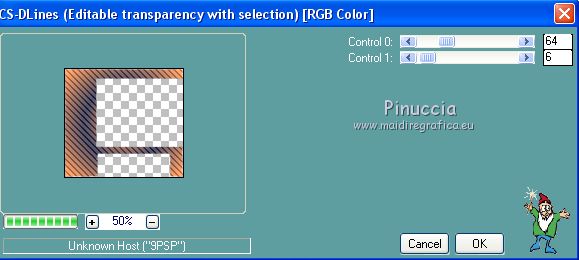
35. Effects>Plugins>Alien Skin Eye Candy 5 Impact - Glass, preset glass_helank_mj.
Selections>Select None.
36. Selections>Load/Save Selection>Load Selection from Disk.
Look for and load the selection helank_3_mj.

37. Layers>New Raster Layer.
Flood Fill  the layer with your Gradient. the layer with your Gradient.
38. Effects>Plugins>Carolaine and Sensibility - CS-Linear-H

39. Effects>Plugins>Alien Skin Eye Candy 5 Impact - Glass, preset glass_helank_mj.
Selections>Select None.
Layers>Merge>Merge Down.
Layers>Arrange>Move down.

40. Activate your top layer, Group-Raster 4.
Layers>Merge>Merge Down - 2 times.

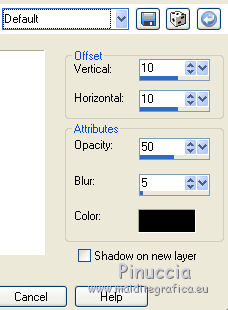
41. Effects>3D Effects>Drop Shadow, default settings.
42. Activate the layer Raster 1.
Edit>Copy, and minimize this image, for caution.
Go back to your work.
43. Image>Add borders, 1 pixel, symmetric, dark color #12142c.
Image>Add borders, 2 pixels, symmetric, light color #d87534.
Image>Add borders, 1 pixel, symmetric, dark color #12142c.
44. Selections>Select None.
Image>Add borders, 25 pixels, symmetric, color white.
Selections>Invert.
45. Edit>Paste into Selection (the image minimized at step 42 is in memory).
46. Effects>3D Effects>Drop Shadow, color black.

Selections>Select None.
47. Image>Add borders, 1 pixel, symmetric, dark color #12142c.
Image>Add borders, 2 pixels, symmetric, light color #d87534.
Image>Add borders, 1 pixel, symmetric, dark color #12142c.
48. Selections>Select All.
Edit>Copy.
49. Image>Add borders, 25 pixels, symmetric, color white.
Selections>Invert.
Edit>Paste into Selection.
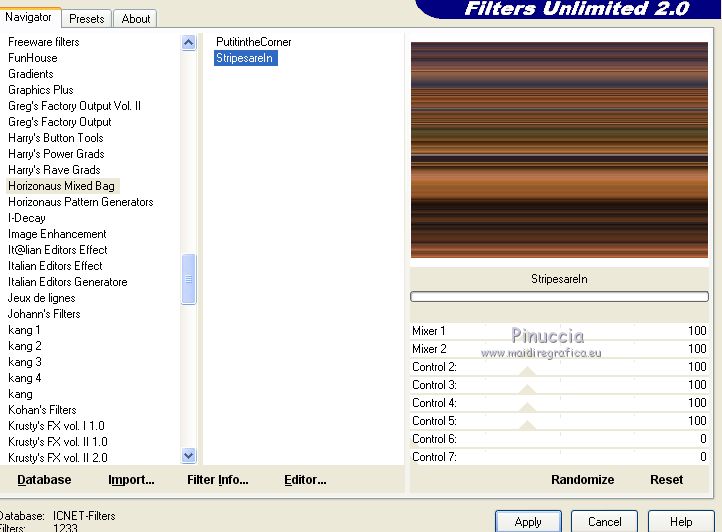
50. Effects>Plugins>Filters Unlimited 2.0 - Horizonaus Mixed Bag - StripesareIn, default settings.
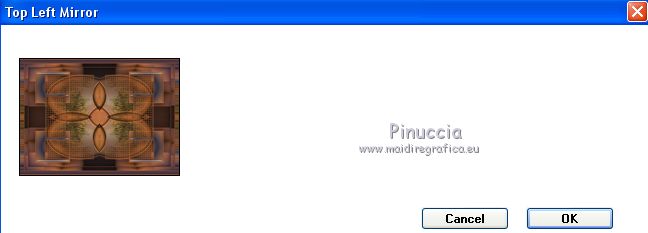
51. Effects>Plugins>Simple - Top Left Mirror.
Effects>3D Effects>Drop Shadow, same settings.

Selections>Select None.
52. Open the tube of the woman and go to Edit>Copy.
Go back to your work and go to Edit>Paste as new layer.
Image>Resize, to 65%, resize all layers not checked.
Effects>3D Effects>Drop Shadow, at your choice.
53. Open the text and go to Edit>Copy.
Go back to your work and go to Edit>Paste as new layer.
Place  correctly the text. correctly the text.
Change the Blend Mode of this layer to Luminance (legacy).
Image>Add borders, 1 pixel, symmetric, dark color #12142c.
54. Sign your work on a new layer.
Layers>Merge>Merge All.
55. Image>Resize, 1000 pixels width, resize all layers checked.
Save as jpg.
Version with tube by Anairma and Kathy

 Your versions here Your versions here

If you have problems or doubts, or you find a not worked link, or only for tell me that you enjoyed this tutorial, write to me.
15 November 2020
|

