|
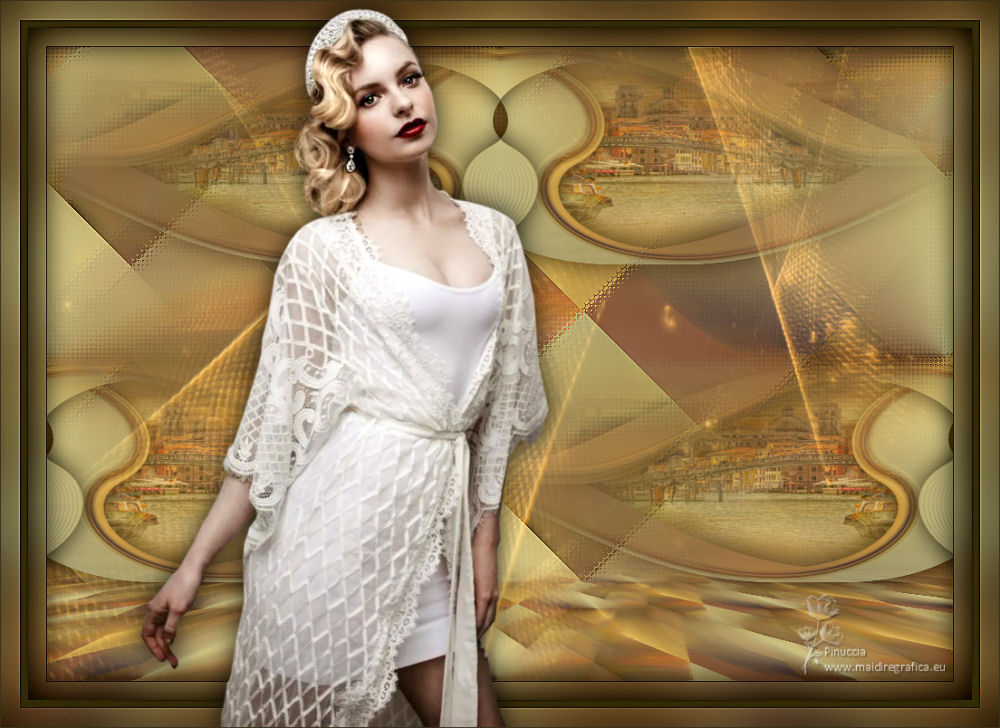
EXPLOSION

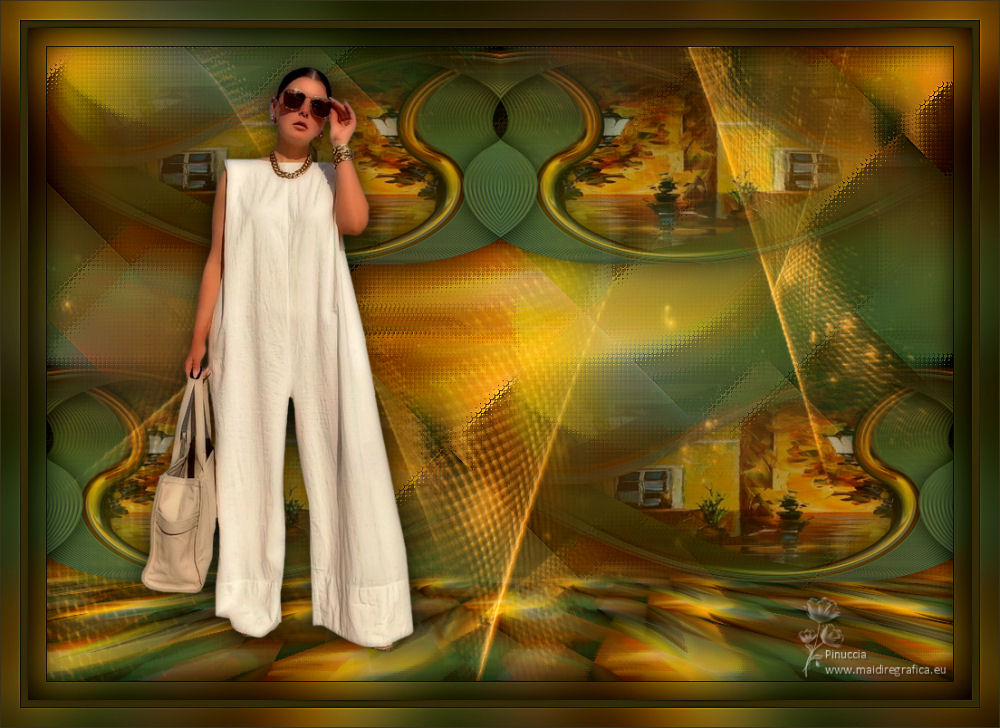
Thanks Maria José for your invitation to translate your tutorial

This tutorial has been translated with PSPX2 and PSPX3, but it can also be made using other versions of PSP.
Since version PSP X4, Image>Mirror was replaced with Image>Flip Horizontal,
and Image>Flip with Image>Flip Vertical, there are some variables.
In versions X5 and X6, the functions have been improved by making available the Objects menu.
In the latest version X7 command Image>Mirror and Image>Flip returned, but with new differences.
See my schedule here
 French translation here French translation here
 your versions ici your versions ici
For this tutorial, you will need:

The material is by Maria José.
(you find here the links to the material authors' sites)

consult, if necessary, my filter section here
Filters Unlimited 2.0 here
Mehdi - Sorting Tiles here
Mura's Meister - Copies here
Mura's Meister - Perspective Tiling here
Funhouse - Tremors here
Mura's Seamless - Emboss at Alpha here
Optional: AAA Filters - Custom here
Filters Funhouse and Mura's Seamless can be used alone or imported into Filters Unlimited.
(How do, you see here)
If a plugin supplied appears with this icon  it must necessarily be imported into Unlimited it must necessarily be imported into Unlimited

You can change Blend Modes according to your colors.

Copy the Selections in the Selections Folder.
Open the mask in PSP and minimize it with the rest of the material.
1. Open a new transparent image 1000 x 700 pixels.
2. Selections>Select All.
Open the background image grafico 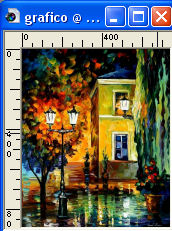
Edit>Copy.
Go back to your work and go to Edit>Paste into Selection.
Selections>Select None.
3. Adjust>Blur>Radial Blur.
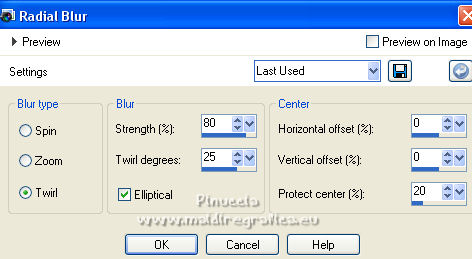
Layers>Duplicate.
4. Effects>Geometric Effects>Perspective Horizontal.
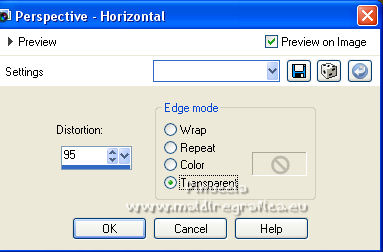
5. Repeat Effects>Geometric Effects>Perspective Horizontal -95.
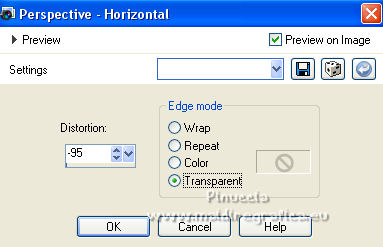
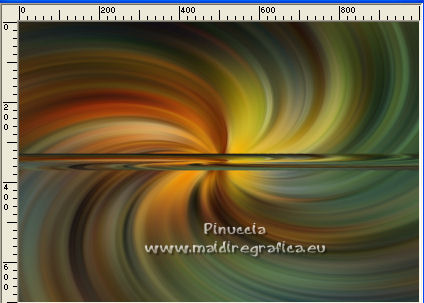
6. Effects>Distortion Effects>Pinch.

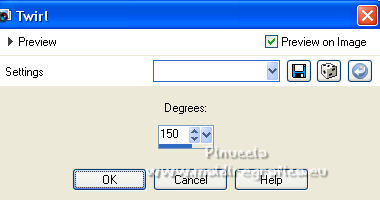
7. Effects>Distortion Effects>Twirl.
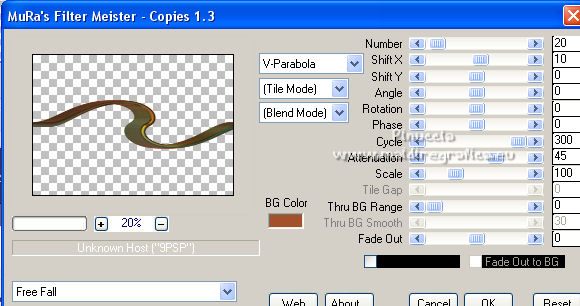
8. Effects>Plugins>Mura's Meister - Copies.
9. Effects>Image Effects>Offset.
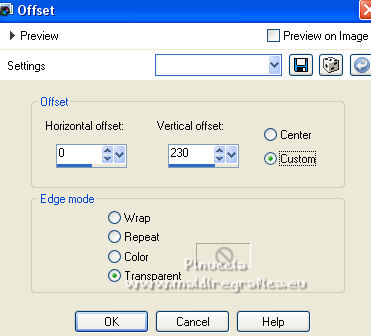
Effects>3D Effects>Drop Shadow, color black.

10. Open the misted 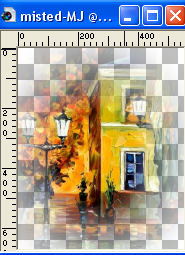
If you use an image of your, apply the mask 20-20, or choose un misted.
Edit>Copy.
Go back to your work and activate the layer Raster 1.
11. Selections>Load/Save Selection>Load Selection from Disk.
Look for and load the selection explosion-MJ
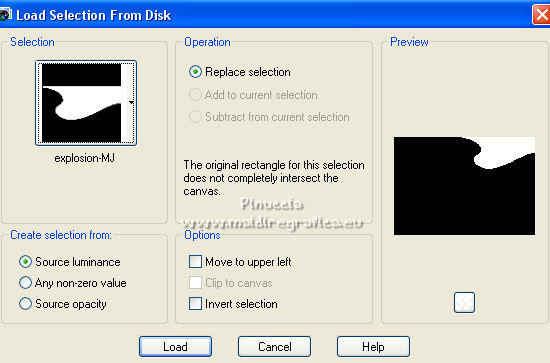
Selections>Promote Selection to layer.
12. Edit>Paste into Selection.
Selections>Select None.
13. Activate the layer Copy of Raster 1.
Layers>Merge>Merge Down.
14. Layers>Duplicate.
Image>Mirror.
Layers>Merge>Merge Down.
15. Effects>Reflection Effects>Rotating Mirror, default settings.

16. Effects>Image Effects>Seamless Tiling.

17. Close the layer Promoted Selection.
Activate the layer Raster 1.
Effects>Plugins>Mehdi - Sorting Tiles.
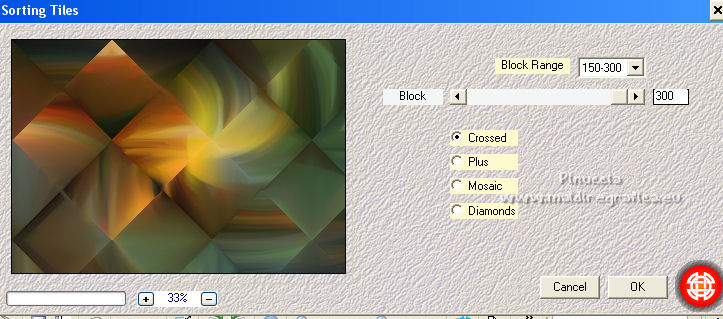
18. Effects>Image Effects>Seamless Tiling.

19. Effects>Plugins>Funhouse - Tremors, default settings.
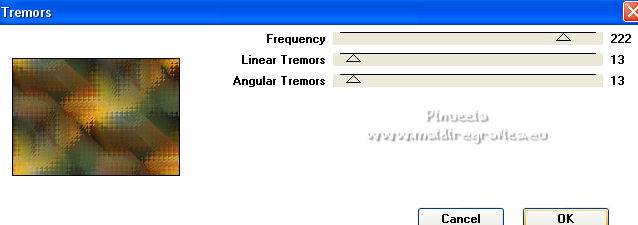
Repeat the Effect another time.
Adjust>Sharpness>Sharpen More.
Layers>Duplicate.
20. Effects>Plugins>Mura's Meister - Perspective Tiling.
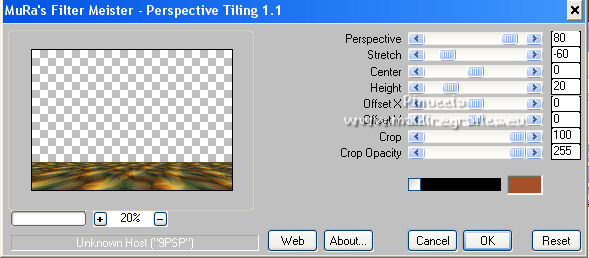
21. Selections>Load/Save Selection>Load Selection from Disk.
Look for and load the selection explosion-1-MJ
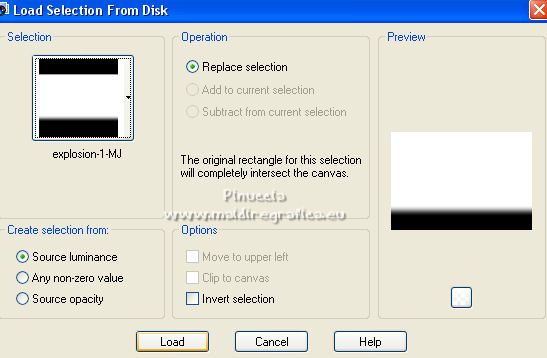
Press +/-10 times CANC on the keyboard 
Selections>Select None.
22. Set your foreground color to a light color of your image; for me #e48928.
Layers>New Raster Layer.
Flood Fill  the layer with your foreground color. the layer with your foreground color.
23. Layers>New Mask layer>From image
Open the menu under the source window and you'll see all the files open.
Select the mask 253-mask-MJ
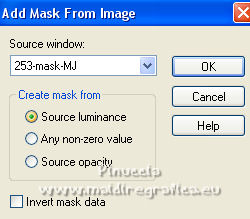
Layers>Merge>Merge Group.
24. Effects>Plugins>Mura's Seamless - Emboss at Alpha, default settings.
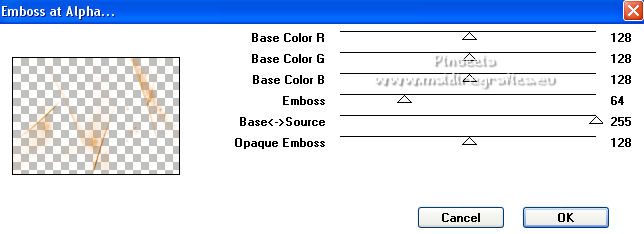
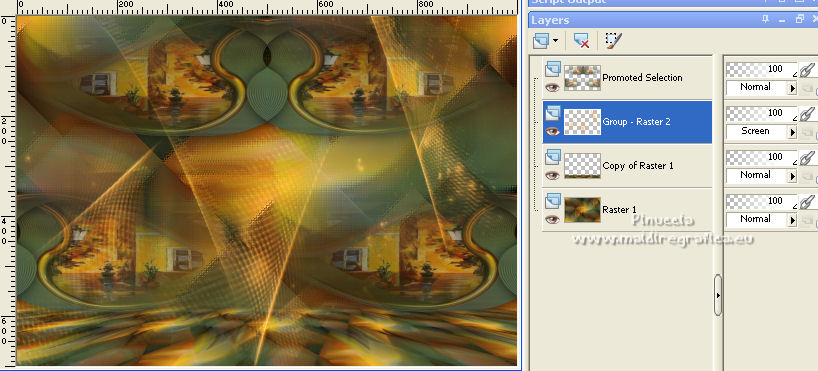
Change the Blend Mode of this layer to Screen.
Open again the top layer, Promoted Selection.
The tag and the layers - adapt Blend Mode and opacity to yur liking.
25. Image>Add borders, 1 pixel, symmetric, color black.
26. Selections>Select All.
Edit>Copy
Image>Add borders, 20 pixels, symmetric, color white.
27. Selections>Invert.
Edit>Paste into Selection.
28. Adjust>Blur>Gaussian Blur - radius 30.

Effects>3D Effects>Drop Shadow, color black.

29. Edit>Copy
Selections>Select All.
Image>Add borders, 30 pixels, symmetric, with a dark color of your image; for me #39331c.
30. Selections>Invert.
Edit>Paste into Selection (the image of step 29).
31. Adjust>Sharpness>Sharpen More.
Repeat Effects>3D Effects>Drop Shadow, same settings.

Selections>Select None.
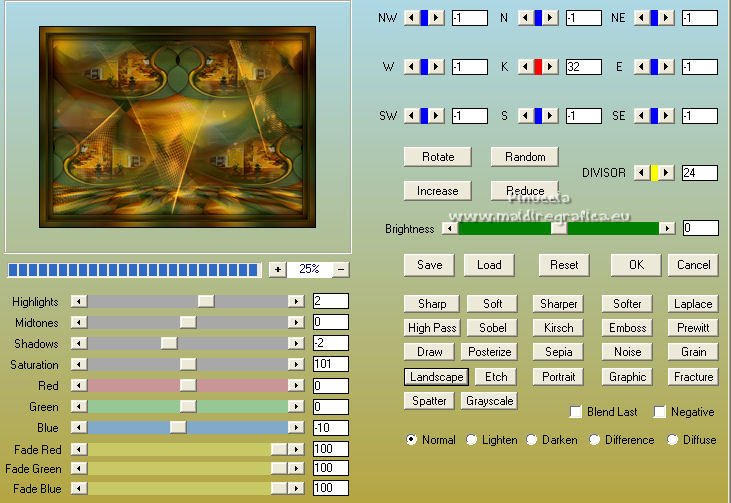
Optional: Effects>Plugins>AAA Filters - Custom - Landscape.
32. Open the woman tube mariajoseMJ-219 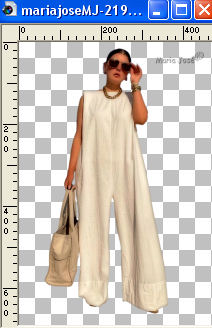
Edit>Copy.
Go back to your work and go to Edit>Paste as new layer.
Move  the tube to the left side. the tube to the left side.
Effects>3D Effects>Drop Shadow, at your choice.
33. Sign your work on a new layer.
Image>Add borders, 1 pixel, symmetric, color black.
34. Image>Resize, 1000 pixels width, resize all layers checked.
Save as jpg.
For the tube of this version thanks Gabry (the misted is mine)

If you have problems or doubts, or you find a not worked link,
or only for tell me that you enjoyed this tutorial, write to me.
7 March 2023

|

