|
DAFNE


Thanks Maria José for your invitation to translate your tutorial

This tutorial has been translated with PSPX2 and PSPX3, but it can also be made using other versions of PSP.
Since version PSP X4, Image>Mirror was replaced with Image>Flip Horizontal,
and Image>Flip with Image>Flip Vertical, there are some variables.
In versions X5 and X6, the functions have been improved by making available the Objects menu.
In the latest version X7 command Image>Mirror and Image>Flip returned, but with new differences.
See my schedule here
 French translation here French translation here
 your versions ici your versions ici
For this tutorial, you will need:
Material here
For the deco tube thanks Nena Silva.
The rest of the material is by Maria José.
(you find here the links to the material authors' sites)
Plugins
consult, if necessary, my filter section here
Filters Unlimited 2.0 here
Mura's Seamless - Emboss at Alpha here
RCS Filter Pak 1.0 - RCS Pencil Sketch Conversion, RCS Noisemaker-Rotary RGB, Digi-Lens-Window ShadesII here
Graphics Plus - Vertical Mirror here
L&K's - L&K's Katharina here
Mura's Meister - Perspective Tiling here
AP [Lines] - Lines SilverLining here
AAA Frames - Foto Frame here
Simple - Top Left Mirror here
Filters RCS Filters and Mura's Seamless can be used alone or imported into Filters Unlimited.
(How do, you see here)
If a plugin supplied appears with this icon  it must necessarily be imported into Unlimited it must necessarily be imported into Unlimited

You can change Blend Modes according to your colors.
In the newest versions of PSP, you don't find the foreground/background gradient (Corel_06_029).
You can use the gradients of the older versions.
The Gradient of CorelX here
Open the mask in PSP and minimize it with the rest of the material.
1. Set your foreground color to #40160a
and your background color to #d4b5a6.

Note: for a good result of the tutorial, use these colors
Set your foreground color to a Foreground/Background Gradient, style Linear.
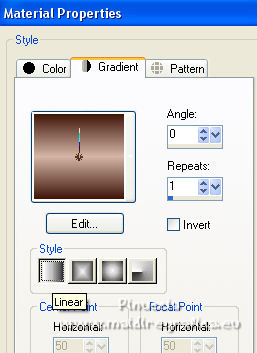
Open a new transparent image 1000 x 700 pixels.
Flood Fill  the transparent image with your Gradient. the transparent image with your Gradient.
1. Open Alphachannel_Dafne
Window>Duplicate or, on the keyboard, shift+D to make a copy.

Close the original.
The copy, that will be the basis of your work, is not empty,
but contains the selections saved to alpha channel.
Flood Fill  the transparent image with your Gradient. the transparent image with your Gradient.
2. Effects>Plugins>RCS Filter Pak 1.0 - RCS Pencil Sketch Conversion.

Colorize according to your colors.
3. Adjust>Hue and Saturation>Hue/Saturation>Lightness.
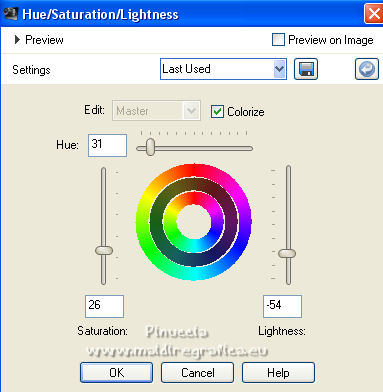
4. Activate your Magic Wand Tool  , tolerance and feather 0, , tolerance and feather 0,
and click on the dark borders to select them.

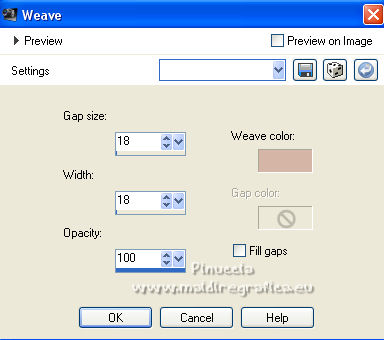
5. Effects>Texture Effects>Weave
weave color: background color

Selections>Select None.
6. Effects>Plugins>Graphics Plus - Vertical Mirror, default settings.

7. Selections>Load/Save Selection>Load Selection from Alpha Channel.
Open the selections menu and load the selection #5.
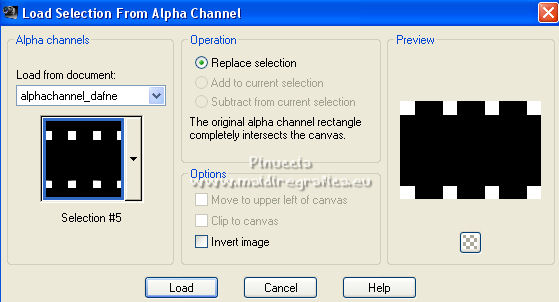
8. Effects>Texture Effects>Weave
weave color: background color
Selections>Invert.
9. Effects>Plugins>L&K's - L&K's Katharina, default settings.

Selections>Select None.
10. Selections>Load/Save Selection>Load Selection from Alpha Channel.
The selection #1 is immediately available. You just have to click Load.
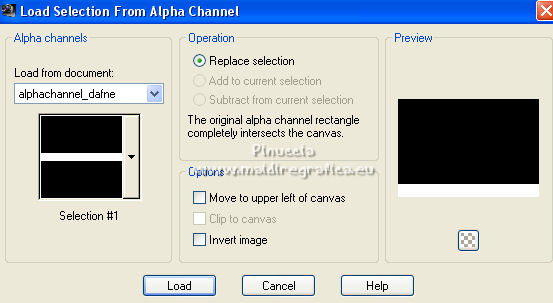
Selections>Promote Selection to Layer.
11. Effects>Plugins>Mura's Meister - Perspective Tiling.

Selections>Select None.
12. Activate the layer Raster 1.
Selections>Load/Save Selection>Load Selection from Alpha Channel.
Open the selections menu and load the selection #2.
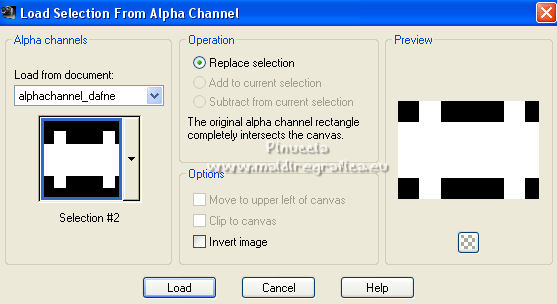
13. Effects>Plugins>AP [Lines] - Lines SilverLining.

Selections>Select None.
14. Selections>Load/Save Selection>Load Selection from Alpha Channel.
Open the selections menu and load the selection #3.
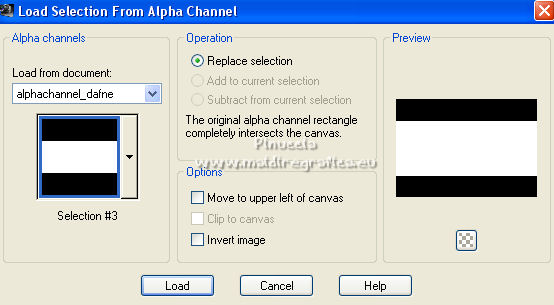
Selections>Promote Selection to Layer.
15. Effects>Plugins>RCS Filter Pak 1.0 - RCS Noisemaker-Rotary RGB

16. Effects>Plugins>AAA Frames - Foto Frame.

17. Selections>Modify>Contract - 40 pxiels.
Press CANC on the keyboard 
Selections>Select None.
Image>Resize, to 70%, resize all layers not checked.
18. Activate the layer Raster 1.
Selections>Load/Save Selection>Load Selection from Alpha Channel.
Open the selections menu and load the selection #4.
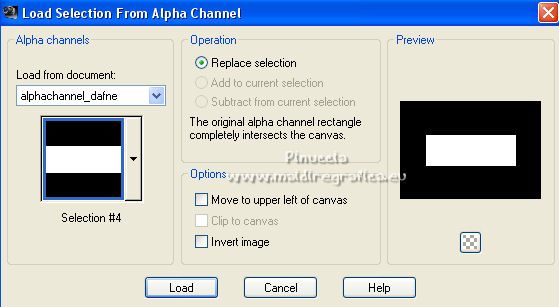
Selections>Promote Selection to Layer.
19. Adjust>Blur>Gaussian Blur - radius 20.

20. Effects>Plugins>RCS FIlter Pak 1.0 - Digi-Lens-Window ShadesII
this effet works without window;
if you import it in Unlimited, you can see the result

21. Layers>New Raster Layer.
Open the misted and go to Edit>Copy.
Go back to your work and go to Edit>Paste into Selection.
Layers>Merge>Merge Down.
Effects>3D Effects>Drop Shadow, color black.

Selections>Invert.
Repeat Effects>3D Effects>Drop Shadow, same settings.
Selections>Select None.
22. Activate the layer Promoted Selection 1.
Effects>3D Effects>Drop Shadow, same settings.

Layers>Merge>Merge Down.
23. Effects>Geometric Effects>Skew.
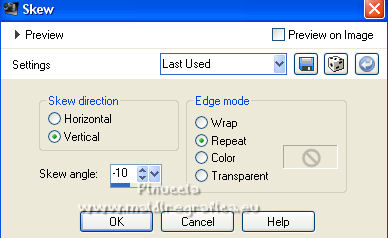
24. Effects>Image Effects>Seamless Tiling.

Layers>Arrange>Bring to top.
25. Activate the layer Raster 2.
Effetcs>Image Effects>Seamless Tiling, same settings.

26. Layers>New Raster Layer.
Reduce the opacity of your Flood Fill Tool to 70,
Flood Fill  the layer with your light background color. the layer with your light background color.
don't forget to set again the opacity of your Flood Fill Tool to 100
27. Layers>New Mask layer>From image
Open the menu under the source window and you'll see all the files open.
Select the mask 99_mask_MJ.
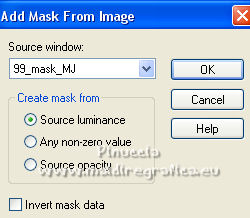
Layers>Merge>Merge Group
28. Effects>Plugins>Mura's Seamless - Emboss at Alpha, default settings.
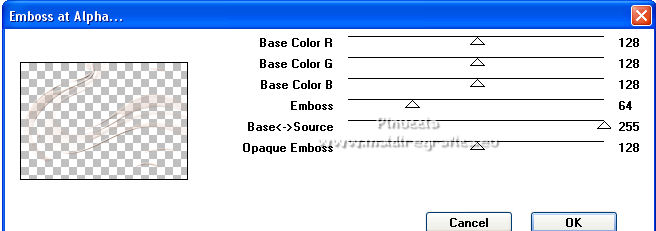
Change the Blend Mode of this layer to Screen.
Layers>Arrange>Move up
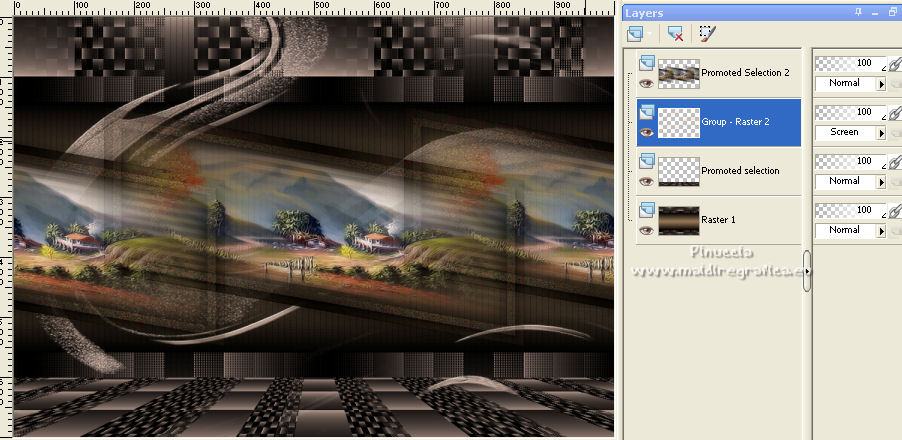
Your tag and the layers - adapt Blend Mode and opacity according to your colors
29. Image>Add borders, 1 pixel, symmetric, light color #b49a7e.
Image>Add borders, 1 pixel, symmetric, dark color #28221c.
Image>Add borders, 1 pixel, symmetric light color #b49a7e.
30. Selections>Select All.
Edit>Copy.
Image>Add borders, 40 pixels, symmetric, dark color #28221c,
31. Selections>Invert.
Edit>Paste into Selection (the image of step 30).
32. Adjust>Blur>Gaussian Blur - radius 20.

33. Open the tube frametag.
Colorize as at step 3.
Edit>Copy.
Go back to your work and go to Edit>Paste into Selection.
Selections>Select None.
34. Open the tube of the woman and go to Edit>Copy.
Go back to your work and go to Edit>Paste as new layer.
Image>Resize, to 80%, resize all layers not checked.
Image>Mirror.
Move  the tube to the right side. the tube to the right side.
Effects>3D Effects>Drop Shadow, at your choice.
35. Open the tube déco and go to Edit>Copy.
Go back to your work and go to Edit>Paste as new layer.
Image>Resize, to 50%, resize all layers not checked.
Image>Mirror.
Move  the tube to the left side. the tube to the left side.
Effects>3D Effects>Drop Shadow, at your choice.
36. Sign your work on a new layer.
Image>Add borders, 1 pixel, symmetric, dark color.
37. Image>Resize, 1000 pixels width, resize all layers checked.
Save as jpg.
For the tubes of this version thanks Luz Cristina, Jewel and Nena Silva

 Your versions here Your versions here

If you have problems or doubts, or you find a not worked link,
or only for tell me that you enjoyed this tutorial, write to me.
22 January 2022

|

