|
AKANNI

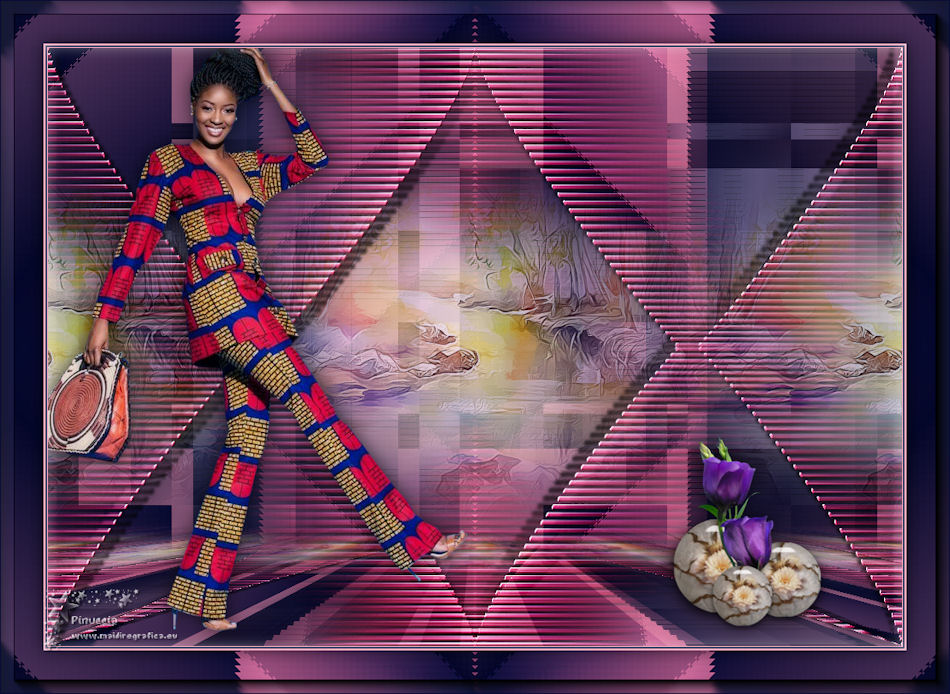
Thanks Maria José for your invitation to translate your tutorial

This tutorial has been translated with PSPX2 and PSPX3, but it can also be made using other versions of PSP.
Since version PSP X4, Image>Mirror was replaced with Image>Flip Horizontal,
and Image>Flip with Image>Flip Vertical, there are some variables.
In versions X5 and X6, the functions have been improved by making available the Objects menu.
In the latest version X7 command Image>Mirror and Image>Flip returned, but with new differences.
See my schedule here
 French translation here French translation here
 your versions ici your versions ici
For this tutorial, you will need:
Material here
Thanks for the landscape Jewel and for one mask Ket.
The rest of the material is by Maria José
(you find here the links to the material authors' sites)
Plugins
consult, if necessary, my filter section here
Filters Unlimited 2.0 here
Kiwi - Zig-zack here
Mehdi - Sorting Tiles here
Mura's Meister - Perspective Tiling here
L&K's - L&k's - Mayra here
Simple - Top Left Mirror here
Mura's Seamless - Emboss at Alpha here
VM Natural - Weave Distortion here
Toadies - Bitches Crystal here
AAA Filters - Foto Frame (old version of this effect; you find it in the material).
Filters Simple, Kiwi, Toadies, VM Natural and Mura's Seamless can be used alone or imported into Filters Unlimited.
(How do, you see here)
If a plugin supplied appears with this icon  it must necessarily be imported into Unlimited it must necessarily be imported into Unlimited

You can change Blend Modes according to your colors.
In the newest versions of PSP, you don't find the foreground/background gradient (Corel_06_029).
You can use the gradients of the older versions.
The Gradient of CorelX here
Copy the mask !!!!mask.ket-fadesuave in the Masks Folder.
Open the second mask in PSP and minimize it with the rest of the material.
Set your foreground color to #060c38,
and your background color to #f696b1.
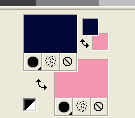
Set your foreground color to a Foreground/Background Gradient, style Rectangular.

1. Open a new transparent image 1000 x 700 pixels.
Flood Fill  the transparent image with your Gradient. the transparent image with your Gradient.
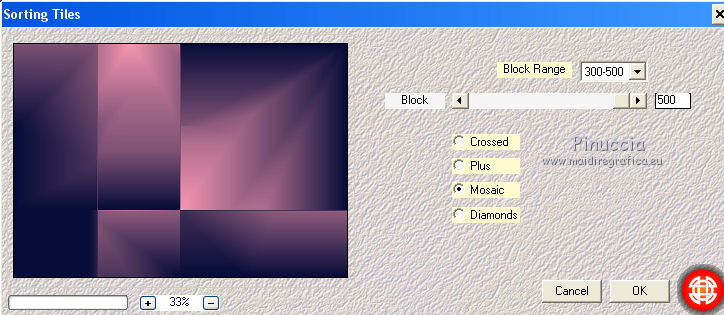
2. Effects>Plugins>Mehdi - Sorting Tiles.

3. Layers>Duplicate.
Repeat Effects>Plugins>Mehdi - Sorting Tiles, same settings, but Mosaic checked.
Change the Blend Mode of this layer to Overlay and reduce the opacity to 50%.
Image>Flip.

Layers>Merge>Merge Down.
4. Effects>Image Effects>Skew.

5. Effects>Plugins>Kiwi - Zig-Zack, default settings.

6. Effects>Plugins>Simple - Top Left Mirror.

Adjust>Sharpness>Sharpen.
7. Layers>Duplicate.
Effects>Plugins>L&K's - L&K's Mayra.

Reduce the opacity of this layer to 50%.

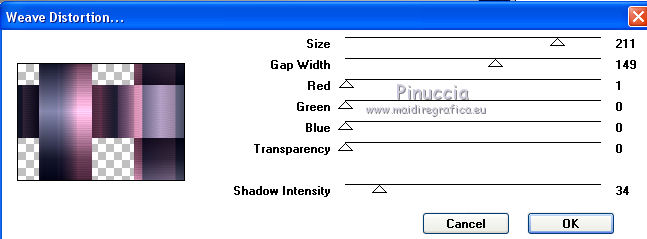
8. Effects>Plugins>VM Natural - Weave Distortion.
9. Effects>Plugins>Toadies - Bitches Crystal, default settings.

10. Layers>New Raster Layer.
Flood Fill  the layer with your light background color. the layer with your light background color.
Layers>New Mask layer>From image
Open the menu under the source window and you'll see all the files open.
Select the mask 41-mask_MJ.

Layers>Merge>Merge Group.
11. Effects>Plugins>Mura's Meister - Emboss at Alpha, default settings.

Change the Blend Mode to Hard Light.

12. Effects>3D Effects>Drop Shadow, default settings.
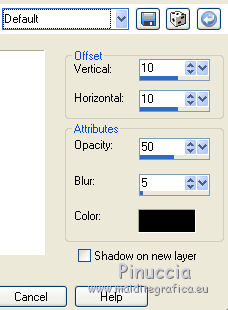
Repeat Drop Shadow, vertical and horizontal -10.
13. Open the misted and go to Edit>Copy.
Go back to your work and go to Edit>Paste as new layer.
Reduce the opacity of this layer to 73%.
Layers>Arrange>Move Down.
14. Effects>Image Effects>Seamless Tiling.

15. Activate the top layer, Group-Raster 2.
Edit>Copy Special>Copy Merged.
16. Edit>Paste as new layer.
17. Effects>Plugins>Mura's Meister - Perspective Tiling.

18. Layers>Load/Save Mask>Load Mask from Disk.
Look for and load the mask !!!!mask.ket-fadesuave 1.

Layers>Merge>Merge Group.
Layers>Arrange>Move Down.
The tag and the layers - adapt Blend Modes and opacities according to your colors.

19. Activate the top layer.
Open the woman tube and go to Edit>Copy.
Go back to your work and go to Edit>Paste as new layer.
Move  the tube to the left side. the tube to the left side.
Effects>3D Effects>Drop Shadow, at your choice.
20. Open the deco tube and go to Edit>Copy.
Go back to your work and go to Edit>Paste as new layer.
Move  this tube at the bottom right. this tube at the bottom right.
Effects>3D Effects>Drop Shadow, at your choice.
21. Activate the layer Raster 1.
Edit>Copy.
For caution Edit>Paste as new image and minimize this image.
22. Go back to your work.
Image>Add borders, 1 pixel, symmetric, light color.
Image>Add borders, 2 pixels, symmetric, dark color.
Image>Add borders, 1 pixel, symmetric, light color.
23. Selections>Select All.
Image>Add borders, 50 pixels, symmetric, color white.
24. Selections>Invert.
Edit>Paste into Selection.
25. Effects>3D Effects>Drop Shadow, color white.

26. Selections>Invert.
Repeat Effects>3D Effects>Drop Shadow, color black.

Selections>Select None.
27. Effects>Plugins>AAA Filters - Foto Frame.
To have the same effect, you must use the old version of this filter,
where the Foto Frame Effect was in the AAA Filters list
I added the effect in the material
When you add the filter in your File Locations,
don't forget to remove the previous version of the filter

28. Sign your work on a new layer.
Layers>Merge>Merge All.
29. Image>Resize, 1000 pixels width, resize all layers checked.
Save as jpg.
Version with tubes by Beatriz, Jewel and Maryse
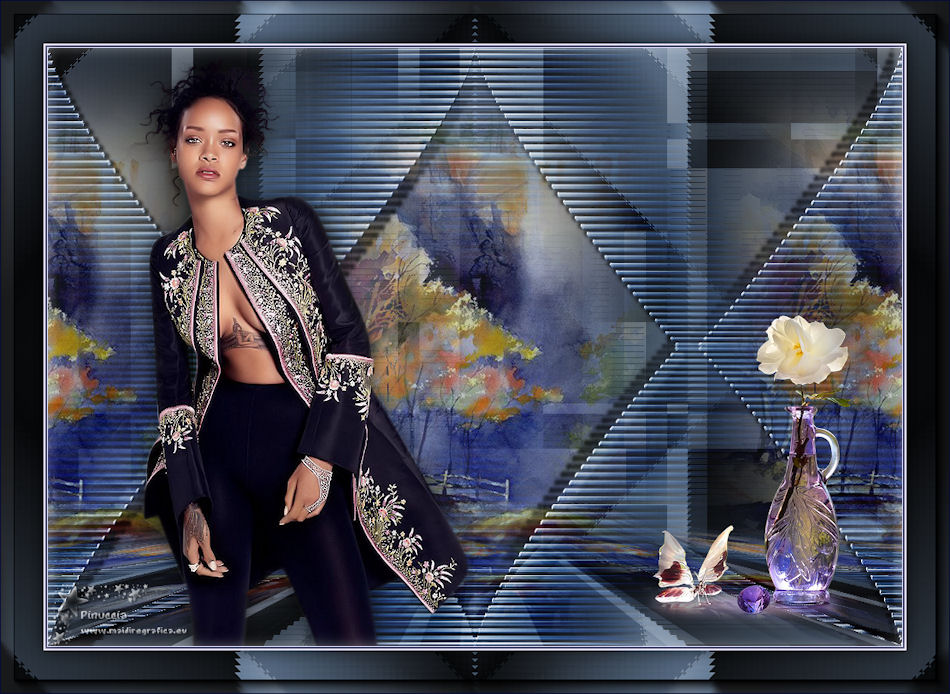
 Your versions here Your versions here

If you have problems or doubts, or you find a not worked link, or only for tell me that you enjoyed this tutorial, write to me.
18 May 2021
|

