|
THINK PINK


Thanks SIM PSP Group for your invitation to translate your tutorials into english

This tutorial was written with Psp2020 and translated with PspX9, but it can also be made using other versions of PSP.
Since version PSP X4, Image>Mirror was replaced with Image>Flip Horizontal,
and Image>Flip with Image>Flip Vertical, there are some variables.
In versions X5 and X6, the functions have been improved by making available the Objects menu.
In the latest version X7 command Image>Mirror and Image>Flip returned, but with new differences.
See my schedule here
For this tutorial, you will need:

For the tubes thanks Adrienne's Designs from the kit BCA 2023.
(The links of the tubemakers here).
Plugins
consult, if necessary, my filter section here
Filters Unlimited 2.0 here
Mura's Seamless - Emboss here
Mehdi - Sorting Tiles here
Alien Skin Eye Candy 5 Impact - Glass here
Mura's Meister - Perspective Tiling here
AAA Frames - Foto Frame here
Filters Mura's Seamless can be used alone or imported into Filters Unlimited.
(How do, you see here)
If a plugin supplied appears with this icon  it must necessarily be imported into Unlimited it must necessarily be imported into Unlimited

You can change Blend Modes according to your colors.
In the newest versions of PSP, you don't find the foreground/background gradient (Corel_06_029).
You can use the gradients of the older versions.
The Gradient of CorelX here

Copy the Selection in the Selections Folder.
1. Choose 2 colors from your material.
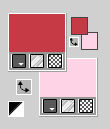
Set your foreground color to #c53a46,
and your background color to #fdd3e5.
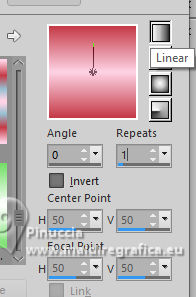
2. Set your foreground color to a Foreground/Background Gradient, style Linear.
3. Open a new transparent image 900 x 500 pixels.
Flood Fill  the transparent image with your Gradent. the transparent image with your Gradent.
Selections>Select All.
4. Open the tube BCA 2023 Tubes 1(1) 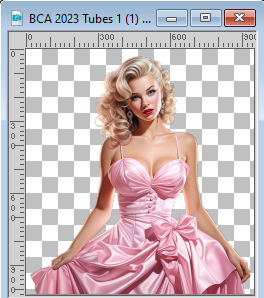
Edit>Copy.
Go back to your work and go to Edit>Paste into Selection.
Selections>Select None.
5. Effects>Image Effects>Seamless Tiling, default settings.

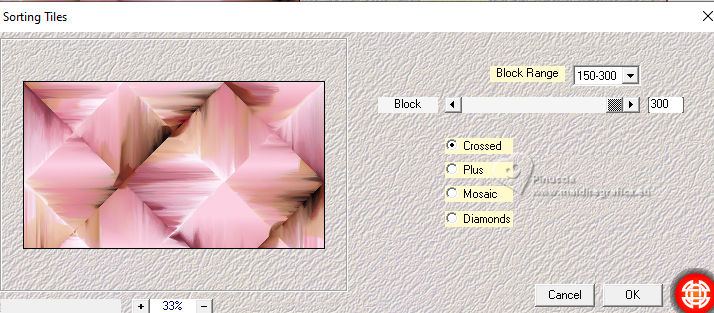
6. Effects>Plugins>Mehdi - Sorting Tiles.
7. Effects>Edge Effects>Enhance.
Layers>Duplicate.
8. Effects>Geometric Effects>Perspective Horizontal.
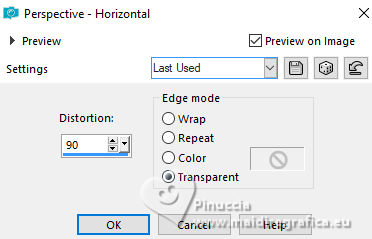
9. Image>Mirror>Mirror Horizontal.
Effects>Geometric Effects>Perspective Horizontal, same settings.

Result
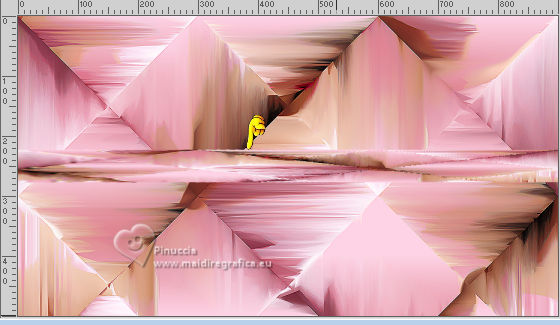
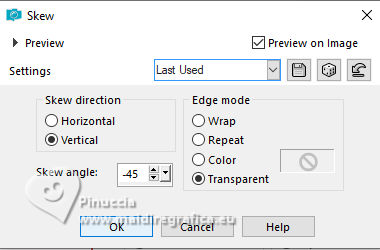
10. Effects>Geometric Effects>Skew.
11. Effects>Distortion Effects>Pinch

12. Layers>Duplicate.
Image>Mirror>Mirror Horizontal.
Layers>Merge>Merge Down.
13. Image>Free Rotate - 90 degrees to left.
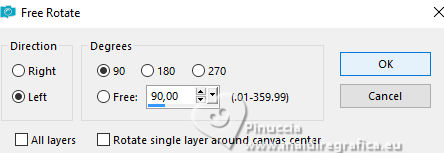
14. K key to activate your Pick Tool 
and set Position X: -50,00 and Position Y: 55,00.

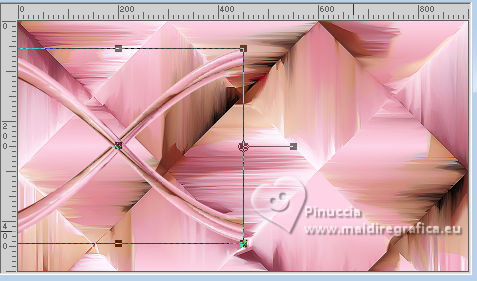
15. Layers>Duplicate.
Image>Mirror>Mirror Horizontal.
Layers>Merge>Merge Down.
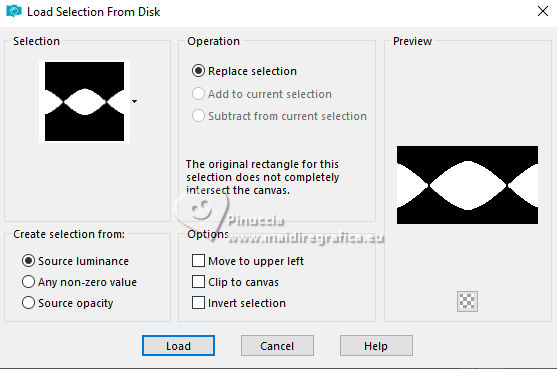
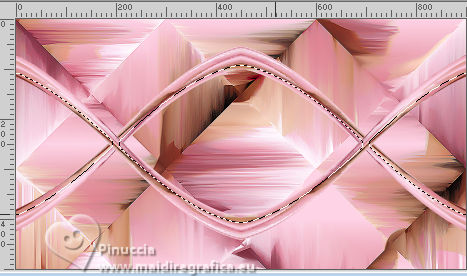
16. Selections>Load/Save Selection>Load Selection from Disk.
Look for and load the selection Selection_01_BCA
17. Open the image BCA 2023 Paper (8) 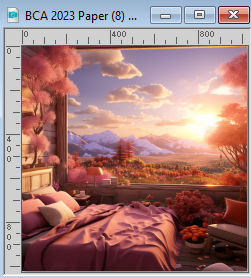
Edit>Copy.
Go back to your work and go to Edit>Paste as new layer.
18. Place  the image on the selection to your liking. the image on the selection to your liking.
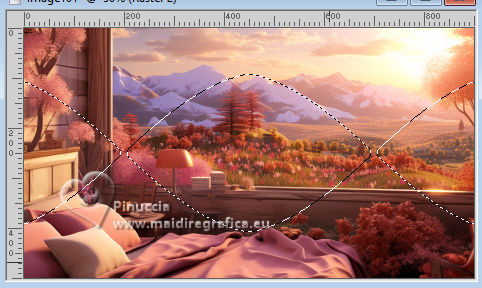
19. Selections>Invert.
Press CANC on the keyboard 
Selections>Invert.
20. Effects>Plugins>Mura's Seamless - Emboss, default settings
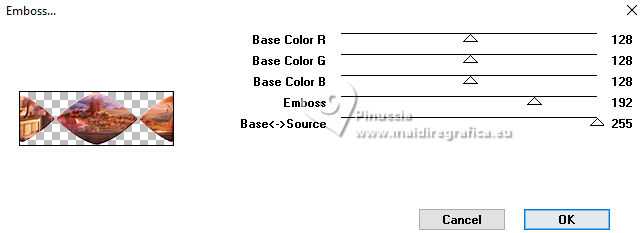
Repeat this Effect another time.
21. Layers>New Raster Layer.
Effects>Plugins>Alien Skin Eye Candy 5 Impact - Glass.
Glass Color: background color
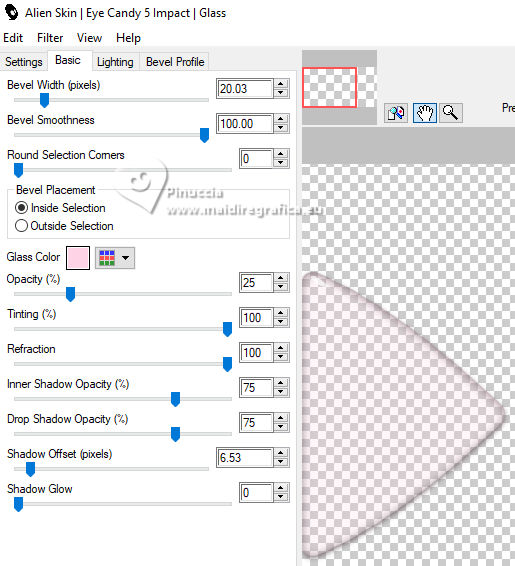
22. Layers>Merge>Merge Down.
Selections>Select None.
Layers>Arrange>Move Down.
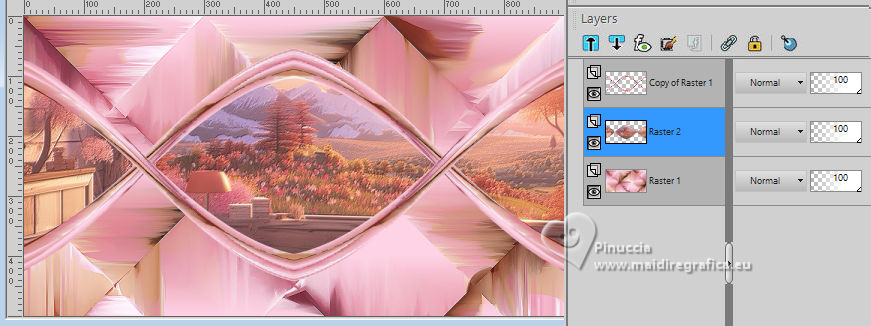
23. Activate your top layer, Copy of Raster 1.
Effects>3D Effects>Drop Shadow, color black #000000.
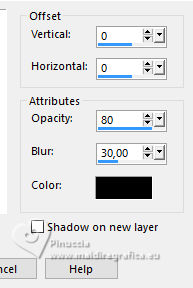
24. Activate the layer Raster 1.
Effects>Art Media Effects>Brush Strokes.
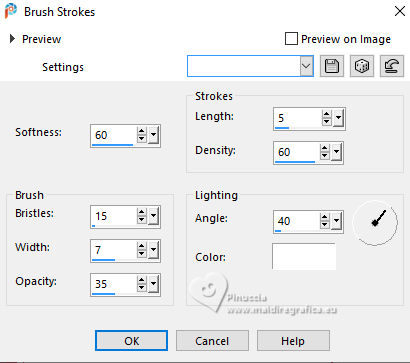
25. Activate again your top layer, Copy of Raster 1.
Edit>Copy Special>Copy Merged.
Edit>Paste as new layer.
26. Effects>Plugins>Mura's Meister - Perspective Tiling.
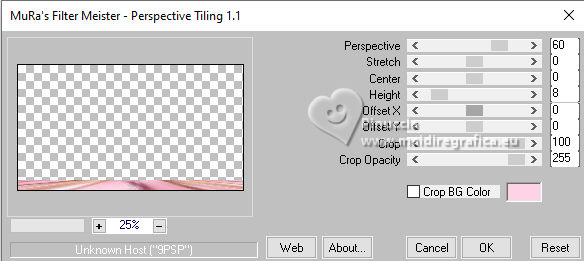
27. Effects>Reflection Effects>Rotating Mirror, default settings.

28. Effects>3D Effects>Drop shadow, color black #000000.
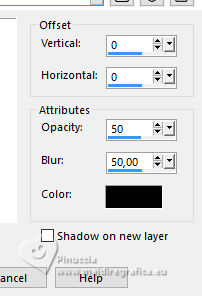
29. Image>Add borders, 1 pixel, symmetric, color black #000000.
Image>Add borders, 5 pixels, symmetric, color white #ffffff.
Image>Add borders, 1 pixel, symmetric, color black #000000.
Selections>Select All.
30. Image>Add borders, 35 pixels, symmetric, background color.
Selections>Invert.
31. Effects>Art Media Effects>Brush Strokes, same settings.

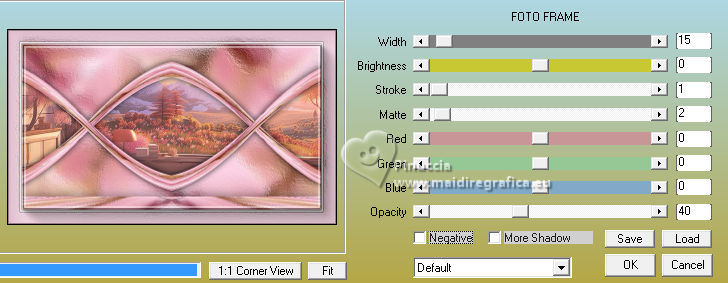
32. Effects>Plugins>AAA Frames - Foto Frame.
33. Selections>Select None.
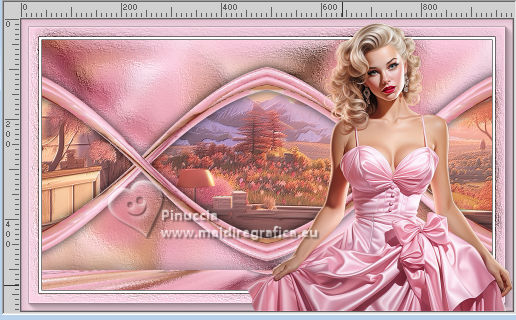
34. Activate again the tube BCA 2023 Tubes 1(1) and go to Edit>Copy.
Go back to your work and go to Edit>Paste as new layer.
Image>Resize, to 58%, resize all layers not checked.
Adjust>Sharpness>Sharpen.
Objects>Align>Bottom.
Objects>Align>Right.
Or move  the tube at the bottom right. the tube at the bottom right.
Layers>Duplicate.
Adjust>Blur>Gaussian Blur - radius 20

Change the Blend Mode of this layer to Multiply.
Layers>Arrange>Move Down.
35. Open BCA 2023 Word Art (2) 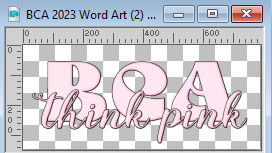
Edit>Copy.
Go back to your work and go to Edit>Paste as new layer.
Image>Resize, to 40%, resize all layers not checked.
Adjust>Sharpness>Sharpen.
K key to activate your Pick Tool 
and set Position X: 112,00 and Position Y: 423,00.

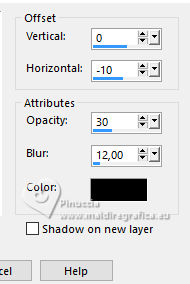
Effects>3D Effects>Drop Shadow, color black #000000.
36. Image>Add borders, 1 pixel, symmetric, color black #000000.
Image>Add borders, 2 pixels, symmetric, color white #ffffff.
Image>Add borders, 1 pixel, symmetric, color black #000000.
37. Signer votre travail et enregistrer en jpg.
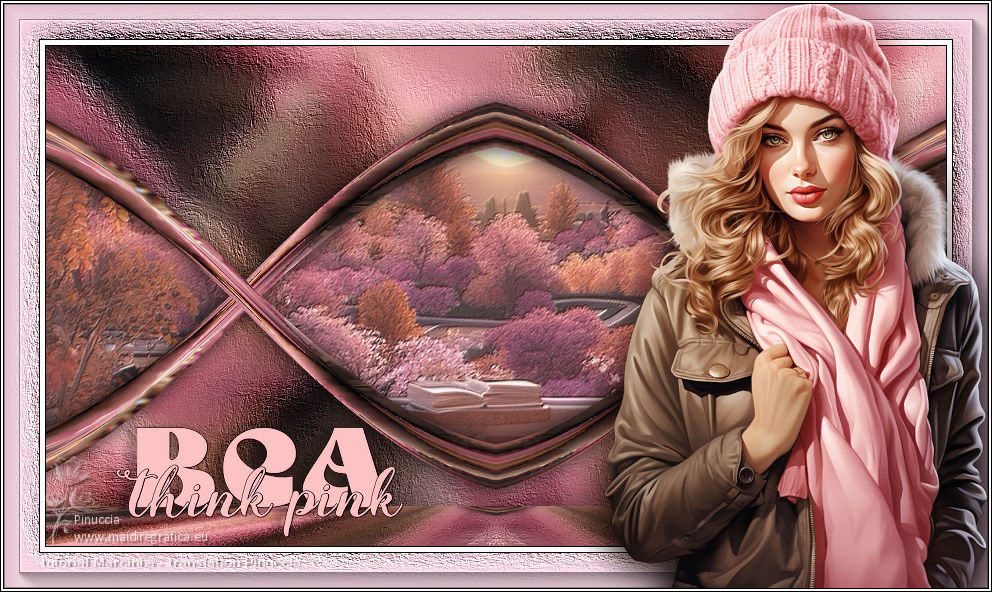

 Your versions. Thanks Your versions. Thanks
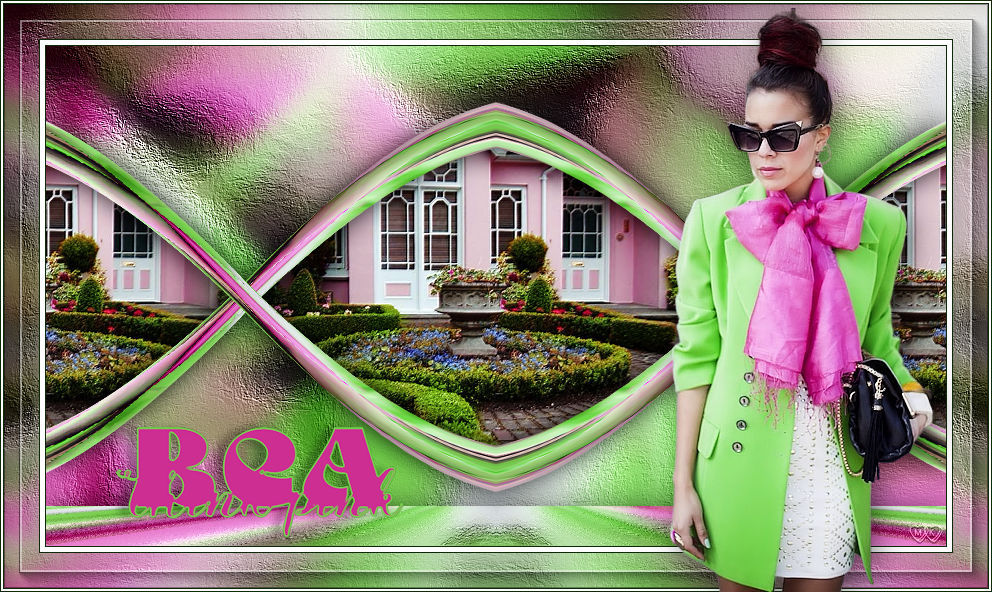
Kamelius
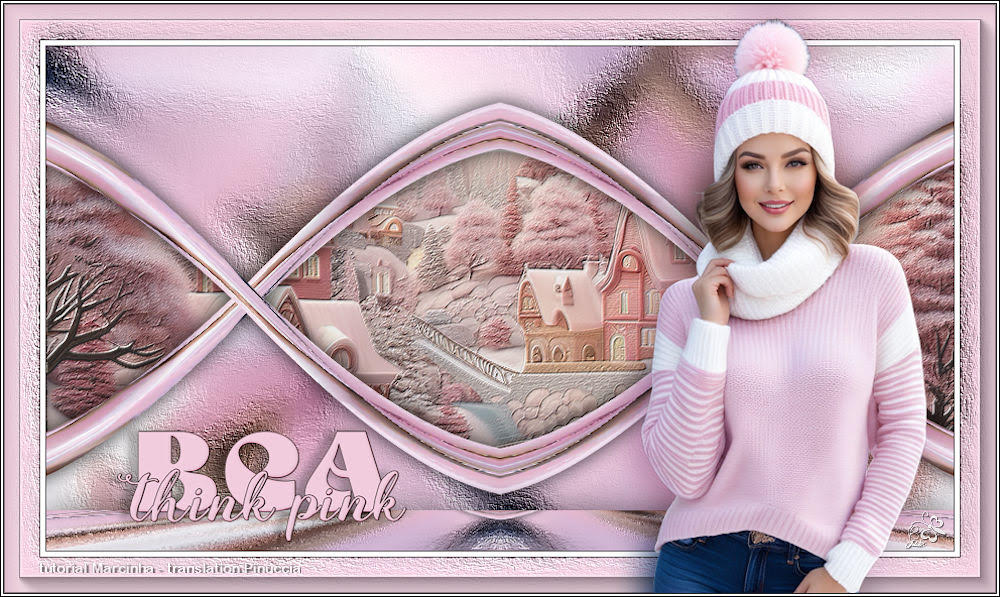
Jolcsi


If you have problems or doubts, or you find a not worked link, or only for tell me that you enjoyed this tutorial, write to me.
9 October 2023

|


