|
BEAUTY IN BLOOM


Thanks SIM PSP Group for your invitation to translate your tutorials into english

This tutorial was written by Marcinha with Psp2020 and translated with Psp2020, but it can also be made using other versions of PSP.
Since version PSP X4, Image>Mirror was replaced with Image>Flip Horizontal,
and Image>Flip with Image>Flip Vertical, there are some variables.
In versions X5 and X6, the functions have been improved by making available the Objects menu.
In the latest version X7 command Image>Mirror and Image>Flip returned, but with new differences.
See my schedule here

|
Special Note
PSP SIM and its Tutorial Authors ask the public:
- Please, we request that we maintain the originality of the tutorial,
refraining from adding or including unsolicited effects;
- The use of other images is permitted and encouraged,
but please don't modify the content of the original tutorial;
- Please acknowledge and attribute the valuable credits to those who write tutorials,
make translation and create materials.
Carefully,
SIM PSP and Marcinha
|
For this tutorial, you will need:

Thanks for the tube Adrienne and for the mask Narah.
(The links of the tubemakers here).
Plugins
consult, if necessary, my filter section here
FM Tile Tools - Blend Emboss here
Mura's Meister - Perspective Tiling here
Carolaine and Sensibility - CS-HLines here

You can change Blend Modes according to your colors.

Copy the selections in the Selections Folder.
Open the mask in PSP and minimize it with the rest of the material.
1. Choose 2 colors from your material.
Set your foreground color to #5d3871,
and your background color to #fddfbc.
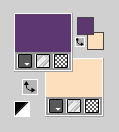
Extra color: 3 #ff8616 
color 4: #6b8a4e 
2. Open a new transparent image 900 x 550 pixels.
Flood Fill  the transparent image with your background color #fddfbc. the transparent image with your background color #fddfbc.
Selections>Select All.
Layers>New Raster Layer.
3. Open the misted Beauty in Bloom Element(4) 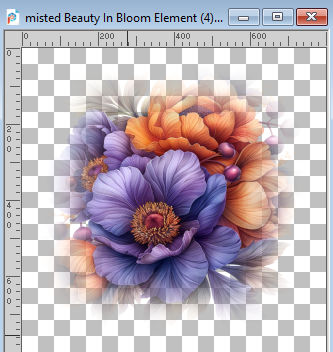
Edit>Copy.
Minimize the tube: you'll use it again.
Go back to your work and go to Edit>Paste into Selection.
Selections>Select None.
4. Effects>Image Effects>Seamless Tiling, default settings.

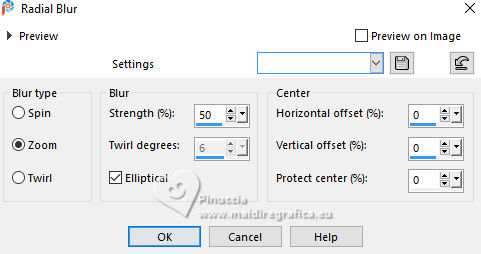
5. Adjust>Blur>Radial Blur.
6. Effects>Reflection Effects>Rotating Mirror, default settings.

7. Layers>Duplicate.
Image>Mirror>Mirror Vertical.
Reduce the opacity of this layer to 50%.
Layers>Merge>Merge Down.
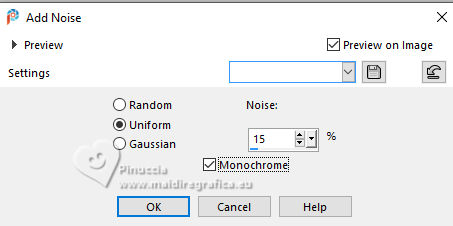
8. Adjust>Add/Remove Noise>Add Noise.
9. Effects>Plugins>FM Tile Tools - Blend Emboss, default settings.

10. Reduce the opacity of this layer to 75%.
Layers>Merge>Merge Down.
11. Layers>New Raster Layer.
Selections>Load/Save Selection>Load Selection from Disk.
Look for and load the selection Sel01_BeautyinBloom
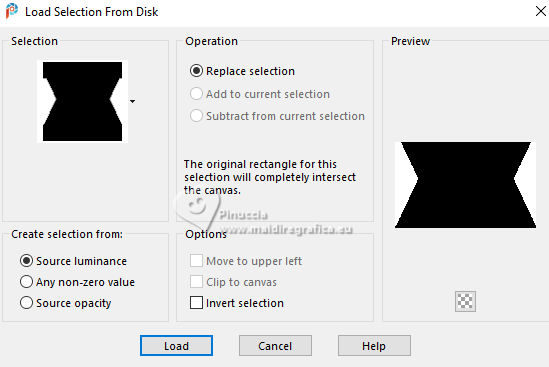
12. Open Beauty in Bloom Paper (14) 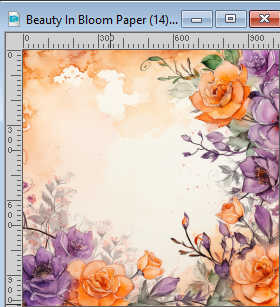
Edit>Copy.
Minimize the image: you'll use it again.
Go back to your work and go to Edit>Paste into Selection.
13. Effects>Reflection Effects>Rotating Mirror, default settings.

Note: Here you can choose the Rotation angle at 180,
depending on the image you want to appear within the selection.
14. Effects>Plugins>FM Tile Tools - Blend Emboss, default settings.

15. Selections>Select None.
Layers>New Raster Layer.
Selections>Load/Save Selection>Load Selection from Disk.
Look for and load the selection Sel02_BeautyinBloom
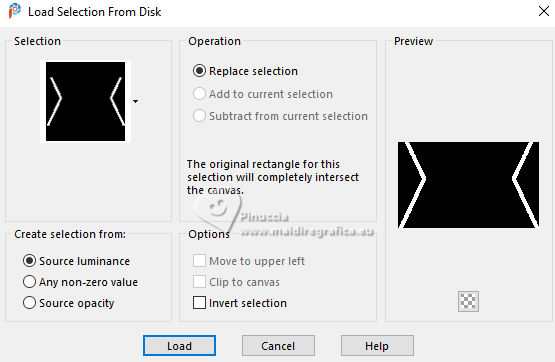
16. Flood fill  the selection with your foreground color #5d3871. the selection with your foreground color #5d3871.
Effects>Plugins>Carolaine and Sensibility - CS-HLines.
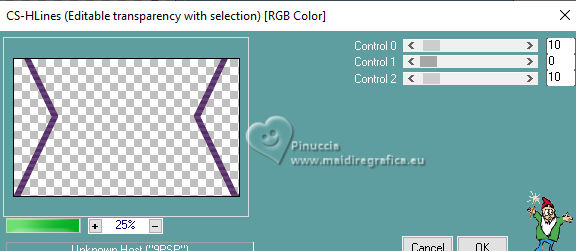
17. Effects>Plugins>FM Tile Tools - Blend Emboss, default settings.

18. Effects>Edge Effects>Enhance.
Selections>Select None.
19. Layers>New Raster Layer.
Selections>Load/Save Selection>Load Selection from Disk.
Look for and load the selection Sel03_BeautyinBloom

20. Set your foreground color to the extra color 3 #ff8616 
Flood fill  the selection with your foreground color #ff8616. the selection with your foreground color #ff8616.
Effects>Texture Effects>Weave - both color #000000.
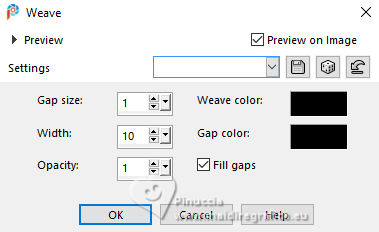
21. Effects>Plugins>FM Tile Tools - Blend Emboss, default settings.

22. Selections>Select None.
Layers>New Raster Layer.
Selections>Load/Save Selection>Load Selection from Disk.
Look for and load the selection Sel04_BeautyinBloom
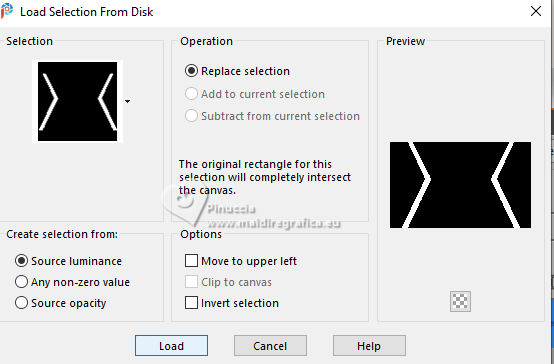
Set your foreground color to the extra color 4 #6b8a4e  . .
Flood fill  the selection with your foreground color #6b8a4e. the selection with your foreground color #6b8a4e.
Adjust>Add/Remove Noise>Add Noise, same settings.

23. Effects>Plugins>FM Tile Tools - Blend Emboss, default settings.

24. Selections>Select None.
Close the layer Raster 1.
Stay on the layer Raster 5.
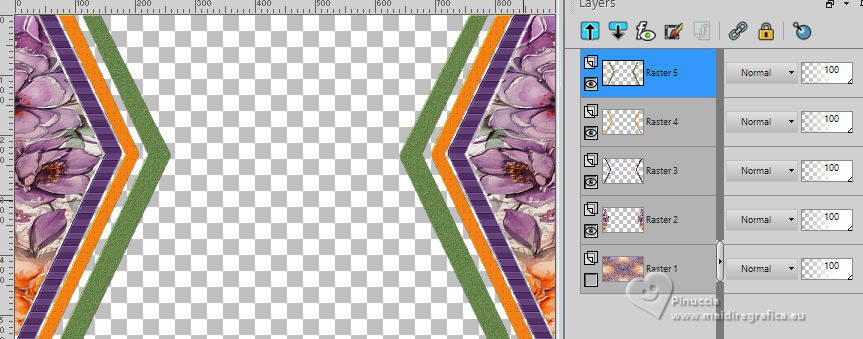
Layers>Merge>Merge visible.
Effects>3D Effects>Drop Shadow, color black #000000.

25. Open the layer Raster 1.
Stay on the Layer Merged.
Set your foreground color to black #000000.
Layers>New Raster Layer.
Flood Fill  the layer with color black. the layer with color black.
26. Layers>New Mask layer>From image
Open the menu under the source window and you'll see all the files open.
Select the mask NarahsMask_1822
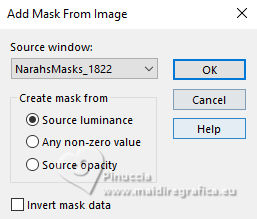
Effects>Edge Effects>Enhance.
Layers>Merge>Merge Group.
27. Edit>Copy Special>Copy Merged.
Edit>Paste as New Layer.
Effects>Plugins>Mura's Meister - Perspective Tiling.
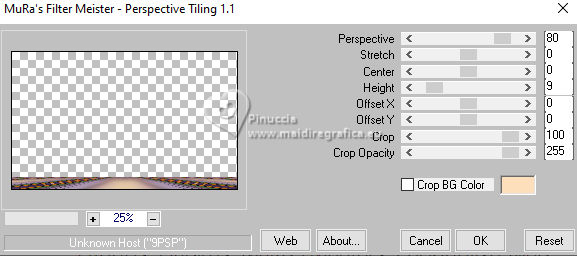
28. Selections>Load/Save Selection>Load Selection from Disk.
Look for and load the selection Sel05_BeautyinBloom
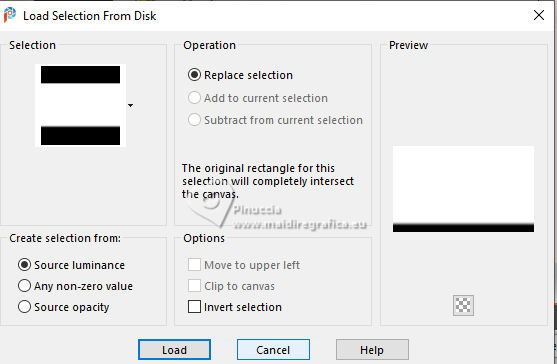
Press 4 times CANC on the keyboard 
Selections>Select None.
Effects>3D Effects>Drop Shadow, color black #000000

29. Activate the layer Raster 1.
Activate again the tube misted Beauty in Bloom Element (4)
Edit>Copy.
Go back to your work and go to Edit>Paste as new layer.
Image>Resize, 70%, resize all layers not checked.
Reduce the opacity of this layer to 60%.
Activate your Pick Tool 
Position X: 204,00 and Position Y: 5,00.

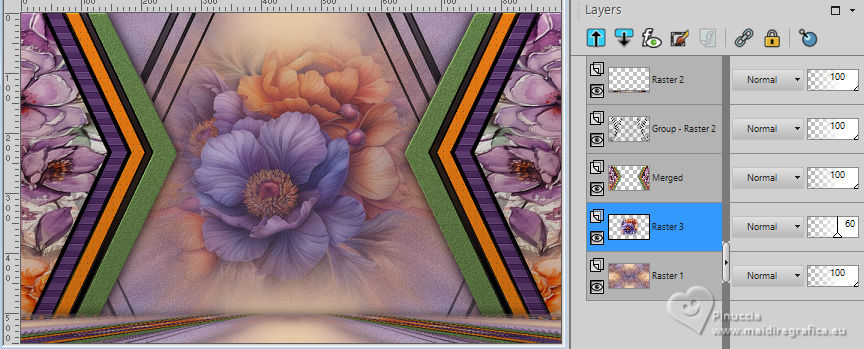
Effects>Plugins>FM Tile Tools - Blend Emboss, default settings.

Repeat FM Tile Tools>Blend Emboss another time.
30. Activate your top layer.
Layers>New Raster Layer.
Flood Fill  the layer with color black #000000. the layer with color black #000000.
Selections>Select All.
Selections>Modify>Contract - 1 pixel.
Press CANC on the keyboard.
Selections>Select None.
We have this.
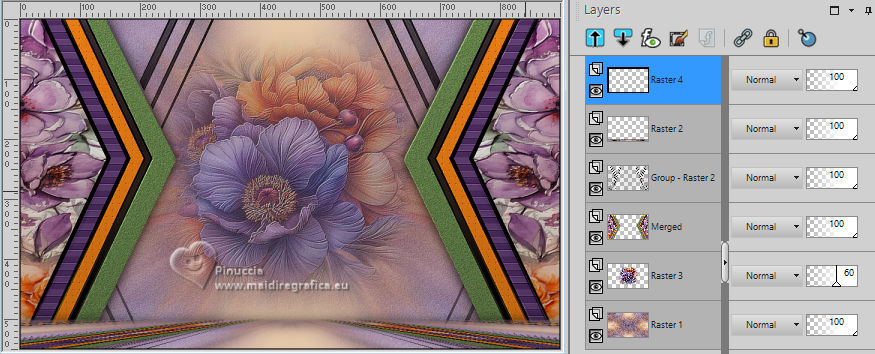
31. Selections>Select All.
Image>Add borders, 45 pixels, symmetric, background color #fddfbc.
Layers>New Raster Layer.
Selections>Invert.
32. Activate again Beauty in Bloom Paper (14)
Edit>Copy.
Go back to your work and go to Edit>Paste into Selection.
33. Effects>Reflection Effects>Rotating Mirror, default settings.

34. Effects>Plugins>FM Tile Tools - Blend Emboss, default settings.

Repeat FM Tile Tools>Blend Emboss another time.
Reduce the opacity of this layer to 30%.
Keep selected.
35. Layers>Merge>Merge Down.
Selections>Invert.
Effects>3D Effects>Drop Shadow, color black.

Selections>Select None.
36. Open Beauty in Bloom Element (17) 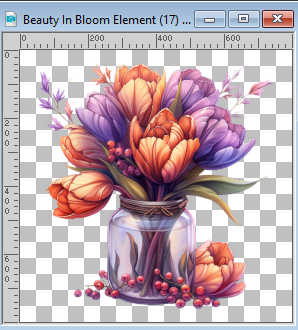
Edit>Copy.
Go back to your work and go to Edit>Paste as new layer.
Image>Resize, to 35%, resize all layers not checked.
Adjust>Sharpness>Sharpen.
Move  the tube at the bottom right. the tube at the bottom right.
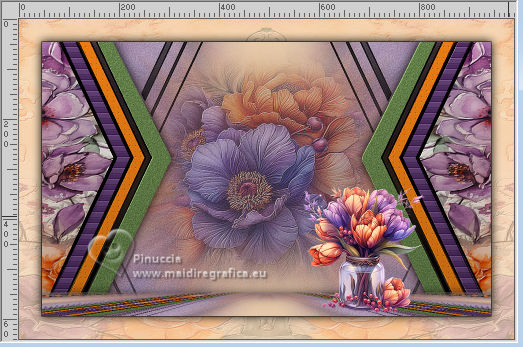
Effects>3D Effects>Drop Shadow, color black #000000.

37. Open Beauty in Bloom Tubes (2) 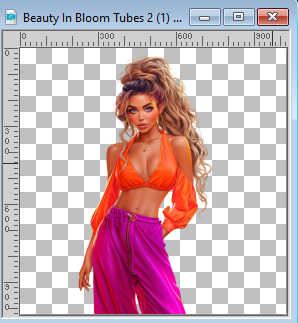
Edit>Copy.
Go back to your work and go to Edit>Paste as new layer.
Image>Mirror>Mirror Horizontal.
Image>Resize, to 60%, resize all layers not checked.
Adjust>Sharpness>Sharpen.
Move  the tube to the left. the tube to the left.
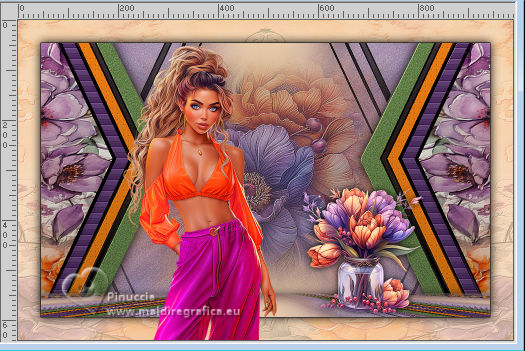
Effects>3D Effects>Drop Shadow, color black #000000.

38. Layers>New Raster Layer.
Selections>Load/Save Selection>Load Selection from Disk.
Look for and load the selection Sel06_BeautyinBloom

39. Set again your foreground color to the first color #5d3871.
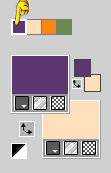
Flood Fill  the selection with your foreground color #5d3871. the selection with your foreground color #5d3871.
Layers>New Raster Layer.
Selections>Modify>Expand - 1 pixel.
Flood Fill  the selection with your background color #fddfbc. the selection with your background color #fddfbc.
Layers>Arrange>Move Down.
Selections>Select None.
Effects>3D Effects>Drop Shadow, color black #000000.
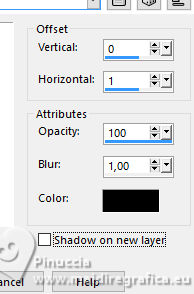
40. Image>Add borders, 1 pixel, symmetric, color black #000000.
41. Sign your work and save as jpg.
For the tube of this version thanks Adrienne.
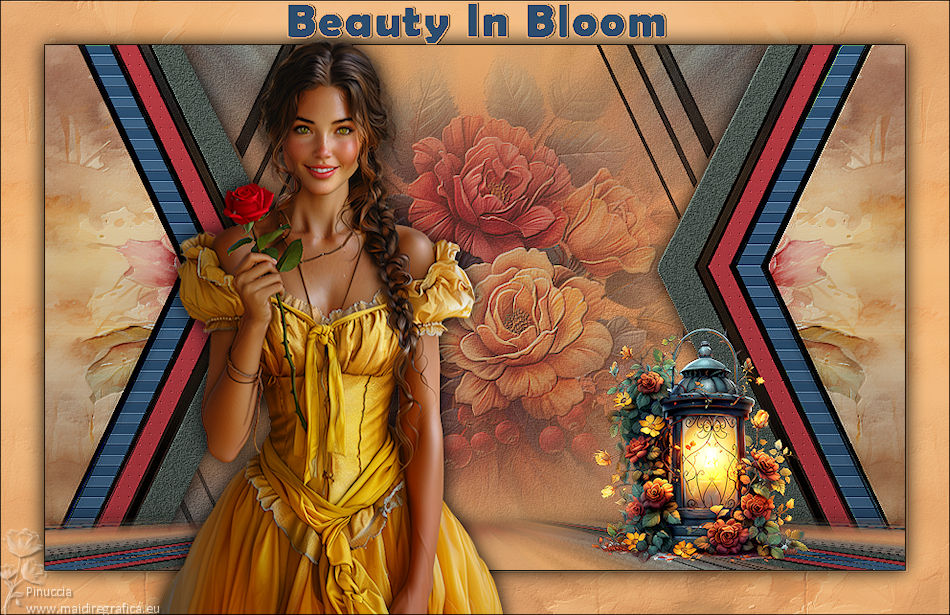

 Your versions. Thanks Your versions. Thanks

Marion
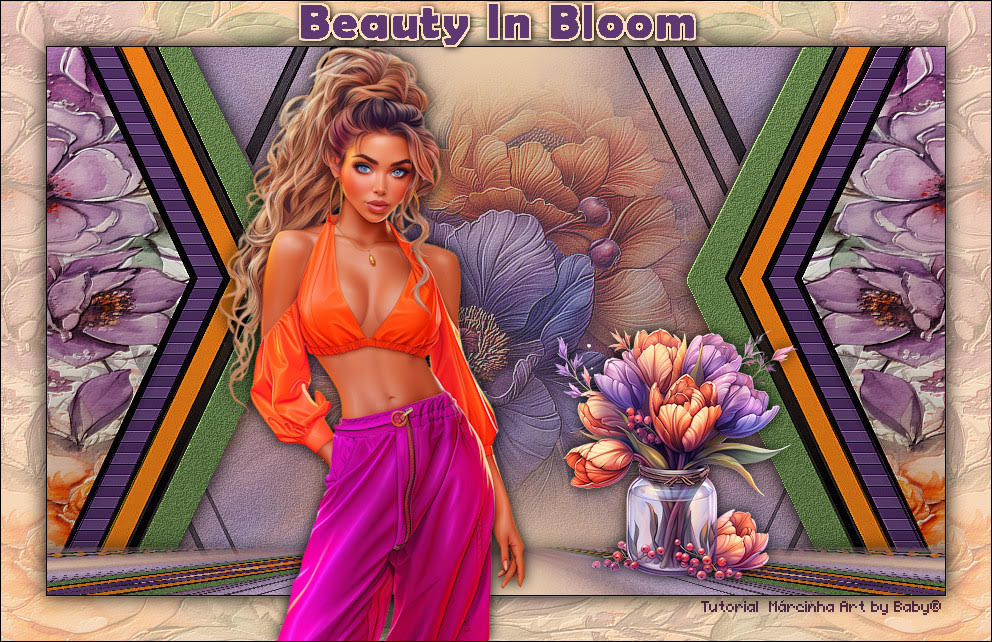
Baby
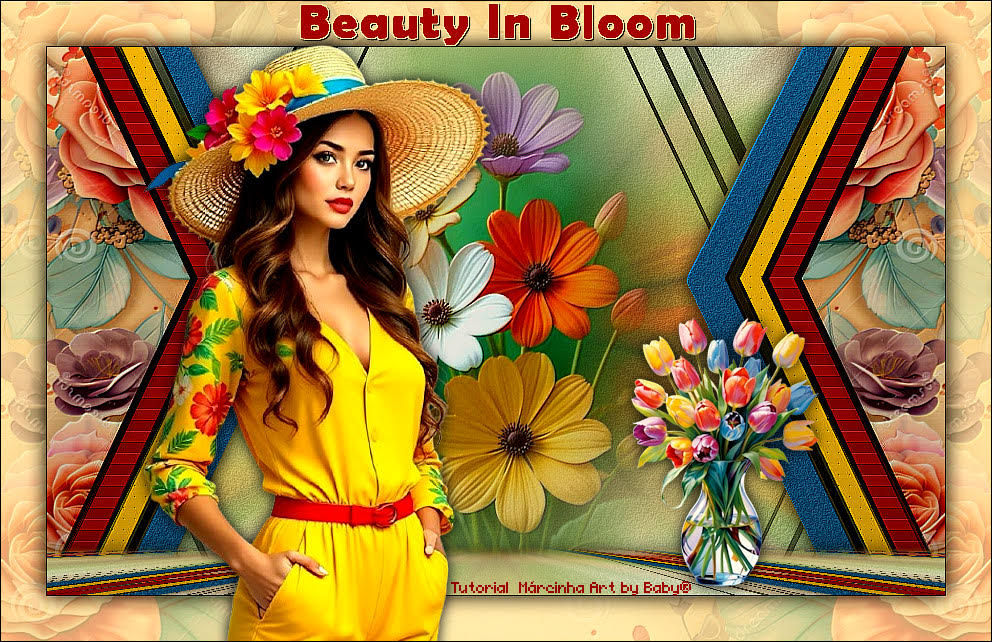
Baby

If you have problems or doubts, or you find a not worked link, or only for tell me that you enjoyed this tutorial, write to me.
23 June 2024

|


