|
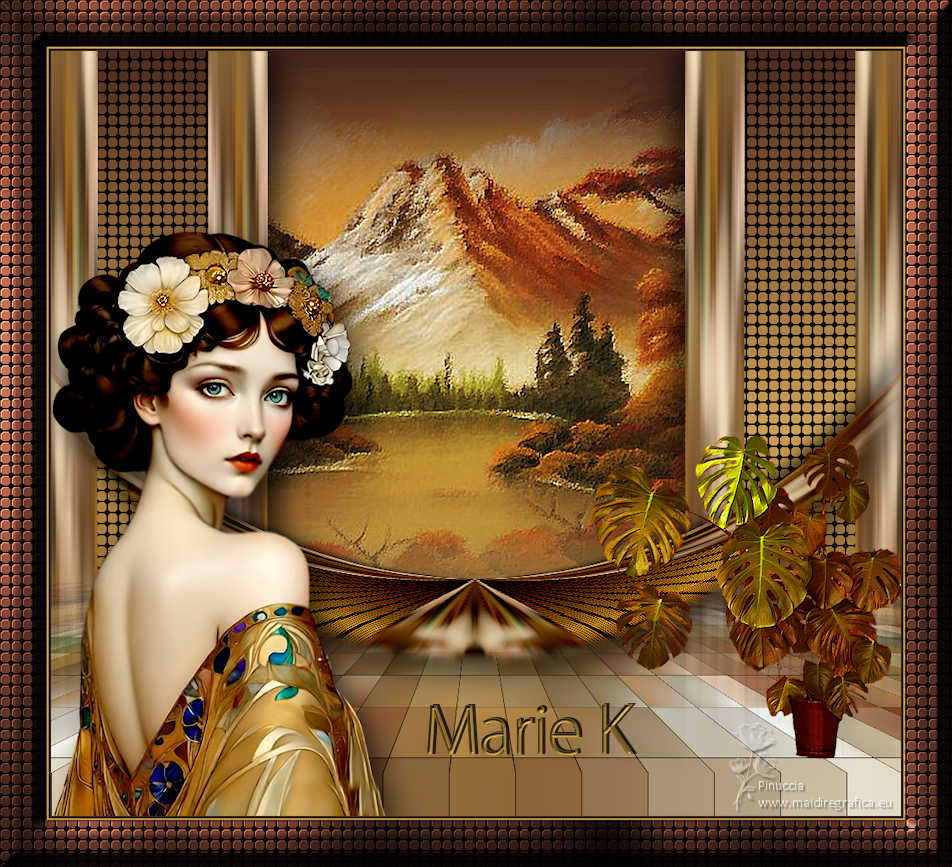
MARIE K


Thanks Luz Cristina for your invitation to translate your tutorials into english

This tutorial, created with PSP2022, was translated with PspX7, but it can also be made using other versions of PSP.
Since version PSP X4, Image>Mirror was replaced with Image>Flip Horizontal,
and Image>Flip with Image>Flip Vertical, there are some variables.
In versions X5 and X6, the functions have been improved by making available the Objects menu.
In the latest version X7 command Image>Mirror and Image>Flip returned, but with new differences.
See my schedule here
 French Translation here French Translation here
 Your versions here Your versions here

For this tutorial, you will need:

Thanks for the deco tube Suizabella.
The rest of the material is by Luz Cristina.
(The links of the tubemakers here).
*It is forbidden to remove the watermark from the supplied tubes, distribute or modify them,
in order to respect the work of the authors

consult, if necessary, my filter section here
Filters Unlimited 2.0 here
Mehdi 2 - Flat Median here
Mura's Meister - Perspective Tiling here
CPK Filters - CK Pegs here
Graphis Plus - Cross Shadow here
Toadies - Plain Mosaic Blur here
FM Tile Tools - Saturation Emboss, Blend Emboss here
Toadies, CPK and Graphics Plus can be used alone or imported into Filters Unlimited.
(How do, you see here)
If a plugin supplied appears with this icon  it must necessarily be imported into Unlimited it must necessarily be imported into Unlimited

You can change Blend Modes according to your colors.
In the newest versions of PSP, you don't find the foreground/background gradient (Corel_06_029).
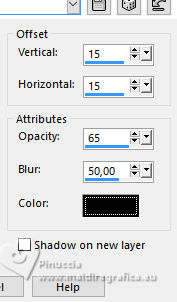
You can use the gradients of the older versions.
The Gradient of CorelX here

Open the mask in PSP and minimize it with the rest of the material.
1. Open a new transparent image 1000 x 900 pixels.
2. Set your foreground color to #cca152,
and your background color to #47261c.
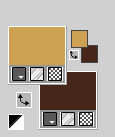
Set your foreground color to a Foreground/Background Gradient, style Linear.
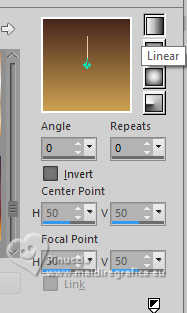
Flood Fill  the transparent image with your Gradient. the transparent image with your Gradient.
3. Layers>Duplicate.
Selections>Select All.
Open the woman's tube 8605-LuzCristina 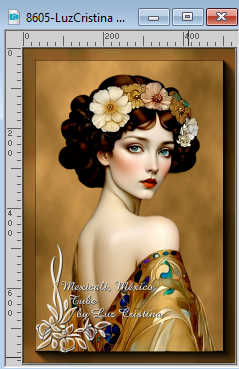
Edit>Copy.
Minimise the tube.
Go back to your work and go to Edit>Paste into Selection.
Selections>Select None.
Effects>Image Effects>Seamless Tiling, default settings.

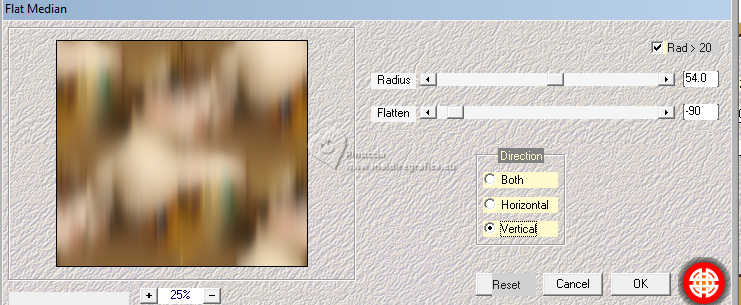
4. Effects>Plugins>Mehdi 2 - Flat Median
5. Effects>Geometric Effects>Perspective Vertical.
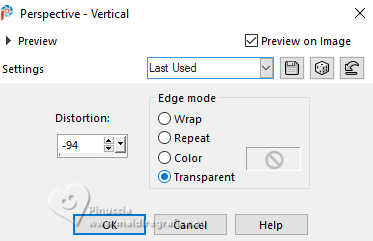
Image>Mirror>Mirror Vertical (Image>Flip).
Repeat Effects>Geometric Effects>Perspective Vertical, same settings.
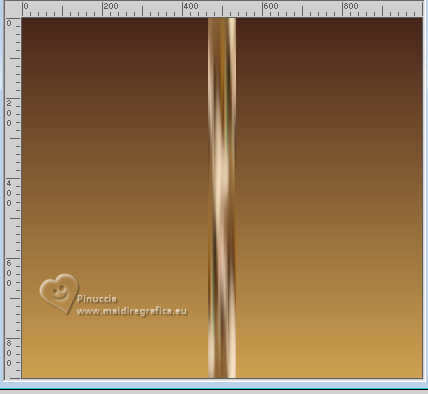
6. Layers>Duplicate.
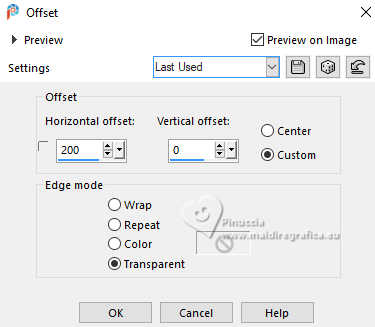
7. Effects>Image Effects>Offset.
8. Layers>Merge>Merge Down.
9. Close the layer Raster 1.
Activate your Magic Wand Tool  , ,
and click in the center to select it.
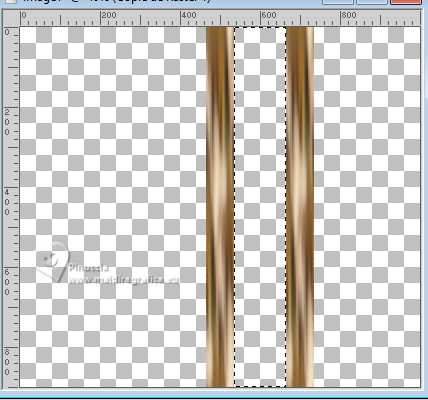
Selections>Modify>Expand - 6 pixels.
Layers>New Raster Layer.
Layers>Arrange>Move Down.
Change the settings of your Gradient.
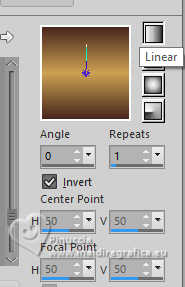
Flood Fill  the selection with your Gradient. the selection with your Gradient.
Selections>Select None.
Open the layer Raster 1 and stay on the layer Raster 2.
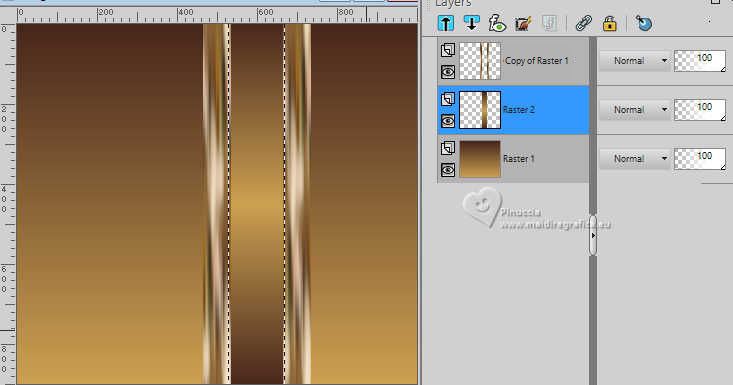
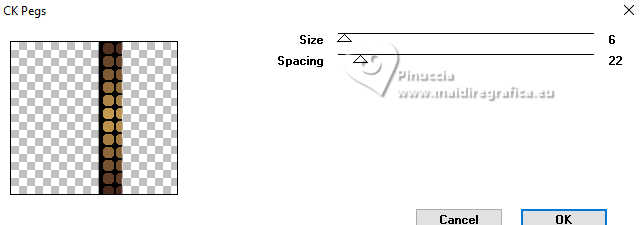
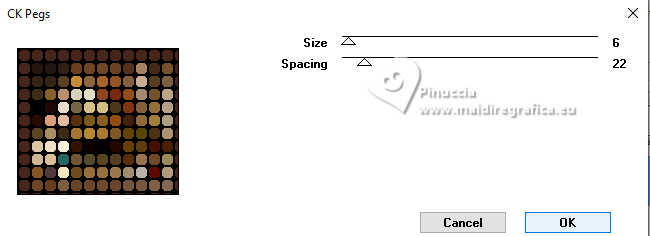
11. Effects>Plugins>CPK Designs - CK Pegs
12. Activate your top layer, Copy of Raster 1.
Layers>Merge>Merge Down.
13. Effects>Image Effects>Offset.
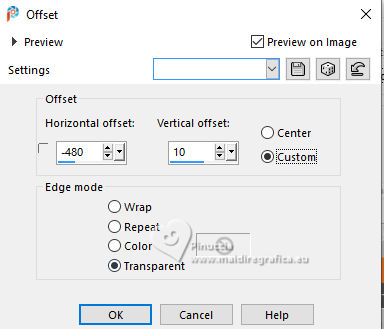
14. Effects>3D Effects>Drop Shadow, color black.
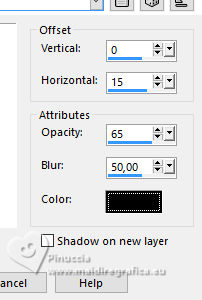
15. Effects>Reflection Effects>Rotating Mirror.

16. Layers>New Mask layer>From image
Open the menu under the source window and you'll see all the files open.
Select the mask !!Marge-TopFade.
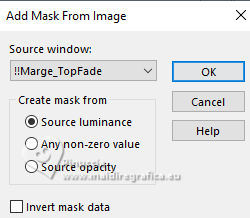
Layers>Duplicate to apply the mask 2 times.
Layers>Merge>Merge Group.
17. Activate the layer Raster 1.
Layers>Duplicate.
Selections>Select All.
Open the misted Misted-LuzCristina 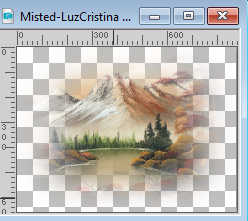
Edit>Copy.
Go back to your work and go to Edit>Paste into Selection.
Selections>Select None.
Effects>Image Effects>Seamless Tiling, default settings.

18. Effects>Plugins>Toadies - Plain Mosaic Blur.
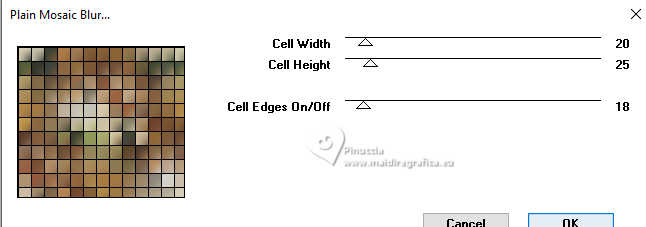
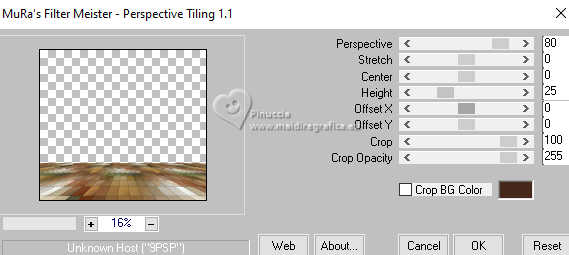
19. Effects>Plugins>Mura's Meister - Perspective Tiling.
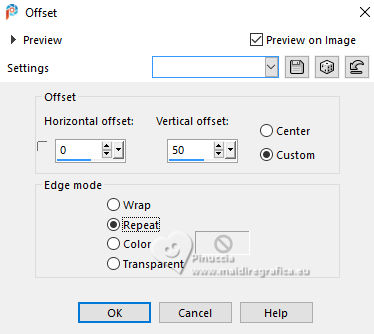
20. Effects>Image Effects>Offset.
Effects>Plugins>FM Tile Tools - Saturation Emboss, default settings

21. Edit>Paste as new layer - the misted Misted-LuzCristina is still in memory.
22. Effects>Image Effects>Offset.
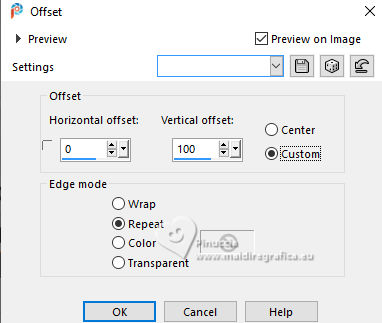
(optional, if you use another tube, according to the size of your tube).
Change the Blend Mode of this layer to Hard Light.
23. >ctivate the layers of the mask Group Raster 2.
Layers>Duplicate.
24. Effects>Distortion Effects>Polar Coordinates.
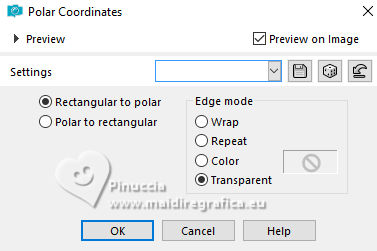
25. Image>Resize, to 85%, resize all layers not checked.
26. Image>Mirror>Mirror vertical (Image>Flip).
27. Effects>Distortion Effects>Warp.
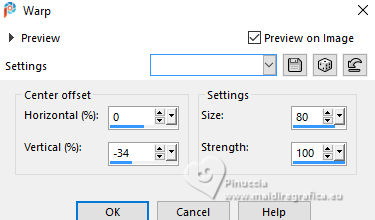
28. Adjust>Brightness and Contrast>Brightness and Contrast - 2 times.
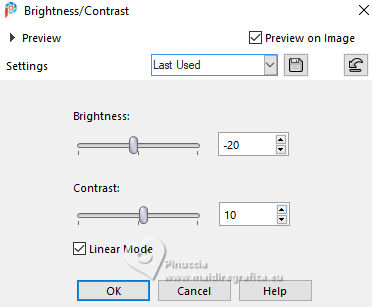
(optional, according to your work).
29. Effects>Image Effects>Offset.
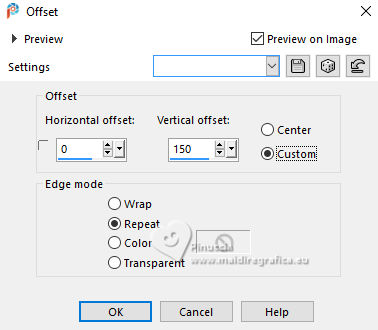
30. Effects>3D Effefts>Drop Shadow, color black.
31. Adjust>Sharpness>Sharpen.
32. Activate again your woman's tube 8605-LuzCristina.
Edit>Copy.
Go back to your work and go to Edit>Paste as new layer.
Move  the tube to the left. the tube to the left.
Effects>3D Effects>Drop shadow, same settings.
33. Open the tube SuizaBella Flores5 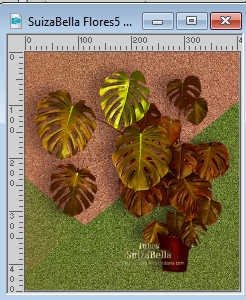
Edit>Copy.
Go back to your work and go to Edit>Paste as new layer.
Move  the tube to the right. the tube to the right.
Effects>3D Effects>Drop Shadow, same settings.
34. Image>Add borders, 3 pixels, symmetric, dark color.
Image>Add borders, 2 pixels, symmetric, light color.
Image>Add borders, 55 pixels, symmetric, dark color.
Activate your Magic Wand tool 
and click in the last border to select it.
35. Effects>Plugins>CPK Designs - CK Pegs, same settings.
36. Effects>Plugins>FM Tile Tools - Blend Emboss, default settings.

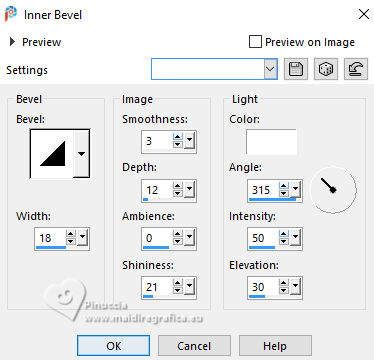
37. Effects>3D Effects>Inner Bevel.
38. Effects>Plugins>Graphics Plus - Cross Shadow.
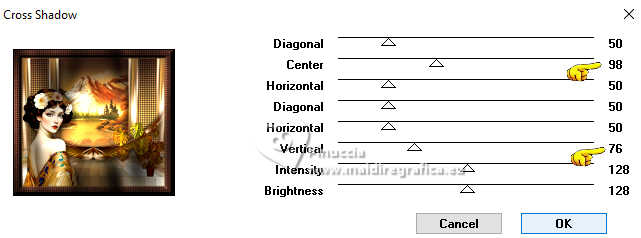
Selections>Select None.
39. Image>Resize, 85%, resize all layers checked.
40. Open the text Texto 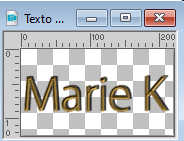
Edit>Copy.
Go back to your work and go to Edit>Paste as new layer.
Move  the text down. the text down.
41. Sign your work on a new layer.
Layers>Merge>Merge All and save as jpg.
Versions with tubes by Luz Cristina et
my misted and deco tube by Vera Mendes
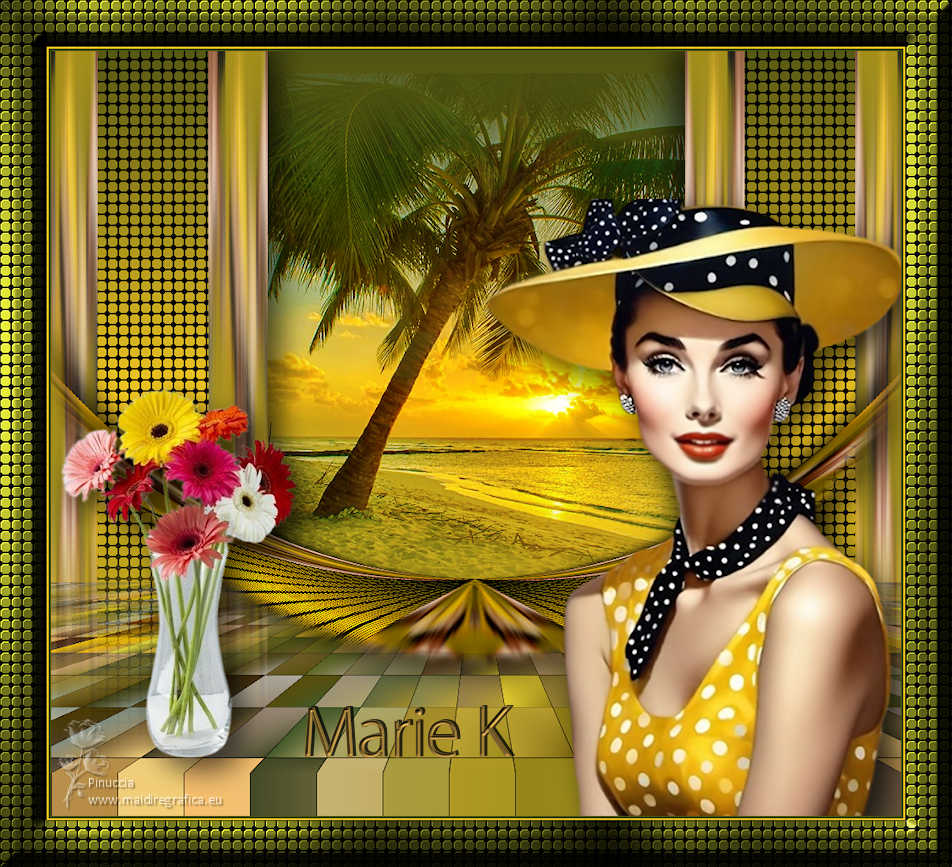
my misted and deco tube by Gabry
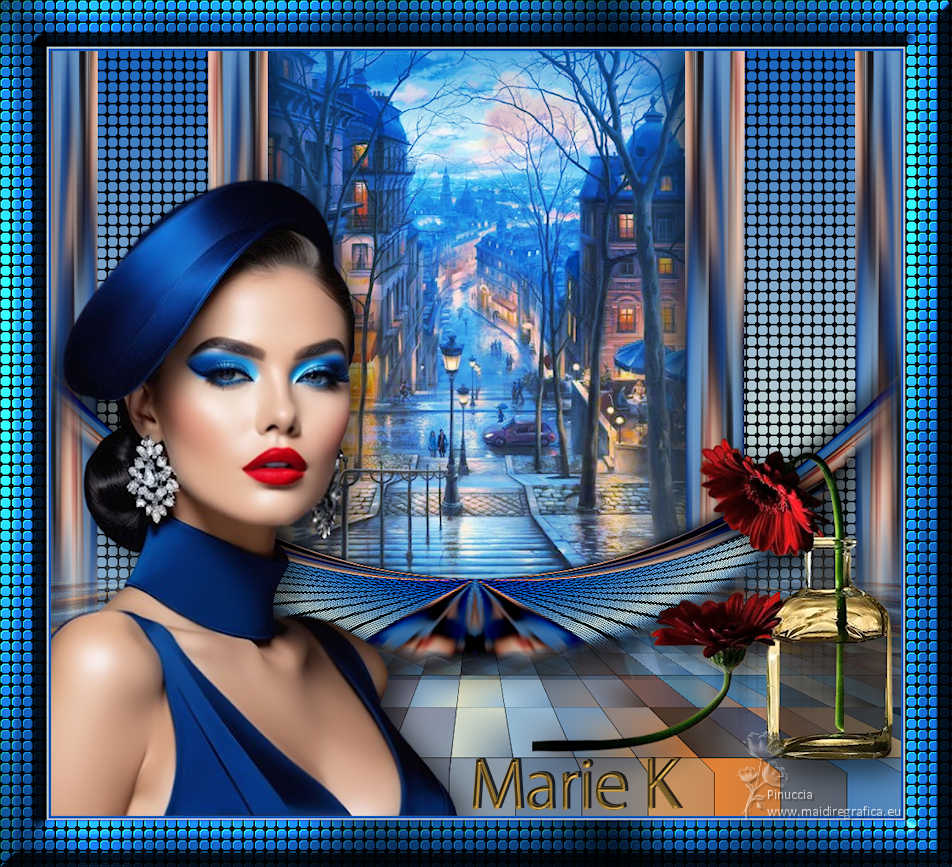


If you have problems or doubts, or you find a not worked link,
or only for tell me that you enjoyed this tutorial, write to me.
21 June 2024

|

