|
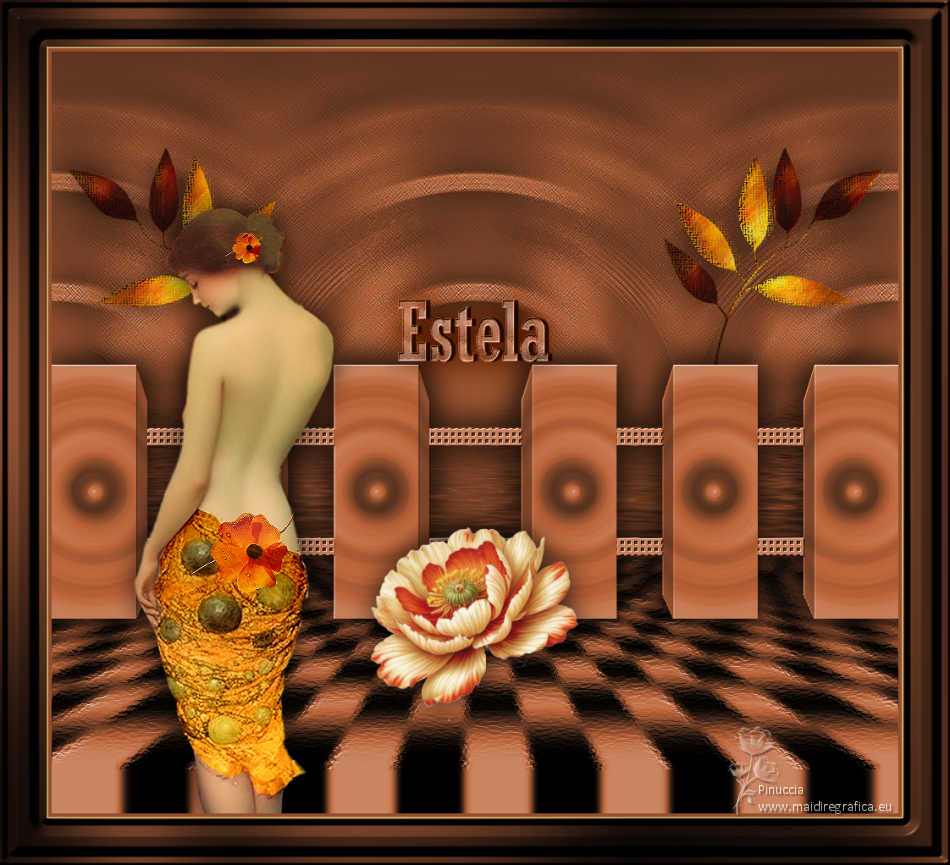
TUTORIAL ESTELA FONSECA


Thanks Luz Cristina for your invitation to translate your tutorials into english

This tutorial, created with PSP2022, was translated with PspX7, but it can also be made using other versions of PSP.
Since version PSP X4, Image>Mirror was replaced with Image>Flip Horizontal,
and Image>Flip with Image>Flip Vertical, there are some variables.
In versions X5 and X6, the functions have been improved by making available the Objects menu.
In the latest version X7 command Image>Mirror and Image>Flip returned, but with new differences.
See my schedule here
 French Translation here French Translation here
 Your versions here Your versions here

For this tutorial, you will need:


consult, if necessary, my filter section here
Filters Unlimited 2.0 here
Alien Skin Eye Candy 5 Impact - Extrude here
Mura's Meister - Perspective Tiling here
Mura's Meister - Copies here
Brush Strokes - Crosshatch here
L&K's - L&K's Pia here
Flaming Pear - Flood here
Artistiques - Pastels here
Graphics Plus - Cross shadow here
FM Tile Tools - Blend Emboss here
Filters Graphics Plus can be used alone or imported into Filters Unlimited.
(How do, you see here)
If a plugin supplied appears with this icon  it must necessarily be imported into Unlimited it must necessarily be imported into Unlimited

You can change Blend Modes according to your colors.
In the newest versions of PSP, you don't find the foreground/background gradient (Corel_06_029).
You can use the gradients of the older versions.
The Gradient of CorelX here

1. Open a new transparent image 1000 x 300 pixels.
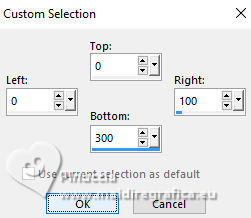
2. Selection Tool 
(no matter the type of selection, because with the custom selection your always get a rectangle)
clic on the Custom Selection 
and set the following settings.
3. Set your foreground color to #c0e2a,
and your background color to #493f2f.
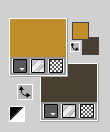
Flood Fill  the selection with your light color #c082ea. the selection with your light color #c082ea.
4. Open the tube Girasol 1 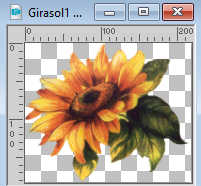
Edit>Copy.
Go back to your work and go to Edit>Paste into Selection.
5. Adjust>Blur>Radial Blur.
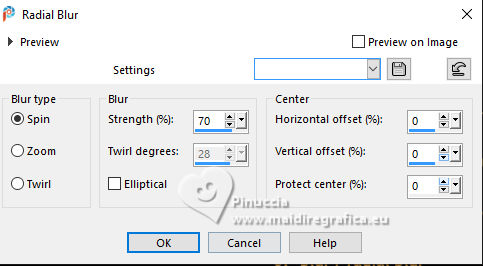
Selections>Select None.
6. Effects>Plugins>Alien Skin Eye Candy 5 Impact - Extrude.
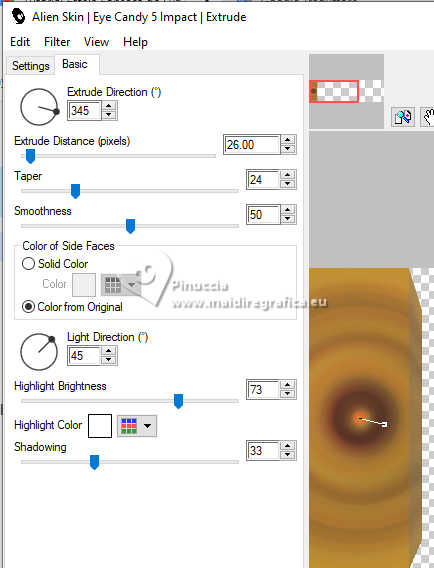
7. Effects>Plugins>Mura's Meister - Copies.
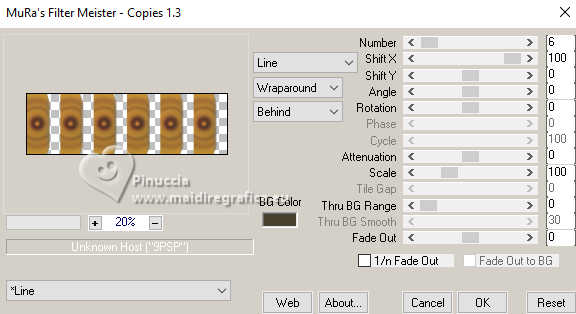
8. Effects>Reflection Effects>Rotating Mirror.

Activate your Erase Tool 
delete the line that was created in the center
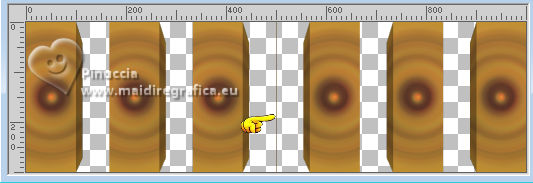
9. Layers>New Raster Layer.
Layers>Arrange>Move Down.
Flood Fill  the layer with your light color. the layer with your light color.
10. Effects>Geometric Effects>Perspective Horizontal.
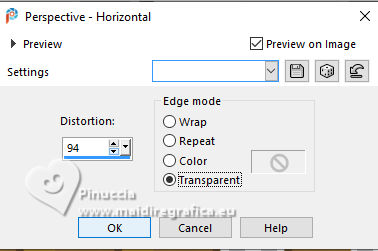
Repeat Effects>Geometric Effects>Perspective Horizontal, -94.
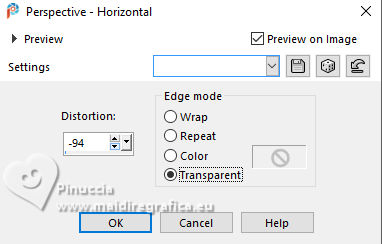
Result

11. Effects>Image Effects>Offset.
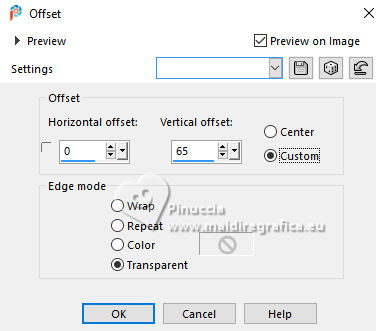
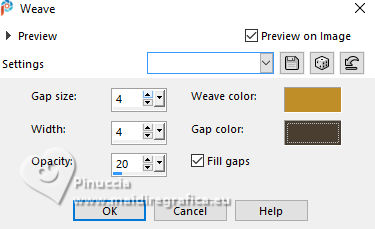
12. Effects>Texture Effects>Weave
weave color: foreground color
gap color: background color
13. Layers>Duplicate.
Image>Mirror>Mirror Vertica (Image>Flip).
Layers>Merge>Merge visible.
14. Image>Canvas Size - 1000 x 900 pixels.
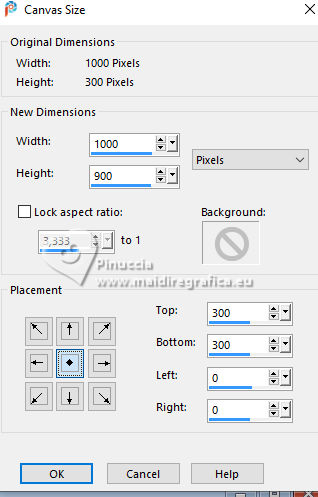
15. Effects>Image Effects>Offset.
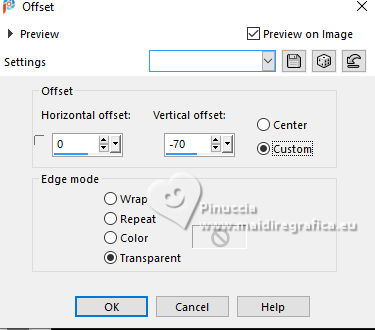
16. Layers>Duplicate.
Layers>Arrange>Move Down.
17. Effects>Image Effects>Offset.
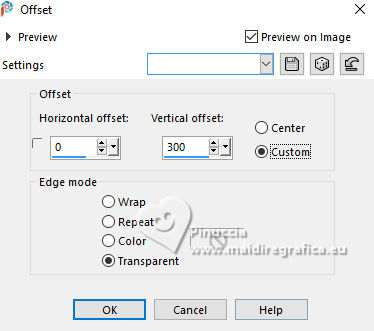
18. Adjust>Blur>Radial Blur.
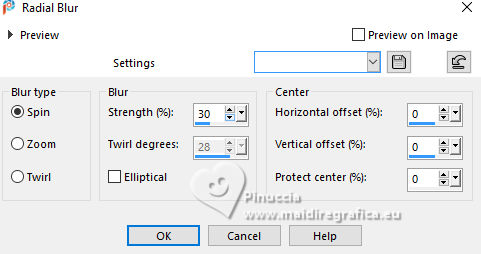
19. Effects>Image Effects>Seamless Tiling.

20. Effects>Plugins>Brush Strokes - Crosshatch.
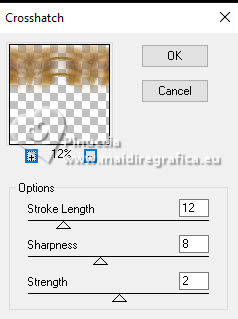
21. Effects>Edge Effects>Enhance.
22. Layers>New Raster Layer.
Layers>Arrange>Send to Bottom.
23. Set your foreground color to a Foreground/Background Gradient, style Linear.
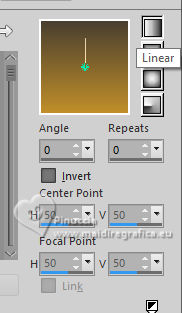
Flood Fill  the layer with your Gradient. the layer with your Gradient.
24. Layers>Duplicate.
25. Effects>Plugins>L&K's - L&K's Pia.
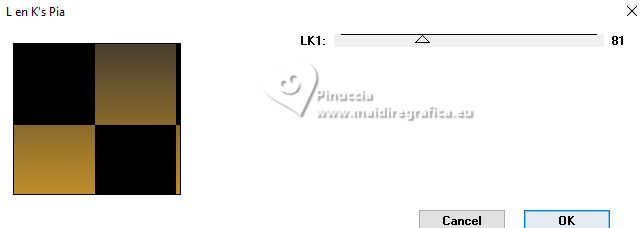
26. Adjust>Blur>Motion Blur.
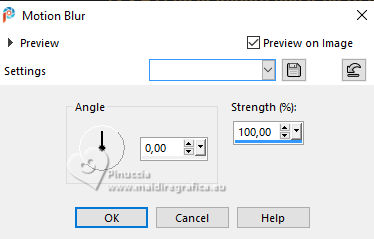
Edit>Repeat Motion Blur.
27. Effects>Plugins>Mura's Meister - Perspective Tiling.
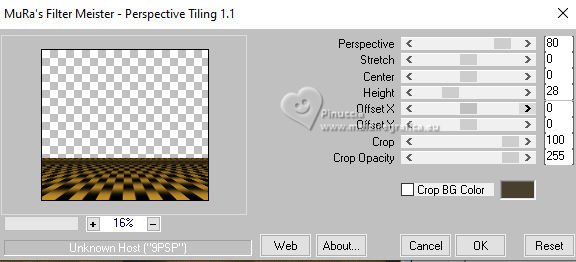
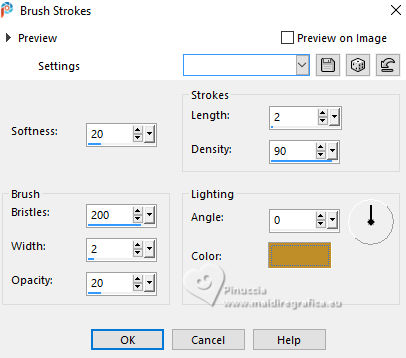
28. Effects>Art Media Effects>Brush Strokes - foreground color
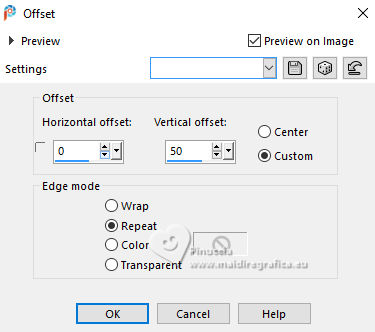
29. Effects>Image Effects>Offset - Repeat checked
30. Activate the layer Copy of Merged
Effects>Plugins>Flaming Pear - Flood.
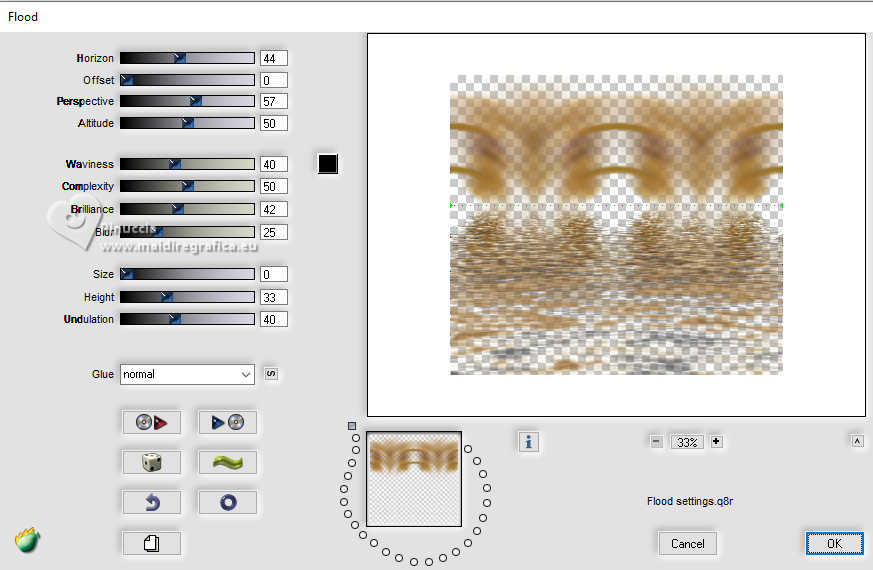
The Flood's effect is visible on the layer below of Mura's filtre
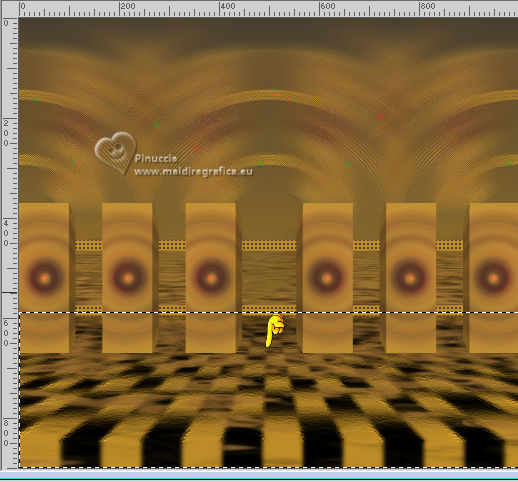
I did:
Activate the Perspective Tiling's layer.
Selections>Selecti All.
Selections>Float.
Selections>Defloat.
Activate again the Flood's layer, Copy of Merged.
Press CANC on the keyboard.
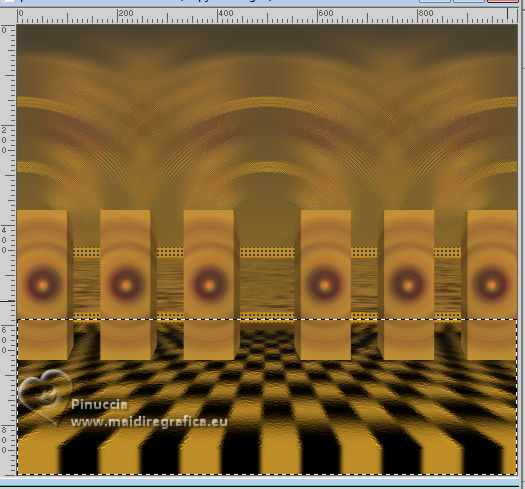
Selections>Select None.
31. Activate the layer Merged
Open the leaves tube Hojas 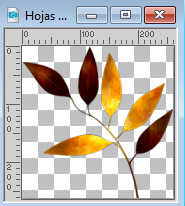
Edit>Copy.
Go back to your work and go to Edit>Paste as new layer.
Move  the tube to the left. the tube to the left.
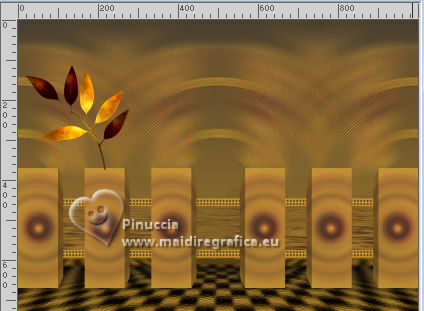
Layers>Arrange>Move Down.
Effects>Reflexion Effects>Rotating Mirror.

32. Effects>3D Effects>Drop Shadow, color black.
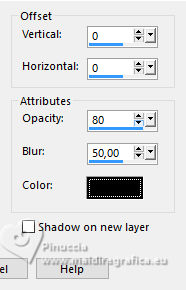
Reduce the opacity of this layer to 80%.
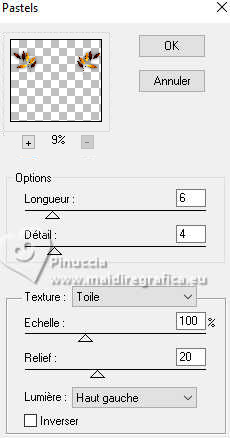
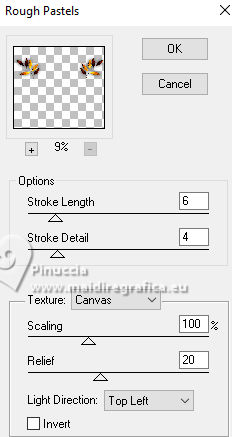
33. Effects>Plugins>Effets artistiques>Pastels.
if you use the english version (the result doesn't change):
Effects>Plugins>Artistics - Rough Pastel.
34. Activate the layer Merged
Effects>3D Effects>Drop Shadow, same settings.
Edit>Repeat Drop Shadow.
35. Effects>Plugins>FM Tile Tools - Blend Emboss, default settings.

36. Activate the layer Copy of Merged
Effects>3D Effects>Drop Shadow, same settings.
37. Activate your top layer.
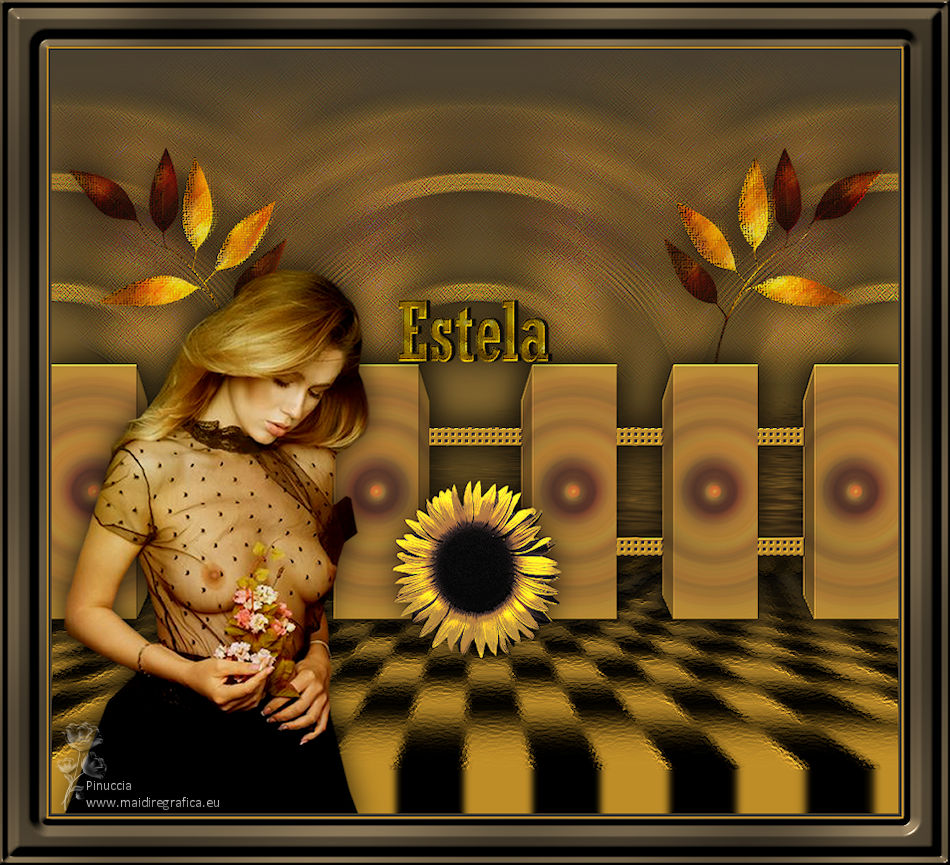
Open the woman's tube 4967-LuzCristina 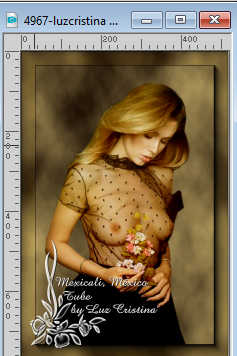
Edit>Copy.
Go back to your work and go to Edit>Paste as new layer.
Move  the tube to the left. the tube to the left.
Effects>3D Effects>Drop Shadow, same settings.
38. Open the tube girasol-2 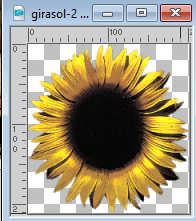
Edit>Copy.
Go back to your work and go to Edit>Paste as new layer.
Place  the tube as in my example. the tube as in my example.
Effects>3D Effets>Drop Shadow, same settings.
39. Open the text texto 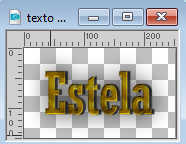
Edit>Copy.
Go back to your work and go to Edit>Paste as new layer.
Place  the text to your liking, or see my example. the text to your liking, or see my example.
40. Image>Add borders, 4 pixels, symmetric, dark color.
Image>Add borders, 2 pixels, symmetric, light color.
Image>Add borders, 55 pixels, symmetric, dark color.
Activate your Magic Wand Tool 
and click in the last border to select it.
41. Effects>3D Effects>Inner Bevel.
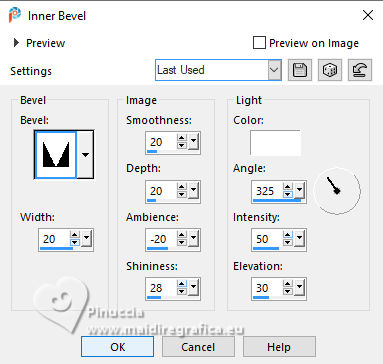
42. Effects>Plugins>Graphics Plus - Cross Shaow - 2 times (optional in your free version).
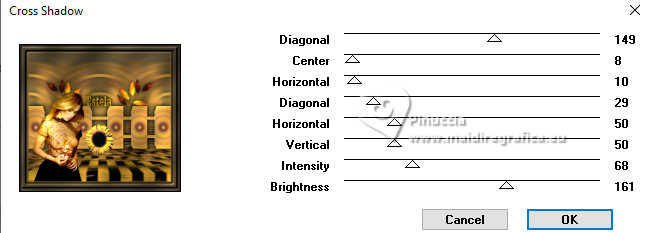
Selections>Select None.
43. Image>Resize, to 85%, resize all layers checked.
44. Sign your work and save as jpg.


If you have problems or doubts, or you find a not worked link,
or only for tell me that you enjoyed this tutorial, write to me.
5 October 2024

|

