|
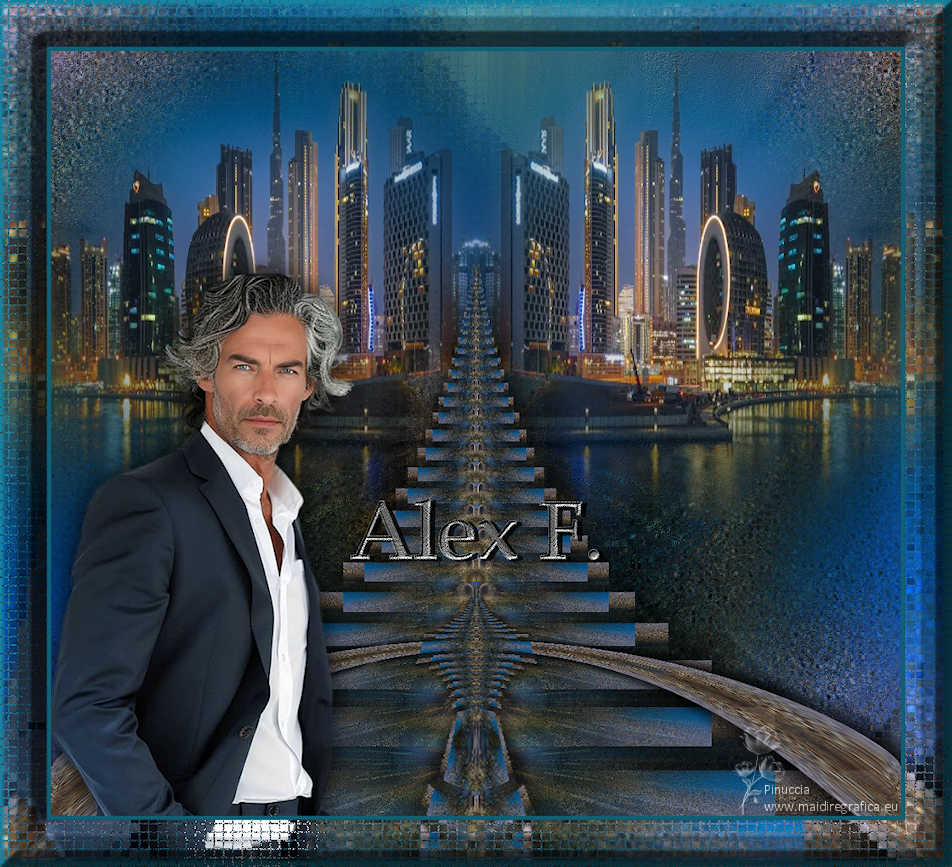
ALEX


Thanks Luz Cristina for your invitation to translate your tutorials into english

This tutorial, created with PSP2022, was translated with PspX7, but it can also be made using other versions of PSP.
Since version PSP X4, Image>Mirror was replaced with Image>Flip Horizontal,
and Image>Flip with Image>Flip Vertical, there are some variables.
In versions X5 and X6, the functions have been improved by making available the Objects menu.
In the latest version X7 command Image>Mirror and Image>Flip returned, but with new differences.
See my schedule here
 French Translation here French Translation here
 Your versions here Your versions here

For this tutorial, you will need:

(The links of the tubemakers here).
*It is forbidden to remove the watermark from the supplied tubes, distribute or modify them,
in order to respect the work of the authors

consult, if necessary, my filter section here
Blur - Radial Blur here
FM Tile Tools - Blend Emboss here

You can change Blend Modes according to your colors.
In the newest versions of PSP, you don't find the foreground/background gradient (Corel_06_029).
You can use the gradients of the older versions.
The Gradient of CorelX here

Open the mask in PSP and minimize it with the rest of the material.
1. Open a new transparent image 1000 x 900 pixels.
2. Set your foreground color to #cfc7b0,
and your background color to #000000.
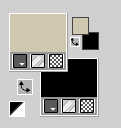
Set your foreground color to a Foreground/Background Gradient, style Sunburst.
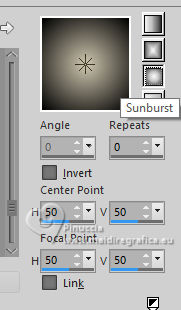
Flood Fill  the transparent image with your Gradient. the transparent image with your Gradient.
3. Layers>New Raster Layer.
Selections>Select All.
Open the misted 8655-LuzCristina 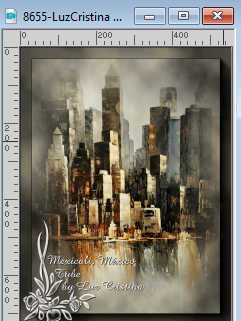
Edit>Copy.
Go back to your work and go to Edit>Paste into Selection.
Selections>Select None.
4. Effects>Image Effects>Seamless Tiling, default settings.

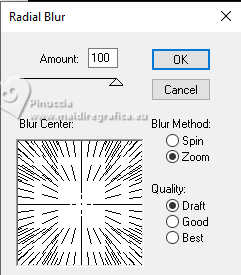
5. Effects>Plugins>Blur - Radial Blur
6. Effects>Reflextion Effects>Rotating Mirror.

7. Effects>Plugins>FM Tile Tools - Blend Emboss, default settings.

8. Layers>Duplicate.
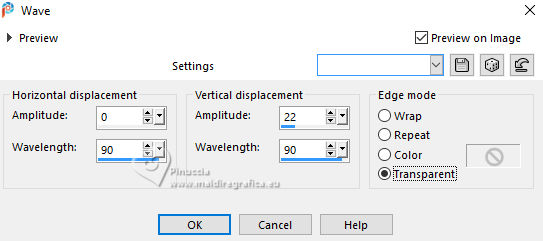
Effects>Distortion Effects>Wave.
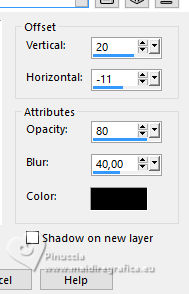
9. Effects>3D Effects>Drop Shadow.
10. Activate the layer below, Raster 2.
Layers>Duplicate.
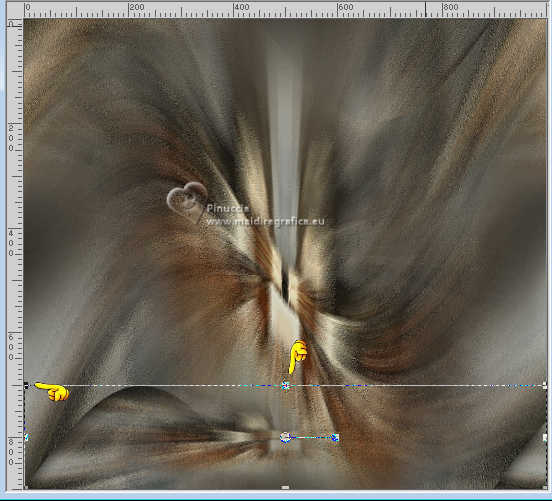
11. Activate your Pick Tool 
mode Scale 
purr the top central node down, until 700 pixels.
12. Layers>Arrange>Bring to top.
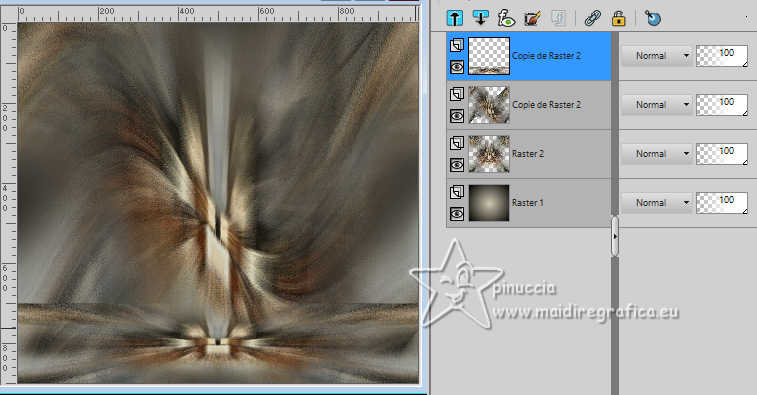
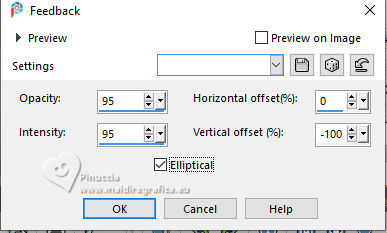
13. Effects>Reflection Effects>Feedback.
14. Effects>Distortion Effects>Pinch.

15. Effects>Image Effects>Offset.
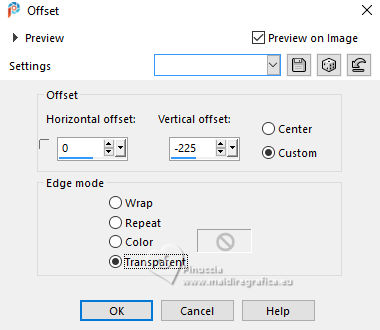
16. Effects>3D Effects>Drop shadow, same settings.

Repeat Effects>3D Effects>Drop shadow, vertical -20, horizontal 11.

17. Layers>Duplicate.
Effects>Distortion Effects>Warp.
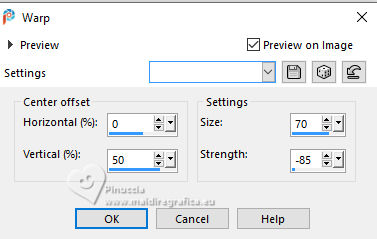
Effects>Geometric Effects>Cylinder vertical.
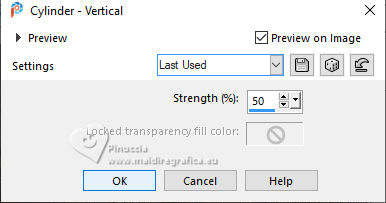
19. Your misted is still in memory: Edit>Paste as new layer.
20. Effects>Image Effects>Offset.
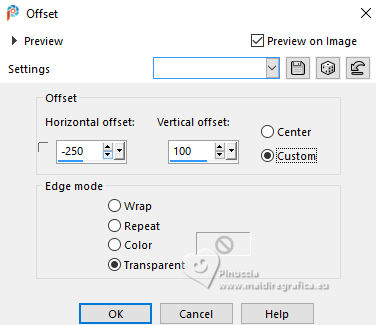
21. Effects>Reflection Effects>Rotating Mirror.

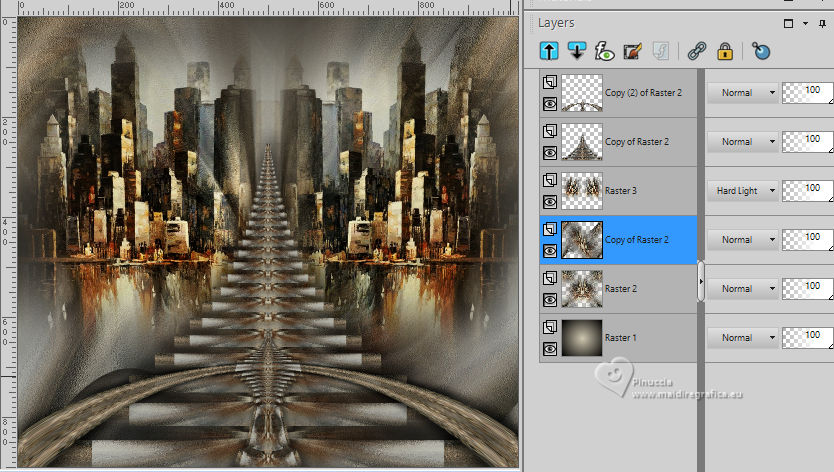
22. Layers>Arrange>Move Down - 2 times.
23. Activate the layer below, Copy of Raster 2.
24. Effects>Texture Effects>Mosaic Antique.
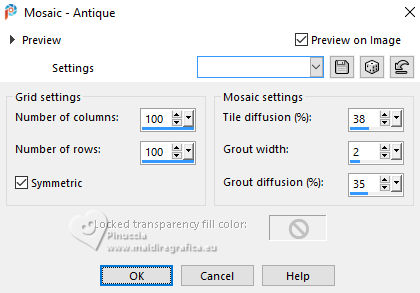
25. Change the Blend Mode of this layer to Hard Light (Optional).
26. Activate your top layer.
Open the tube 8654-LuzCristina 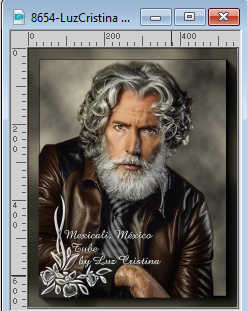
Edit>Copy.
Go back to your work and go to Edit>Paste as new layer.
Move  the tube at the bottom left. the tube at the bottom left.
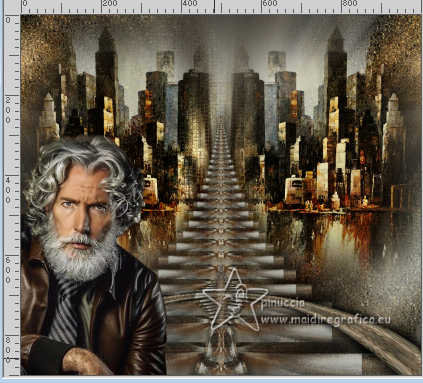
Effects>3D Effects>Drop Shadow, at your choice.
27. Open the texte 
Edit>Copy.
Go back to your work and go to Edit>Paste as new layer.
Move  the text as below or to your liking. the text as below or to your liking.
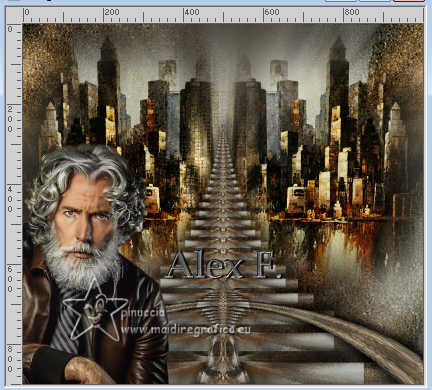
The text have his Drop Shadow.
28. Image>Add borders, 5 pixels, symmetric, dark color.
Edit>Copy
Image>Add borders, 55 pixels, symmetric, light color.
Activate your Magic Wand Tool 
and click on the last border to select it.
Edit>Paste into Selection
29. Effects>Texture Effects>Mosaic Antique, same settings.

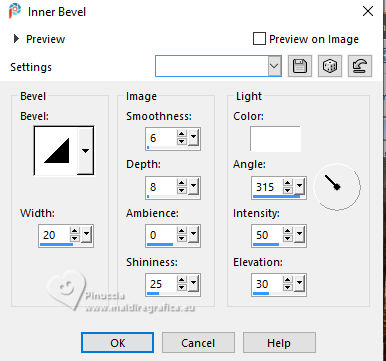
30. Effects>3D Effects>Inner Bevel.
Selections>Select None.
31. Image>Resize, to 85%, resize your layers checked.
32. Sign your work and save as jpg.
For the tube of this version thanks Beatriz; the misted is mine.


If you have problems or doubts, or you find a not worked link,
or only for tell me that you enjoyed this tutorial, write to me.
21 June 2024

|


