|
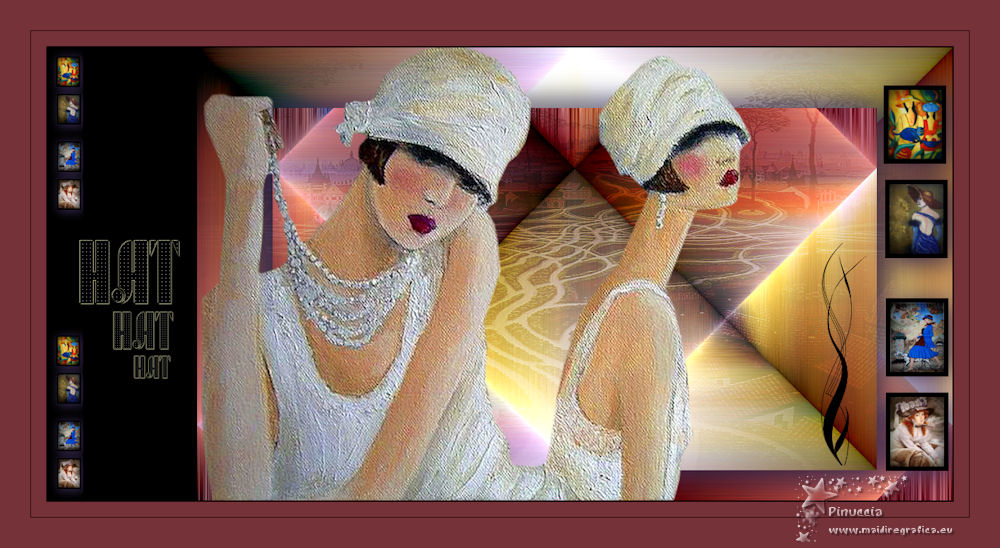
HAT

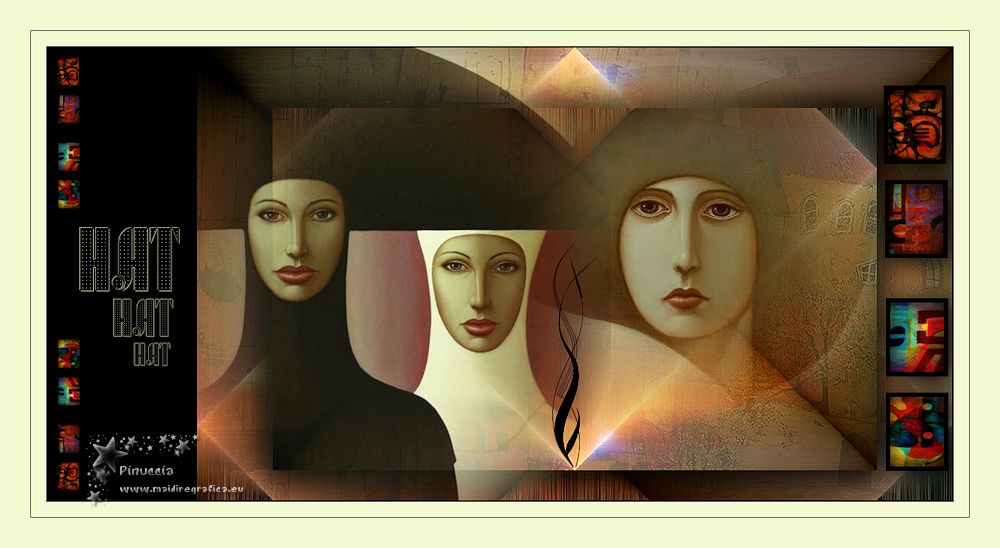
Thanks Ligia for your invitation to translate your tutorial

This tutorial was translated with PSPX7, but it can also be made using other versions of PSP.
Since version PSP X4, Image>Mirror was replaced with Image>Flip Horizontal,
and Image>Flip with Image>Flip Vertical, there are some variables.
In versions X5 and X6, the functions have been improved by making available the Objects menu.
In the latest version X7 command Image>Mirror and Image>Flip returned, but with new differences.
See my schedule here
 French translation here French translation here
 your versions ici your versions ici
For this tutorial, you will need:
Material here
The tubes are by Ligia, after images found on the net, without signature.
(you find here the links to the material authors' sites)
Plugins
consult, if necessary, my filter section here
Filters Unlimited 2.0 here
Graphics Plus - Emboss here
Mehdi - Sorting Tiles here
Optional: Adjust - Variations here
Filters Graphics Plus can be used alone or imported into Filters Unlimited.
(How do, you see here)
If a plugin supplied appears with this icon  it must necessarily be imported into Unlimited it must necessarily be imported into Unlimited

You can change Blend Modes according to your colors.
Copy the brush in Brush folder. Attention, please, the brush is composed by two files, you must place both the files in the folder.
See my notes about Brushes here
Copy the Selection in the Selections Folder.
1. Open the background image "fundo.jpg"
This image will be the basis of your work.
If you want use your image:
Open a new transparent image 1000 x 600 pixels.
Selections>Select All.
Open your image and Edit>Copy.
Go back to your work and go to Edit>Paste into Selection.
Selections>Select None.
Adjust>Blur>Gaussian Blur, radius 10

Adjust>Add/Remove Noise>Add Noise.

Optional: Effects>Plugins>Graphics Plus - Emboss, default settings

And here is your background image, which will be the basis of your work.
2. Effects>Plugins>Mehdi - Sorting Tiles.

3. Layers>Duplicate.
Image>Resize, to 80%, resize all layers not checked.
Image>Flip.
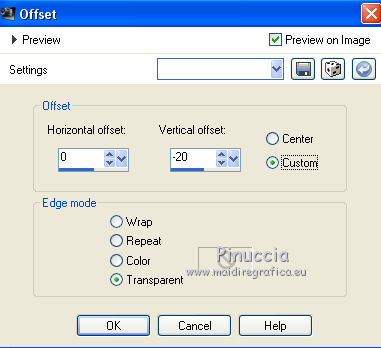
Effects>Image Effects>Offset.
4. Effects>3D Effects>Drop Shadow, color #000000.
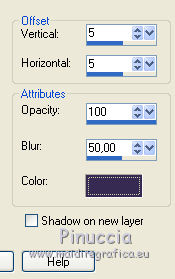
Repeat Drop Shadow, vertical and horizontal -5.
6. Open the misted "city" and go to Edit>Copy.
Go back to your work and go to Edit>Paste as new layer.
Don't move it.
Change the Blend mode of this layer to Overlay and reduce the opacity to 35%.
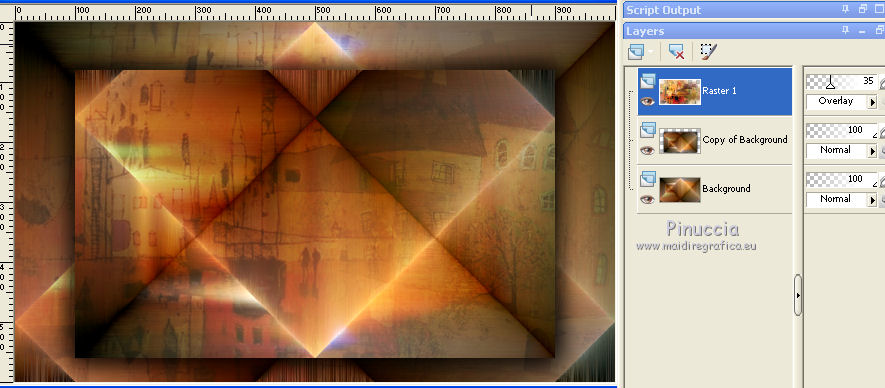
(If you use another image,
make sure it has the same dimensions of the misted city: 1000 x 600 pixels).
Effects>Edge Effects>Enhance.
6. Open the misted mulheres_li, and go to Edit>Copy.
Go back to your work and go to Edit>Paste as new layer.
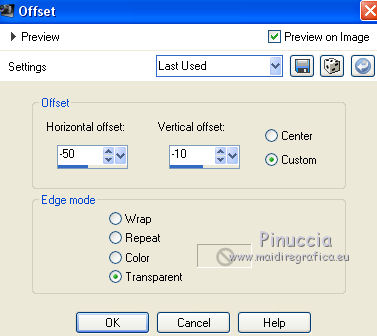
Effects>Image Effects>Offset.
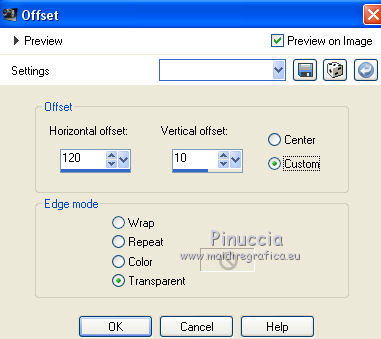
or place  according to your tube; according to your tube;
for me

7. Layers>New Raster Layer.
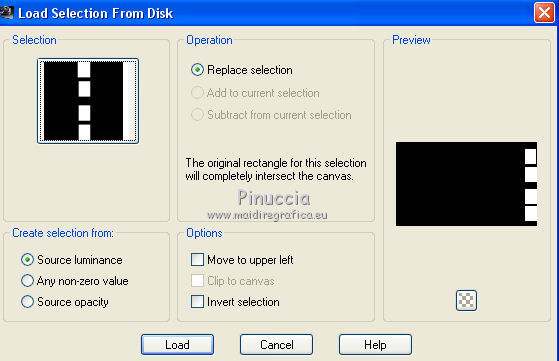
Selections>Load/Save Selection>Load Selection from Disk.
Look for and load the selection chap_1.
Set your foreground color to #000000.
Flood Fill  the selection with color #000000. the selection with color #000000.
Selections>Modify>Contract - 6 pixels.
Press CANC on the keyboard 
Selections>Select None.
8. Prepare 4 abstract images that correspond to your work,
or use the frames 1,2,3 and 4 which are in the material.
9. Activate your Magic Wand Tool  , tolerance et feather 0, , tolerance et feather 0,
and click on the first top frame to select it.

Open the image cadre_1 and go to Edit>Copy.
Go back to your work and go to Edit>Paste into Selection.
Layers>New Raster Layer.
Effects>3D Effects>Cutout.
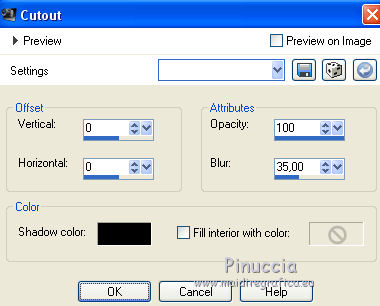
Layers>Merge>Merge Down.
Selections>Select None.
10. Selectionner the second frame with your Magic Wand Tool 
Open the image cadre_2 and go to Edit>Copy.
Go back to your work and go to Edit>Paste into Selection.
Layers>New Raster Layer.
Effects>3D Effects>Cutout, same settings.
Layers>Merge>Merge Down.
Selections>Select None.
11. Selectionner the thirth frame with your Magic Wand Tool 
Open the image cadre_3 and go to Edit>Copy.
Go back to your work and go to Edit>Paste into Selection.
Layers>New Raster Layer.
Effects>3D Effects>Cutout, same settings.
Layers>Merge>Merge Down.
Selections>Select None.
12. Selectionner the fourth frame with your Magic Wand Tool 
Open the image cadre_4 and go to Edit>Copy.
Go back to your work and go to Edit>Paste into Selection.
Layers>New Raster Layer.
Effects>3D Effects>Cutout, same settings.
Layers>Merge>Merge Down.
Selections>Select None.
13. Effects>3D Effects>Drop Shadow, color #000000.

14. Copy the layer of the 4 frames
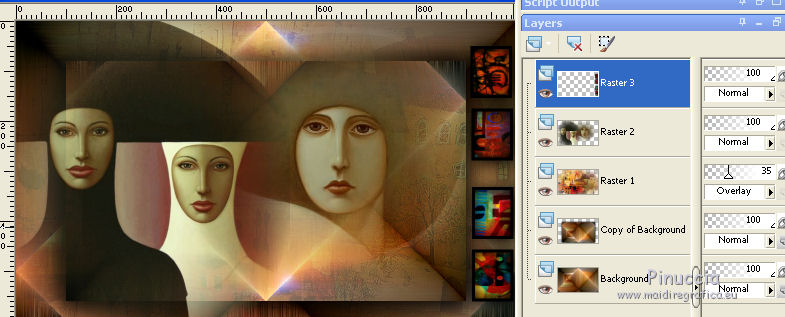
If you want, for precaution Edit>Paste as new image

Or, if you prefer open and copy the layer "cadres" which you found in the material.
15. Image>Add borders, symmetric not checked, color #000000.
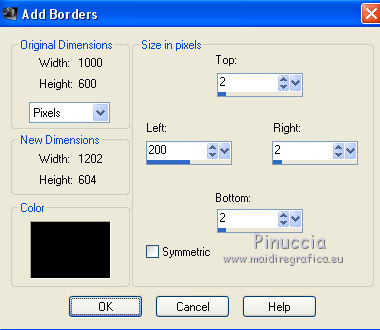
16. Edit>Paste as new layer (the 4 frames are in memory)
Image>Resize, to 40%, resize all layers not checked.
Objcts>Align>Top and Objets>Align>Left,
or activate your Pick Tool 
and set Position X and Y to 0,00
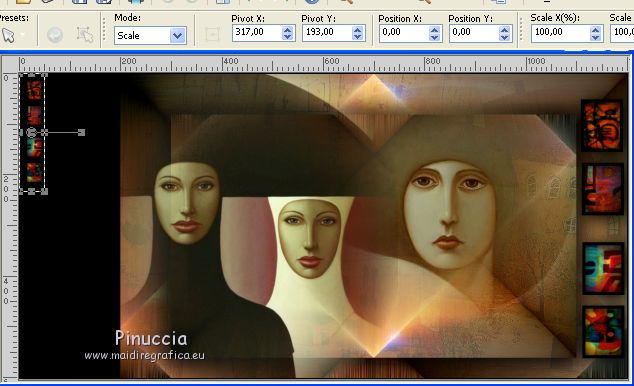
Layers>Duplicate.
Image>Flip.
Layers>Merge>Merge Down.
17. Activate your Brush Tool 
look for and select the brush L&L les_zara_brush

Apply the brush, clicking 3 times with your left mouse button,
to use your foreground color #000000 (or with another color at your choice).

18. Open the tube texto_li and go to Edit>Copy.
Go back to your work and go to Edit>Paste as new layer.
Move  the text to the left side. the text to the left side.
(the font is in the material, if you want to write your text).
19. Image>Add borders, 20 pixels, symmetric, color #f3fad1.
Image>Add borders, 1 pixel, symmetric, color #000000.
Image>Add borders, 40 pixels, symmetric, color #f3fad1.
20. Image>Resize, 1000 pixels width, resize all layers checked.
Adjust>Sharpness>Sharpen.
Sign your work on a new layer.
Add, if you want, the author's watermark; in this case, don't forget the translator's watermark.
Layers>Merge>Merge All and save as jpg.
Version with tube by Luz Cristina
 Your versions here Your versions here

If you have problems or doubts, or you find a not worked link, or only for tell me that you enjoyed this tutorial, write to me.
2 April 2021
|

