|
TOP SUSANNE
 ENGLISH VERSION ENGLISH VERSION
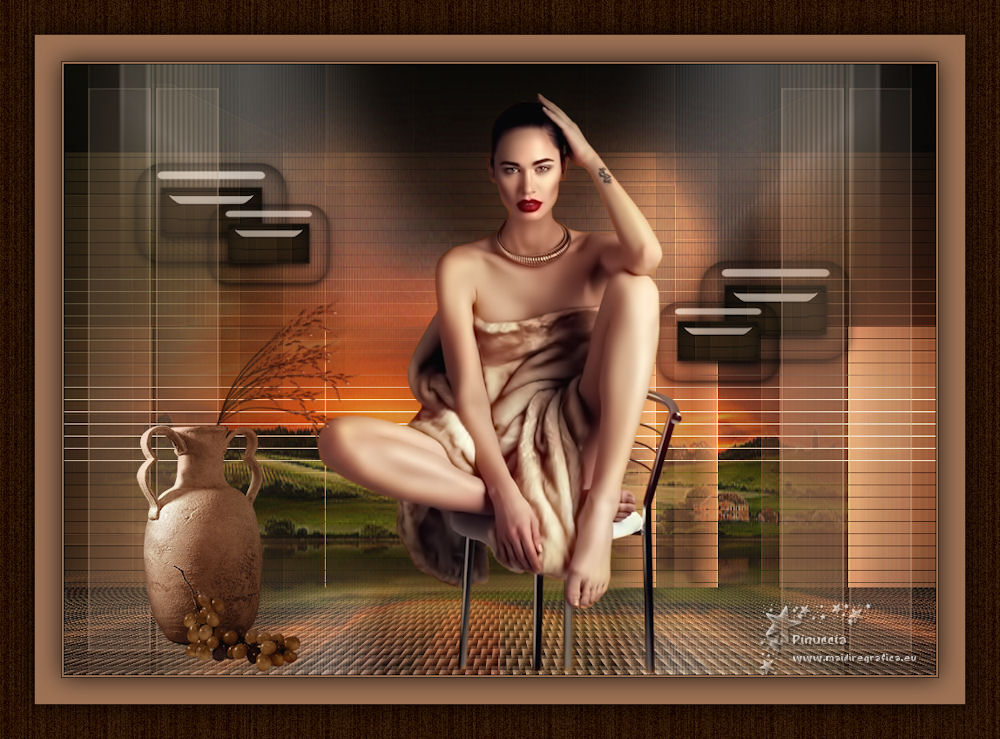
Thanks Lica Cida for your invitation to translate your tutorial

This tutorial was created with PSPX8 and translated with PSPX3, but it can also be made using other versions of PSP.
Since version PSP X4, Image>Mirror was replaced with Image>Flip Horizontal,
and Image>Flip with Image>Flip Vertical, there are some variables.
In versions X5 and X6, the functions have been improved by making available the Objects menu.
In the latest version X7 command Image>Mirror and Image>Flip returned, but with new differences.
See my schedule here
French translation here
your versions ici
For this tutorial, you will need:
Material here
Thanks: for the tubes CibiBijoux (Beauty_in_fur_CibiBijoux, Jarre_raisins), Animabelle (328_paysage_p3_animabelle),
Mask: maskfield (mp)
(you find here the links to the material authors' sites)
Plugins
consult, if necessary, my filter section here
Filters Unlimited 2.0 here
Mehdi - Sorting Tiles here
L&&k's - L&K's Mayra here
&<Bkg Designer sf10I> - 4Way Average (to import in Unlimited) here
VM Natural - Legoland here
Alien Skin Eye Candy 5 Impact - Glass here
Toadies - What are you here
Transparency - Eliminate Black here
Nik Software Color Efex Pro here
Filters VM Natural, Toadies and Transparency can be used alone or imported into Filters Unlimited.
(How do, you see here)
If a plugin supplied appears with this icon  it must necessarily be imported into Unlimited it must necessarily be imported into Unlimited

You can change Blend Modes according to your colors.
In the newest versions of PSP, you don't find the foreground/background gradient (Corel_06_029).
You can use the gradients of the older versions.
The Gradient of CorelX here
Copy the preset Intuition in the Presets Folder.
1. Set your foreground color to #1a130e,
and your background color to #9c7154.
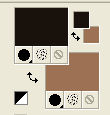
Set your foreground color to a Foreground/Background Gradient, style Linear.
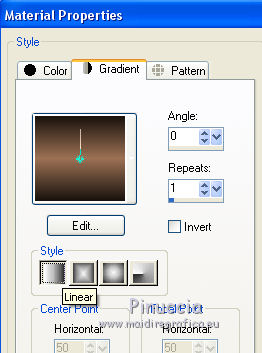
Open a new transparent image 1000 x 700 pixels.
Flood Fill  the transparent image with your Gradient. the transparent image with your Gradient.
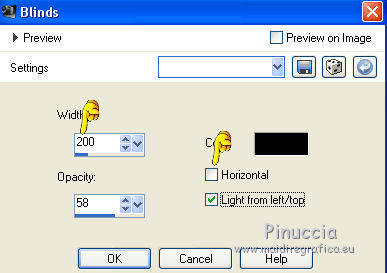
2. Effects>Texture Effects>Blinds, color #000000.
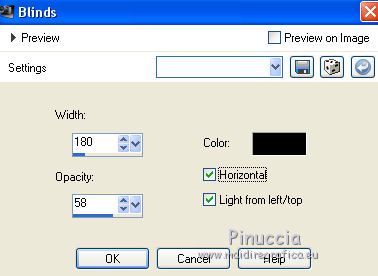
3. Effects>Image Effects>Blinds, color #000000.
4. Effects>Plugins>Mehdi - Sorting Tiles.
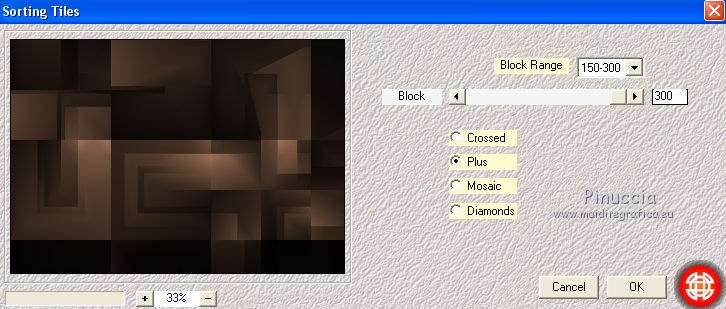
Effects>Edge Effects>Enhance More.
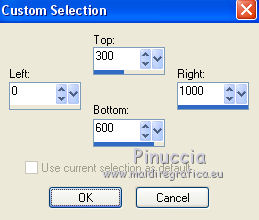
5. Selection Tool 
(no matter the type of selection, because with the custom selection your always get a rectangle)
clic on the Custom Selection 
and set the following settings.
6. Effects>Plugins>L&K's - L&K's Mayra, default settings.
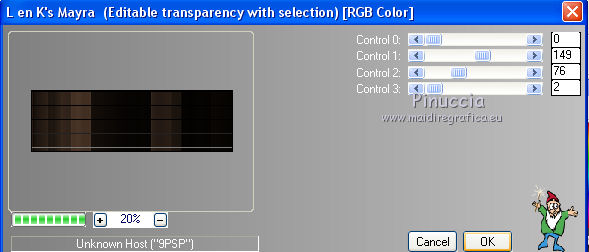
Selections>Promote Selection to Layer.
If you close the layer below, you'll see this
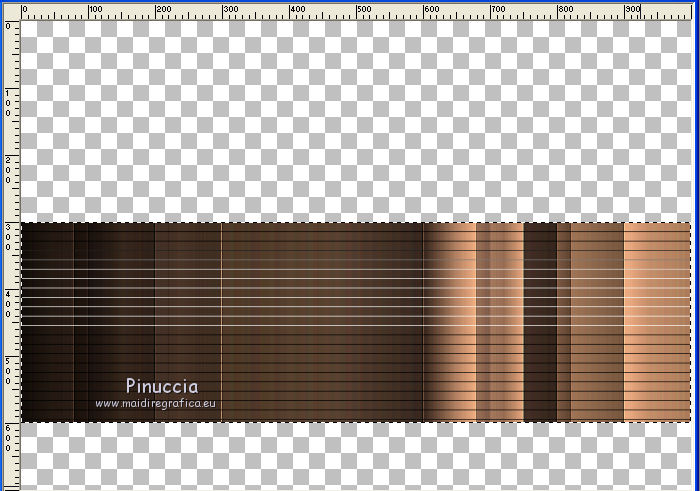
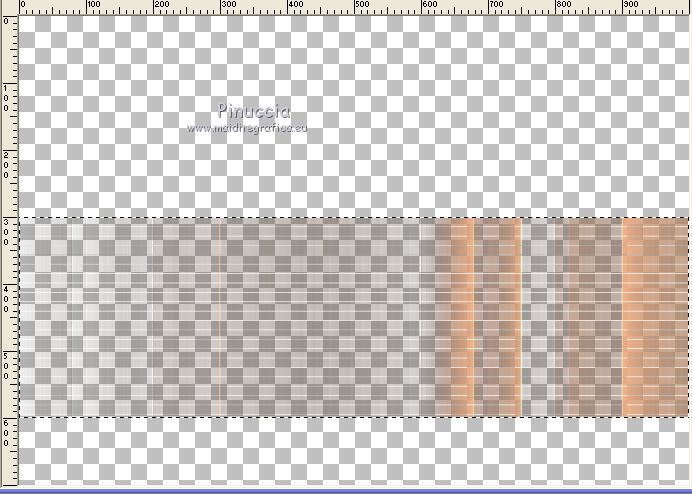
7. Effects>Plugins>Transparency - Eliminate Black.
This effect works without window; result
8. Layers>New Raster Layer.
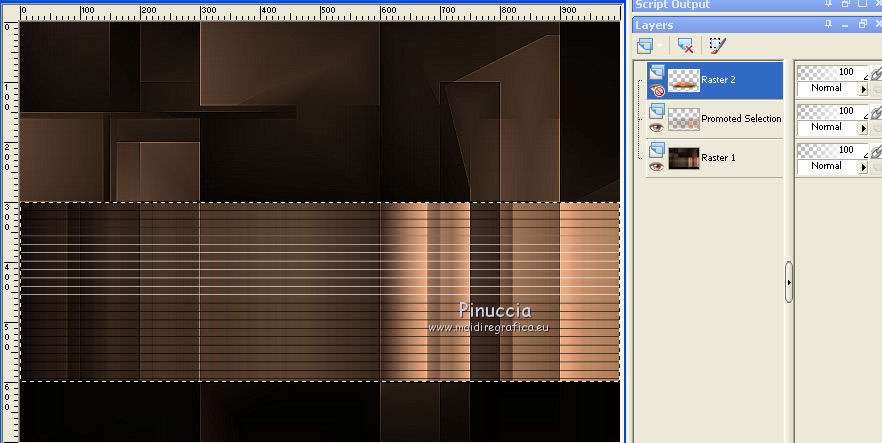
Open the landscape misted 328_paysage_p3_animabelle (Raster 2) - Edit>Copy.
Go back to your work and go to Edit>Paste into Selection.
Edit>Copy (the tube in your selection) and close the layer Raster 2.
9. Calques>Nouveau calque raster.
Sélections>Sélectionner tout.
Edit>Paste into Selection (the layer 2).
Selections>Select None.
Delete the layer Raster 2
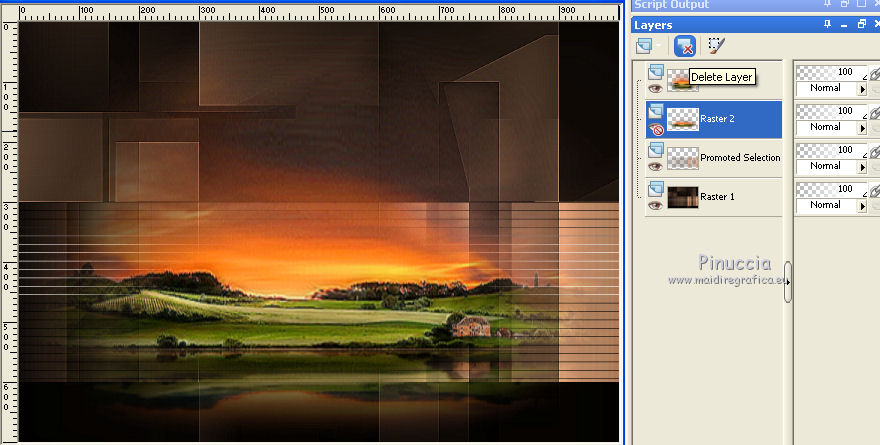
Activate the layer Raster 3.
Layers>Arrange>Move Down.
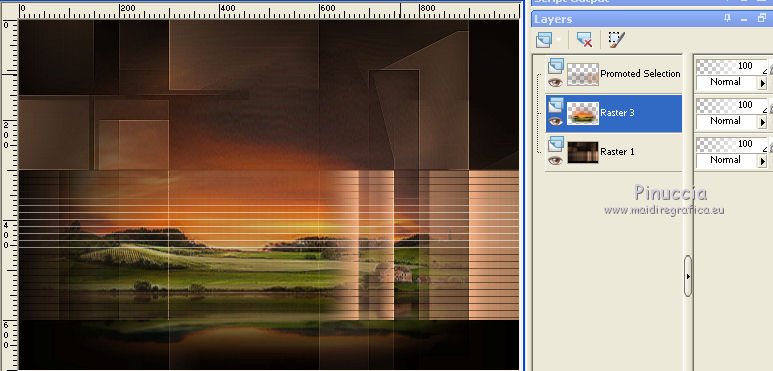
10. Activate the bottom layer, Raster 1.
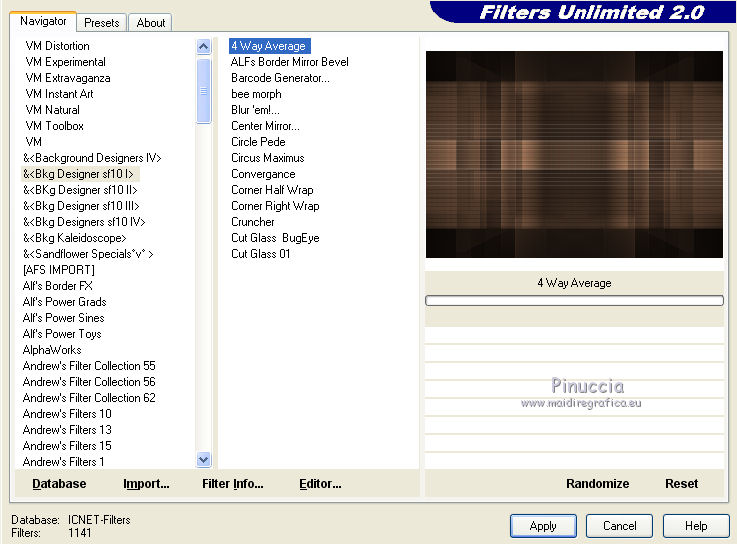
Effects>Plugins>Filters Unlimited 2.0 - &<Bkg Designer sf10I> - 4Way Average
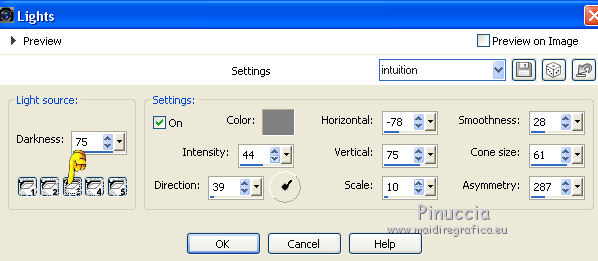
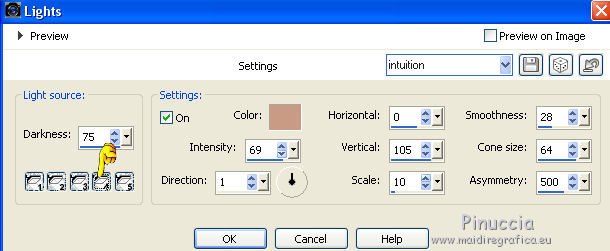
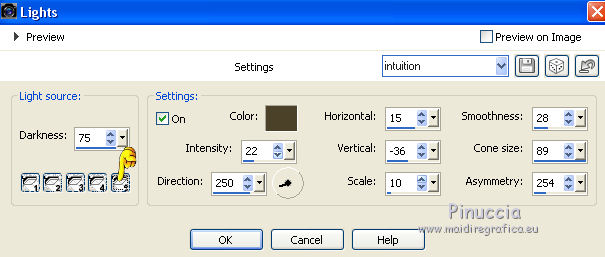
11. Effects>Illumination Effects>Lights
select the preset intuition and ok.
The first light that you'll see is the number 2- color #b9531b
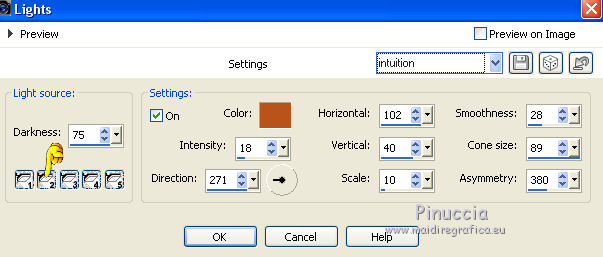
Here below the other lights, in case of problems with the preset
Light 1 - color 7bac74
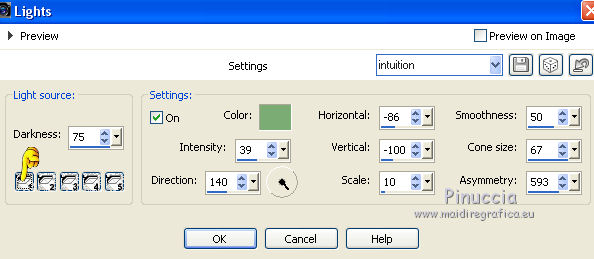
Light 3 - color #808080
Light 4 - color #c99a84
Light 5 - color #4c4129
12. Layers>Duplicate.
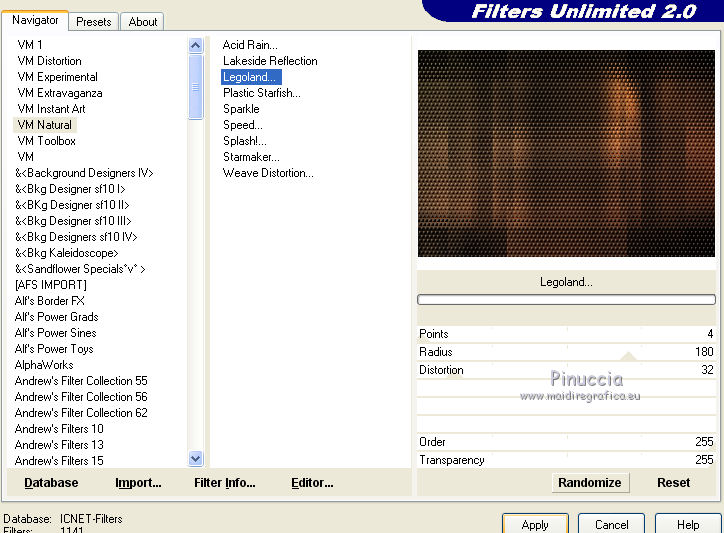
Effects>Plugins>Filters Unlimited 2.0 - VM Natural - Legoland.
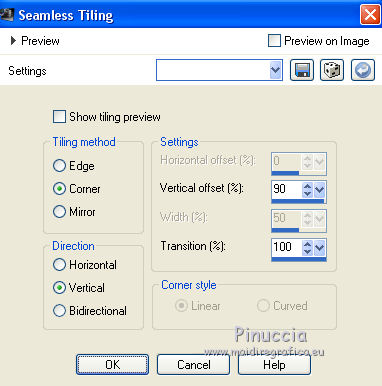
Effects>Image Effects>Seamless Tiling.
13. Effects>Plugins>Mura's Meister - Perspective Tiling.
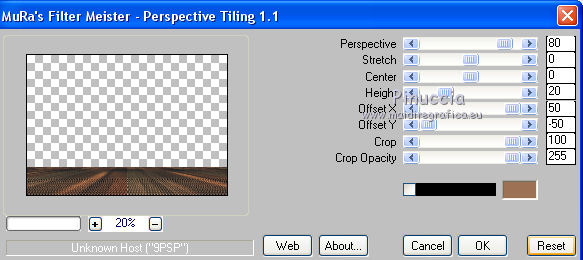
Activate your Magic Wand Tool  , feather 70 , feather 70

and click on the transparent part to select it.
Press 6-7 times CANC on the keyboard  , to soften the effect. , to soften the effect.
Selections>Select None.
14. Layers>New Raster Layer.
Selections>Select All.
Open maskfield - Edit>Copy.
Go back to your work and go to Edit>Paste into Selection.
Selections>Select None.
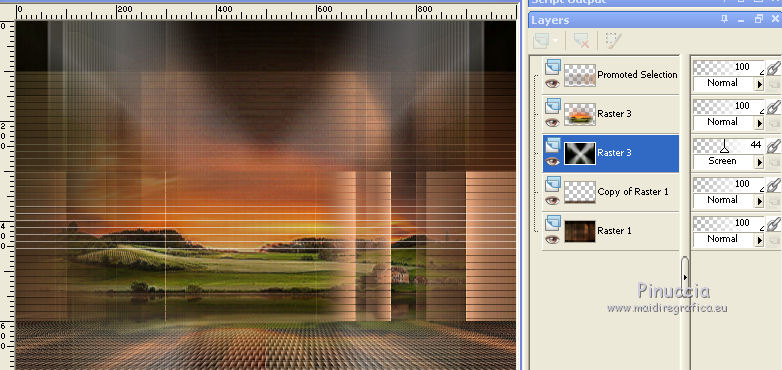
Change the Blend Mode of this layer to Screen and reduce the opacity to 44%.
Image>Flip.
15. Activate the layer Raster 1.
Custom Selection 
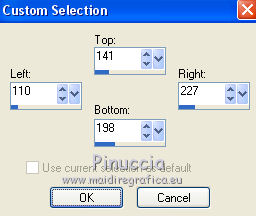
Selections>Promote Selection to Layer.
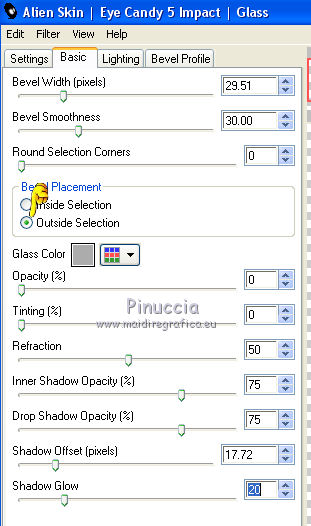
16. Effects>Plugins>Alien Skin Eye Candy 5 Impact - Glass.
Select the preset Clear and under Basic select Outside Selection.
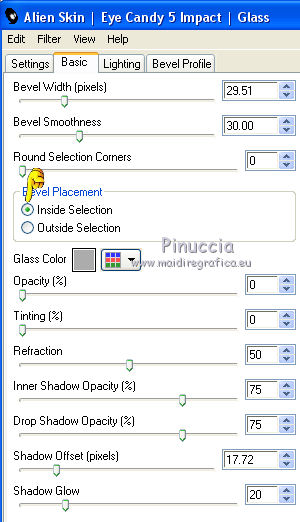
Repeat Glass-Clear and under Basic select Inside Selection
Selections>Select None.
Layers>Arrange>Bring to Top.
Layers>Duplicate.
Image>Resize, 80%, resize all layers not checked.
Layers>Merge>Merge Down.
Layers>Duplicate.
Image>Mirror.
Effects>Image Effects>Offset.
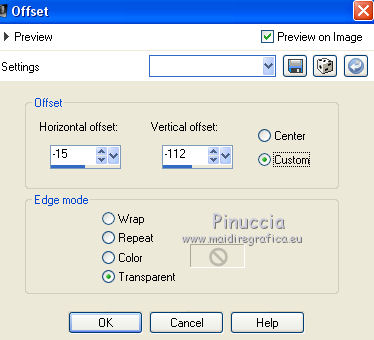
Layers>Merge>Merge Down.
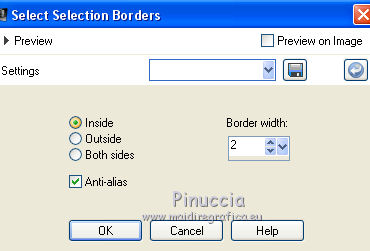
17. Custom Selection 
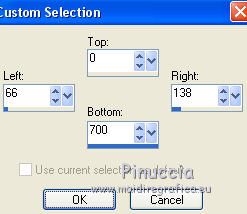
Selections>Modify>Select Selection Border.
18. Set your foreground color to white #ffffff.
Layers>New Raster Layer.
Flood Fill  the selection with color white. the selection with color white.
Selections>Select None.
19. Activate your Magic Wand Tool  , feather 0, , feather 0,
and click in the rectangle to select it.
Reduce the opacity of your Flood Fill Tool to 40%.
Flood Fill  the selection with color white. the selection with color white.
Don't forget to set again your Flood Fill Tool to 100
Selections>Select None.
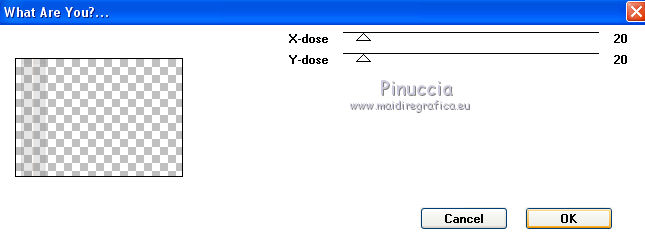
20. Effects>Plugins>Toadies - What are you, par Défaut.
Layers>Duplicate.
Image>Mirror.
Layers>Merge>Merge Down.
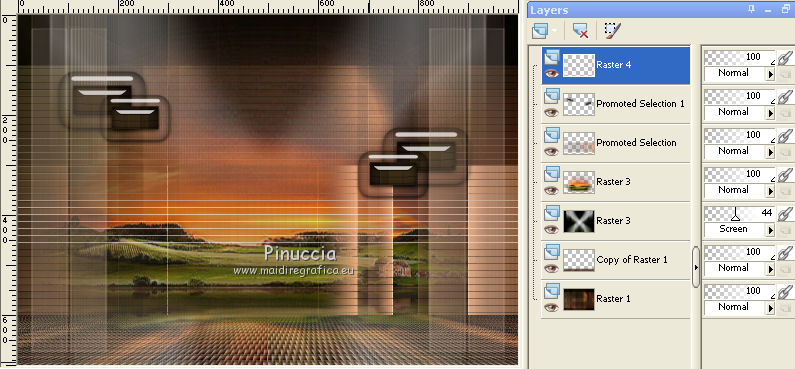
21. You should have this
22. Open the tube Beauty_in_fur_CibiBijoux - Edit>Copy.
Go back to your work and go to Edit>Paste as new layer.
Image>Resize, 90%, resize all layers not checked.
23. Open the tube Jarre_raisins_CibiBijoux - Edit>Copy.
Go back to your work and go to Edit>Paste as new layer.
Image>Resize, 70%, resize all layers not checked.
Move  the tube at the bottom left. the tube at the bottom left.
Layers>Merge>Merge visible.
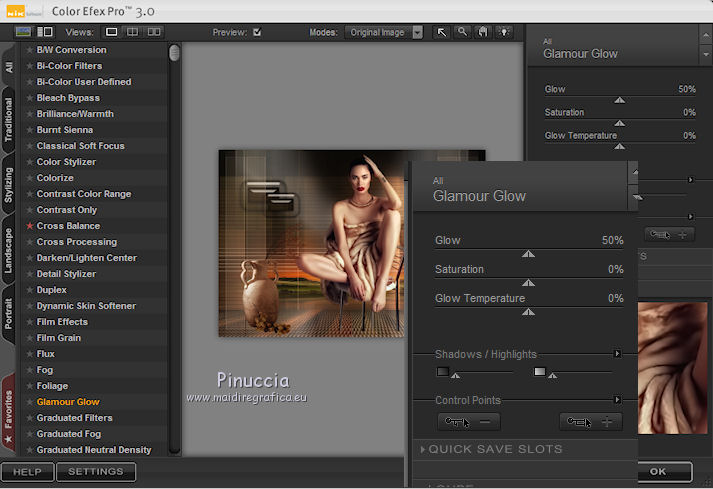
21. Effects>Plugins>Nik Software - Color Efex Pro - Glamour Glow.
22. Image>Add borders, 1 pixel, symmetric, foreground color #1a130e.
Image>Add borders, 2 pixels, symmetric, background color #9c7154.
Image>Add borders, 1 pixel, symmetric, foreground color #1a130e.
Selections>Select All.
Image>Add borders, 30 pixels, symmetric, background color #9c7154.
Effects>3D Effects>Drop Shadow, color #000000.
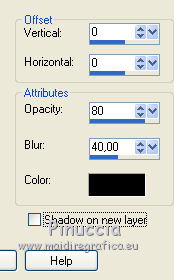
Selections>Select All.
Image>Add borders, 40 pixels, symmetric, foreground color #1a130e.
Selections>Invert.
25. Effects>Plugins>Filters Unlimited 2.0 - Special Effects 1 - Aged Film
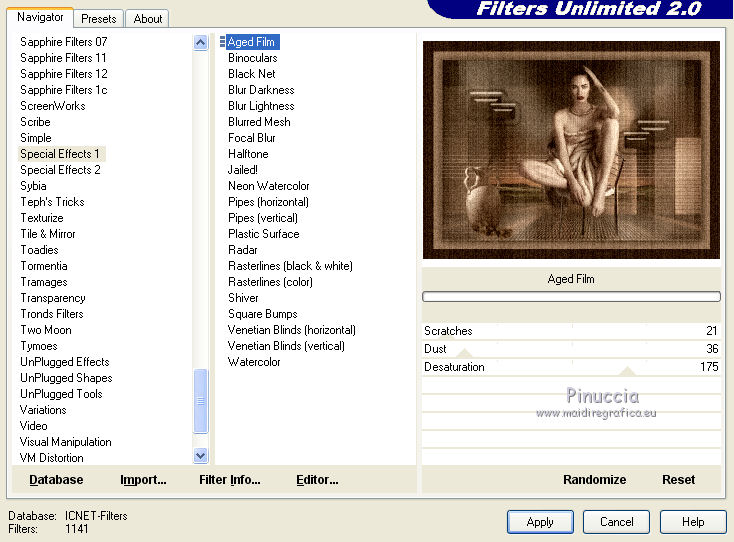
Selections>Invert.
Effects>3D Effects>Drop Shadow, same settings.

Selections>Select None.
Image>Resize, 1000 pixels width, resize all layers checked.
Sign your work on a new layer.
little note about the watermark:
I don't ask to put watermark on the versions made by my translations.
But if you decide to use the watermark supplied by the author, I would appreciate that my work as translator was also respected.
For that, I added my watermark to the material (english and french).
26. Layers>Merge>Merge All and save as jpg.
The tubes of this version are by Thafs and Cal
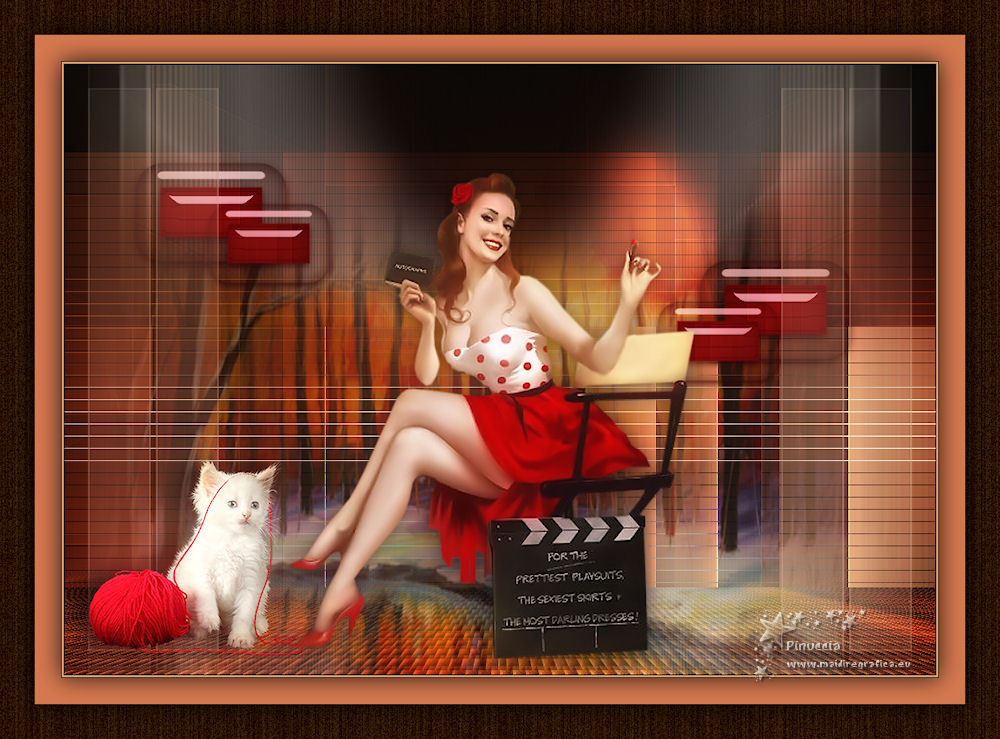
Your versions here

If you have problems or doubts, or you find a not worked link, or only for tell me that you enjoyed this tutorial, write to me.
7 March 2019
|
 ENGLISH VERSION

 ENGLISH VERSION
