|
TOP ORIGINAL
 ENGLISH VERSION ENGLISH VERSION
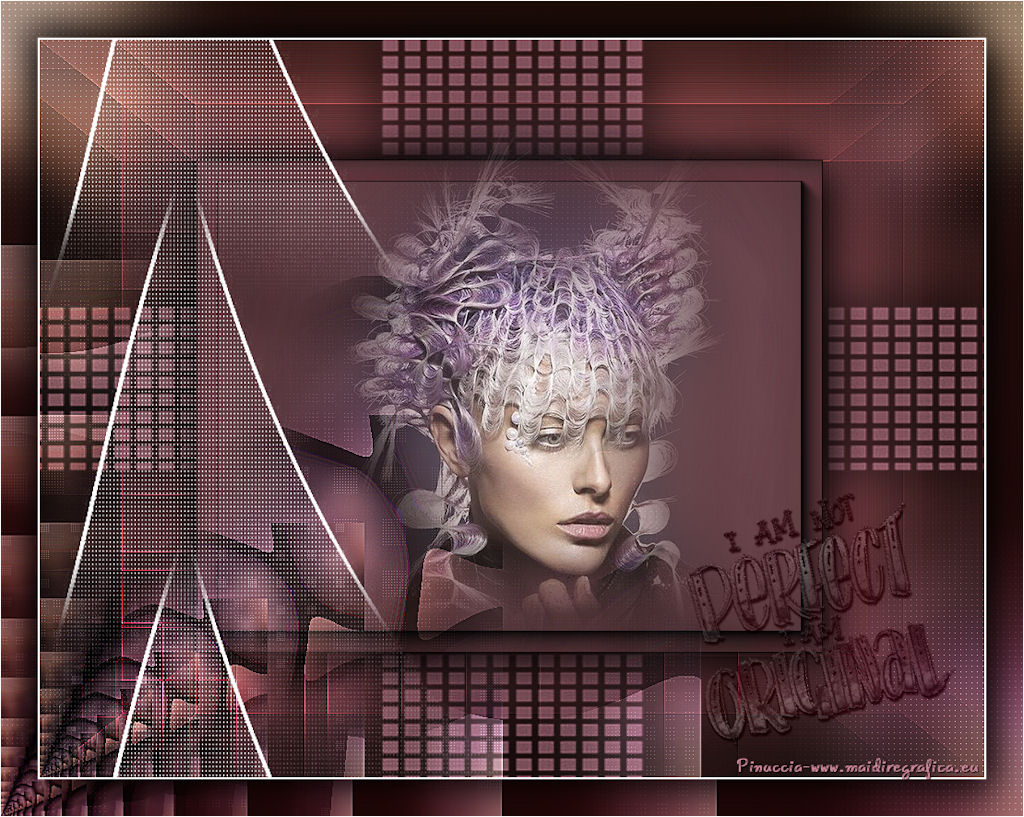
Here you find the original of this tutorial:

This tutorial was created with PSPX8 and translated with PSPX3, but it can also be made using other versions of PSP.
Since version PSP X4, Image>Mirror was replaced with Image>Flip Horizontal,
and Image>Flip with Image>Flip Vertical, there are some variables.
In versions X5 and X6, the functions have been improved by making available the Objects menu.
In the latest version X7 command Image>Mirror and Image>Flip returned, but with new differences.
See my schedule here
French translation here
your versions ici
For this tutorial, you will need:
Material here
For the tubes and the masks, thanks
Yoka-MISTED-InterestingHair-17415
Texto:Yoka-TEXT-IAmNot-17418
Narah_mask_0658 et Narah_Mask_1027
(you find here the links to the material authors' sites)
Plugins
consult, if necessary, my filter section here
Toadies - What are you here
Filters Unlimited 2.0 here
Graphics Plus - Button Beveler III ici
Nik Software - Color Efex Pro here
Carolaine and Sensibility - CS-LDots here
AAA Frames - Foto Frame here
Filters Toadies and Graphics Plus can be used alone or imported into Filters Unlimited.
(How do, you see here)
If a plugin supplied appears with this icon  it must necessarily be imported into Unlimited it must necessarily be imported into Unlimited

You can change Blend Modes according to your colors.
In the newest versions of PSP, you don't find the foreground/background gradient (Corel_06_029).
You can use the gradients of the older versions.
The Gradient of CorelX here
Open the masks in PSP and minimized them with the rest of the material.
1. Set your foreground color to #21110f.
and your background color to #c98598.
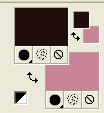
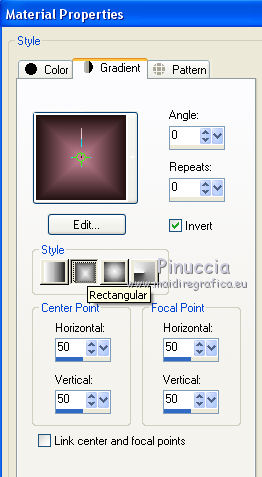
Set your foreground color to a Foreground/Background Gradient, style Rectangular.
2. Open a new transparent image 1024 x 800 pixels.
Flood Fill  the transparent image with your Gradient. the transparent image with your Gradient.
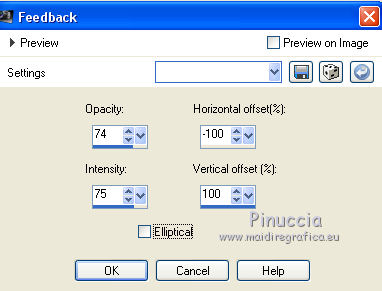
3. Effects>Reflection Effects>Feedback.
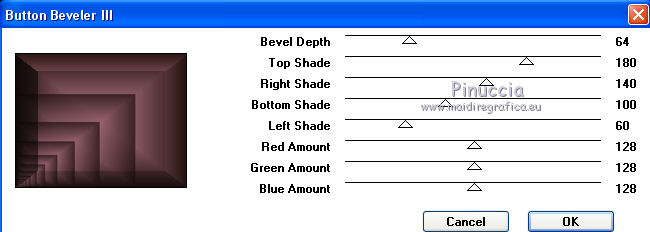
4. Effects>Plugins>Graphics Plus - Button Beveler III, default settings.
5. Effects>Plugins>Toadies - What are you.
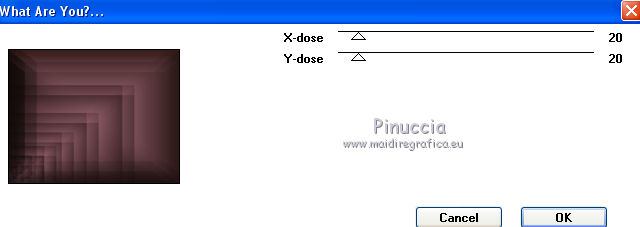
Effects>Edge Effects>Enhance More.
6. Selection Tool 
(no matter the type of selection, because with the custom selection your always get a rectangle)
clic on the Custom Selection 
and set the following settings.
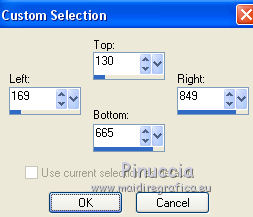
Selections>Promote Selection to Layer.
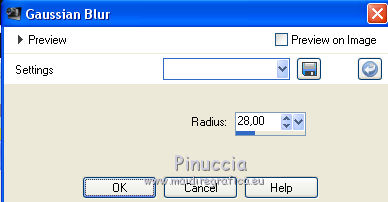
Adjust>Blur>Gaussian Blur - radius 28.
7. Effects>Plugins>AAA Frames - Foto Frame.
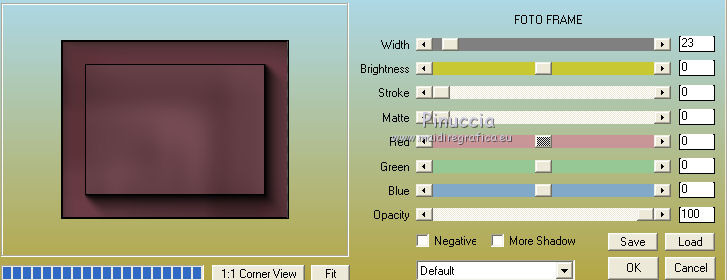
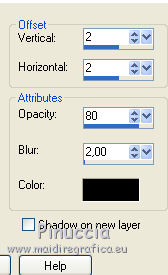
Effects>3D Effects>Drop Shadow, color #000000.
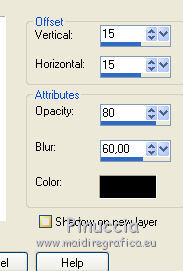
Repeat Drop Shadow, vertical and horizontal -15.
Selections>Select None.
8. Open the tube Yoka-MISTED-InterestingHair-17415 - Edit>Copy.
Go back to your work and go to Edit>Paste as new layer.
Place  rightly the tube. rightly the tube.
Adjust>Sharpness>Sharpen.
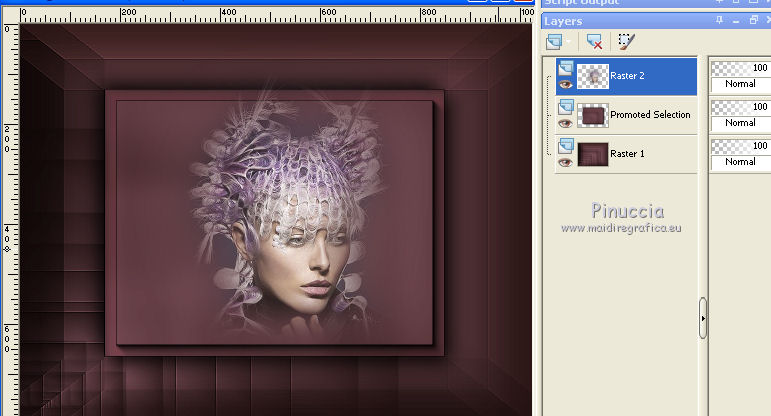
You should have this
9. Layers>New Raster Layer (raster 3).
Flood Fill  with your background color #c98598. with your background color #c98598.
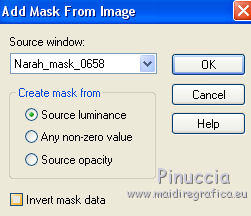
Layers>New Mask layer>From image
Open the menu under the source window and you'll see all the files open.
Select the mask Narah_mask_0658.
Adjust>Sharpness>Sharpen More
Layers>Merge>Merge Group.
10. Effects>Reflection Effects>Rotating Mirror.
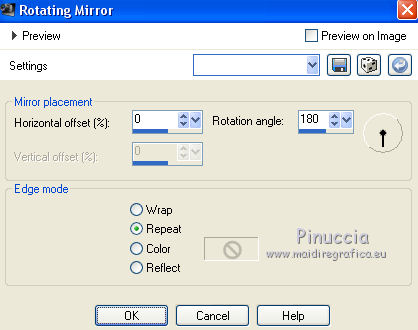
Effects>3D Effects>Drop Shadow, same settings.

Repeat Drop Shadow, vertical and horizontal -15.
Layers>Arrange>Move Down - 2 times.
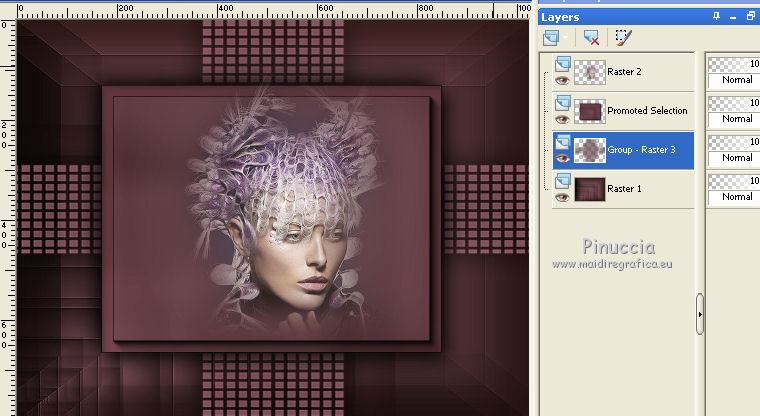
11. Activate the top layer, Raster 2.
Layers>New Raster Layer.
Set your foreground color to white #ffffff.
Flood Fill  the layer with color #ffffff. the layer with color #ffffff.
Layers>New Mask layer>From image
Open the menu under the source window and select the mask Narah_mask_1027.
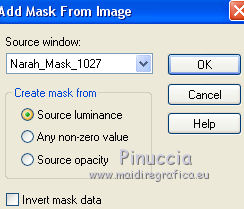
Adjust>Sharpness>Sharpen More.
Layers>Merge>Merge Group.
12. Effects>Image Effects>Offset.
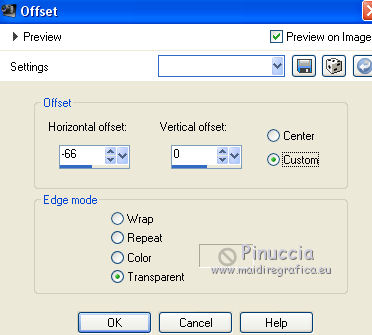
13. Activate the layer Raster 2.
Layers>Duplicate.
Effects>Image Effects>Seamless Tiling, default settings.

Adjust>Blur>Gaussian Blur - radius 28.

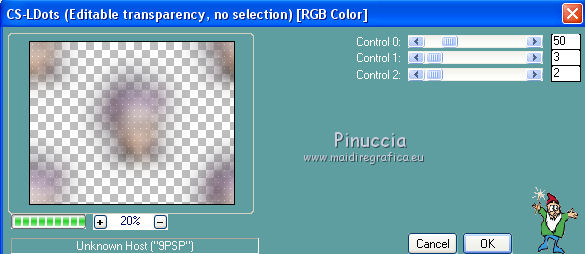
14. Effects>Plugins>Carolaine and Sensibility - CS-LDots, default settings.
15. Effects>Reflection Effects>Feedback.

16. Edit>Copy.
Edit>Paste as new image.
Minimize this image; you'll use it later for the final bord.
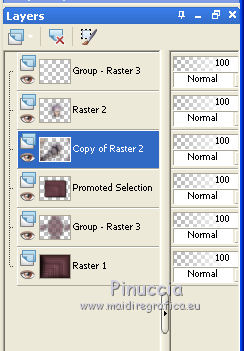
Go back to your work, on the layer Copy of Raster 2.
Layers>Arrange>Move Down.
Adjust>Sharpness>Sharpen More.
17. Activate the layer Raster 2.
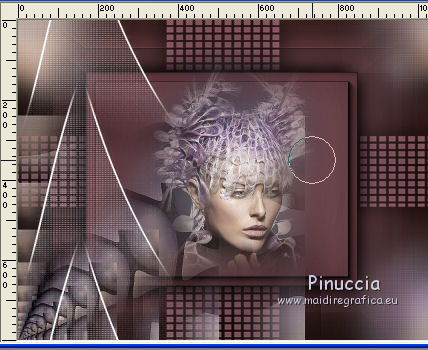
Activate the Eraser Tool  , size 100, , size 100,
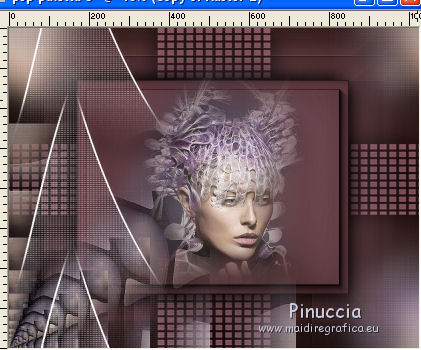
and erase the lateral effect on the face
18. Activate the layer Raster 1.
Layers>Duplicate.
Effects>Plugins>Nik Software - Color Efex Pro - Bi-Color User Defined.
(use contrasting colors; for me upper color #545923, lower color #7b1f2a).
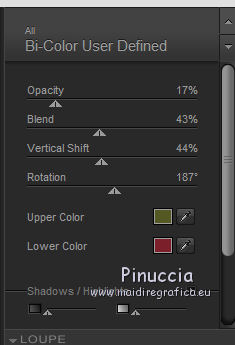
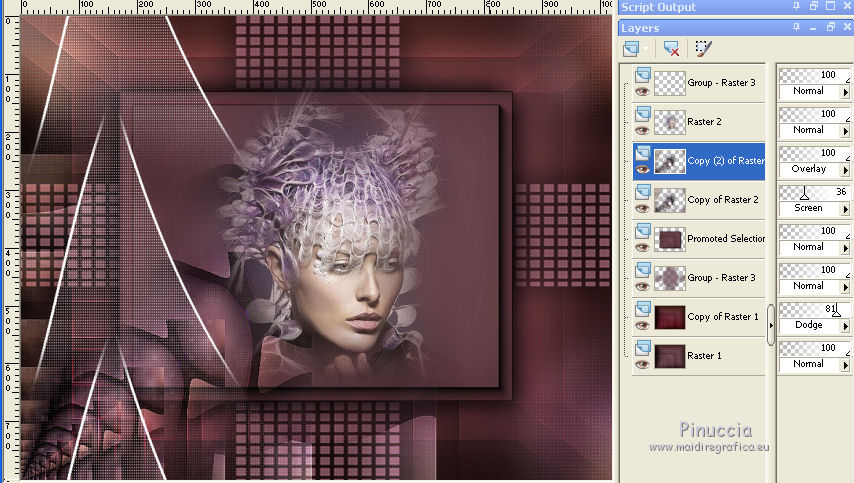
Change the Blend Mode of this layer to Dodge and reduce the opacity to 81%.
19. Activate the layer Copy of Raster 2.
Change the Blend Mode of this layer to Screen and reduce the opacity to 36%.
Layers>Duplicate.
Change the Blend Mode of this layer to Overlay, opacity 100.
20. Image>Add borders, 2 pixels, symmetric, color #ffffff.
Selections>Select All.
Image>Add borders, 40 pixels, symmetric, color #c98598 (or at your choice).
Selections>Invert.
Set again your foreground color to color (#21110f) and to Gradient as step 1.
 
Flood Fill  the selection with your Gradient. the selection with your Gradient.
Selections>Promote Selection to Layer.
21. Activate the image minimized at step 16.
Edit>Copy.
Go back to your work and go to Edit>Paste into Selection.
Adjust>Sharpness>Sharpen More.
22. Effects>Plugins>Nik Software - Color Efex Pro - Bi-Color User Defined, same settings.
Selections>Invert.
Effects>3D Effects>Drop Shadow, same settings.

Repeat Drop Shadow, vertical and horizontal -15.
Selections>Select None.
23. Open Yoka-TEXT-IAmNot-17418 - Edit>Copy.
Go back to your work and go to Edit>Paste as new layer.
Move  the texte at the bottom right. the texte at the bottom right.
Change the Blend Mode of this layer to Luminance (legacy), or as you like better.
Effects>3D Effects>Drop Shadow, color #000000.
24. Image>Add borders, 1 pixel, symmetric, color #ffffff.
Sign your work.
Image>Resize, 1024 pixels width, resize all layers checked.
little note about the watermark:
I don't ask to put watermark on the versions made by my translations.
But if you decide to use the watermark supplied by the author, I would appreciate that my work as translator was also respected.
For that, I added my watermark to the material (in english and in french).

25. Save as jpg.
Your versions here

If you have problems or doubts, or you find a not worked link, or only for tell me that you enjoyed this tutorial, write to me.
My mail is in the menu on the top of the page.
8 May 2018
|
 ENGLISH VERSION

 ENGLISH VERSION
