|
TOP CARINE
 ENGLISH VERSION ENGLISH VERSION
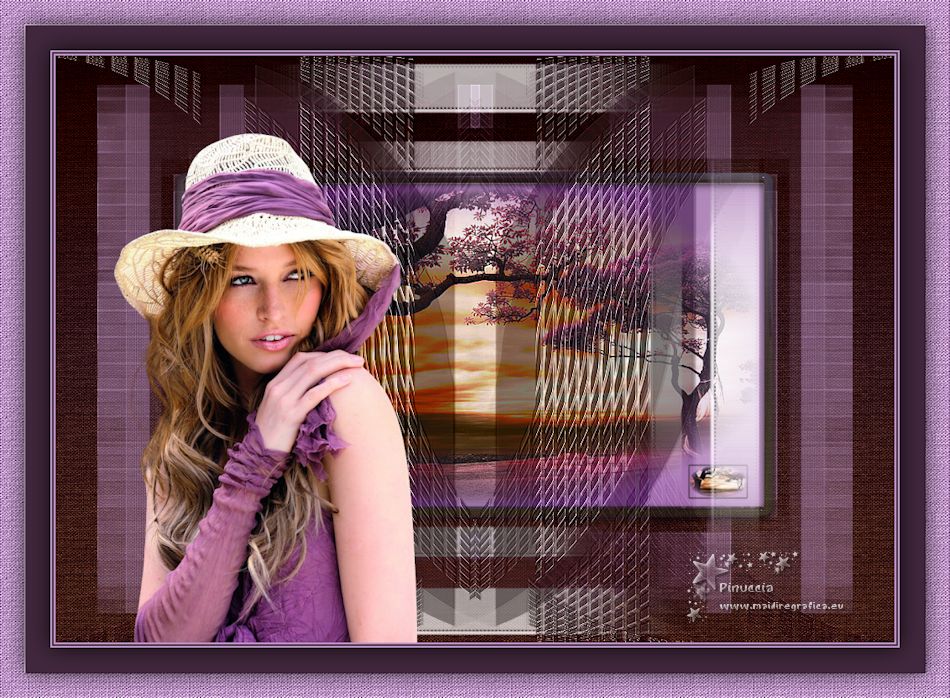
Thanks Lica Cida for your invitation to translate your tutorial

This tutorial was created with PSPX8 and translated with PSPX3, but it can also be made using other versions of PSP.
Since version PSP X4, Image>Mirror was replaced with Image>Flip Horizontal,
and Image>Flip with Image>Flip Vertical, there are some variables.
In versions X5 and X6, the functions have been improved by making available the Objects menu.
In the latest version X7 command Image>Mirror and Image>Flip returned, but with new differences.
See my schedule here
French translation here
your versions ici
For this tutorial, you will need:
Material here
Thanks: for the tubes: Maryse (MR_Lauren) and Syl (SvB Natuur)
For the masks Beatrice (Mask_GB_128) and Narah (Narah_mask_0658).
The rest of the material is by Lica Cida.
(you find here the links to the material authors' sites)
Plugins
consult, if necessary, my filter section here
Filters Unlimited 2.0 here
Alien Skin Eye Candy 5 Impact - Glass here
Nik Software Color Efex Pro here
FM Tile Tools - Blend Emboss here
AAA Filters - Custom here

You can change Blend Modes according to your colors.
In the newest versions of PSP, you don't find the foreground/background gradient (Corel_06_029).
You can use the gradients of the older versions.
The Gradient of CorelX here
Copy the preset  in the folder of the plugins Alien Skin Eye Candy 5 Impact>Settings>Glass in the folder of the plugins Alien Skin Eye Candy 5 Impact>Settings>Glass
One or two clic on the file (it depends by your settings), automatically the preset will be copied in the right folder.
why one or two clic see here
Copy the preset Emboss 3 in the Presets Folder.
Open the masks in PSP and minimize them with the rest of the material.
1. Set your foreground color to #bf96c8,
and your background color to #41273d.
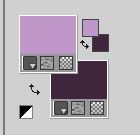
Set your foreground color to a Foreground/Background Gradient, style Linear.
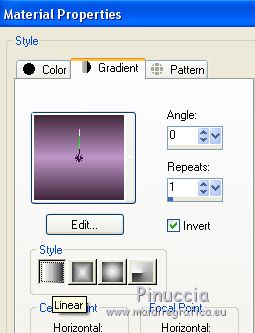
Open a new transparent image 1000 x 700 pixels.
Flood Fill  the transparent image with your Gradient. the transparent image with your Gradient.
2. Selections>Select All.
Open the tube MR_Lauren, erase the watermark and go to Edit>Copy.
Minimize the tube.
Go back to your work and go to Edit>Paste into Selection.
Selections>Select None.
Effects>Image Effects>Seamless Tiling, default settings

3. Adjust>Blur>Radial Blur.
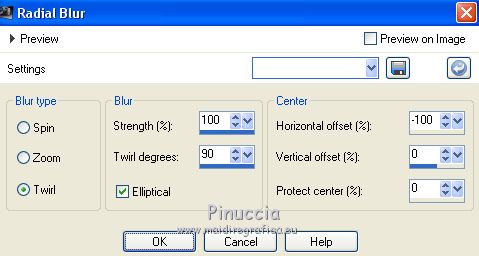
Layers>Duplicate.
Image>Mirror.
Change the Blend Mode of this layer to Overlay
and reduce the opacity to 50%.
Layers>Merge>Merge Down.
Adjust>Add/Remove Noise/JPEG Artefact Removal.
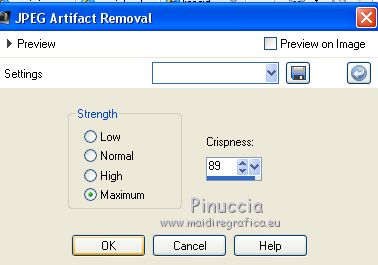
Effects>Plugins>FM Tile Tools - Blend Emboss, default settings.

4. Layers>New Raster Layer.
Flood Fill  with your background color #41273d. with your background color #41273d.
Effects>Plugins>Filters Unlimited 2.0 - Paper Textures - Canvas,Fine.
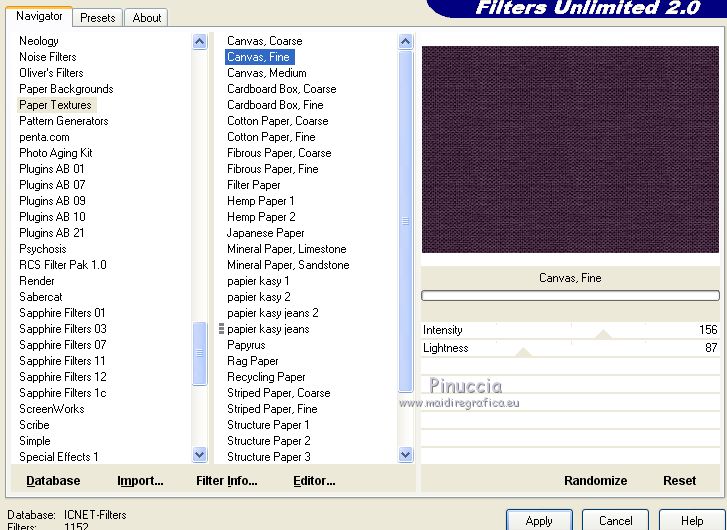
5. Set your foreground color to Color.
Layers>New Raster Layer.
Flood Fill  with your foreground color #bf96c8. with your foreground color #bf96c8.
Layers>New Mask layer>From image
Open the menu under the source window and you'll see all the files open.
Select the mask Mask_GB_128.
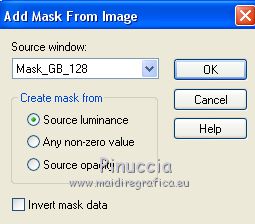
Layers>Merge>Merge Group.
Effects>Plugins>Mura's Seamless - Emboss at alpha, default settings.
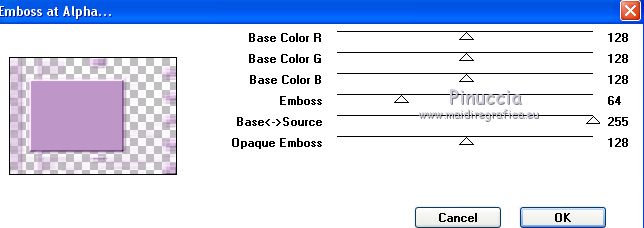
6. Effects>Reflection Effects>Rotating Mirror.
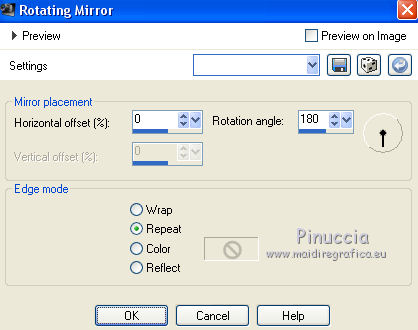
Activate your Sélection Tool  , rectangle, , rectangle,
and select the square of the mask
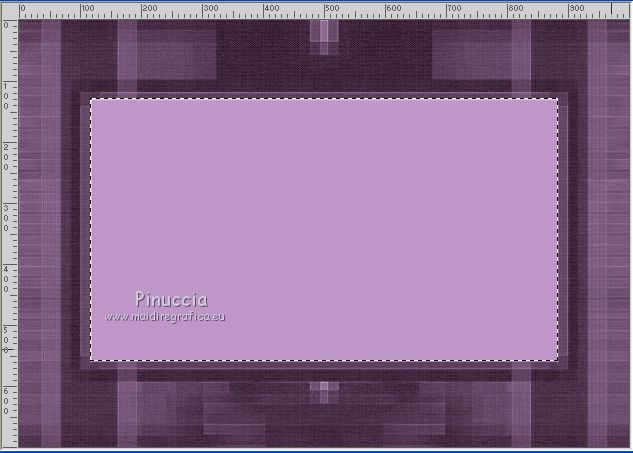
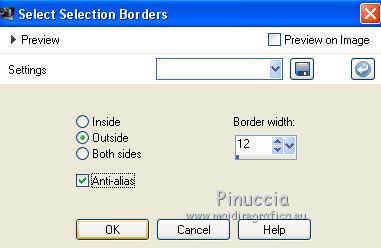
7. Selections>Modify>Select Selection Borders.
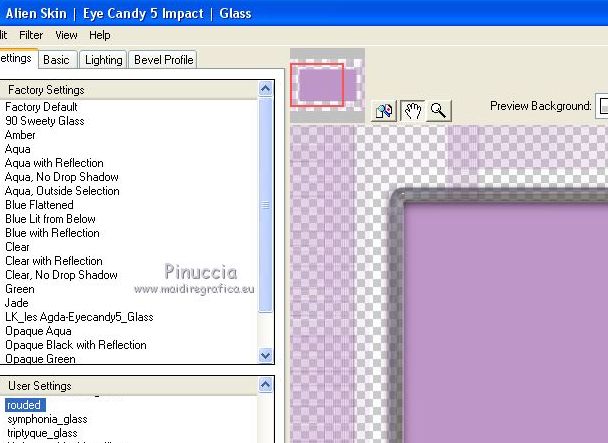
8. Effects>Plugins>Alien Skin Eye Candy 5 Impact - Glass
select the preset rounded and ok.
Selections>Select None.
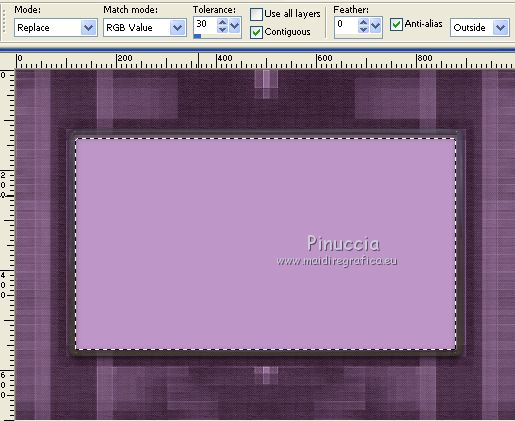
Activate your Magic Wand Tool 
and click in the square to select it
I setted Tolerance to 30
9. Layers>New Raster Layer.
Open the tube SvB Natuur 1 and go to Edit>Copy.
Go back to your work and go to Edit>Paste into Selection.
Selections>Select None.
Adjust>Sharpness>Sharpen More.
Optional: Effects>Plugins>AAA Filters - Custom - click on landscape and ok.
Layers>Merge>Merge Down.
Layers>Duplicate.
Image>Resize, to 10%, resize all layers not checked.
Effects>Image Effects>Offset.
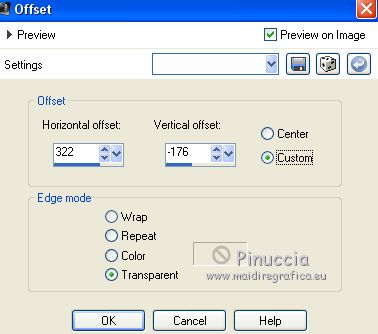
Layers>Merge>Merge Down.
10. Open the tube deco1lc and go to Edit>Copy.
Go back to your work and go to Edit>Paste as new layer.
Layers>Duplicate.
Image>Free Rotate - 90 degrees to left.

Layers>Merge>Merge Down.
Keep the Blend Mode to Screen or change according to your colors.
11. Layers>New Raster Layer.
Flood Fill  with your background color #41273d. with your background color #41273d.
Layers>New Mask layer>From image
Open the menu under the source window
and select the mask Narah_mask_0658.
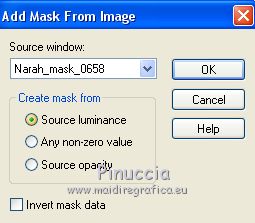
Layers>Merge>Merge Group.
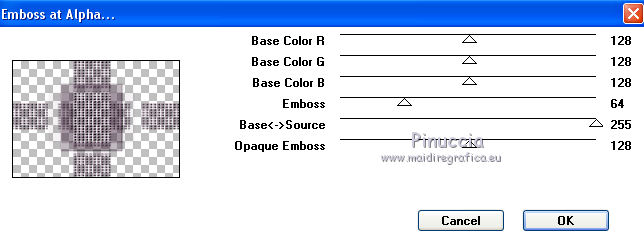
Effects>Plugins>Mura's Seamless - Emboss at alpha, default settings.
12. Effects>Distortion Effects>Pinch

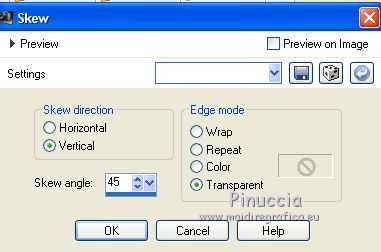
13. Effects>Geometric Effects>Skew.
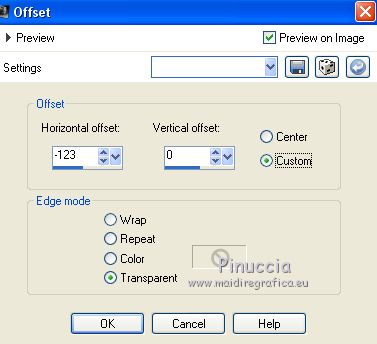
Effects>Image Effects>Offset.
Layers>Duplicate.
Image>Mirror.
Layers>Merge>Merge Down.
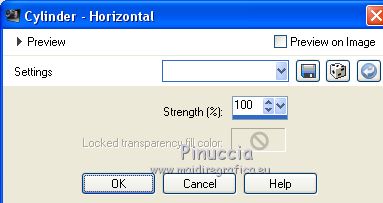
14. Effects>Geometric Effects>Cylinder horizontal
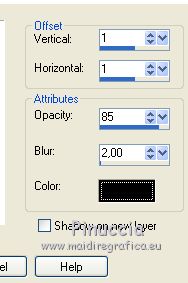
Effects>3D Effects>Drop Shadow, color #000000.
Effects>Edge Effects>Enhance.
Change the Blend Mode of this layer to Soft Light, or other.
Layers>Duplicate.
Image>Flip.
Change the Blend Mode of this layer to Luminance (legacy) or other.
15. Activate the layer Raster 2.
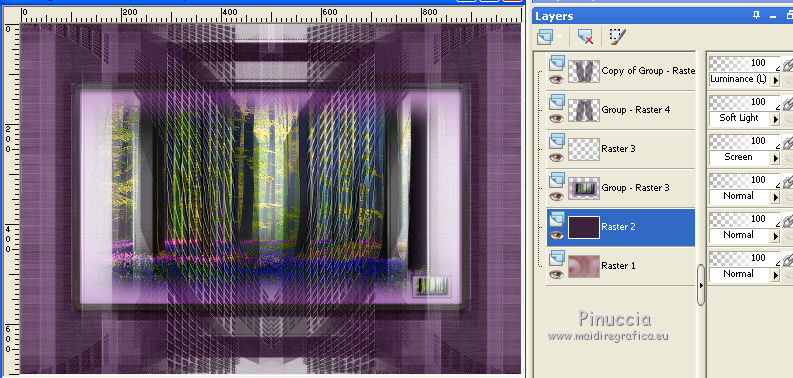
Layers>Duplicate.
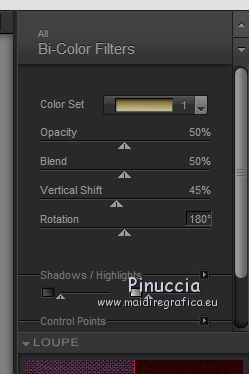
Effects>Plugins>Nik Software - Color Efex Pro - Color filters
to the right Color set Brown 1.
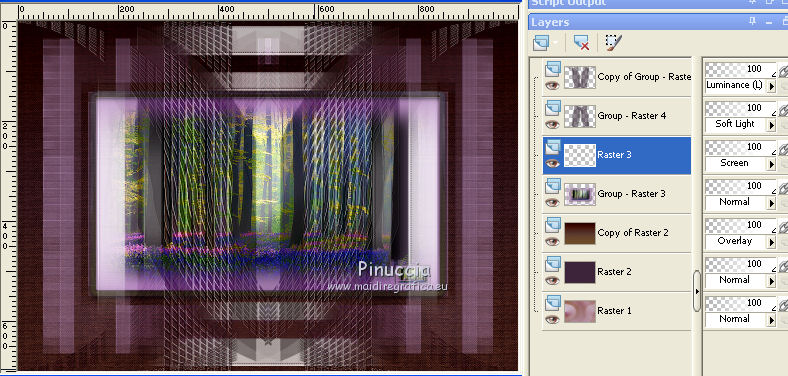
16. Activate the layer Group-Raster 3.
Image>Resize, to 90%, resize all layers not checked.
Activate the layer Raster 3.
Edit>Repeat Resize.
You should have this
Set the Blend mode and opacity of the layer according to your work.
19. Activate the top layer.
Activate again the tube MR_Lauren and go to Edit>Copy.
Go back to your work and go to Edit>Paste as new layer.
Move  the tube to the left side. the tube to the left side.
Layers>Merge>Merge All.
20. Image>Add borders, 2 pixels, symmetric, foreground color #bf96c8.
Image>Add borders, 2 pixels, symmetric, background color #41273d.
Image>Add borders, 2 pixels, symmetric, foreground color #bf96c8.
Selections>Select All.
21. Image>Add borders, 30 pixels, symmetric, background color #41273d.
Effects>3D Effects>Drop Shadow, color #000000.

Selections>Select All.
22. Image>Add borders, 30 pixels, symmetric, foreground color #bf96c8.
Sélections>Inverser.
Effects>Plugins>Filters Unlimited 2.0 - Paper Textures - Canvas,Fine.
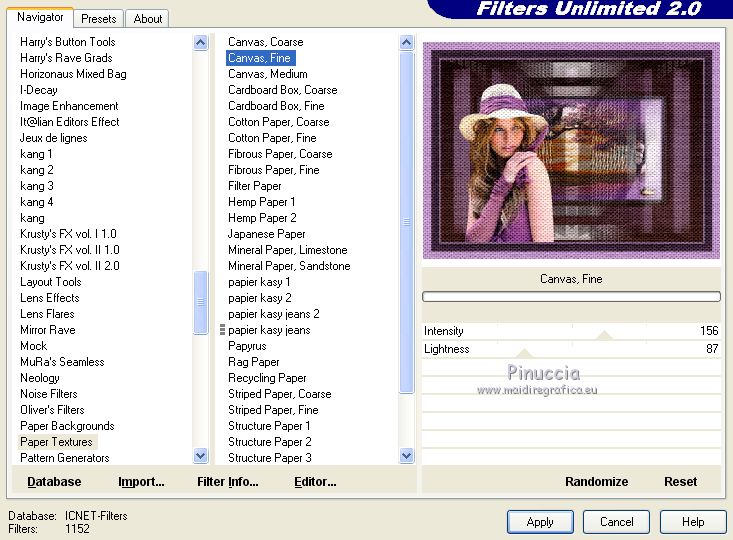
Effects>User Defined Filter - select the preset Emboss 3 and ok.

Selections>Invert.
Effects>3D Effects>Drop Shadow, same settings.

Selections>Select None.
23. Sign your work on a new layer.
little note about the watermark:
I don't ask to put watermark on the versions made by my translations.
But if you decide to use the watermark supplied by the author, I would appreciate that my work as translator was also respected.
For that, I added my watermark to the material (english and french).
24. Image>Resize, 1000 pixels width, resize all layers checked.
Layers>Merge>Merge All and save as jpg.
The tubes of this version are by Syl and Sonia
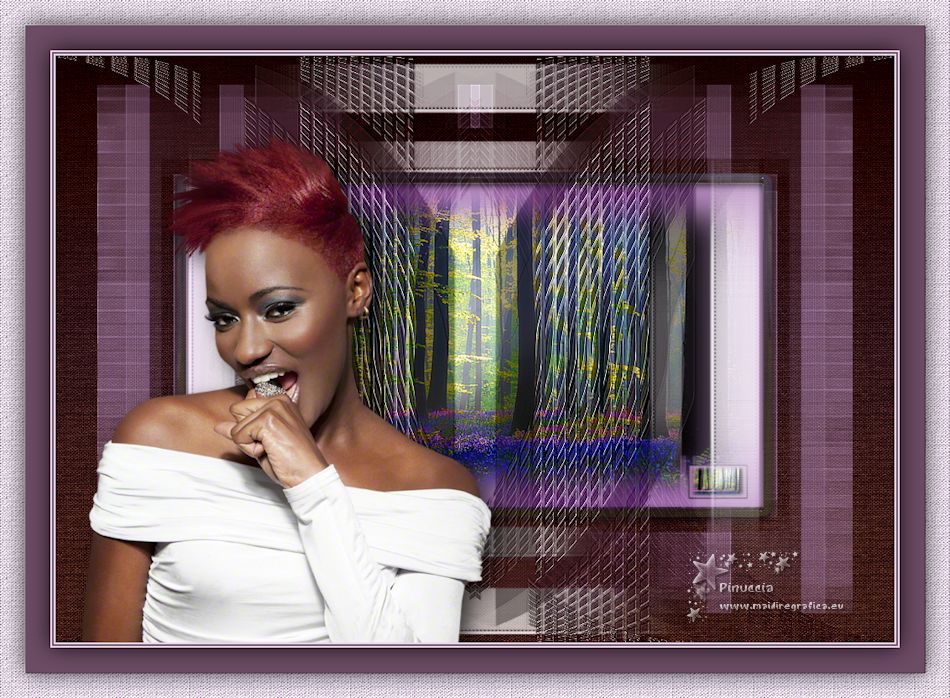
Your versions here

If you have problems or doubts, or you find a not worked link, or only for tell me that you enjoyed this tutorial, write to me.
7 March 2019
|
 ENGLISH VERSION

 ENGLISH VERSION
