|
TAG ESTRELLA
 ENGLISH VERSION ENGLISH VERSION
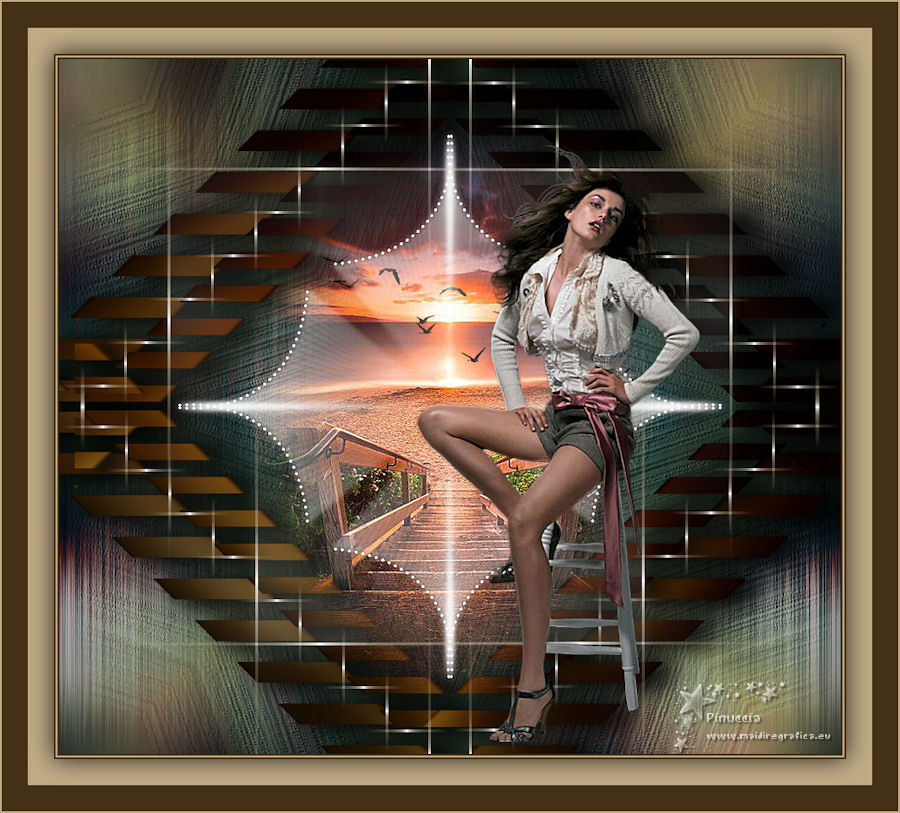
Thanks Lica Cida for your invitation to translate your tutorial

This tutorial was created with PSPX8 and translated with PSPX3, but it can also be made using other versions of PSP.
Since version PSP X4, Image>Mirror was replaced with Image>Flip Horizontal,
and Image>Flip with Image>Flip Vertical, there are some variables.
In versions X5 and X6, the functions have been improved by making available the Objects menu.
In the latest version X7 command Image>Mirror and Image>Flip returned, but with new differences.
See my schedule here
French translation here
your versions ici
For this tutorial, you will need:
Material here
For the tubes thanks Malacka (malackatube u0385) and Syl (SvB Zee 47 misted)
The rest of the material is by Lica Cida.
(you find here the links to the material authors' sites)
Plugins
consult, if necessary, my filter section here
Filters Unlimited 2.0 here
Alien Skin Eye Candy 5 Impact - Motion Trail here
Nik Software Color Efex Pro here
&<Bkg Kaleidoscope> - Kaleidoscope 8 (to import in Unlimited) here
Mehdi - Weaver here
DSB Flux - Blast here

You can change Blend Modes according to your colors.
In the newest versions of PSP, you don't find the foreground/background gradient (Corel_06_029).
You can use the gradients of the older versions.
The Gradient of CorelX here
Copy the preset  in the folder of the plugins Alien Skin Eye Candy 5 Impact>Settings>Glass in the folder of the plugins Alien Skin Eye Candy 5 Impact>Settings>Glass
One or two clic on the file (it depends by your settings), automatically the preset will be copied in the right folder.
why one or two clic see here
Copy the preset Emboss 3 in the Presets Folder.
1. Set your foreground color to #443016,
and your background color to #bfaa85.

Set your foreground color to a Foreground/Background Gradient, style Linear.
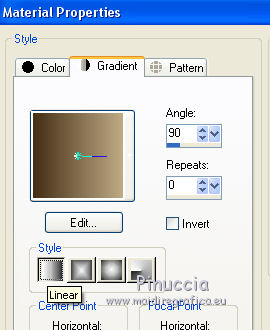
Open a new transparent image 900 x 800 pixels.
2. Selection Tool 
(no matter the type of selection, because with the custom selection your always get a rectangle)
clic on the Custom Selection 
and set the following settings.
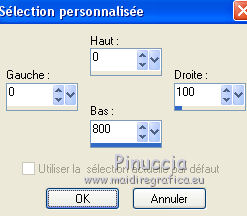
Flood Fill  the selection with your gradient. the selection with your gradient.
3. Open the tube malackatube u0384, erase the watermark and go to Edit>Copy.
Minimize the tube.
Go back to your work and go to Edit>Paste into Selection.
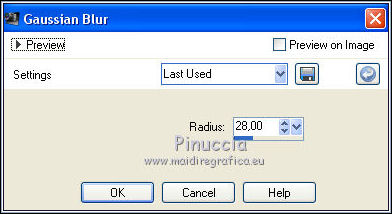
4. Adjust>Blur>Gaussian Blur - radius 28.
5. Effects>3D Effects>Inner Bevel.
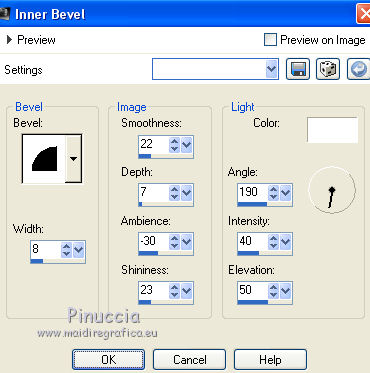
Selections>Select None.
6. Activate the Eraser Tool  with these settings. with these settings.

Use the tool by sliding the mouse over the strip, as below
 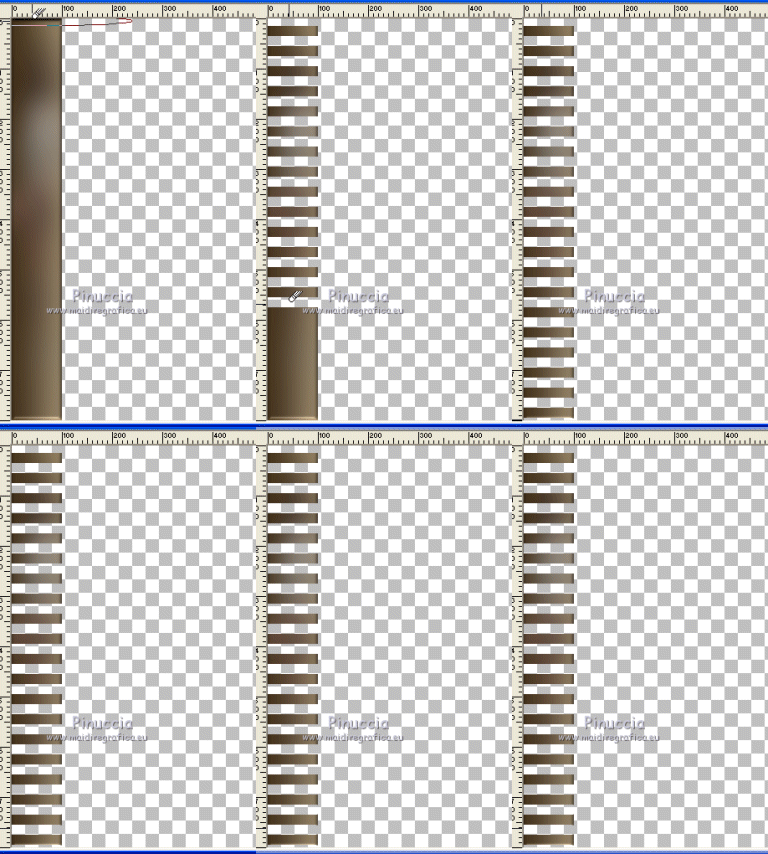
7. Effects>Geometric Effects>Skew
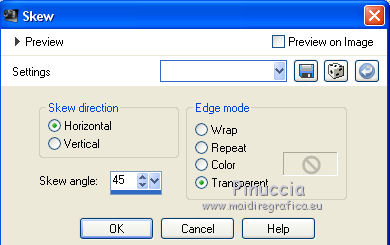
Layers>Duplicate.
Image>Mirror.
Layers>Merge>Merge Down.
Layers>Duplicate.
Image>Flip.
Layers>Merge>Merge Down.
Image>Resize, to 120%, resize all layers not checked.
8. Layers>New Raster Layer.
Layers>Arrange>Send to Bottom.
Change the settings of your gradient, style Sunburst
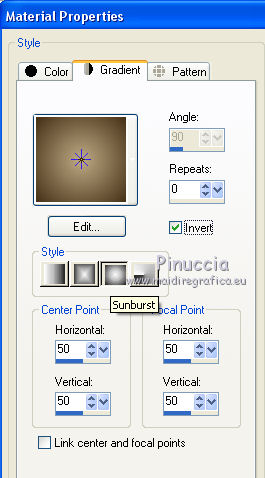
Flood Fill  the layer with your Gradient. the layer with your Gradient.
9. Selections>Select All.
Edit>Paste into Selection (the tube malackatube u0385 is still in memory).
Selections>Select None.
Effects>Image Effects>Seamless Tiling, default settings.

Adjust>Blur>Gaussian Blur - radius 28.

10. Effects>Plugins>DSB Flux - Blast.
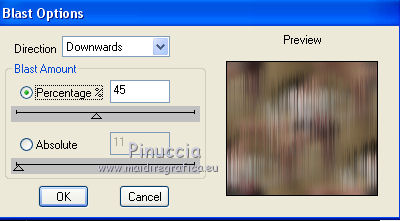
An effect with the same name is also found in the VM Toolbox filter.
The first of the filters that is added in the File Locations prevents the use of the effect contained in the second filter.
Therefore, if you don't find the effect in DSB Flux, you need to remove the VM Toolbox filter from the File Locations
11. Activate the layer Raster 1.
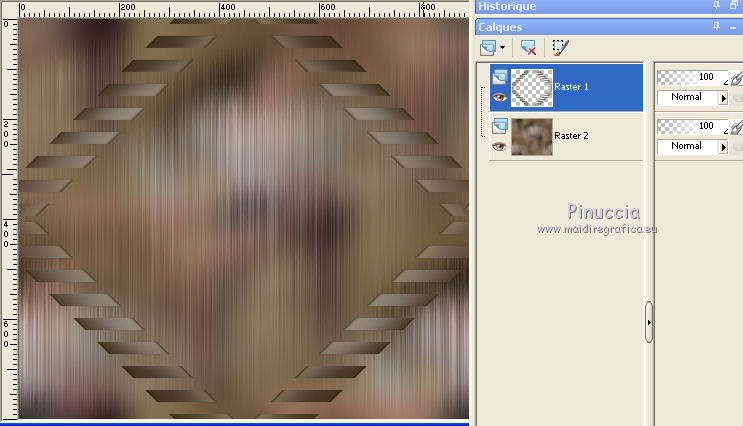
Layers>New Raster Layer.
Custom Selection 
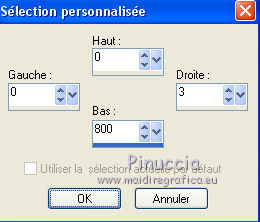
Set your foreground color to white #ffffff.
Flood Fill  the selection with color white #ffffff the selection with color white #ffffff
(zoom in to see better)
Selections>Select None.
13. Effects>Geometric Effects>Skew, same settings.

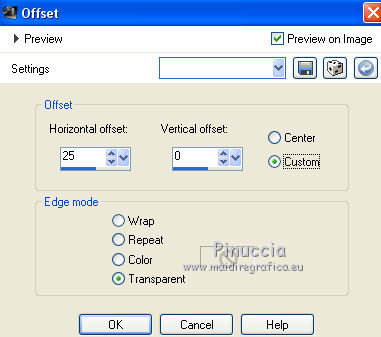
Effects>Image Effects>Offset.
Layers>Duplicate.
Image>Mirror.
Layers>Merge>Merge Down.
Layers>Duplicate.
Image>Flip.
Layers>Merge>Merge Down.
Layers>Duplicate.
15. Activate the original layer Raster 3.
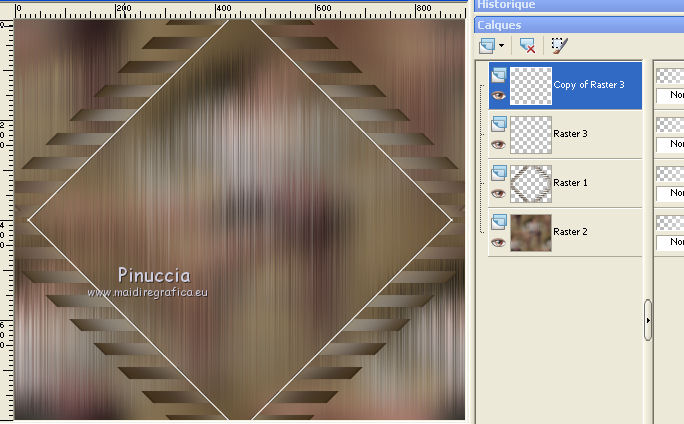
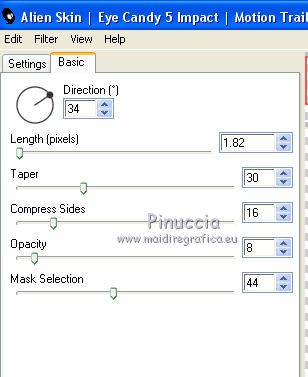
Effects>Plugins>Alien Skin Eye Candy 5 Impact - Motion Trail.
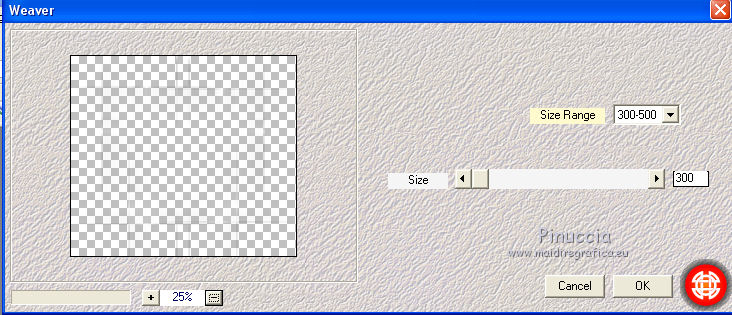
16. Effects>Plugins>Mehdi - Weaver.
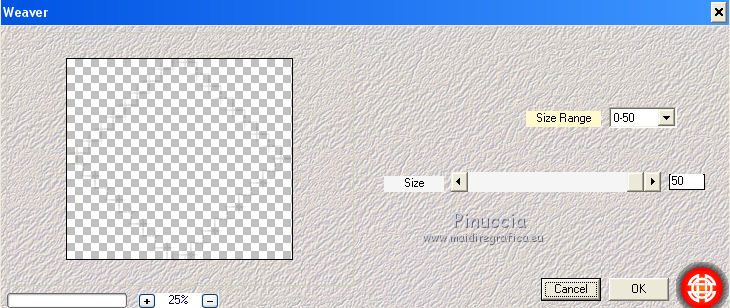
17. Activate the layer Copy of Raster 3.
Effects>Plugins>Mehdi - Weaver.
18. Activate the bottom layer Raster 2.
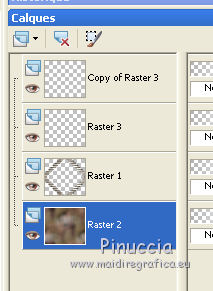
Layers>Duplicate.
Effects>Plugins>Nik Software - Color Efex.
Bi-color filters - to the right Color set Cool/Warm 1.
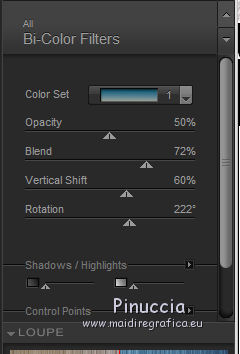
If you have difficulty to use the cursor to set the settings, you can use the keyboard arrows.
19. Effects>Plugins>Filters Unlimited 2.0 - &<Bkg Kaleidoscope>
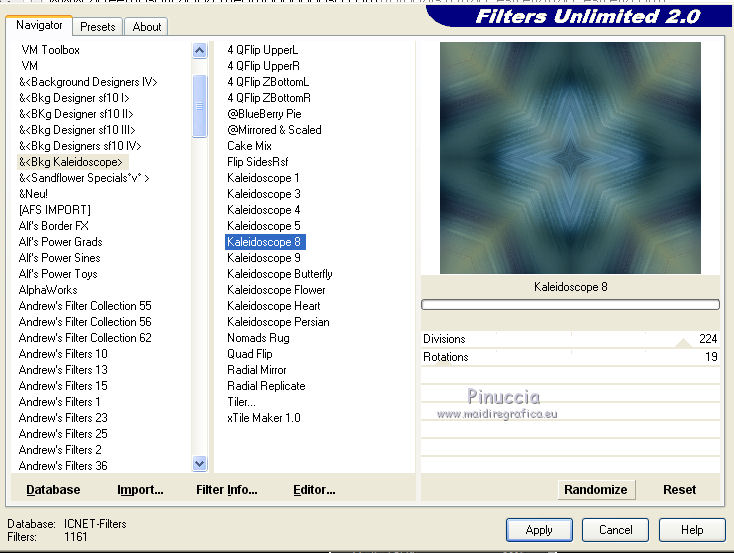
Effects>User defined Filter - select the preset Emboss 3 and ok.

Change the Blend Mode of this layer to Overlay.
20. Activate the layer Raster 1.
Layers>Duplicate.
Effects>Plugins>Nik Software - Color Efex.
Bi-color filters - to the right Colorset Brown 1.
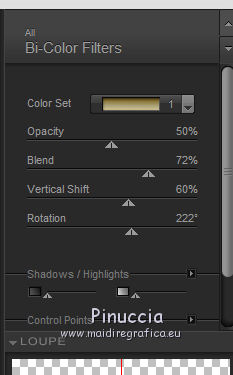
Change the Blend Mode of this layer to Multiply.
Layers>Duplicate.
Image>Resize, to 80%, resize all layers not checked.
Layers>Duplicate.
Change the Blend Mode of the layer below Copy (2) of Raster 1 to Normal.
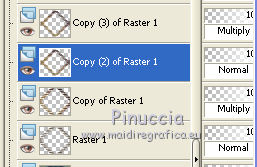
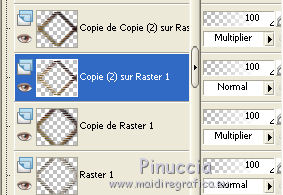
21. On the layers Copy of Raster 1 and Copy of Copy(2) of Raster 1 (the layers Multiply)
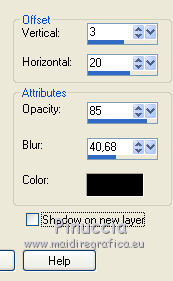
Effects>3D Effects>Drop Shadow, color #000000.
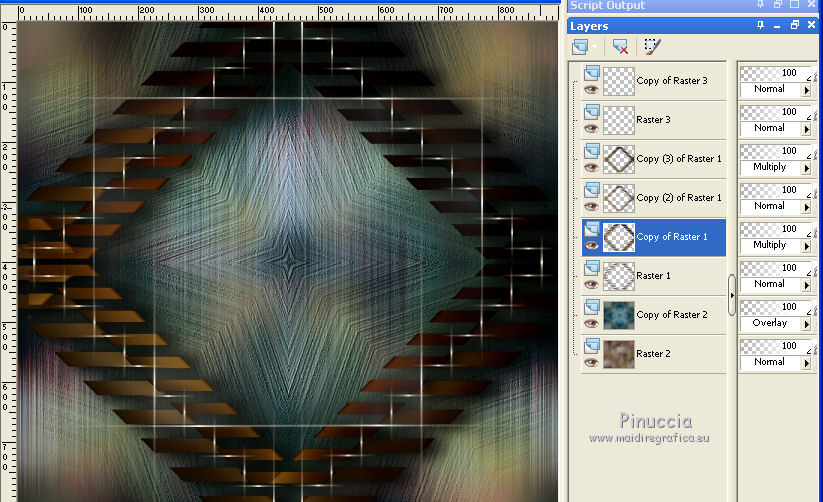
Here below your layers, opacity and Blend Mode - adapt as you like better.
22. Activate the layer copy of Copy(2) of Raster 1.
Open the tube SvB Zee 47 and go to Edit>Copy.
Go back to your work and go to Edit>Paste as new layer.
Adjust>Sharpness>Sharpen More.
22. Open the tube bird_brushes_II_by_lpdragonfly_5 and go to Edit>Copy.
Go back to your work and go to Edit>Paste as new layer.
Place  the tube as you like. the tube as you like.
23. Open the tube delicatemp and go to Edit>Copy.
Go back to your work and go to Edit>Paste as new layer.
24. Activate the top layer.
Activate again the tube malackatube u0385 and go to Edit>Copy.
Go back to your work and go to Edit>Paste as new layer.
Move  the tube to the right side. the tube to the right side.
Adjust>Sharpness>Sharpen More.
Layers>Merge>Merge All.
25. For the borders, set again your foreground color to #443016.

Image>Add borders, 2 pixels, symmetric, foreground color.
Image>Add borders, 2 pixels, symmetric, background color.
Image>Add borders, 2 pixels, symmetric, foreground color.
Selections>Select All.
Image>Add borders, 30 pixels, symmetric, background color.
Effects>3D Effects>Drop Shadow, color black.

Selections>Select None.
Image>Add borders, 30 pixels, symmetric, foreground color.
Image>Add borders, 2 pixels, symmetric, background color.
Image>Resize, 900 pixels width, resize all layers checked.
Sign your work on a new layer.
little note about the watermark:
I don't ask to put watermark on the versions made by my translations.
But if you decide to use the watermark supplied by the author, I would appreciate that my work as translator was also respected.
For that, I added my watermark to the material (english and french).
Layers>Merge>Merge All and save as jpg
The tube of this version is by Jeanne
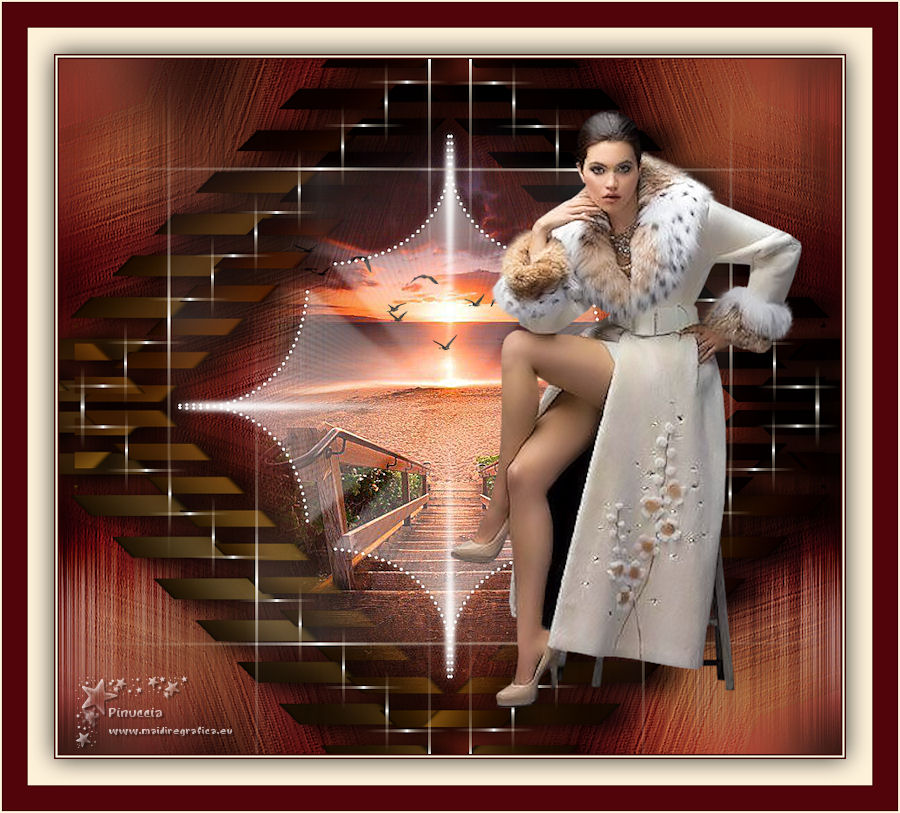
Your versions here

If you have problems or doubts, or you find a not worked link, or only for tell me that you enjoyed this tutorial, write to me.
31 March 2019
|
 ENGLISH VERSION

 ENGLISH VERSION
