|
TOP UNIQUE
 ENGLISH VERSION ENGLISH VERSION
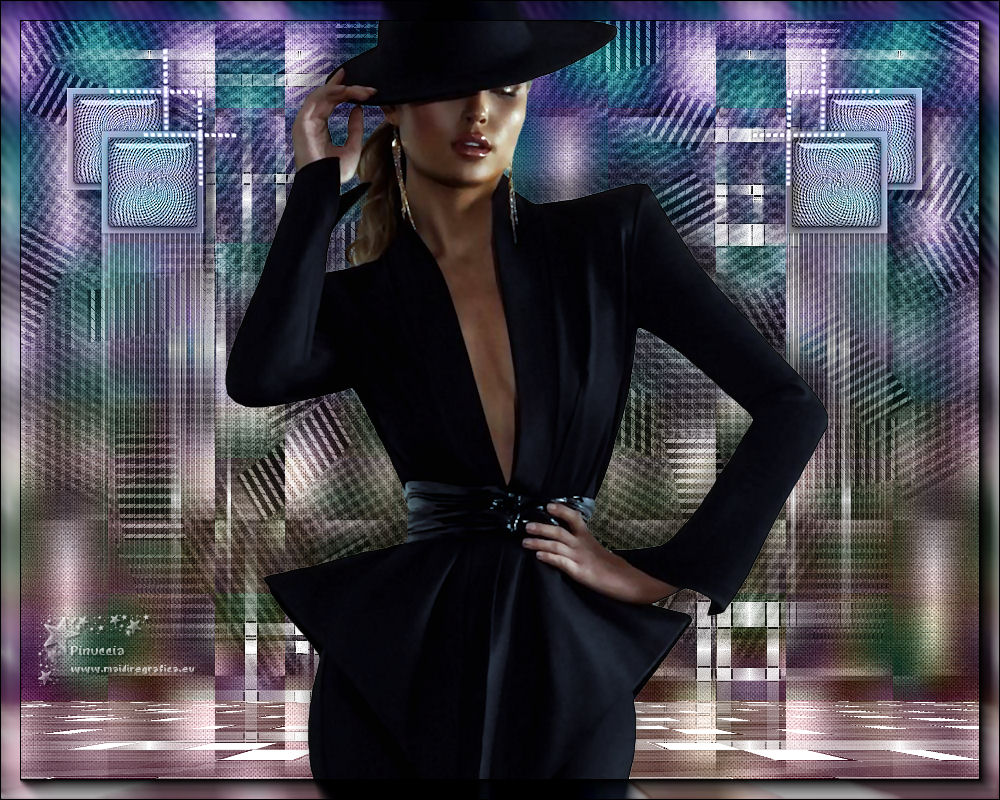
Thanks Lica Cida for your invitation to translate your tutorial

This tutorial was created with PSPX8 and translated with PSPX3, but it can also be made using other versions of PSP.
Since version PSP X4, Image>Mirror was replaced with Image>Flip Horizontal,
and Image>Flip with Image>Flip Vertical, there are some variables.
In versions X5 and X6, the functions have been improved by making available the Objects menu.
In the latest version X7 command Image>Mirror and Image>Flip returned, but with new differences.
See my schedule here
French translation here
your versions ici
For this tutorial, you will need:
Material here
Tube :SuizaBella_Ref_AG-00695.
Grafico: graficolc.
Deco: deco_mj http://www.butterfly.adv.br (with author's permission, pleas don't sharing)
Deco: decolc.
Back :backlc.
Mask:Mask_GB_119.
(you find here the links to the material authors' sites)
Plugins
consult, if necessary, my filter section here
Mura's Meister - Perspective Tiling here
Mura's Meister - Copies here
AAA Frames - Foto Frame here
Nik Software - Color Efex Pro here

You can change Blend Modes according to your colors.
The Gradient Landscape night, or Corel_06_013, is standard in PSP. If you don't find it in your PSP,
copy the supplied gradient in the Gradients Folder.
Copy the Preset Emboss 3 in the Presets Folder.
Open the Mask in PSP and minimize it with the rest of the material.
1. Open a new transparent image 1000 x 700 pixels.
Selections>Select All.
Open graficolc and go to Edit>Copy.
Go back to your work and go to Edit>Paste into Selection.
Selections>Select None.
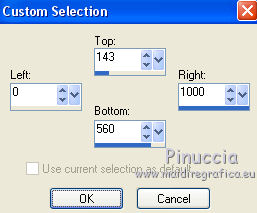
2. Selection Tool 
(no matter the type of selection, because with the custom selection your always get a rectangle)
clic on the Custom Selection 
and set the following settings.
3. Set your foreground color to white #ffffff.
Layers> New Raster Layer.
Flood>Fill  the layer with color white. the layer with color white.
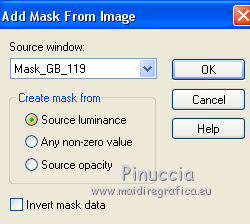
Layers>New Mask layer>From image
Open the menu under the source window and you'll see all the files open.
Select the mask Mask_GB_119.
Layers>Merge>Merge Group.
Selections>Select None.
Layers>Duplicate.
4. Activate the bottom layer.
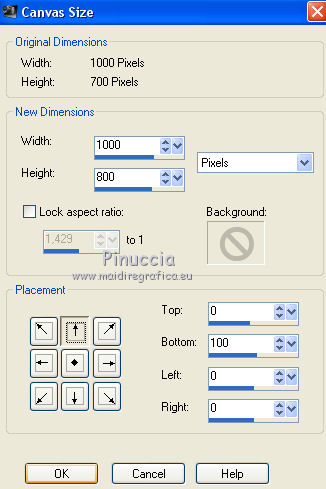
Image>Canvas Size - 1000 x 800 pixels.
5. Set your foreground color to Gradient and select the Gradient Corel_06_013, style Linear.
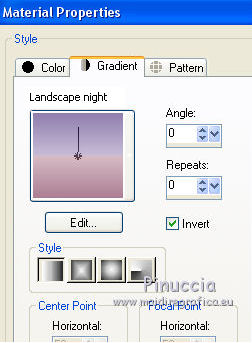
Layers>New Raster Layer.
Layers>Arrange>Send to Bottom.
Flood Fill  the layer with your Gradient. the layer with your Gradient.
6. Activate the top layer Copy of Group-Raster 2.
Effects>Distortion Effects>Pinch.

7. Effects>Plugins>Mura's Meister - Perspective Tiling.
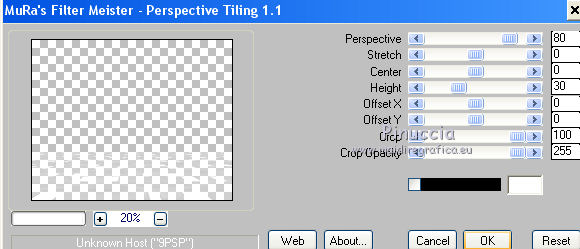
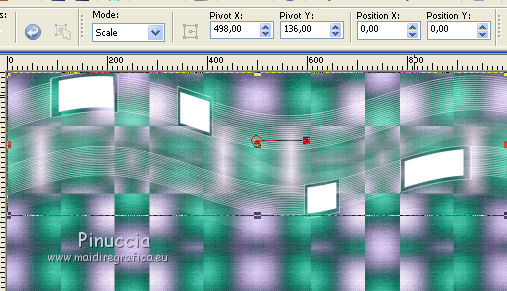
Activate your Pick Tool 
mode Scale 
push the top central node down until 700 pixels.
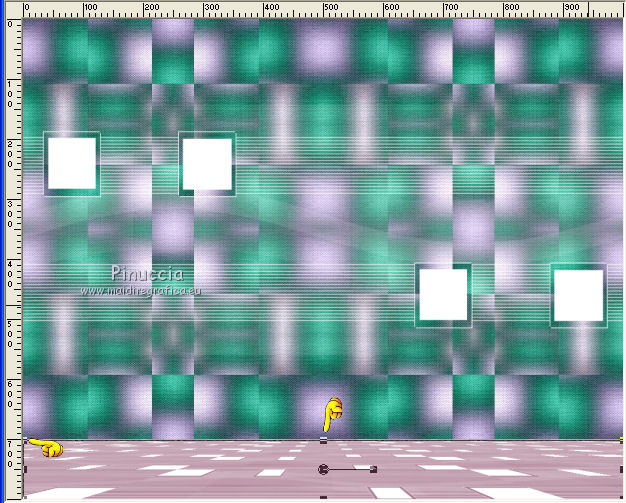
Effects>User Defined Effects - select the preset Emboss 3 and ok.

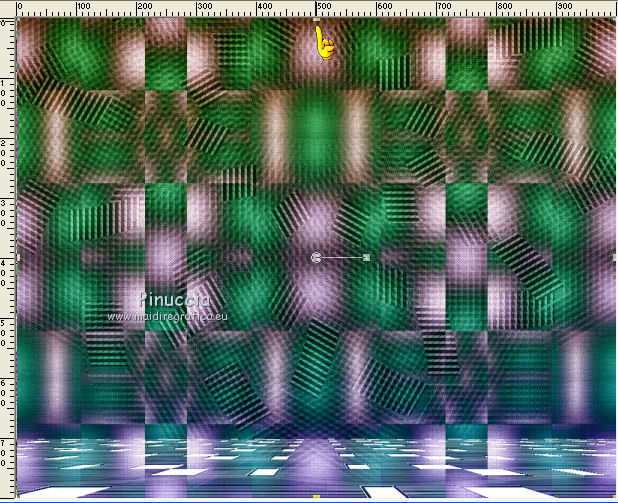
8. Activate layer above (Group-Raster 2).
Effects>Distortion Effects>Pinch, same settings.

9. Effects>Distortion Effects>Wave.
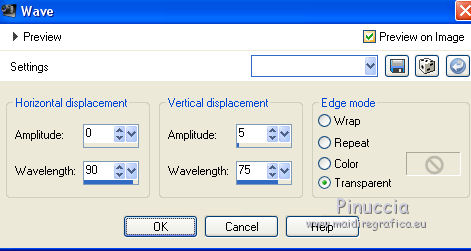
Move  / / the image up, the image up,
as below
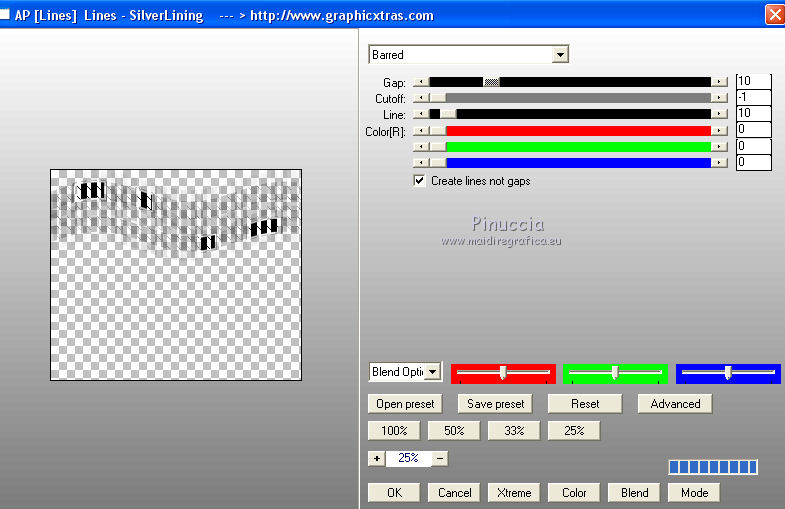
10. Effects>Plugins>AP Lines - Lines SilverLining.
11. Effects>Plugins>Mura's Meister - Copies.
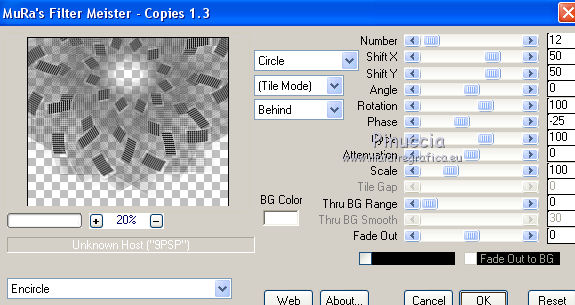
Change the Blend Mode of this layer to Soft Light.
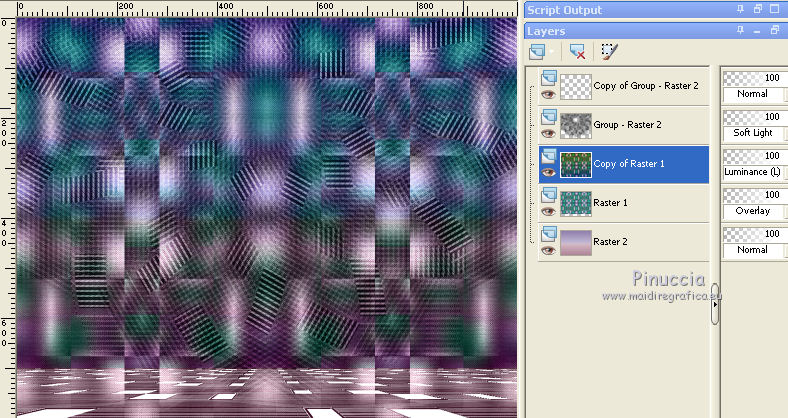
12. Activate the layer Raster 1.
Layers>Duplicate.
Effects>Plugins>Nik Sotware - Color Efex - Bi-Color User Defined.
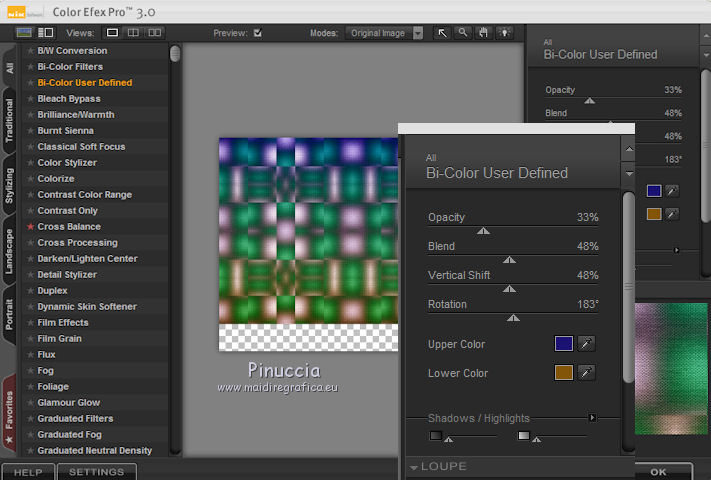
Image>Flip.
Activate your Pick tool 
and push the top central node up, until the border.
Change the Blend Mode of this layer to Luminance Legay
and the Blend Mode of the layer below of the original to Overlay
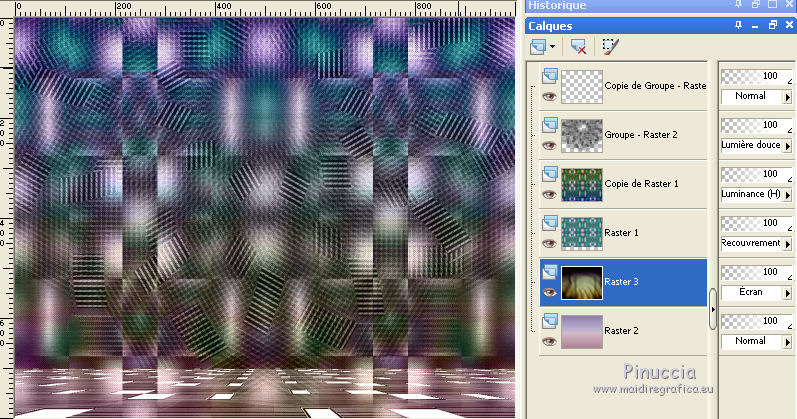
13. Activate the bottom layer, Raster 2.
Layers>New Raster Layer.
Selections>Select All.
Copy backlc and go to Edit>Copy.
Go back to your work and go to Edit>Paste into Selection.
Selections>Select None.
Change the Blend Mode of this layer to Screen.
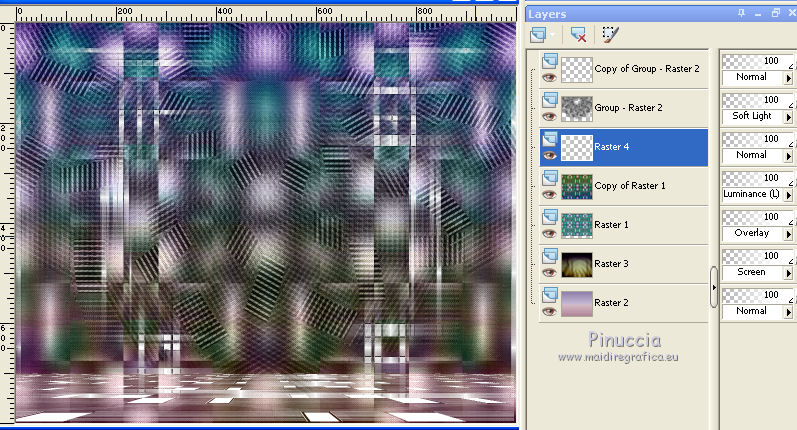
14. Activate the layer Copy of Raster 1.
Open decolc and go to Edit>Copy.
Go back to your work and go to Edit>Paste as new layer.
Effects>Edge Effects>Enhance ( raster4 )
Your tag and your layers - Blend Modes and opacities at your choice.
15. Activate the top layer.
Open deco_mj and go to Edit>Copy.
Go back to your work and go to Edit>Paste as new layer.
The Blend Mode of this layer is to Luminance Legacy.
Place  rightly the tube. rightly the tube.
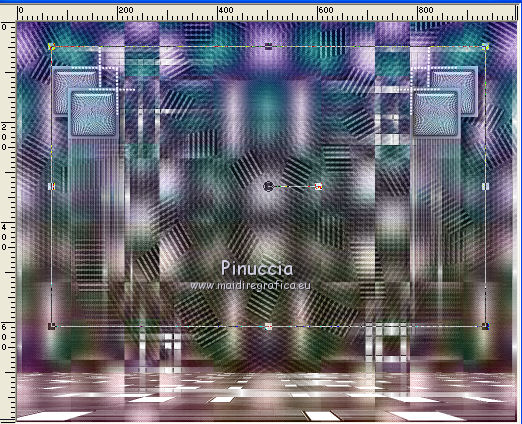
Adjust>Sharpness>Sharpen.
Effects>3D Effects>Drop Shadow, at your choice.
16. Open the tube SuizaBella_Ref_AG-00695 and go to Edit>Copy.
Go back to your work and go to Edit>Paste as new layer.
Resize and place the tube at your choice.
Drop Shadow optional.
Layers>Merge>Merge visible.
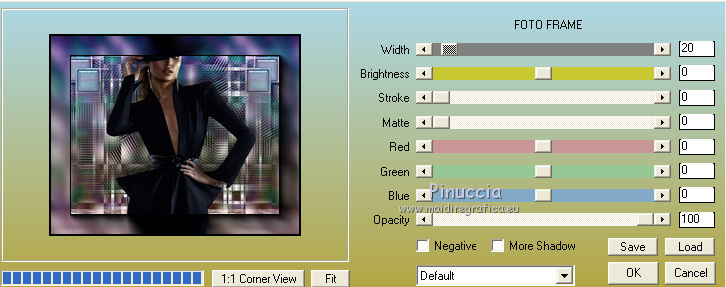
17. Effects>Plugins>AAA Frames - Foto Frame.
18. Sign your work on a new layer.
little note about the watermark:
I don't ask to put watermark on the versions made by my translations.
But if you decide to use the watermark supplied by the author, I would appreciate that my work as translator was also respected.
For that, I added my watermark to the material (english and french).
19. Save as jpg.
Version with tube by Tina Reagen
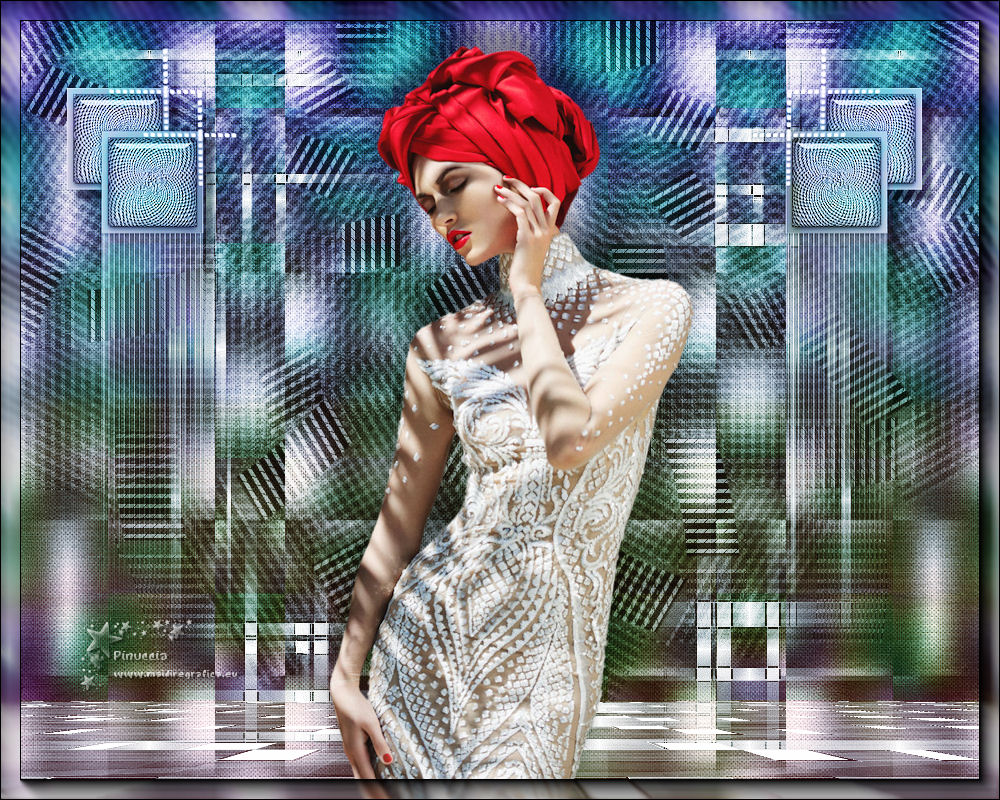
Your versions here

If you have problems or doubts, or you find a not worked link, or only for tell me that you enjoyed this tutorial, write to me.
19 June 2019
|
 ENGLISH VERSION
 ENGLISH VERSION