|
TOP TENDENCIAS

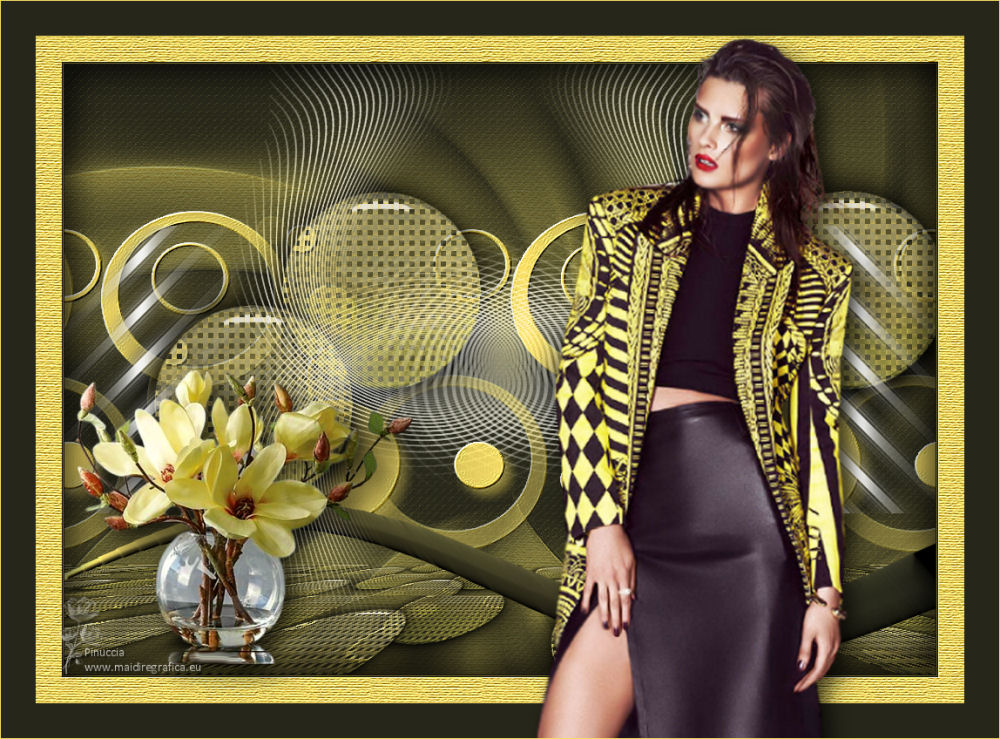
Thanks Lica Cida for your invitation to translate your tutorial

This tutorial was created with PSPX9 and translated with PSPX2 and PSPX3 and PSPX7, but it can also be made using other versions of PSP.
Since version PSP X4, Image>Mirror was replaced with Image>Flip Horizontal,
and Image>Flip with Image>Flip Vertical, there are some variables.
In versions X5 and X6, the functions have been improved by making available the Objects menu.
In the latest version X7 command Image>Mirror and Image>Flip returned, but with new differences.
See my schedule here
 French translation here French translation here
 your versions here your versions here

For this tutorial, you will need:
Material here
Thanks for the tubes Luz Cristina (6449-Luz Cristina) and Calli (Callitubes-200flores);
and for one mask Ket (!!!!.mask.ket-fadesuave);
the other masks are not signed (1btjmCBE6PLeK6lBY7Y2C4SmQI; g9Tg46gAJNQZ7Q1QFXWCtPhz9qE)
The rest of the material is by Lica Cida.
(you find here the links to the material authors' sites)
Plugins
consult, if necessary, my filter section here
Filters Unlimited 2.0 here
Texture - Texturizer here
Alien Skin Eye Candy 5 Impact - Glass here
Mura's Meister - Perspective Tiling here
Mura's Seamless - Emboss at Alpha here
FM Tile Tools - Blend Emboss here
Filters Mura's Seamless can be used alone or imported into Filters Unlimited.
(How do, you see here)
If a plugin supplied appears with this icon  it must necessarily be imported into Unlimited it must necessarily be imported into Unlimited

You can change Blend Modes according to your colors.
In the newest versions of PSP, you don't find the foreground/background gradient (Corel_06_029).
You can use the gradients of the older versions.
The Gradient of CorelX here
Copy the Selection in the Selections Folder.
Open the masks in PSP and minimize them with the rest of the material.
1. Set your foreground color to #fae067,
and your background color to #26261a.
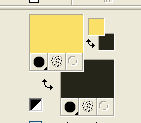
1. Open a new transparent image 1000 x 700 pixels.
Flood Fill  the transparent image with your background color #26261a. the transparent image with your background color #26261a.
2. Layer>New Raster Layer.
Flood Fill  the layer with your foreground color #fae067. the layer with your foreground color #fae067.
3. Layers>New Mask layer>From image
Open the menu under the source window and you'll see all the files open.
Select the mask 1btjmCBE6PLeK6lBY7Y2C4SmQI.
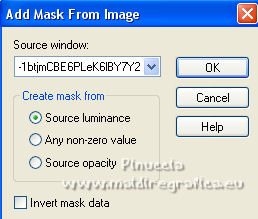
Effects>Edge Effects>Enhance.
Layers>Merge>Merge Group.
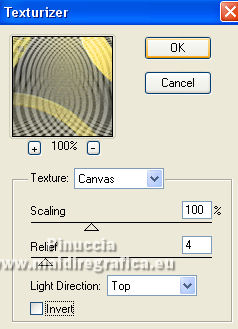
4. Effects>Plugins>Texture - Texturizer.
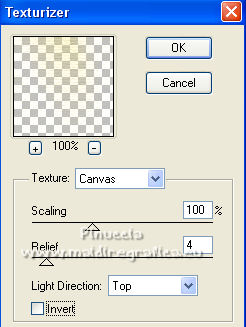
Effects>Plugins>Mura's Seamless - Emboss at Alpha, default settings.
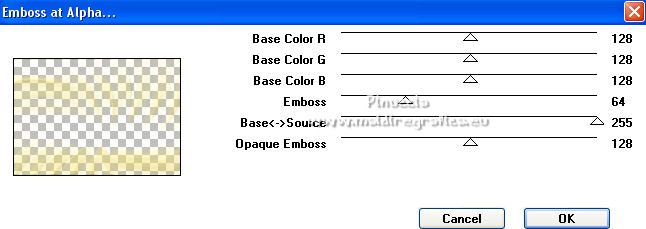
5. Layer>New Raster Layer.
Flood Fill  the layer with your foreground color #fae067. the layer with your foreground color #fae067.
6. Layers>New Mask layer>From image
Open the menu under the source window
and select the mask g9Tg46gAJNQZ7Q1QFXWCtPhz9qE.
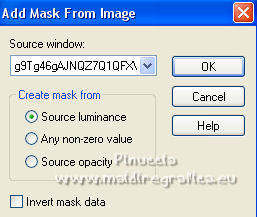
Effects>Edge Effects>Enhance.
Layers>Merge>Merge Group.
Effects>Plugins>Mura's Seamless - Emboss at Alpha, same settings (default)
Apply the Effect 2 times.
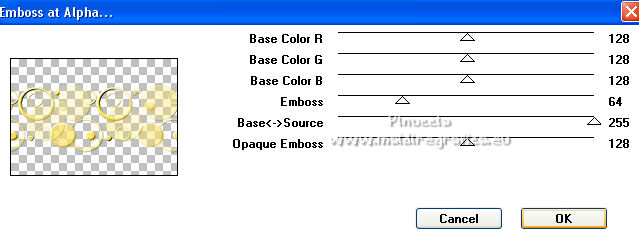
7. Selections>Load/Save Selection>Load Selection from Disk.
Look for and load the selection selcirculo-lc.PspSelection.
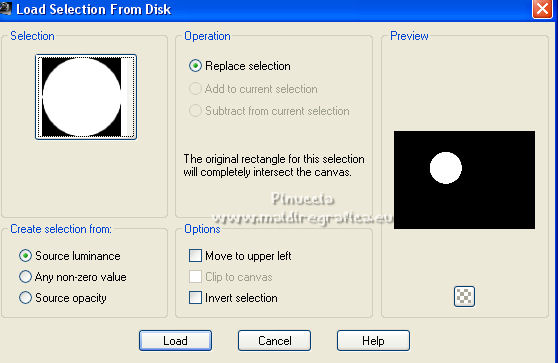
Selections>Promote Selection to Layer.
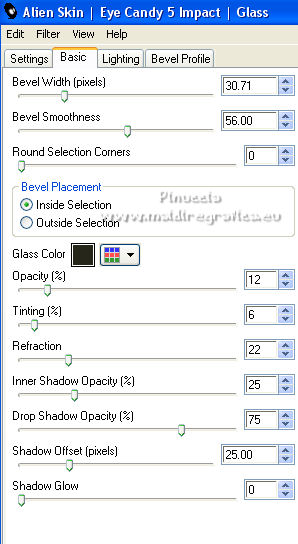
8. Effects>Plugins>Alien Skin Eye Candy 5 Impact - Glass
Glass Color: background color #26261a.
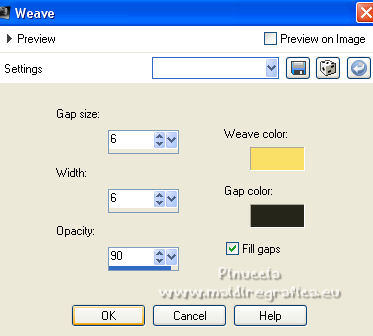
9. Effects>Texture Effects>Weave
weave color: foreground color
gap color: background color
10. Effects>3D Effects>Drop Shadow, color #000000.
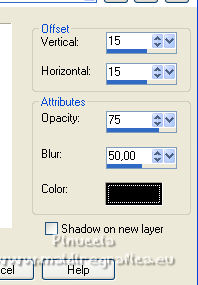
Repeat Drop Shadow, vertical and horizontal -15.
Selections>Select None.
11. Layers>Duplicate.
K key on the keyboard to activate your Pick Tool 
and set Position X: 734,00 and Position Y: 94,00.

12. Layers>Duplicate.
Set Position X: 52,00 and Position Y: 225,00.

Layers>Duplicate.
Set Position X: 516,00 and Position Y: 224,00.

M key to deselect the Tool.
Make sure the circles are positioned correctly
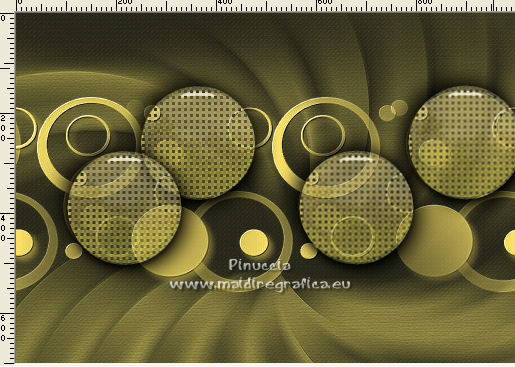
Layers>Merge>Merge Down - 3 times.
13. Layers>Duplicate.
Effects>Plugins>Mura's Meister - Perspective Tiling.
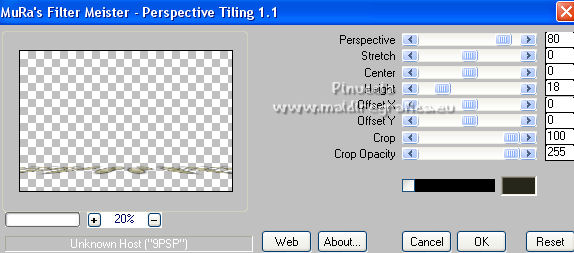
Effects>3D Effects>Drop Shadow, color #000000.

14. Effects>Plugins>FM Tile Tools - Blend Emboss, default settings.

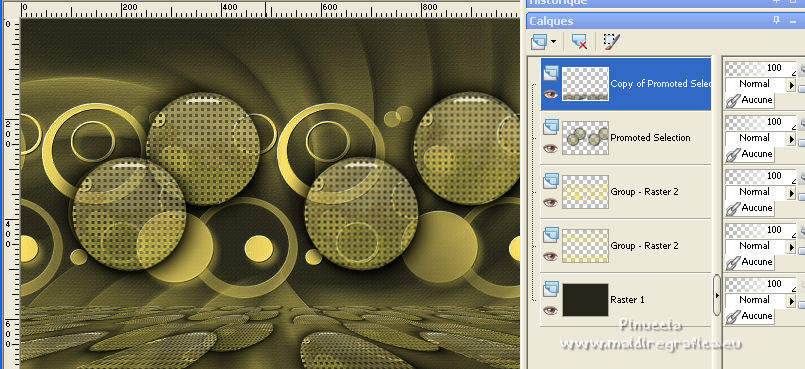
Your tag and the layer.
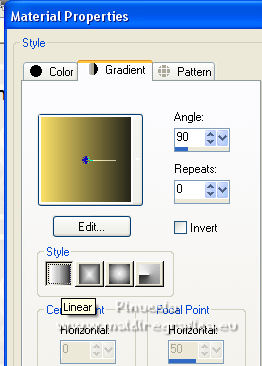
15. Set your foreground color to a Foreground/Background Gradient, style Linear.
Layer>New Raster Layer.
Flood Fill  the layer with your Gradient. the layer with your Gradient.
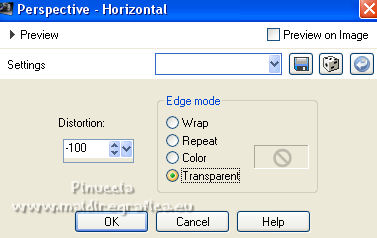
16. Effects>Geometric Effects>Perspective Horizontal.
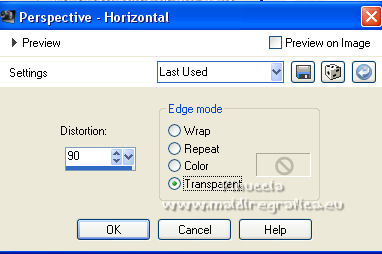
17. Effects>Geometric Effects>Perspective Horizontal.
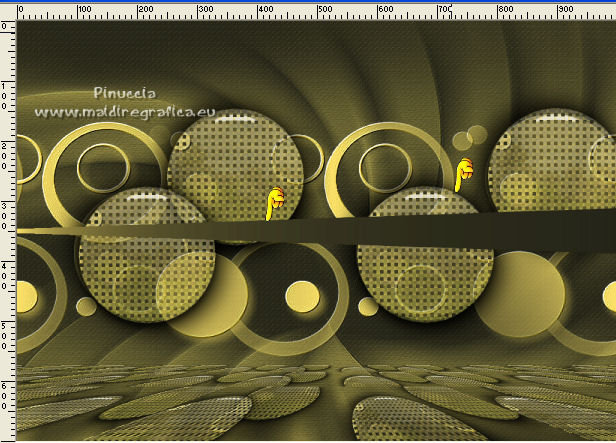
Result
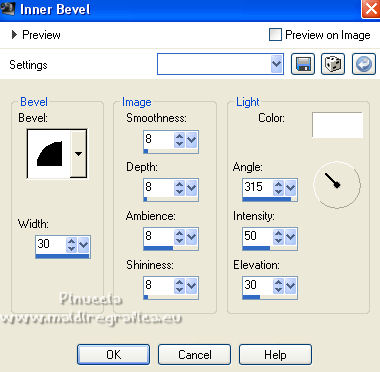
18. Effects>3D Effects>Inner Bevel.
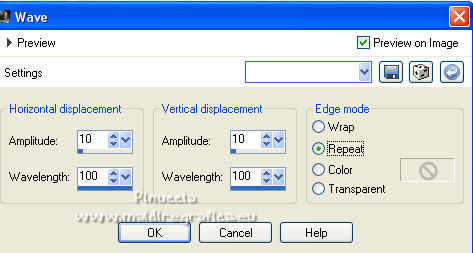
19. Effects>Distortion Effects>Wave.
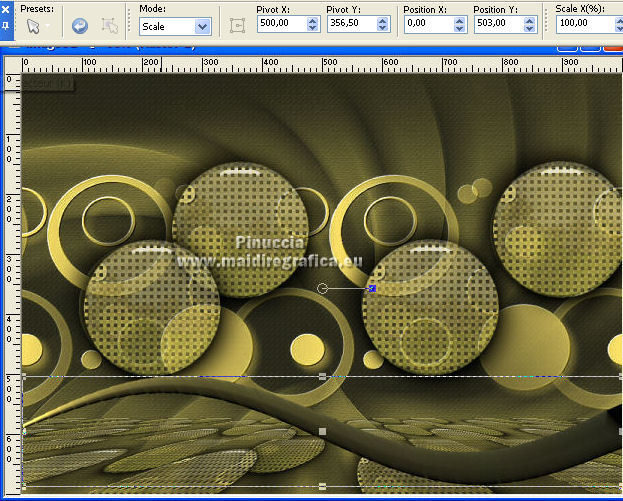
20. K key to activate your Pick Tool 
and set Position X: 0,00 and Position Y: 503,00.
M key to deselect the Tool.
21. Open deco_1lc and go to Edit>Copy.
Go back to your work and go to Edit>Paste as new layer.
It is at its place.
22. Open deco_2lc and go to Edit>Copy.
Go back to your work and go to Edit>Paste as new layer.
Objects>Align>Top
If you are working with a previous version,
activate your Pick Tool 
and set Position vert. à 0,00.
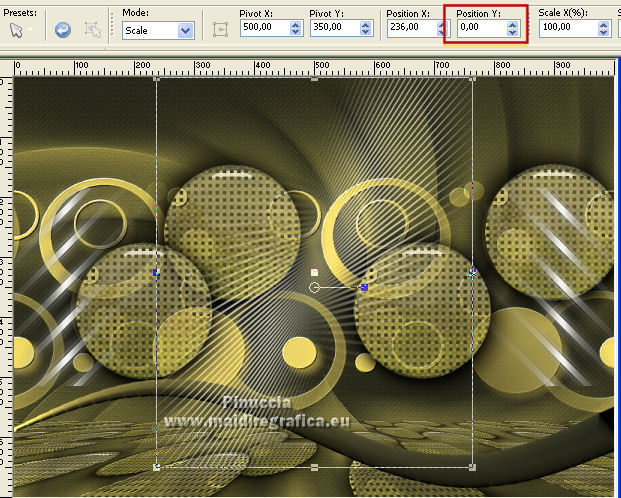
Keep the Blend Mode of this layer to Luminance (legacy).
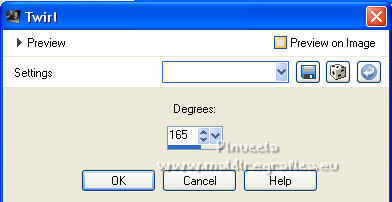
23. Effects>Distortion Effects>Wirl.
24. Layers>Duplicate.
Image>Mirror.
Layers>Merge>Merge Down.
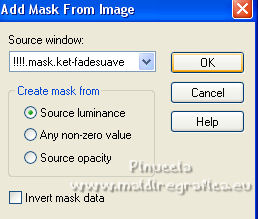
24. Layers>New Mask layer>From image
Open the menu under the source window
and select the mask !!!!.mask.ket-fadesuave.
Layers>Duplicate - 2/3 times (according to your colors).
Layers>Merge>Merge>Group.
25. Image>Add borders, 1 pixel, symmetric, background color #26261a.
Image>Add borders, 1 pixel, symmetric, foreground color #fae067.
Image>Add borders, 1 pixel, symmetric, background color #26261a.
Sélections>Sélectionner tout.
Image>Add borders, 30 pixels, symmetric, couleur #fae067.
Selections>Invert.
Effects>Plugins>Texture - Texturizer, same settings.
Effects>Plugins>FM Tile Tools - Blend Emboss, par défaut.
Effects>3D Effects>Drop Shadow, color #000000.

Repeat Drop Shadow, vertical and horizontal -15.
Selections>Select None.
Image>Add borders, 40 pixels, symmetric, background color #26261a.
26. Open the tube 6449-Luz Cristina and go to Edit>Copy.
Go back to your work and go to Edit>Paste as new layer.
Image>Resize, to 105%, resize all layers not checked.
Image>Miroir.
Move  the tube to your liking, or see my example. the tube to your liking, or see my example.
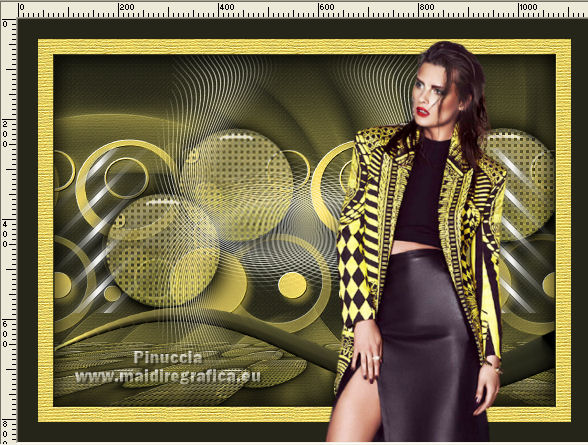
Effects>3D Effects>Drop Shadow, at your choice.
27- Open the tube Callitubes-200flores and go to Edit>Copy.
Go back to your work and go to Edit>Paste as new layer.
Image>Resize, to 75%, resize all layers not checked.
Move  the tube at the bottom left, or to your liking. the tube at the bottom left, or to your liking.
Effects>3D Effects>Drop Shadow, at your choice.
28. Image>Add borders, 1 pixel, symmetric, foreground color #fae067.
Sign your work on a new layer.
Add, if you want, the author's and translator's watermarks.
29. Image>Resize, 1000 pixels width, resize all layers checked.
Save as jpg.
For the tubes of this version thanks Adrimar and Vera Mendes

 Your versions here Your versions here

If you have problems or doubts, or you find a not worked link, or only for tell me that you enjoyed this tutorial, write to me.
17 August 2022

|

