|
TOP TEMPO


Thanks Lica Cida for your invitation to translate your tutorial

This tutorial was created with PSPX9 and translated with PSPX2 and PSPX3, but it can also be made using other versions of PSP.
Since version PSP X4, Image>Mirror was replaced with Image>Flip Horizontal,
and Image>Flip with Image>Flip Vertical, there are some variables.
In versions X5 and X6, the functions have been improved by making available the Objects menu.
In the latest version X7 command Image>Mirror and Image>Flip returned, but with new differences.
See my schedule here
 French translation here French translation here
 your versions ici your versions ici
For this tutorial, you will need:
Material here
Pour les tubes merci Beatriz (2809-woman-LB TUBES), Jewel (Paysage misted jewel 036) et SuizaBella (Vaso 7).
(you find here the links to the material authors' sites)
Plugins
consult, if necessary, my filter section here
Filters Unlimited 2.0 here
DSB Flux - Blast here
Graphics Plus - Cross Shadow here
Alien Skin Eye Candy 5 Impact - Perspective Shadow here
Mura's Meister - Perspective Tiling here
AAA Filters - Custom here
Filters Graphics Plus can be used alone or imported into Filters Unlimited.
(How do, you see here)
If a plugin supplied appears with this icon  it must necessarily be imported into Unlimited it must necessarily be imported into Unlimited

You can change Blend Modes according to your colors.
Copy the preset Preset_Lights_lc15mp in the Presets Folder.
Copy the gradient Shadow Monsters in the Gradients Folder
Copy the selection in the Selections Folder
1. Open a new transparent image 1000 x 700 pixels.
Set your foreground color to Gradient, and select the gradient Shadow Monsters, style Linear.

Flood Fill  the transparent image with your Gradient. the transparent image with your Gradient.
2. Adjust>Blur>Gaussian Blur - radius 50.

3. Selections>Select All.
Open the tube Paysage misted jewel 036, erase the watermark and go to Edit>Copy.
Minimize the tube.
Go back to your work and go to Edit>Paste into Selection.
Selections>Select None.
4. Adjust>Blur>Radial Blur.

5. Layers>Duplicate.
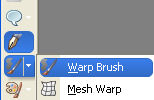
Activate your Warp Brush Tool  with these settings with these settings

Place the mouse in the center of the image

Hold the mouse button down without moving it, until you have this

If you are problems using your Warp Brush Tool, you can increase the size of the brush.

6. Selections>Load/Save Selection>Load Selection from Disk.
Look for and load the selection tempolc.PspSelection.

if the selection is not the size of your brush,

use Selections>Edit Selection and your Pick Tool, to adapt it

Repeat Selections>Edit Selection

Press CANC on the keyboard 
7. Selections>Modify>Select Selection Borders

Layers>New Raster Layer.
Flood Fill  the layer with the Gradient. the layer with the Gradient.
8. Effects>3D Effects>Inner Bevel.

Selections>Select None.
Layers>Merge>Merge Down.
9. Effects>Plugins>DSB Flux - Blast.

Adjust>Sharpness>Sharpen More.
10. Image>Canvas Size - 1000 x 800 pixels.

11. Edit>Copy Special>Copy Merged.
Edit>Paste as New layer.
12. Effects>Plugins>Mura's Meister - Perspective Tiling.

13. Activate your Magic Wand Wool  , feather 70, , feather 70,

Click on the transparent part to select it.

Press CANC on the keyboard (as many times as necessary to soften the effect;
it is important that the circle is visible).

Selections>Select None.
14. Activate again the tube Paysage misted jewel 036 and go to Edit>Copy.
Go back to your work and go to Edit>Paste as new layer.
Image>Resize, to 80%, resize all layers not checked.
Adjust>Sharpness>Sharpen More.
15. Activate the layer Copy of Raster 1.

Image>Resize, to 80%, resize all layers not checked.
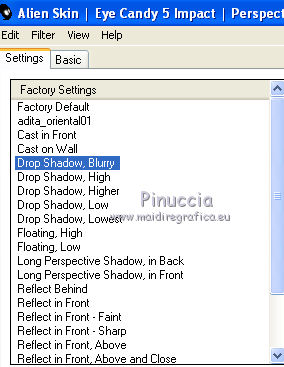
Effects>Plugins>Alien Skin Eye Candy 5 Impact - Perspective Shadow.
Select the preset Drop Shadow Blurry and ok.

Apply the Effect also on the layer Raster 1.
Use a Drop Shadow at your choice (optionnel).
NOTE: this step is only for composing the tutorial
(because in the end the layer will be hidden).
16. Layers>New Raster Layer
Layers>Arrange>Send to Bottom.
Flood Fill  the layer with the Gradient. the layer with the Gradient.
17. Effects>Texture Effects>Weave

18. Effects>Reflection Effects>Kaleidoscope.

19. Effects>Reflection Effects>Rotating Mirror, same settings

20. Effects>Illumination Effects>Lights - select the preset lc15 and ok.

21. Activate the layer Raster 1.
Repeat Effects>Illumination Effects>Lights - preset lc15.
Repeat Effects>Plugins>DSB Flux - Blast, same settings.
Adjust>Sharpness>Sharpen More.
Adjust>One Step Photo Fix.
22. Effects>Plugins>Mura's Meister - Perspective Tiling, same settings

Effects>Reflections Effects>Rotating Mirror, default settings.

Activate the layer Raster 2.
Edit>Repeat Rotating Mirror.
Adjust>Sharpness>Sharpen More.
Reduce the opacity of the layer Raster between 85 et 99%
The layers, Blend Modes and opacities (adjust at your choice)

23. Activate your top layer, Raster 3.
Open the tube 2809-woman-LBTUBES and go to Edit>Copy.
Go back to your work and go to Edit>Paste as new layer.
Image>Mirror.
Image>Resize, at your choice (for me 120%), resize all layers not checked.
Adjust>Sharpness>Sharpen More.
Move  the tube to the left side. the tube to the left side.
Effects>Plugins>Alien Skin Eye Candy 5 Impact - Perspective Shadow - Drop Shadow Blurry.
24. Open the tube SuizaBella Vaso 7 and go to Edit>Copy.
Go back to your work and go to Edit>Paste as new layer.
Image>Resize, at your choice (for me 60%), resize all layers not checked.
Adjust>Sharpness>Sharpen More.
Move  the tube to the right side. the tube to the right side.
Effects>Plugins>Alien Skin Eye Candy 5 Impact - Perspective Shadow - Drop Shadow Blurry.
25. Image>Add borders, 1 pixel, symmetric, color #000000.
Edit>Copy.
Image>Add borders, 40 pixels, symmetric, color #ffffff.
Activate your Magic Wand Tool 
don't forget to set again the feather to 0,
and click on the white border to select it.
Edit>Paste into Selection.
26. Adjust>Blur>Gaussian Blur - radius 50.

Effects>Lights Effects>Lights - preset lc15.
Effects>Plugins>Graphics Plus - Cross Shadow, default settings.

Selections>Invert.
Effects>3D Effects>Drop Shadow, color #000000.

Selections>Select None.
27. Image>Resize, 1000 pixels width, resize all layers checked.
Effects>Plugins>AAA Filters - Custom - click on Landscape and ok (optional).

Sign your work on a new layer.
little note about the watermark:
I don't ask to put watermark on the versions made by my translations.
But if you decide to use the watermark supplied by the author, I would appreciate that my work as translator was also respected.
For that, I added my watermark to the material.
29. Layers>Merge>Merge All and save as jpg.
Version whit tubes by Tocha, Nicole and Nara Pamplona

 Your versions here Your versions here

If you have problems or doubts, or you find a not worked link, or only for tell me that you enjoyed this tutorial, write to me.
5 July 2020
|

