|
TOP SILENCE
 ENGLISH VERSION ENGLISH VERSION
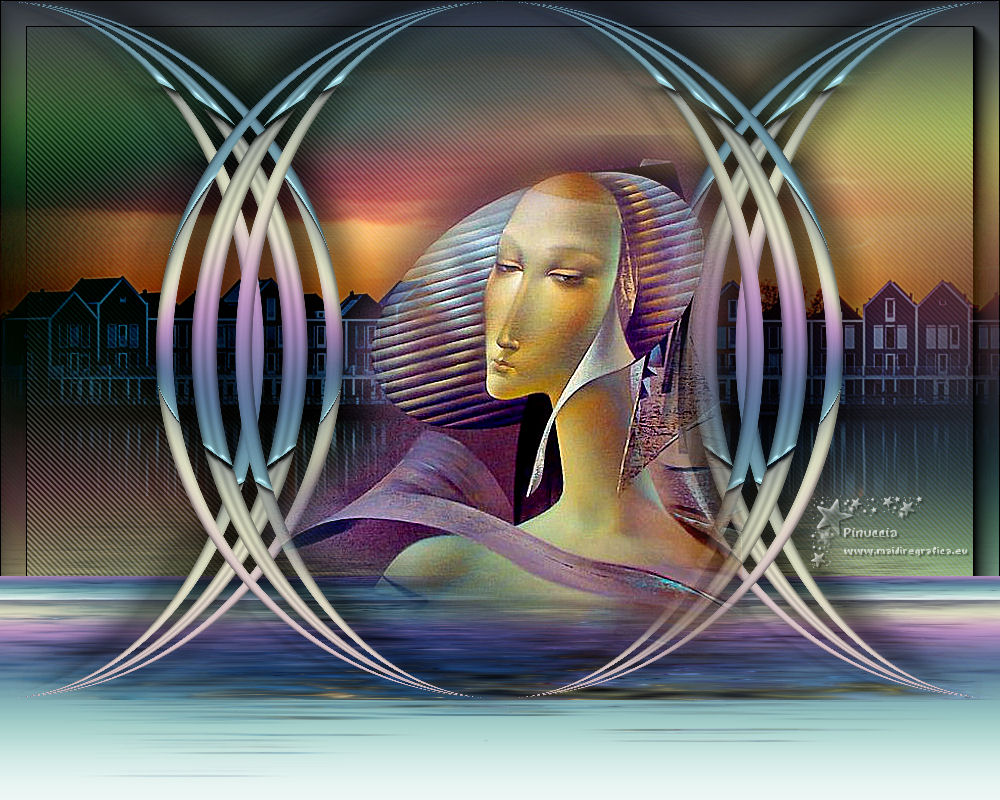
Thanks Lica Cida for your invitation to translate your tutorial

This tutorial was created with PSPX8 and translated with PSPX3, but it can also be made using other versions of PSP.
Since version PSP X4, Image>Mirror was replaced with Image>Flip Horizontal,
and Image>Flip with Image>Flip Vertical, there are some variables.
In versions X5 and X6, the functions have been improved by making available the Objects menu.
In the latest version X7 command Image>Mirror and Image>Flip returned, but with new differences.
See my schedule here
French translation here
your versions ici
For this tutorial, you will need:
Material here
Tubes: rocio_4066 - 286_paysage_p3_animabelle.
(you find here the links to the material authors' sites)
Plugins
consult, if necessary, my filter section here
Mura's Meister - Copies here
Mura's Meister - Perspective Tiling here
Flaming Pear - Flood here
DC Layer - SideMerge here
Nik Software - Color Efex here
AAA Frames - Foto Frame here
Filters DC Layer can be used alone or imported into Filters Unlimited.
(How do, you see here)
If a plugin supplied appears with this icon  it must necessarily be imported into Unlimited it must necessarily be imported into Unlimited

You can change Blend Modes according to your colors.
Copy the Gradient in the Gradients Folder.
Copy the Selection in the Selections Folder.
Copy presets Preset_InnerBevel_Deep Beveled
and Preset_SmudgeBrush_flood_mara1 in the Presets Folder.
1. Set your foreground color to #f39e9f,
and your background color to #aff38f.
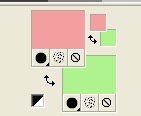
these colors will not be used and the gradient doesn't change colors with other colors
Set your foreground color to Gradient and select the Gradient Holographic, style Linear.
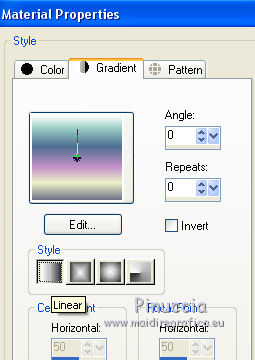
Open a new transparent image 1000 x 700 pixels.
Flood Fill  the transparent image with your Gradient. the transparent image with your Gradient.
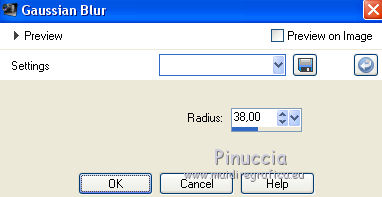
Adjust>Blur>Gaussian Blur - radius 38.
Image>Flip.
Layers>Duplicate.
Close the layer Raster 1 and stay on the layer Copy of Raster 1.
2. Selections>Load/Save Selection>Load Selection from Disk.
Look for and load the selection silencelc.PspSelection.
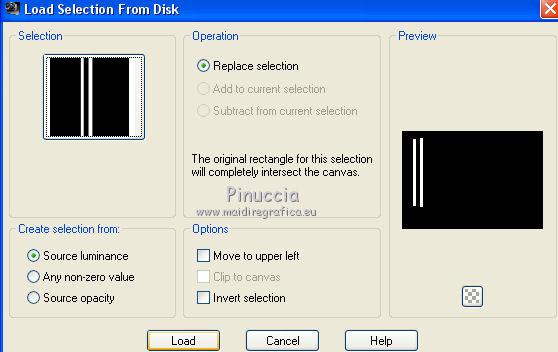
Selections>Promote Selection to Layer.
3. Effects>3D Effects>Inner Bevel.
Select the preset Deep Beveled and ok.
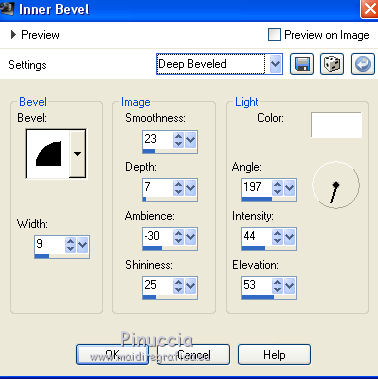
Selections>Select None.
Layers>Duplicate.
Image>Mirror.
Layers>Merge>Merge Down.
4. Effects>Plugins>Mura's Meister - Copies
Preset Tiling, default settings.
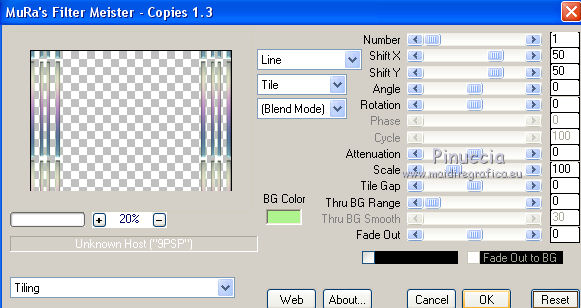
5. Effects>Geometric Effects>Circle.

6. Effects>Plugins>Mura's Meister - Copies.
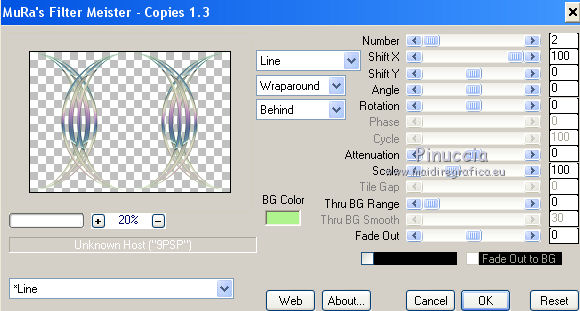
Effects>3D Effects>Drop Shadow, color #000000
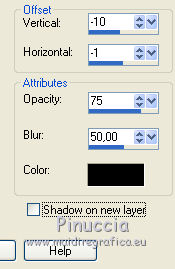
Layers>Duplicate.
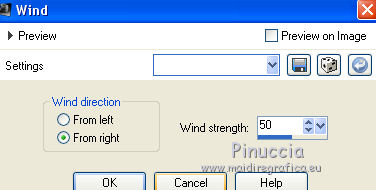
7. Effects>Distortion Effects>Wind - from right, intensity 50
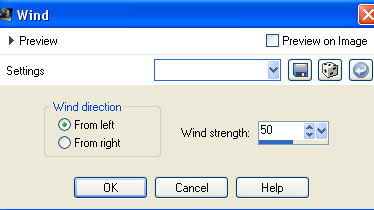
Repet the Effet Wind, this time from left.
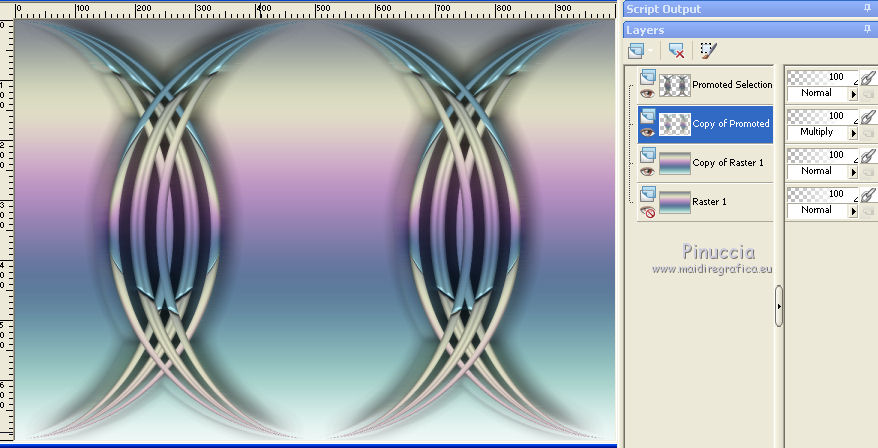
Change the Blend Mode of this layer to Multiply.
Layers>Arrange>Move Down.
8. Open the tube 286_paysage_p3_animabelle and go to Edit>Copy.
Go back to your work and go to Edit>Paste as new layer.
Image>Resize, to 80%, resize all layers not checked.
Adjust>Sharpness>Sharpen More.
Layers>Arrange>Move Down.
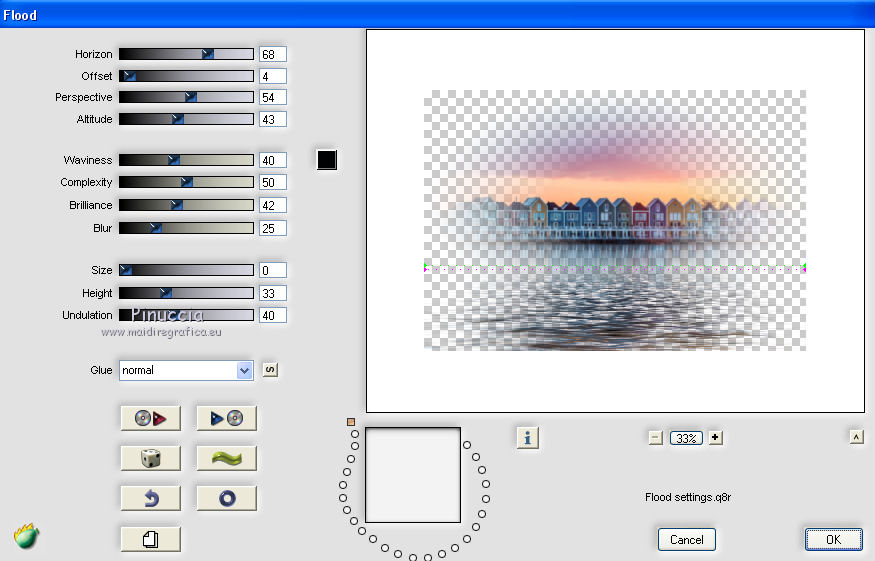
9. Effects>Plugins>Flaming Pear - Flood.
adapt Horizon according to your landscape.
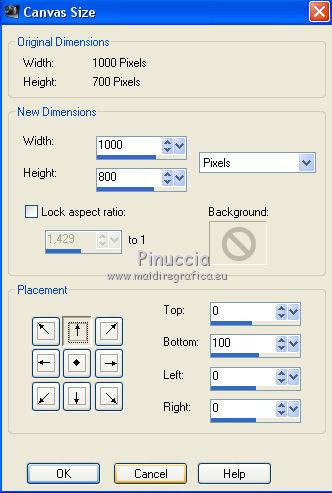
10. Image>Canvas Size - 1000 x 800 pixels.
11. Activate your Smudge Brush Tool 
Open the presets menu and select the preset flood_mara1
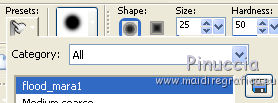

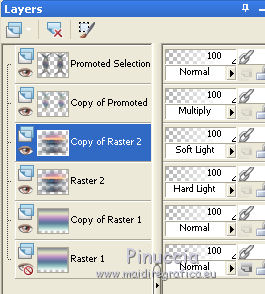
Apply the brush over the Flood effects to soften it.
Change the Blend Mode of this layer to Hard Light.
Layers>Duplicate.
Change the Blend Mode of this layer to Soft Light.
12. Activate the layer Copy of Raster 1.
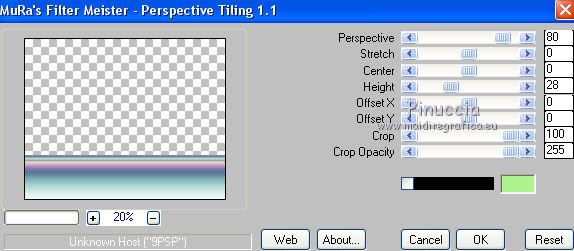
Effects>Plugins>Mura's Meister - Perspective Tiling.
13. Layers>New Raster Layer.
Layers>Arrange>Send to Bottom.
Flood Fill  the layer with your Gradient. the layer with your Gradient.
14. Open and activate the layer Raster 1.
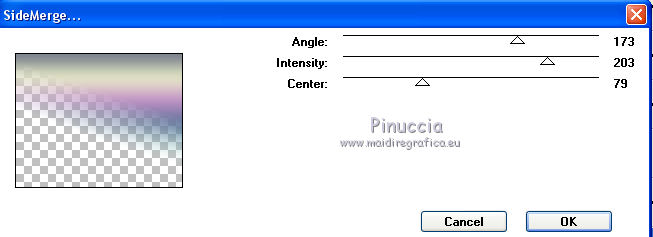
Effects>Plugins>DC Layer - SideMerge.
Change the Blend Mode of this layer to Multiply.
Layers>Duplicate.
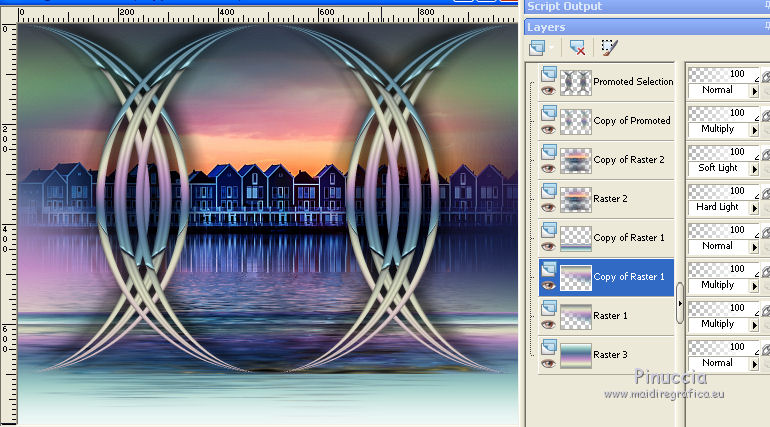
Your layers palette (you can change Blend Modes and opacities at your choice).
15. Activate the top layer.
Open the tube rocio_4066 and go to Edit>Copy.
Go back to your work and go to Edit>Paste as new layer.
Adjust>Sharpness>Sharpen More.
Optional: Effects>3D Effects>Drop Shadow, same settings.

16. Activate the bottom layer, Raster 3.
Effects>Artistic Effects>Halftone.
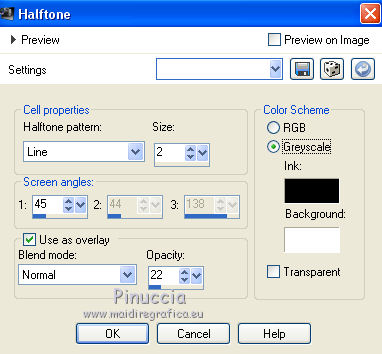
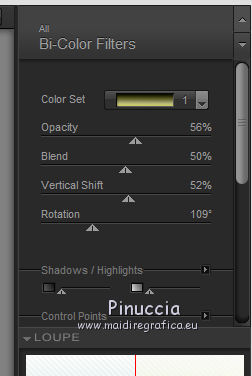
17. Effects>Plugins>Nik Software - Color Efex Pro
Bi-Color Filters - to the right Color set: Green/Brown 1.
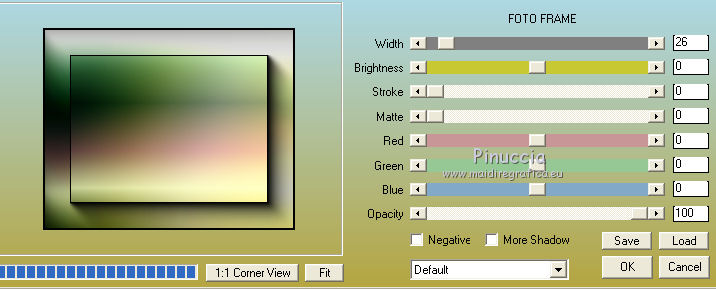
18. Effects>Plugins>AAA Frames - Foto Frame.
Sign your work on a new layer.
little note about the watermark:
I don't ask to put watermark on the versions made by my translations.
But if you decide to use the watermark supplied by the author, I would appreciate that my work as translator was also respected.
For that, I added my watermark to the material (english and french).
Image>Add borders, 1 pixel, symmetric, color #000000.
Save as jpg.
Version with tubes by Luz Cristina and Mina
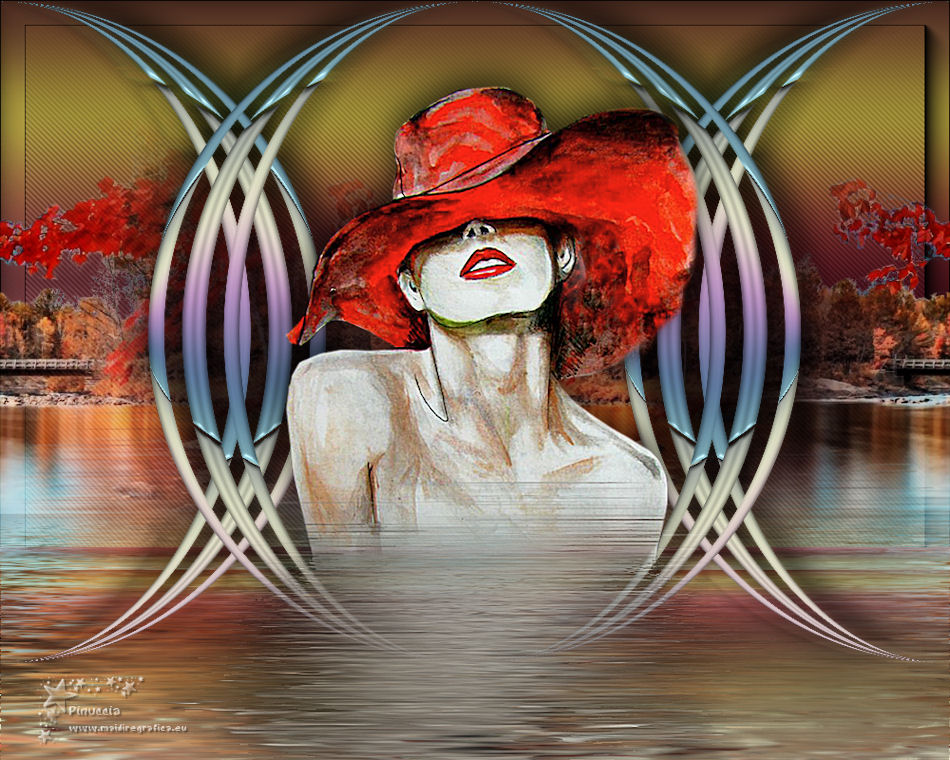
Your versions here

If you have problems or doubts, or you find a not worked link, or only for tell me that you enjoyed this tutorial, write to me.
30 Octobre 2019
|
 ENGLISH VERSION