|
TOP MARIANA

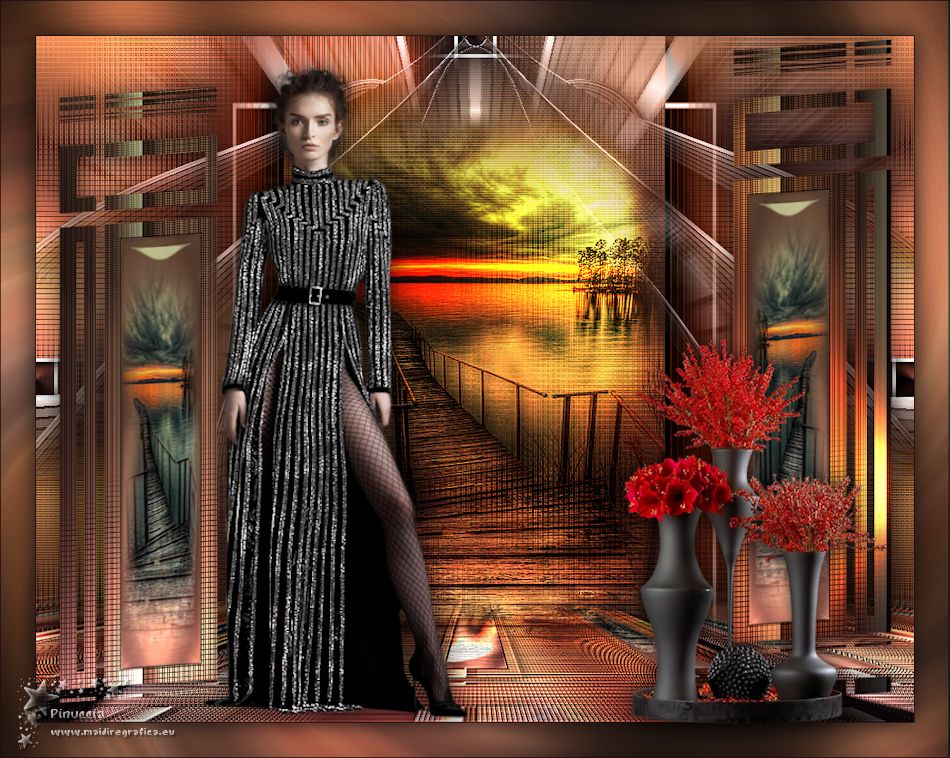
Thanks Lica Cida for your invitation to translate your tutorial

This tutorial was created with PSPX9 and translated with PSPX2 and PSPX3, but it can also be made using other versions of PSP.
Since version PSP X4, Image>Mirror was replaced with Image>Flip Horizontal,
and Image>Flip with Image>Flip Vertical, there are some variables.
In versions X5 and X6, the functions have been improved by making available the Objects menu.
In the latest version X7 command Image>Mirror and Image>Flip returned, but with new differences.
See my schedule here
 French translation here French translation here
 your versions ici your versions ici
For this tutorial, you will need:
Material here
Thanks for the tubes Beatriz (3113-woman-LBTUBES, 3252-stilllife-LBTUBES) et Nicole (nicole-paysage2-2020).
Mask: 079tchrist.
The rest of the material is by Lica Cida
(you find here the links to the material authors' sites)
Plugins
consult, if necessary, my filter section here
Filters Unlimited 2.0 here
Filter Factory Gallery M - Loom here
Filter Factory Gallery G - Panel Stripes here
Alien Skin Eye Candy 5 Impact - Glass here
Mura's Meister - Perspective Tiling here
Filters Factory Gallery can be used alone or imported into Filters Unlimited.
(How do, you see here)
If a plugin supplied appears with this icon  it must necessarily be imported into Unlimited it must necessarily be imported into Unlimited

You can change Blend Modes according to your colors.
In the newest versions of PSP, you don't find the foreground/background gradient (Corel_06_029).
You can use the gradients of the older versions.
The Gradient of CorelX here
Copy the preset lc14 and Emboss 3 in the Presets Folder.
Open the mask in PSP and minimize it with the rest of the material.
1. Set your foreground color to #1f0f14,
and your background color to #cb938e.
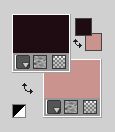
Set your foreground color to a Foreground/Background Gradient, style Rectangular

Open a new transparent image 1024 x 800 pixels.
Flood Fill  the transparent image with your gradient. the transparent image with your gradient.
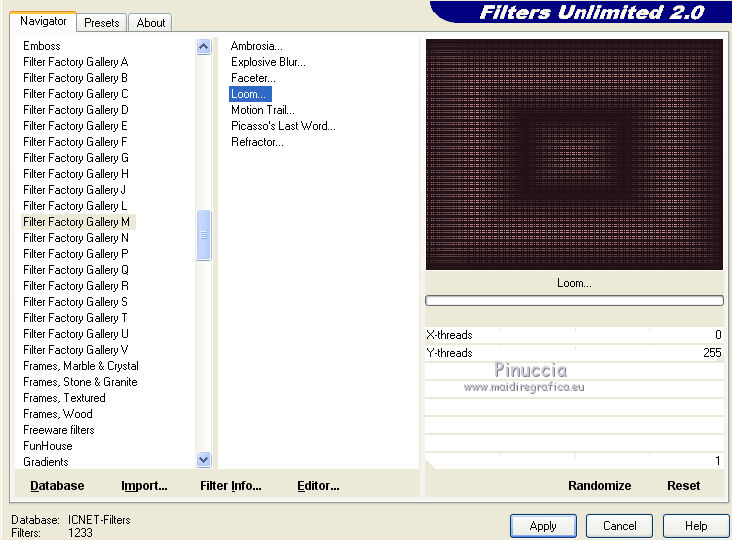
2. Effects>Plugins>Filters Unlimited 2.0 - Filter Factory Gallery M - Loom, default settings.
Layers>Duplicate.
Close the layer Raster 1, and stay on the layer Copy of Raster 1.
3. Layers>New Mask layer>From image
Open the menu under the source window and you'll see all the files open.
Select the mask 079tchrist.

Layers>Merge>Merge Group.
Effects>Reflection Effect>Rotating Mirror, default settings.

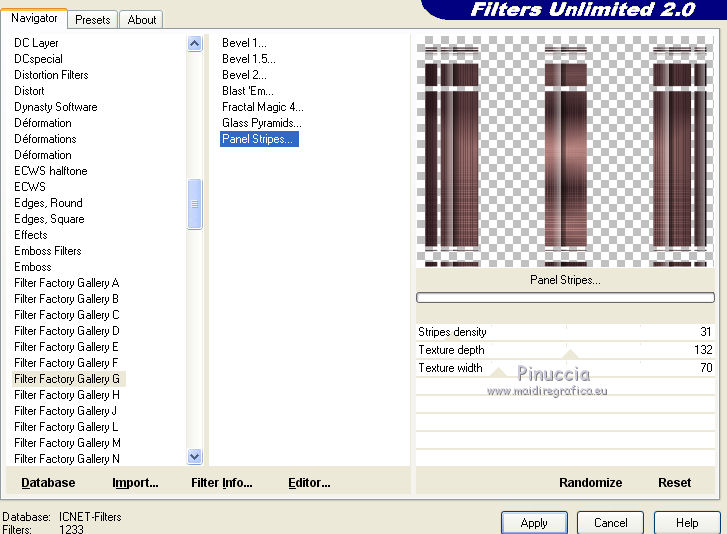
4. Effects>Plugins>Filters Unlimited 2.0 - Filter Factory Gallery G - Panel Stripes, default settings.
Activate your Magic Wand Tool 
and click on the outside to select it.
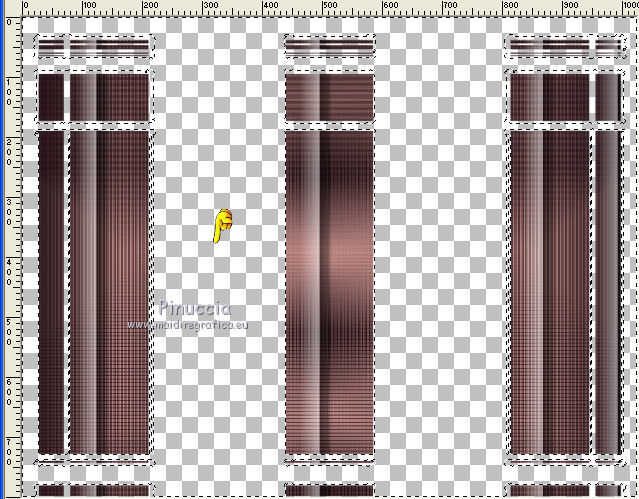
Selections>Invert.
5. Selections>Modify>Contract - 20 pixels.
Press CANC on the keyboard 
Selections>Select None.
Select the first rectangle with your Magic Wand Tool 
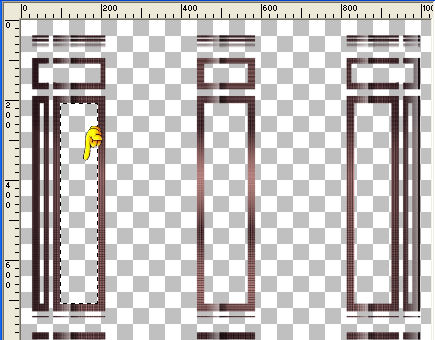
6. Layers>New Raster Layer, Raster 2.
Flood Fill  the layer with your gradient. the layer with your gradient.
Adjust>Blur>Radial Blur.

Open the landscape nicole-paysage2-2020 and go to Edit>Copy.
Go back to your work and go to Edit>Paste into Selection.
Adjust>Sharpness>Sharpen More.
Effects>Plugins>Alien Skin Eye Candy 5 Impact - Glass.
Factory Default and change Basic's settings.
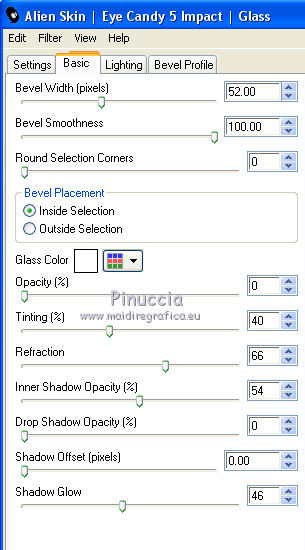
Effects>3D Effects>Cisel, foreground color.

Selections>Select None.
7. Effects>Illumination Effects>Lights
Select the preset lc14 and ok.
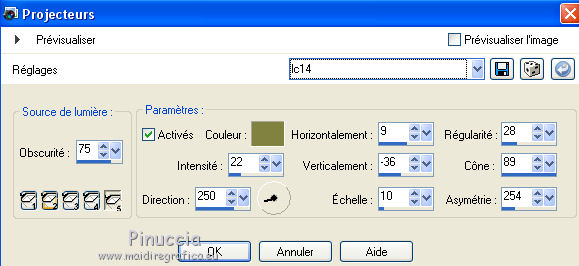
Layers>Duplicate.
Image>Mirror.
Layers>Merge>Merge Down.
8. Activate the mask's layer.

Effects>Illumination Effects>Lights, same settings (lc14)
Select the second rectangle with your Magic Wand Tool 
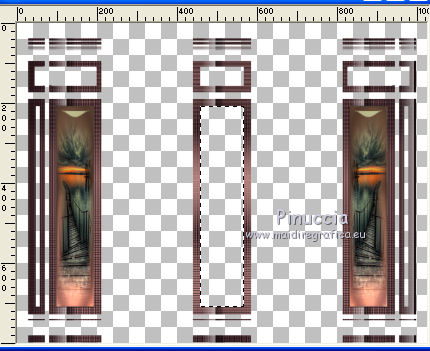
9. Instead of adding a new layer, activate the layer Raster 2
Flood Fill  the layer with your Gradient. the layer with your Gradient.

Adjust>Blur>Radial Blur, same settings.

Adjust>Sharpness>Sharpen More.
Effects>Plugins>Alien Skin Eye Candy 5 Impact - Glass, same settings.
Effects>3D Effets 3D>Chisel, couleur d'avant same settings.

Effects>Illumination Effects>Lights, same settings (lc14).
Selections>Select none.
Layers>Merge>Merge Down.
Effects>3D Effects>Drop Shadow, color #000000.

10. Open and activate the closed layer, Raster 1.
Effects>Illumination Effects>Lights, preset lc14.
11. Activate the top layer.
Edit>Copy Special>Copy Merged.
Edit>Paste as new layer.
12. Effects>Plugins>Mura's Meister - Perspective Tiling.
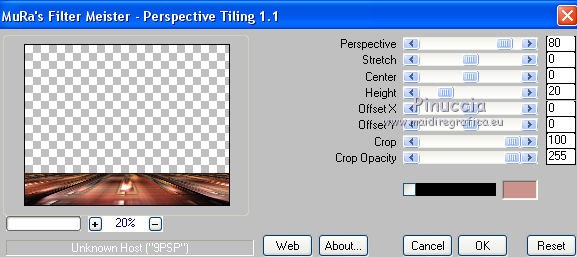
Layers>Arrange>Move Down.
Activate your Magic Wand Tool  , feather 60% , feather 60%

Click on the transparent part to select it.
Press 3-4 times CANC on the keyboard.
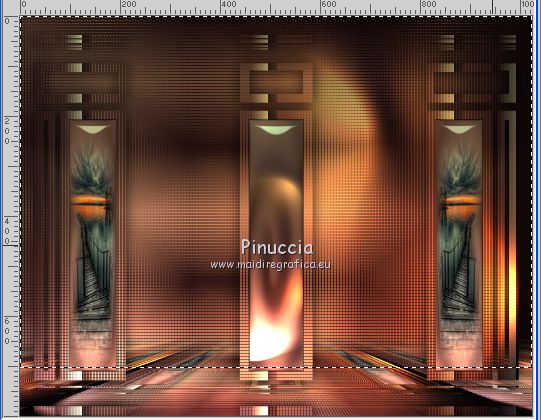
Selections>Select None.
Effects>User Defined Filter - select the preset Emboss 3 and ok.

13. Activate the layer of the mask, group-copy of Raster 1.
Activate l'outil Eraser  , size 200 pixels. , size 200 pixels.
Erase the central rectangle.

14. Effects>Geometric Effects>Skew.

15. Activate again the tube nicole-paysage2-2020 and go to Edit>Copy.
Go back to your work and go to Edit>Paste as new layer.
Optional: Effects>Illumination Effects>Lights, same settings, lc14.
Change the Blend Mode of this layer to Hard Layer, or as you like better.

Adjust>Sharpness>Sharpen More.
16. Open elemento2mariana and go to Edit>Copy.
Go back to your work and go to Edit>Paste as new layer.
Layers>Arrange>Move Down, 3 times (over your background layer).
17. Open elemento1mariana and go to Edit>Copy.
Go back to your work and go to Edit>Paste as new layer.
Objects>Align>Top.
Or activate your Pick Tool 
and set Position Y to 0,00

Adjust>Sharpness>Sharpen More.
18. Set your foreground color to #fbf7b5.
Activate your Charge to Target Tool  with these settings with these settings

Apply the brush on elemento1 at your choice.
in previous versions the result of this tool is not the same.
Apply according to your version and your colors.
Change the Blend Mode of this layer to Luminance (legacy), or at your choice.
19. Open elementomariana and go to Edit>Copy.
Go back to your work and go to Edit>Paste as new layer.
Objects>Align>Top.
Or activate your Pick Tool 
and set Position Y to 0,00

Adjust>Sharpness>Sharpen More.
20. Activate the layer Raster 1.
Effects>Plugins>AAA Frames - Foto Frame.
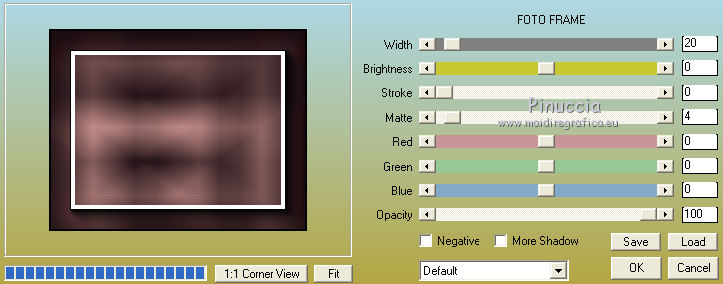
Effects>Image Effects>Seamless Tiling, default settings.

21. The layers, Blend Modes and Opacities

Activate the layer Raster 1.
Edit>Copy.
22. Image>Add borders, 1 pixel, symmeric, foreground color #1f0f14.
Selections>Select All.
Image>Add borders, 40 pixels, symmetric, background color.
Selections>Invert.
Edit>Paste into Selection.
Adjust>Blur>Radial Blur, same settings.
Effects>Plugins>Graphics Plus - Cross Shadow, default settings.

Selections>Invert.
Effects>3D Effects>Drop Shadow, color #000000.

Selections>Select None.
23. Open the tube 3113-woman-LBTUBES and go to Edit>Copy.
Go back to your work and go to Edit>Paste as new layer.
Image>Resize, at your choice, redize all layers not checked.
Place  the tube at your choice, or see my example. the tube at your choice, or see my example.
Effects>3D Effects>Drop Shadow, at your choice.
24. Open the tube 3252-still life-LBTUBES and go to Edit>Copy.
Go back to your work and go to Edit>Paste as new layer.
Image>Resize, at your choice, redize all layers not checked.
Place  the tube at your choice, or see my example. the tube at your choice, or see my example.
Effects>3D Effects>Drop Shadow, at your choice.
25. Image>Add borders, 1 pixel, symmetric, foreground color #1f0f14.
Image>Resize, 1024 pixels width, resize all layers checked.
26. Add, if your like, the author and translator watermarks.
Sign your work on a new layer.
Layers>Merge>Merge All and save as jpg.
Version with tubes by Alies and Nicole.
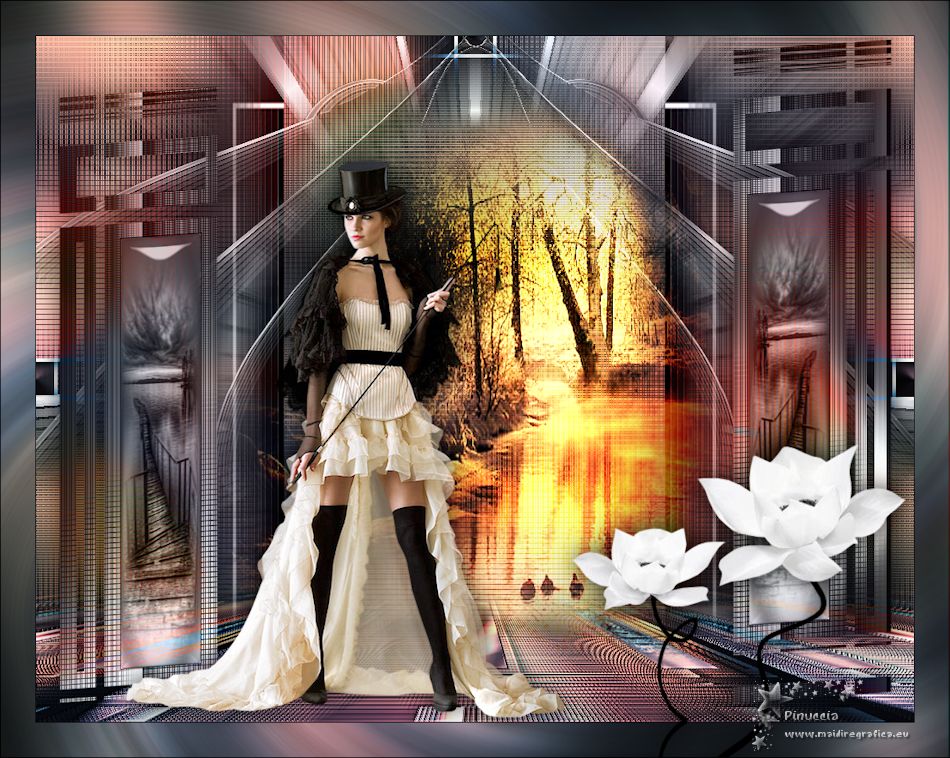
 Your versions here Your versions here

If you have problems or doubts, or you find a not worked link, or only for tell me that you enjoyed this tutorial, write to me.
15 November 2020
|

