|
TOP LET

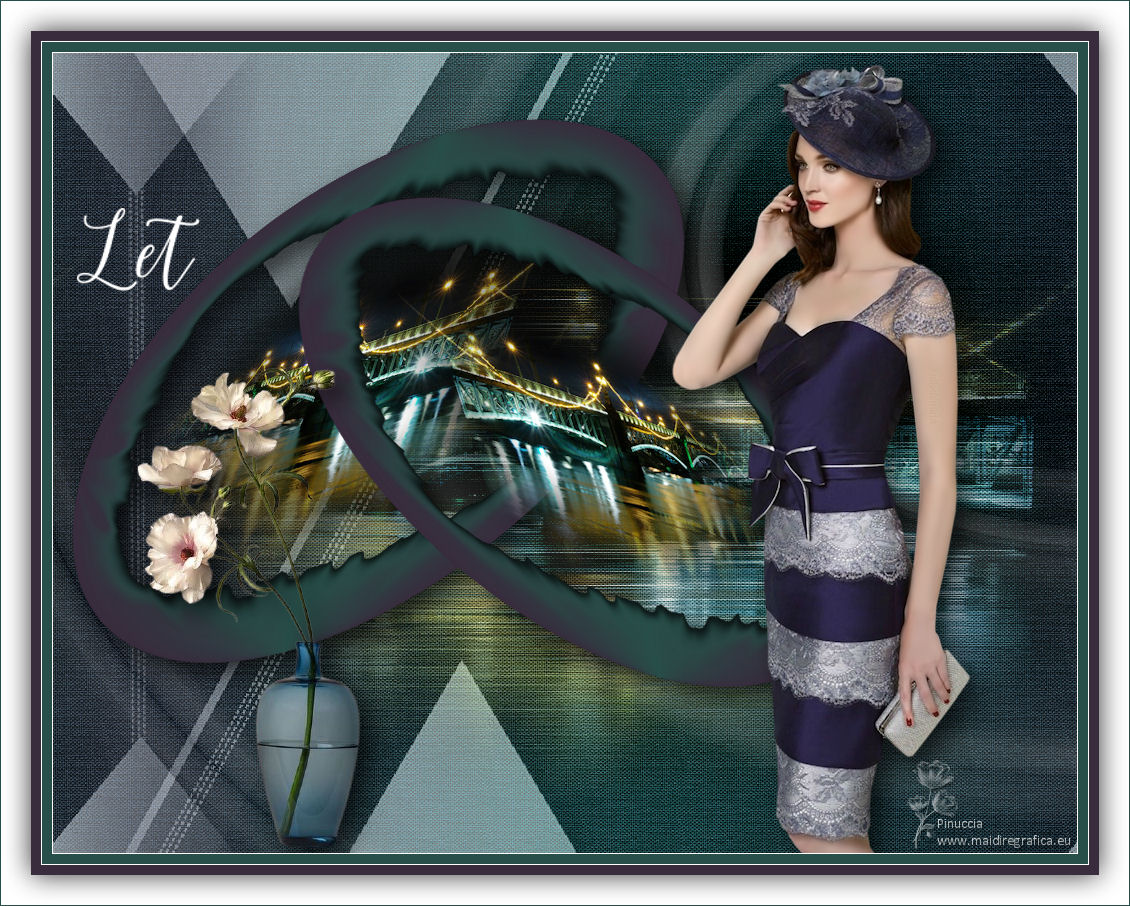
Thanks Lica Cida for your invitation to translate your tutorial

This tutorial was created with PSPX9 and translated with PSPX2 and PSPX3 and PSPX7, but it can also be made using other versions of PSP.
Since version PSP X4, Image>Mirror was replaced with Image>Flip Horizontal,
and Image>Flip with Image>Flip Vertical, there are some variables.
In versions X5 and X6, the functions have been improved by making available the Objects menu.
In the latest version X7 command Image>Mirror and Image>Flip returned, but with new differences.
See my schedule here
 French translation here French translation here
 your versions here your versions here
For this tutorial, you will need:
Material here
Thanks for the tubes Animabelle (158_Femme_Page6_Animabelle - 145_paysage_p3_animabelle)
and Callygraph (Callitubes-115flores); for the mask Narah (NarahsMasks_1644)
The rest of the material is by Lica Cida.
(you find here the links to the material authors' sites)
Plugins
consult, if necessary, my filter section here
Filters Unlimited 2.0 here
Alien Skin Xenofex 2 - Burnt Edge here
DSB Flux - Blast here
Carolaine and Sensibility - CS-LDots here
Alien Skin Eye Candy 5 Impact - Perspective Shadow here
AAA Filters - Custom here

You can change Blend Modes according to your colors.
In the newest versions of PSP, you don't find the foreground/background gradient (Corel_06_029).
You can use the gradients of the older versions.
The Gradient of CorelX here
Copy the selection in the Selection Folder.
Open the mask in PSP and minimize it with the rest of the material.
1. Set your foreground color to #382c3d,
and your background color to #284f49.
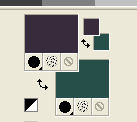
Set your foreground color to a Foreground/Background Gradient, style Linear.
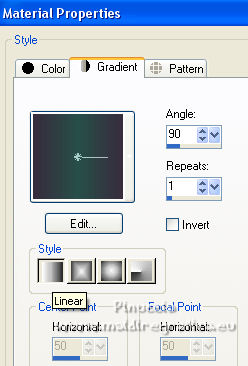
Open a new transparent image 1024 x 800 pixels.
Flood Fill  the transparent image with your Gradient. the transparent image with your Gradient.
2. Effects>Plugins>Alien Skin Xenofex 2 - Burnt Edges.
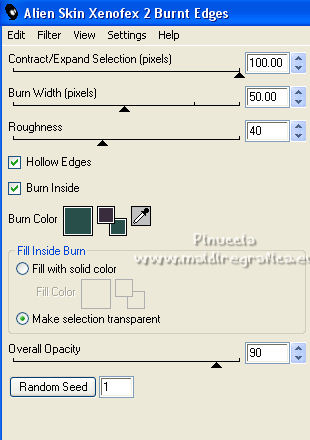
3. Effects>Geometric Effects>Circle

4. Activate your Magic Wand Tool 
and click in the circle to select it.
5. Layers>New Raster Layer.
Open the misted 145_paysage_p3_animabelle and go to Edit>Copy.
Go back to your work and go to Edit>Paste into Selection.
Selections>Select None.
Adjust>Sharpness>Sharpen.
Layers>Merge>Merge Down.
Image>Resize, to 90%, resize all layers not checked.
6. Effects>Distortion Effects>Lens Distortion.
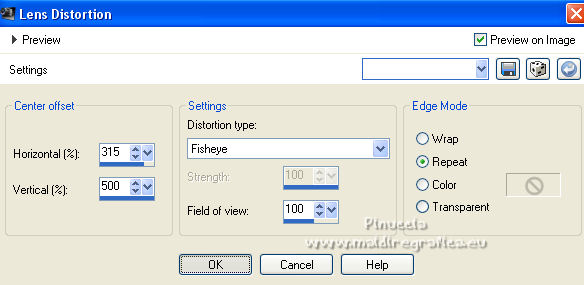
Layers>Duplicate.
Image>Mirror.
Image>Resize, to 90%, resize all layers not checked.
7. Activate the layer Raster 1.
K key on the keyboard to activate your Pick Tool 
and set Position X: 19,00 and Position Y: 66,00.

M key to deselect the Tool.
8. Activate your top layer.
Layers>Merge>Merge Down.
Effects>Plugins>Alien Skin Eye Candy 5 Impact - Perspective Shadow, at your choice.
Optional: Close the layer Raster 1, to view better your work.
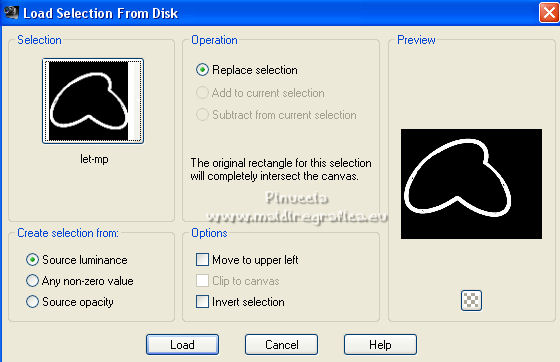
9. Selections>Load/Save Selection>Load Selection from Disk.
Look for and load the selection sellet.PspSelection.
10. Set your foreground color to #ffffff.
Layers>New Raster Layer.
Flood Fill  the selection with color #ffffff. the selection with color #ffffff.
Selections>Select None.
11. Adjust>Blur>Radial Blur.
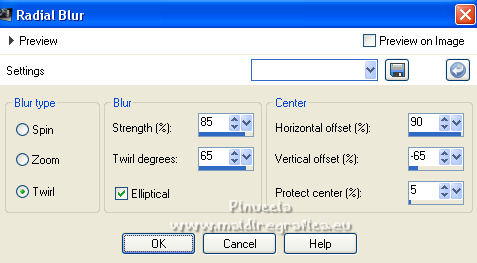
if you closed the layer Raster 1, don't worry if you see nothing
12. Effetcs>Artistic Effects>Enamel.
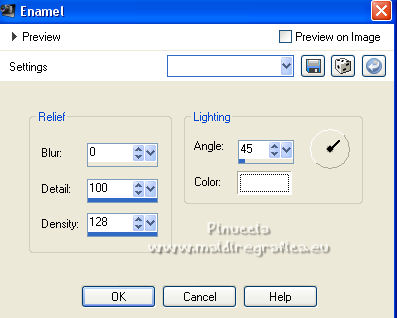
Effects>Edge Effects>Enhance More.
Layers>Arrange>Move Down.
13. Layers>New Raster Layer.
Layers>Arrange>Send to Bottom.
Set again your foreground color with the color (#382c3d) and the gradient of step 1
 
Flood Fill  the layer with your Gradient. the layer with your Gradient.
14. Selections>Select All.
Edit>Paste into Selection (the misted 145_paysage_p3_animabelle is still in memory).
Selections>Select None.
15. Effects>Plugins>DSB Flux - Blast.
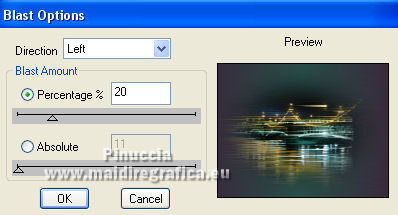
Note: An effect with the same name is also in VM Toolbox filter.
In older versions, if you have previously added the VM Toolbox filter in the File Locations,
you'll not see the Blast effect in Dsb filter list (and vice versa).
The filters are not similar, so you'll have to remove the first filters added in the File Locations.
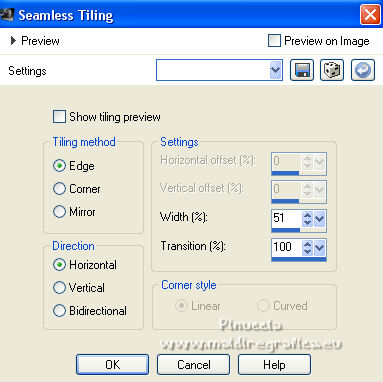
16. Effects>Image Effects>Seamless Tiling.
17. Layers>New Raster Layer.
Set again your foreground color to #ffffff.
Flood Fill  the layer with color #ffffff. the layer with color #ffffff.
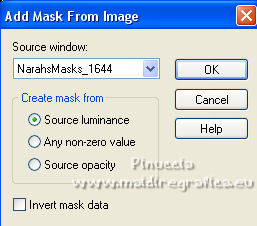
18. Layers>New Mask layer>From image
Open the menu under the source window and you'll see all the files open.
Select the mask NarahsMasks_1644.
Effects>Edge Effects>Enhance.
Layers>Merge>Merge Group.
19. Effects>Image Effects>Seamless Tiling, same settings.

20. Effects>Artistic Effects>Enameil, same settings.

Change the Blend Mode of this layer to Luminance (legacy) and reduce the opacity to 50%.
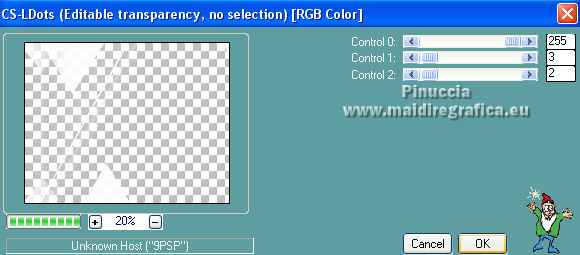
21. Effects>Plugins>Carolaine and Sensibility - CS-LDots.
Effects>Plugins>Alien Skin Eye Candy 5 Impact - Perspective Shadow, at your choice.
Activate the layer Raster 3.
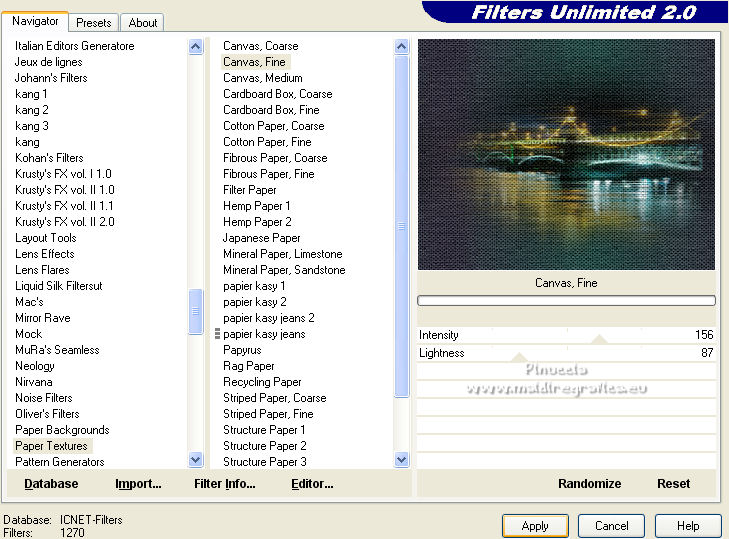
22. Effects>Plugins>Filters Unlimited 2.0 - Paper Texture - Canvas Fine, default settings.
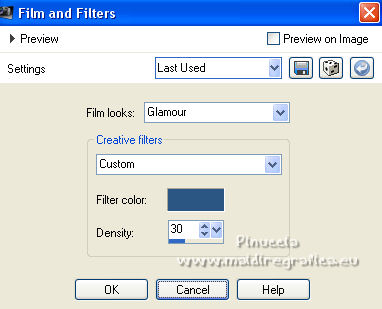
23. Effects>Photo Effects>Film and Filters.
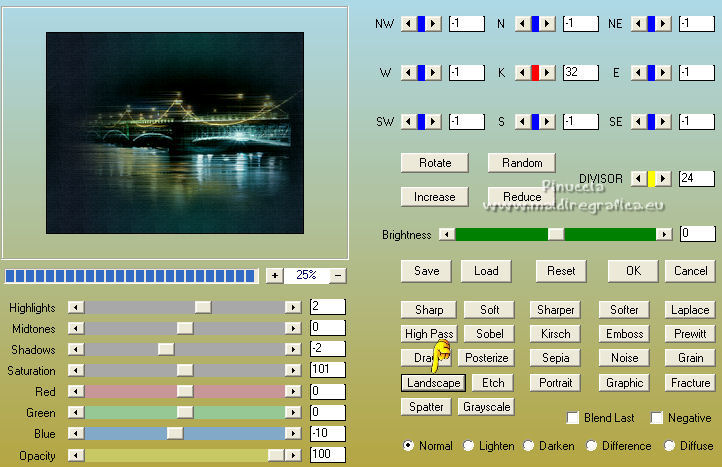
24. Effects>Plugins>AAA Filters - Custom - click on Landscape and ok.
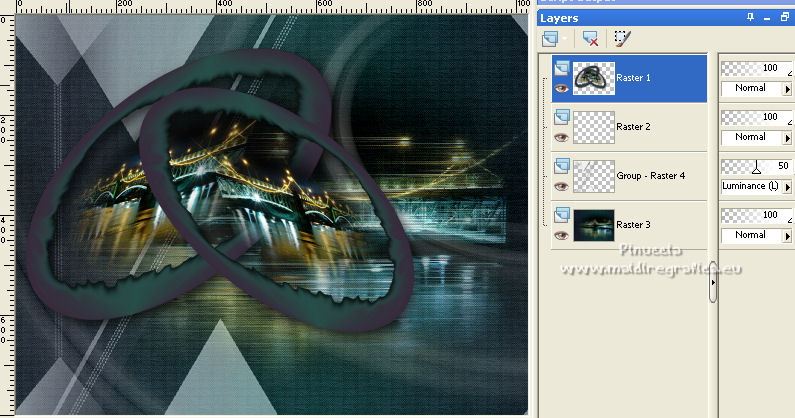
Open and activate the layer Raster 1.
Adapt Blend Modes and opacities at your choice.
25. Open the tube 158_Femme_Page6_Animabelle and go to Edit>Copy.
Go back to your work and go to Edit>Paste as new layer.
Image>Resize, at your choice, resize all layers not checked.
Image>Mirror.
Adjust>Sharpness>Sharpen.
Move  the tube to the right side. the tube to the right side.
Effects>3D Effects>Drop Shadow, at your choice.
26. Open the tube Callitubes-115flores and go to Edit>Copy.
Go back to your work and go to Edit>Paste as new layer.
Adjust>Sharpness>Sharpen.
Move  the tube at the bottom left. the tube at the bottom left.
Effects>3D Effects>Drop Shadow, at your choice.
27. Open the text texte_lc
The text was saved without converting to raster layer.
Fot his reason, if you don't have the font used, you'll get this message
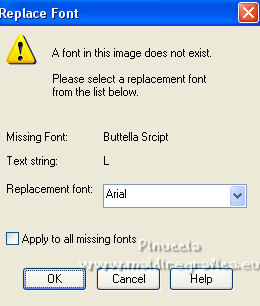
I added another text to the material, which I created after an image of the font found on the net
Copy.
Go back to your work and go to Edit>Paste as new layer.
Place  the text at your choice. the text at your choice.
28. Image>Add borders, 1 pixel, symmetric, color #ffffff.
Image>Add borders, 10 pixels, symmetric, background color.
Image>Add borders, 1 pixel, symmetric, color #ffffff.
Image>Add borders, 10 pixels, symmetric, foreground color.
Selections>Select All.
Image>Add borders, 30 pixels, symmetric, color #ffffff.
Effects>3D Effects>Drop Shadow, color #000000.

Image>Add borders, 1 pixel, symmetric, background color.
Selections>Select None.
29. Sign your work on a new layer.
Add, if you want, the author's and translator's watermarks.
Layers>Merge>Merge All and save as jpg.
For the tubes of this version thanks
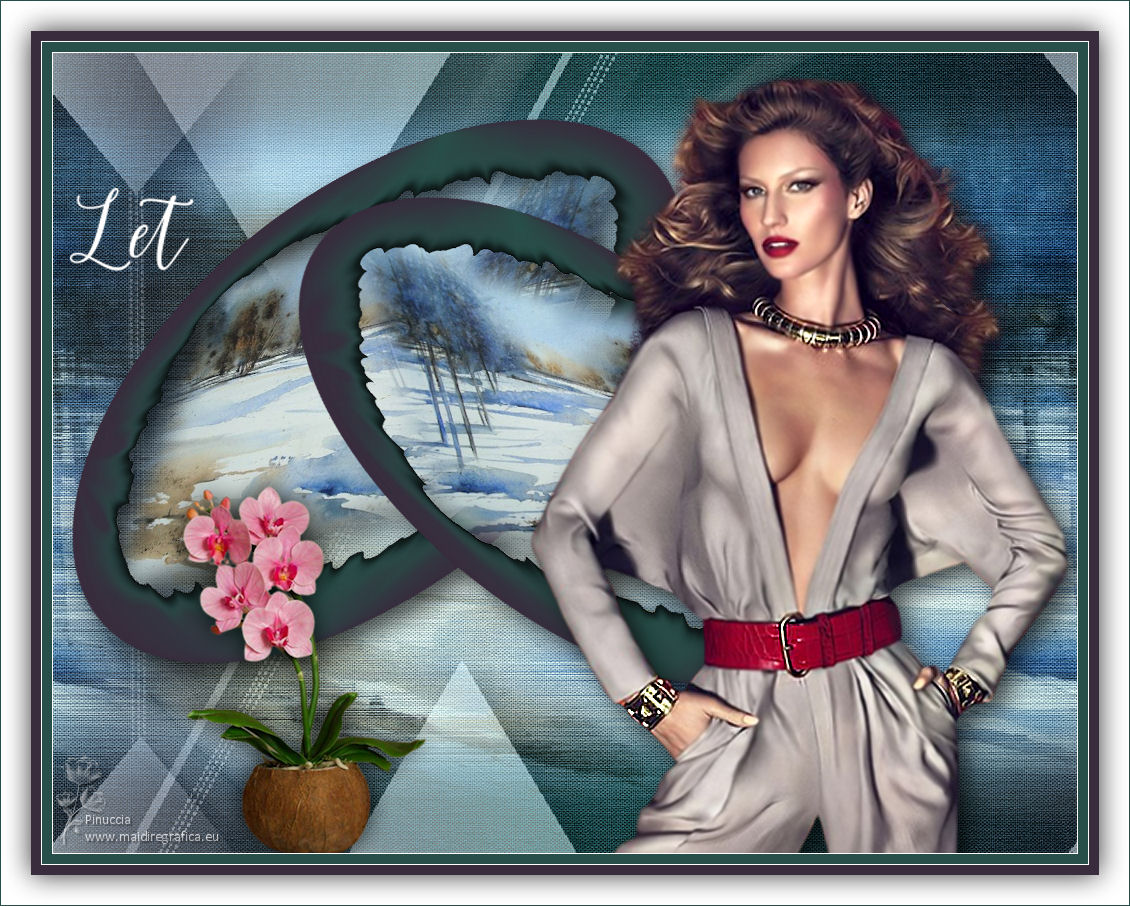
 Your versions here Your versions here

If you have problems or doubts, or you find a not worked link, or only for tell me that you enjoyed this tutorial, write to me.
18 May 2022

|

