|
TOP GOOD TIME

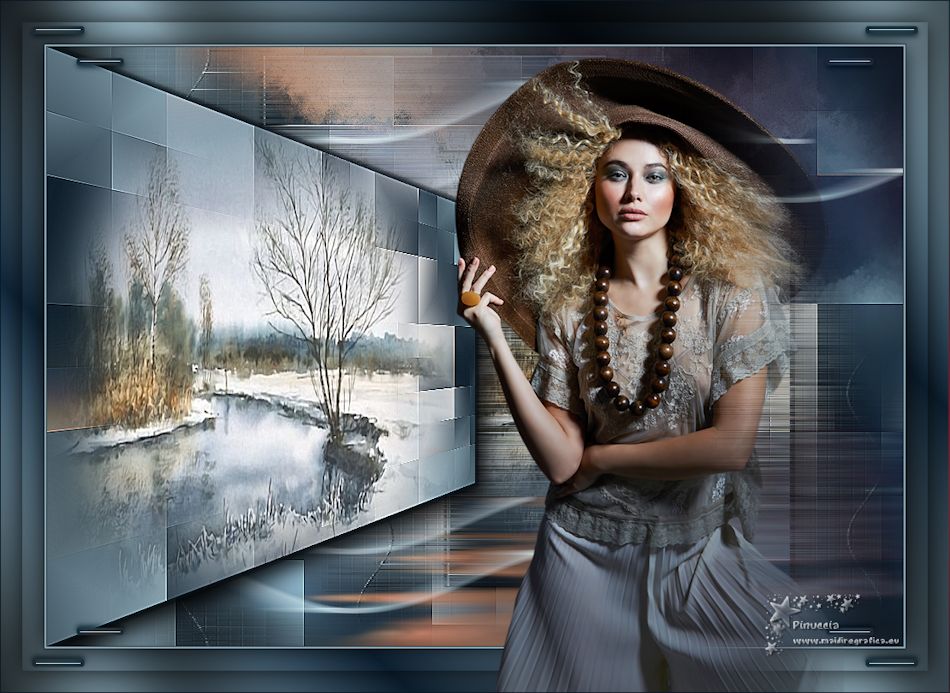
Thanks Lica Cida for your invitation to translate your tutorial

This tutorial was created with PSPX9 and translated with PSPX2 and PSPX3 and PSPX7, but it can also be made using other versions of PSP.
Since version PSP X4, Image>Mirror was replaced with Image>Flip Horizontal,
and Image>Flip with Image>Flip Vertical, there are some variables.
In versions X5 and X6, the functions have been improved by making available the Objects menu.
In the latest version X7 command Image>Mirror and Image>Flip returned, but with new differences.
See my schedule here
 French translation here French translation here
 your versions ici your versions ici
For this tutorial, you will need:
Material here
Thanks for the tubes Lily (Femme 752), Jewel (paysage hiver misted jewel 020),
and Ildiko (ildiko@create0006deco,
for the masks Narah (Narah_mask_0793) and Dushi (Du_difuminadaLateralDe_Dushi)
The rest of the material is by Lica Cida.
(you find here the links to the material authors' sites)
Plugins
consult, if necessary, my filter section here
Filters Unlimited 2.0 here
DSB Flux - Blast here
Mehdi - Sorting Tiles here
Alien Skin Eye Candy 5 Impact - Perspective Shadow here
Mura's Seamless - Emboss at Alpha here
Graphics Plus - Cross Shadow here
Nik Sofware - Color Efex here
Simple - Top Left Mirror here
Filters Graphics Plus, Mura's Seamless and Simple can be used alone or imported into Filters Unlimited.
(How do, you see here)
If a plugin supplied appears with this icon  it must necessarily be imported into Unlimited it must necessarily be imported into Unlimited

You can change Blend Modes according to your colors.
In the newest versions of PSP, you don't find the foreground/background gradient (Corel_06_029).
You can use the gradients of the older versions.
The Gradient of CorelX here
Copy the Selection in the Selections Folder.
Open the masks in PSP and minimize them with the rest of the material.
1. Open a new transparent image 1000 x 700 pixels.
Set your foreground color to #0a1926,
and your background color to #8aa6b2.
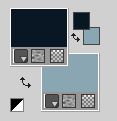
Set your foreground color to a Foreground/Background Gradient, style Linear.
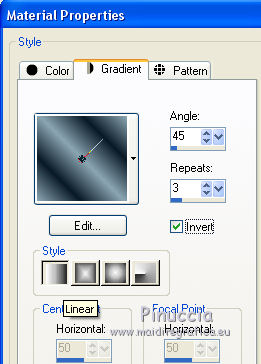
Flood Fill  the transparent image with your Gradient. the transparent image with your Gradient.
2. Selections>Select All.
Open the tube Paysage hiver misted jewel 020, erase the watermark and go to Edit>Copy.
Go back to your work and go to Edit>Paste into Selection.
Selections>Select None.
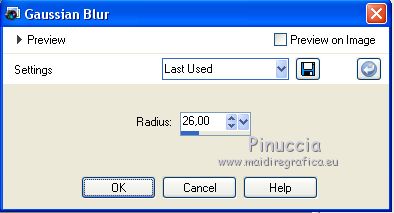
Adjust>Blur>Gaussian Blur, radius 26
3. Effects>Plugins>Mehdi - Sorting Tiles.
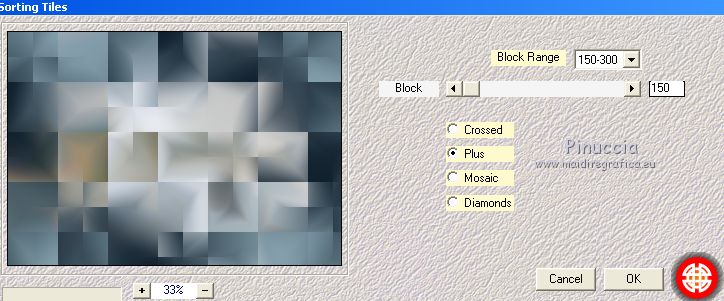
Effects>Edge Effects>Enhance.
Layers>Duplicate.
4. Effects>Geometric Effects>Perspective Horizontal
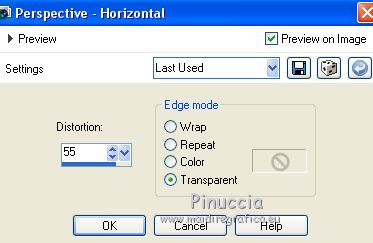
Activate your Pick Tool 
mode Scale 
(if you don't see the rulers: View>Rulers)
push the right central node to the left, up to 500 pixels
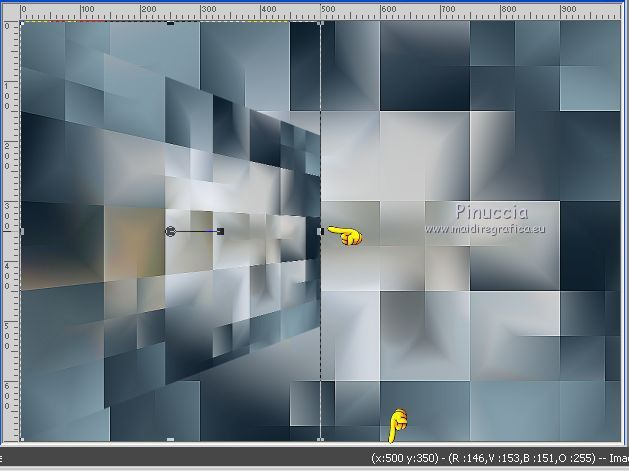
5. Activate your Magic Wand Tool  , tolerance and feather 0, , tolerance and feather 0,
and click on the ouside to select it.
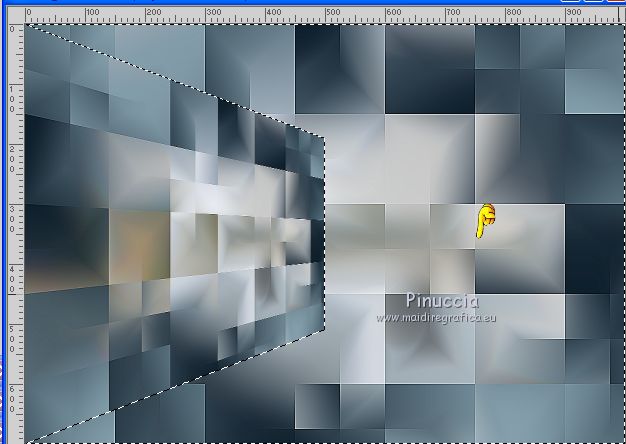
Selections>Invert.
6. Edit>Paste into Selection (the tube Paysage hiver misted jewel 020 is still in memory).
Adjust>Sharpness>Sharpen More.
7. Effects>3D Effects>Chisel, dark foreground color.
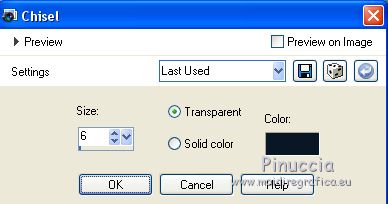
Selections>Select None.
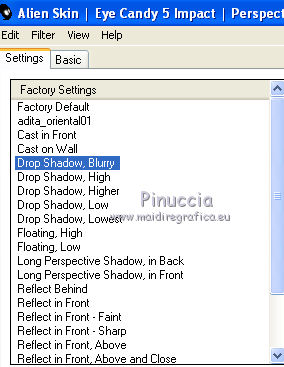
Effects>Plugins>Alien Skin Eye Candy 5 Impact - Perspective Shadow.
Select the preset Drop Shadow Blurry and ok.
8. Activate the layer Raster 1.
Layers>Duplicate.
Close the layer Raster 1 and stay on the layer of the copy.
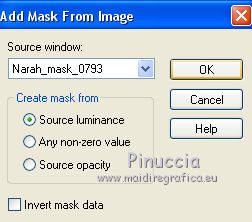
Layers>New Mask layer>From image
Open the menu under the source window and you'll see all the files open.
Select the mask Narah_Mask_0793.
Effects>Edge Effects>Enhance.
Layers>Merge>Merge Group.
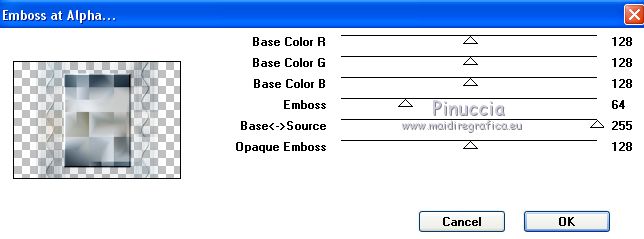
Effects>Plugins>Mura's Seamless - Emboss at Alpha, par défaut.
9. Effects>Image Effects>Offset.
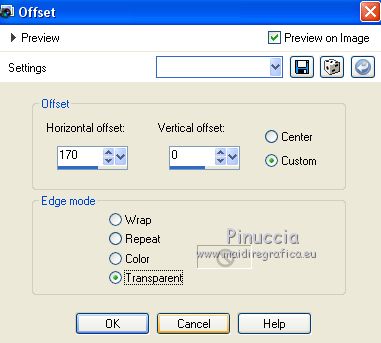
10. Selections>Load/Save Selection>Load Selection from Disk.
Look for and load the selection selbtempo_1_lc.
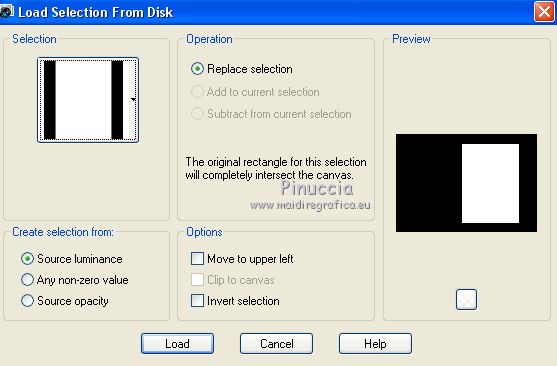
11. Edit>Paste into Selection (the tube Paysage hiver misted jewel 020 is still in memory).
Adjust>Sharpness>Sharpen More.
12. Effects>3D Effects>Chisel, same settings

Selections>Select None.
13. Effects>Plugins>DSB Flux - Blast.
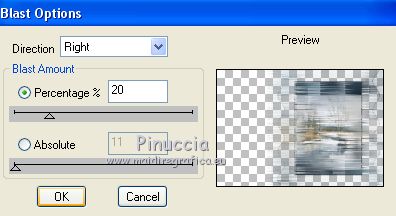
Effects>Plugins>Alien Skin Eye Candy 5 Impact - Perspective Shadow, Drop Shadow Blurry.
14. Effects>Image Effects>Seamless Tiling.
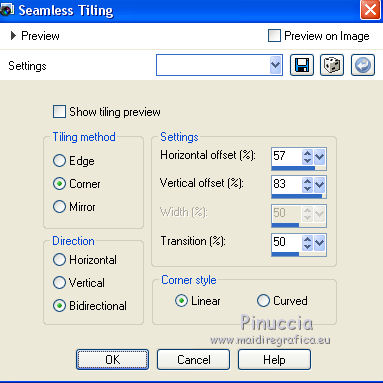
Open again the layer Raster 1 and stay on the central layer.
15. Activate your Pen Tool 
Line style +Solid, width 5 pixels

Invert the colors of your palette and close the background color.
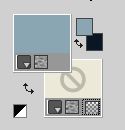
Draw 2 lines as below
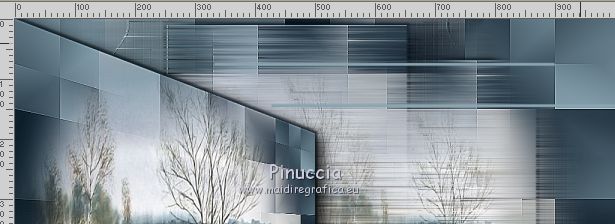
Layers>Convert to Raster Layer.
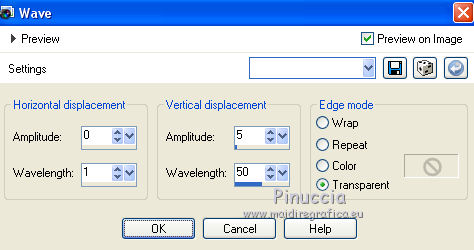
16. Effects>Distortion Effects>Wave
Layers>Duplicate.
Image>Flip.
Image>Mirror.
Layers>Merge>Merge Down.
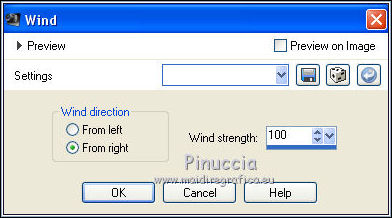
17. Effects>Distortion Effects>Wind - from right, wind strength 100
Change the Blend Mode of this layer to Screen.
18. Activate the layer below.
Open elementobtempo_1_lc and go to Edit>Copy.
Go back to your work and go to Edit>Paste as new layer.
Objects>Align>Right
If you work with a previous version which does not make the Objects menu available,
activate your Pick Tool 
and set Position X to 108

Keep the Blend Mode of this layer to Luminance (legacy).
19. Open elementobtempo_2_lc and go to Edit>Copy.
Go back to your work and go to Edit>Paste as new layer.
Objects>Align>Right or, as - Édition>Copier.
Revenir sur votre travail et Édition>Coller comme nouveau calque.
Objets>Aligner>Droite or, as before, set Position X to 108,00
Keep the Blend Mode of this layer to Screen.
20. On this layer and on the layers Raster 3 and Group-Copy of Raster 1,
(the layers shown here below)
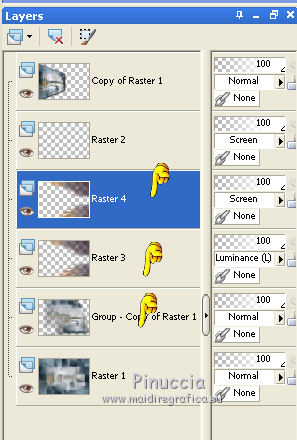
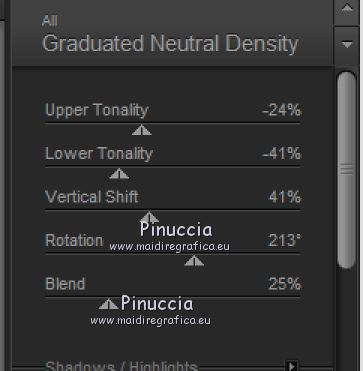
apply Effects>Plugins>Nik Software - Color Efex Pro - Graduated Neutral Density
21. Activate the layer Raster 1.
Effects>Plugins>Graphics Plus - Cross Shadow, default settings

22. Invert again the colors of your materials
and open the foreground color
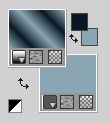
Image>Add borders, 1 pixel, symmetric, foreground color.
Image>Add borders, 2 pixels, symmetric, background color.
Image>Add borders, 1 pixel, symmetric, foreground color.
Image>Add borders, 50 pixels, symmetric, color #ffffff.
Activate your Magic Wand Tool 
and click on the white border to select it.
Flood Fill  the selection with your Gradient. the selection with your Gradient.
23. Effects>Plugins>Graphics Plus - Cross Shadow, default settings.

Selections>Invert.
Effects>3D Effects>Drop Shadow, color #000000.

24. Selections>Select All.
Selections>Modify>Contract - 25 pixels.
Effects>3D Effects>Drop Shadow, color #000000.

Selections>Select None.
25. Open the tube Femme 752 by Lily, erase the watermark and go to Edit>Copy.
Go back to your work and go to Edit>Paste as new layer.
Move  the tube at the bottom right. the tube at the bottom right.
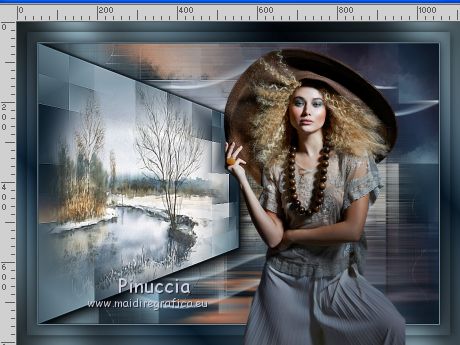
Necessary for this tube, to blend the clean cut of the dress
(not necessary if you use anothe tube).
Layers>New Mask layer>From image
Open the menu under the source window
and select the mask Du_difuminadaLateralDe_Dushi.
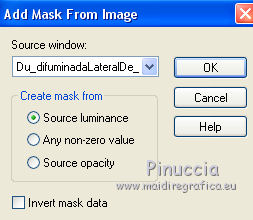
Optional, if necessary, Layers>Duplicate.
Layers>Merge>Merge Group.
26. Open ildiko@create0006_deco and go to Edit>Copy.
Go back to your work and go to Edit>Paste as new layer.
Move  the tube to the top left corner. the tube to the top left corner.
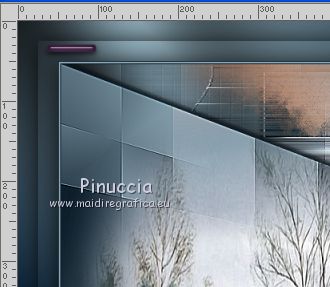
Change the Blend Mode of this layer to Luminance (legacy).
Effects>Plugins>Simple - Top Left Mirror.
Layers>Duplicate.
Image>Resize, to 90%, resize all layers not checked.
27. Image>Add border, 1 pixels, symmetric, foreground color.
28. Sign your work on a new layer.
Add, if you want, the watermarks of the author and of the translator.
Layers>Merge>Merge All.
Image>Resize, 1000 pixels width, resize all layers checked.
Save as jpg.
Version with tubes by Luz Cristina and Cal
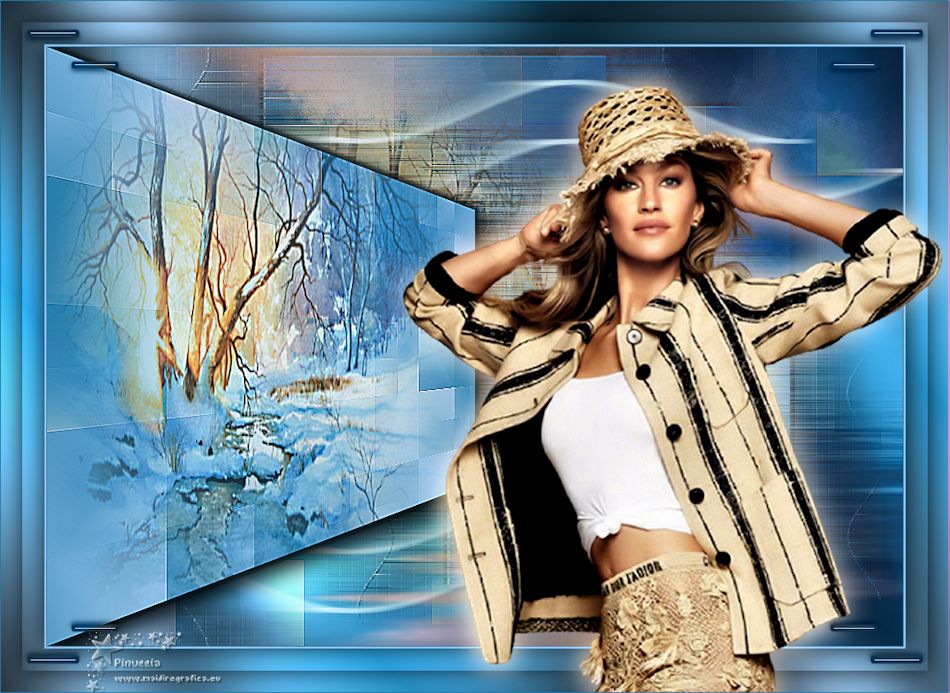
 Your versions here Your versions here

If you have problems or doubts, or you find a not worked link, or only for tell me that you enjoyed this tutorial, write to me.
13 February 2021
|

