|
TOP EVA
 ENGLISH VERSION ENGLISH VERSION
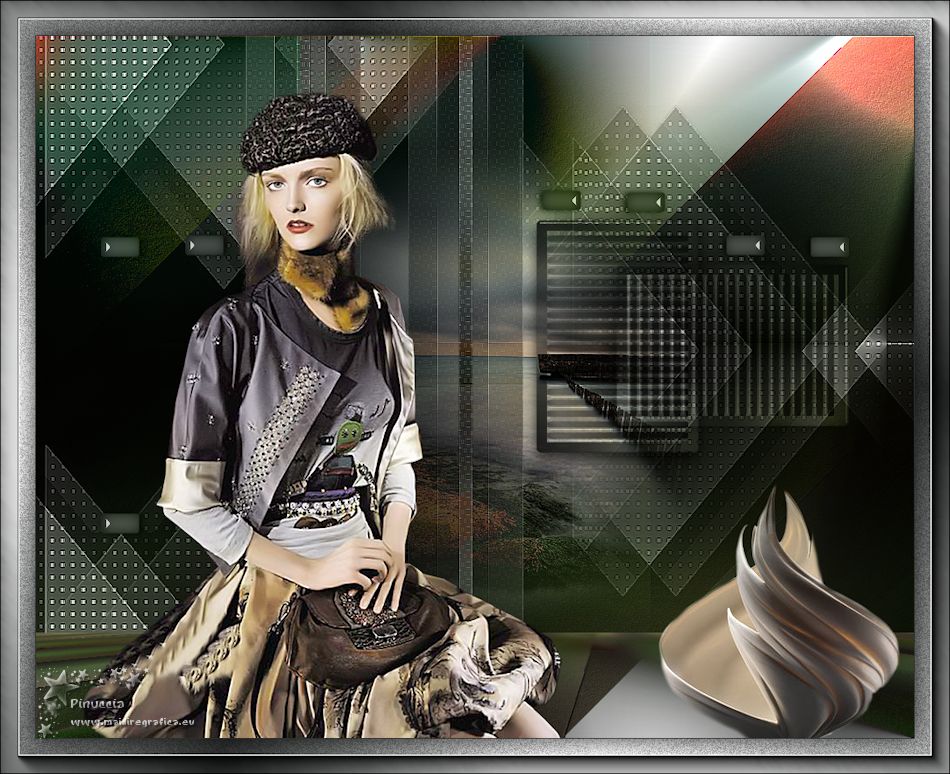
Thanks Lica Cida for your invitation to translate your tutorial

This tutorial was created with PSPX8 and translated with PSPX3, but it can also be made using other versions of PSP.
Since version PSP X4, Image>Mirror was replaced with Image>Flip Horizontal,
and Image>Flip with Image>Flip Vertical, there are some variables.
In versions X5 and X6, the functions have been improved by making available the Objects menu.
In the latest version X7 command Image>Mirror and Image>Flip returned, but with new differences.
See my schedule here
 French translation here French translation here
your versions ici
For this tutorial, you will need:
Material here
Tubes: 5139-luzcristina - Drevers_misted_landscape_11.
Deco: Drevers_deco_25 - ildiko@create0006_deco - Ildiko_create_deco (139)
Images: backinicial - BACK6-RB.
(you find here the links to the material authors' sites)
Plugins
consult, if necessary, my filter section here
Mehdi - Sorting Tiles ici
Graphics Plus - Vertical Mirror here
Italian Editors Effect - Effetto Fantasma here
DSB Flux - Bright Noise here
FM Tile Tools - Blend Emboss here
Mura's Meister - Perspective Tiling here
Alien Skin Eye Candy 5 Impact - Glass, Perspective Shadow here
Nik Software - Color Efex here
AAA Frames - Foto Frame here
Filters Unlimited 2.0 here
Filters Italian Editors and Graphics Plus can be used alone or imported into Filters Unlimited.
(How do, you see here)
If a plugin supplied appears with this icon  it must necessarily be imported into Unlimited it must necessarily be imported into Unlimited

You can change Blend Modes according to your colors.
In the newest versions of PSP, you don't find the foreground/background gradient (Corel_06_029).
You can use the gradients of the older versions.
The Gradient of CorelX here
Copy the presets  in the folders of the plugins Alien Skin Eye Candy 5. in the folders of the plugins Alien Skin Eye Candy 5.
One or two clic on the file (it depends by your settings), automatically the preset will be copied in the right folder.
why one or two clic see here
Copy the preset Light-6 in the Presets Folder.
1. Open the background image "backinicial".
This image will be the basis of your work.
Layers>Promote Background layer and automatically the layer will be renamed Raster 1.
*****
Alternately, you can open a new transparente image 1000 x 700 pixels.
Set your foreground color to a light color,
and your background color to a dark color of your misted.
Set your foreground color to a Foreground/Background Gradient, style Linear,
angle and repeats 0, Invert checked.
Flood Fill  the transparent image with the Gradient. the transparent image with the Gradient.
****
2. Layers>New Raster Layer.
Selections>Select All.
Open the tube Drevers_misted_landscape_11 and go to Edit>Copy.
Minimize the tube: you'll use it later.
Go back to your work and go to Edit>Paste into Selection.
Selections>Select None.
Change the Blend Mode of this layer to Soft Light.
Layers>Merge>Merge Down.
3. Effects>Plugins>Graphics Plus - Vertical Mirror, default settings.
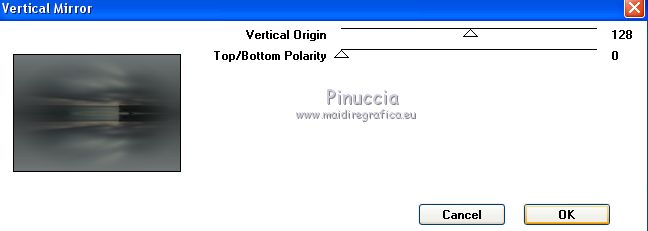
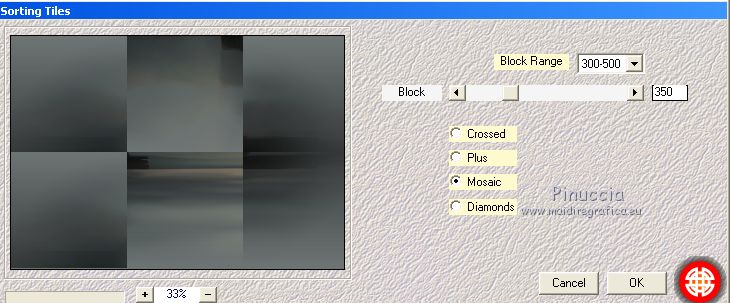
4. Effects>Plugins>Mehdi - Sorting Tiles.
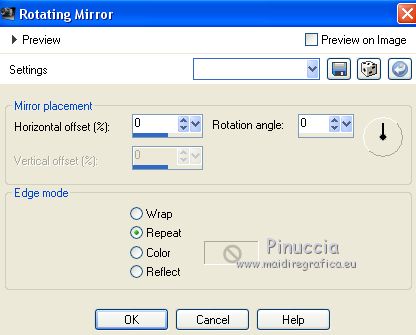
Effects>Reflection Effects>Rotating Mirror.
Effects>Edge Effects>Enhance.
5. Layers>New Raster Layer, Raster 2.
Selections>Select All.
Open Ildiko_create_deco (139) and go to Edit>Copy.
Go back to your work and go to Edit>Paste into Selection.
Selections>Select None.
6. With your Pick Tool default hit the left side.
No significant differences after this step.
I skipped it and applied it after the Effetto Fantasma.
You decide if to follow my example; even in this case the difference is not important
Effects>Plugins>It@lian Editors Effect - Effetto Fantasma
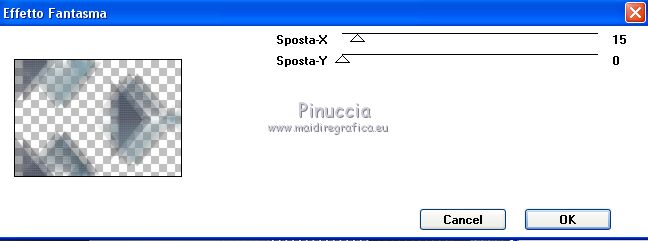
See the effet after the Pick tool.
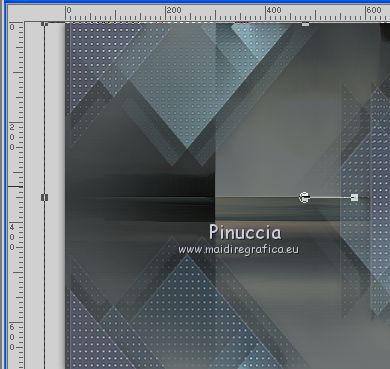
Effects>Edge Effects>Enhance.
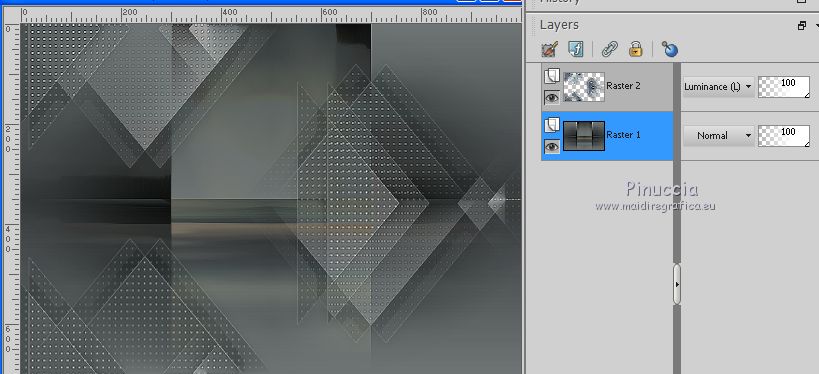
Change the Blend Mode of this layer to Luminance (legacy).
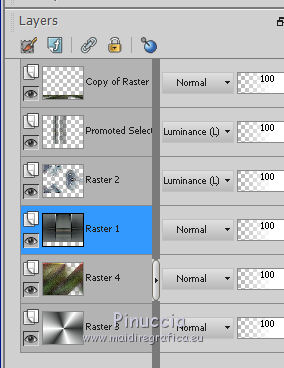
7. Activate the layer Raster 1.
Selection Tool 
(no matter the type of selection, because with the custom selection your always get a rectangle)
clic on the Custom Selection 
and set the following settings.
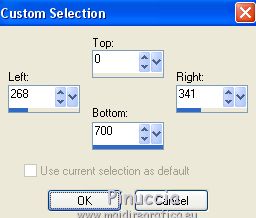
Selections>Promote Selection to layer.
Selections>Select None.
Layers>Arrange>Move Up.
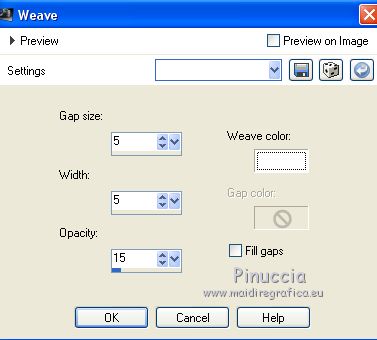
8. Effects>Texture Effects>Weave
Weave color #ffffff.
9. Effects>Plugins>It@lian Editors Effect - Effetto Fantasma, same settings.
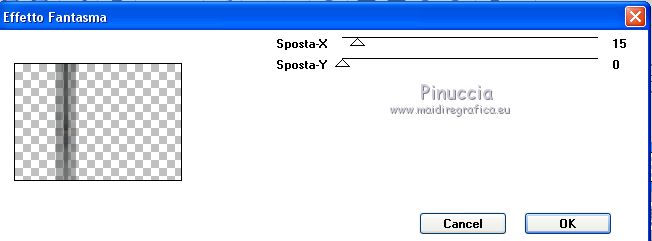
Effects>Edge Effects>Enhance.
10. Layers>Duplicate.
Effects>Image Effects>Offset.
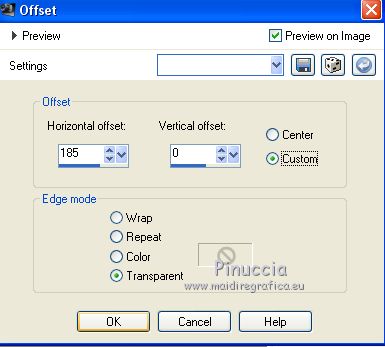
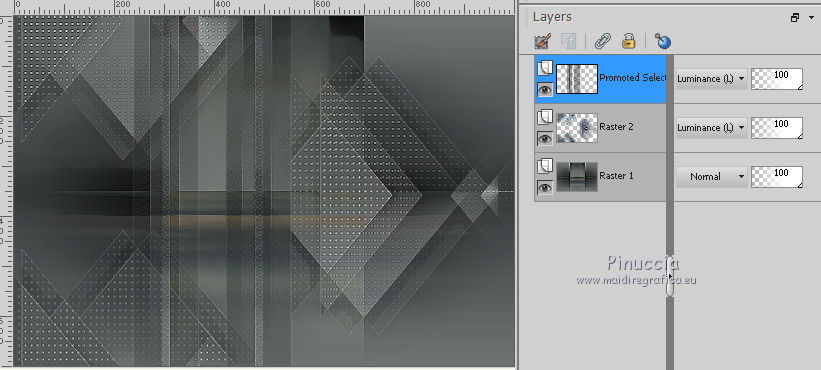
Layers>Merge>Merge Down.
Change the Blend Mode of this layer to Luminance (legacy).
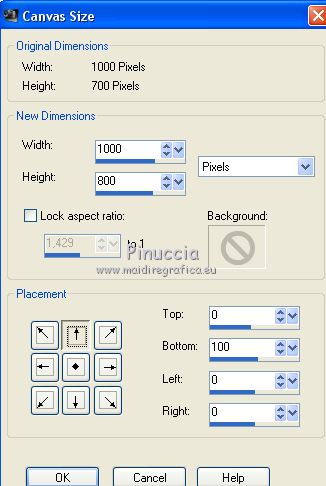
11. Image>Canvas Size - 1000 x 800 pixels.
Layers>New Raster Layer.
Layers>Arrange>Send to Bottom.
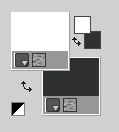
Set your foreground color to #ffffff,
and your background color to the dark color used for the initial gradient (for me #2f3231)
Set your foreground color to a Foreground/Background Gradient, style Radial.
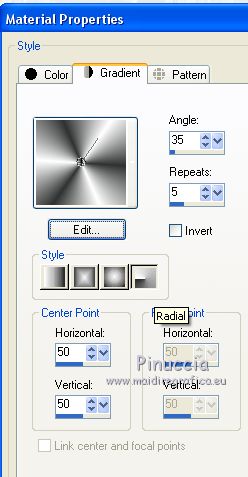
Flood Fill  the layer with your Gradient. the layer with your Gradient.
Attention, please, all layers not checked.

12. Layers>New Raster Layer.
Selections>Select All.
Open the background image BACK6_RB and go to Edit>Copy.
Go back to your work and go to Edit>Paste into Selection.
Selections>Select None.
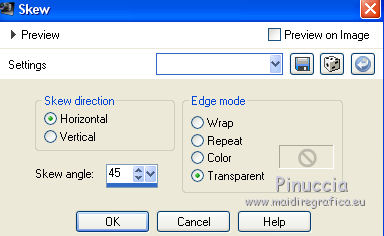
13. Effects>Geometric Effects>Skew
14. Effects>Image Effects>Seamless Tiling, Side by side

15. Adjust>Add/Remove Noise>JPEG Artifact Removal.
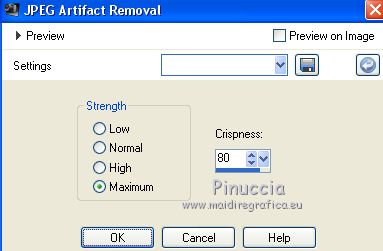
Effets>Modules Externer>FM Tile Tools - Blend Emboss, default settings.

16. Layers>Duplicate.
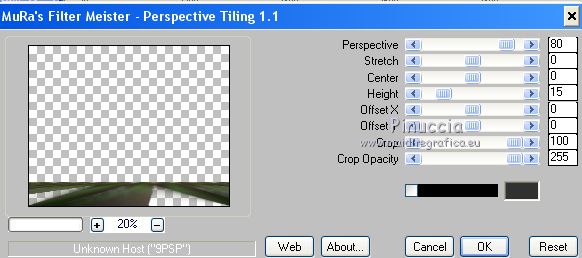
Effects>Plugins>Mura's Meister - Perspective Tiling.
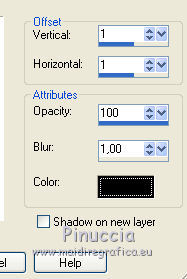
Effects>3D Effects>Drop Shadow, color #000000.
Layers>Arrange>Bring to Top.
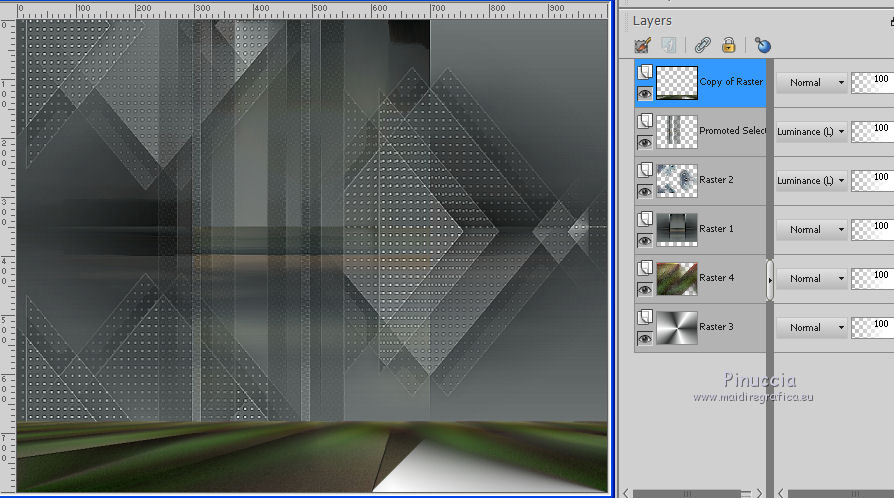
17. Activate the layer Raster 1.
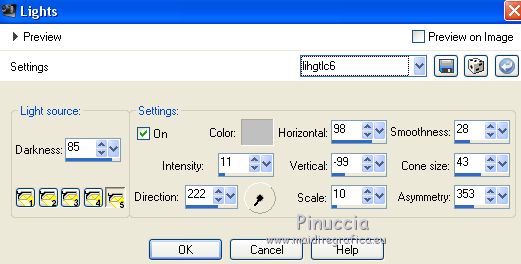
Effects>Illumination Effects>Lights
Select the preset lightlc6 and ok
18. Stay on the layer Raster 1.
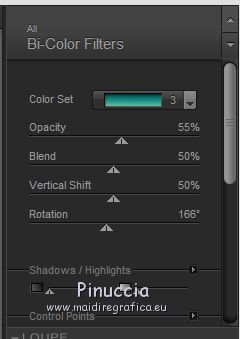
Effects>Plugins>Nik Software - Color Efex
Bi-Color Filters - to the right side Moss 3 with these settings
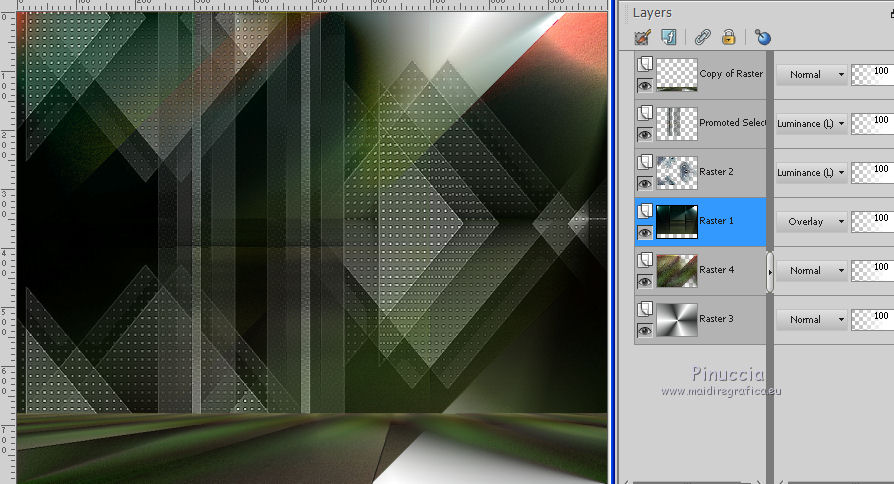
Change the Bland Mode of this layer to Overlay
The layers and your tag
you can change Blend Modes and opacitys at your choice.
19. Activate the layer above, Raster 2.
Activate again the tube Drevers_misted_landscape_11 and go to Edit>Copy.
Go back to your work and go to Edit>Paste as new layer.
Image>Resize, to 90%, resize all layers not checked.
Adjust>Sharpness>Sharpen More.
Adjust>One Step Photo Fix.
20. Layers>Merge>Merge visible.
21. Custom Selections 
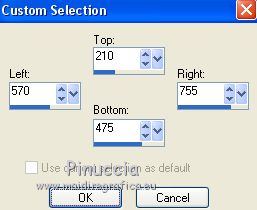
Layers>New Raster Layer.
Flood Fill  with the Radial Gradient of step 11. with the Radial Gradient of step 11.
Adjust>Blur>Gaussian Blur - radius 38.
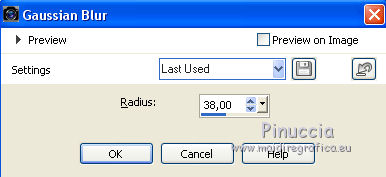
Selections>Modify>Contract - 12 pixels.
22. Effects>Reflection Effects>Pattern
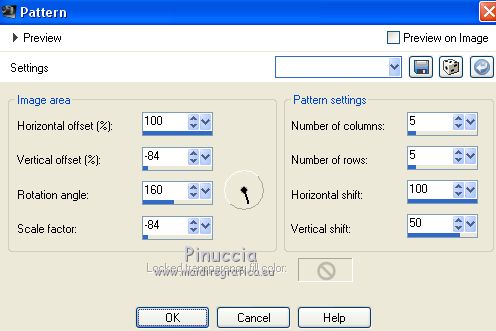
Selections>Select None.
23. Effects>Plugins>Alien Skin Eye Candy 5 Impact - Glass.
Select the preset Katrina and ok.
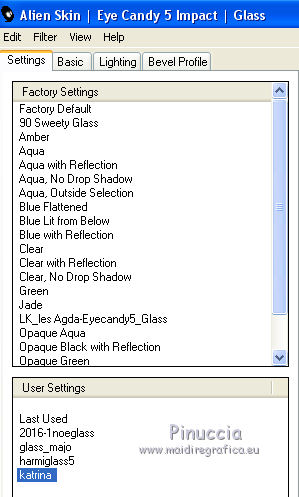
24. Effects>Plugins>Alien Skin Eye Candy 5 Impact - Perspective Shadow.
Select the preset Drop Shadow Blurry and ok.
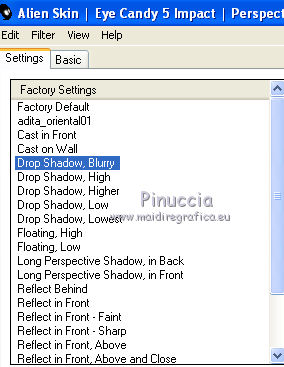
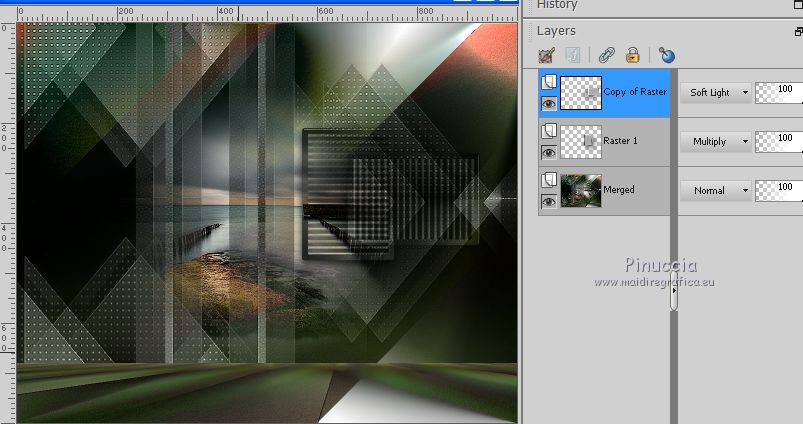
Change the Blend mode to Multiply.
25. Layers>Duplicate.
Image>Free Rotate - 90 degrees to right.

Change the Blend Mode of this layer to Soft Light
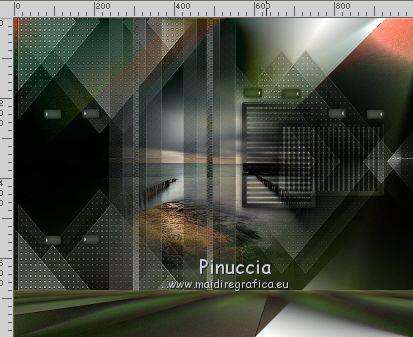
26. Open the tube ildiko@create0006_deco and copy the selected image.
Go back to your work and go to Edit>Paste as new layer.
Change the Blend Mode of this layer to Luminance (legacy).
Duplicate and place  the decos at your choice. the decos at your choice.
For me
27. Open the tube 5139-luzcristina and go to Edit>Copy.
Go back to your work and go to Edit>Paste as new layer.
Adjust>Sharpness>Sharpen More.
Move  the tube to the left side. the tube to the left side.
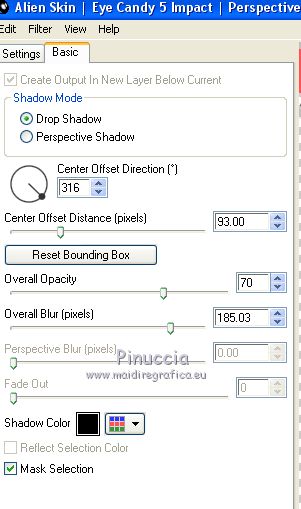
Effects>Plugins>Alien Skin Eye Candy 5 Impact - Perspective Shadow.
Drop Shadow Blurry and set Overall Opacity to 70
28. Open the tube Drevers_deco_25 and go to Edit>Copy.
Go back to your work and go to Edit>Paste as new layer.
Adjust>Sharpness>Sharpen.
Move  the tube to the right side. the tube to the right side.
Effects>Plugins>Alien Skin Eye Candy 5 Impact - Perspective Shadow, same settings

29. Image>Add borders, 1 pixel, symmetric, dark color #2f3231.
Image>Add borders, 40 pixels, symmetric, light color #ffffff.
Activate your Magic Wand Tool 
and clic on the white border to select it.
Flood Fill  the selection with your Radial Gradient. the selection with your Radial Gradient.
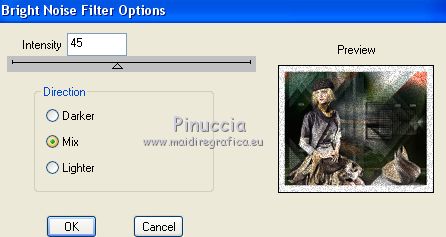
30. Effects>Plugins>DSB Flux - Bright Noise
Selections>Invert.
Effects>3D Effects>Drop Shadow, color #000000.

Selections>Select None.
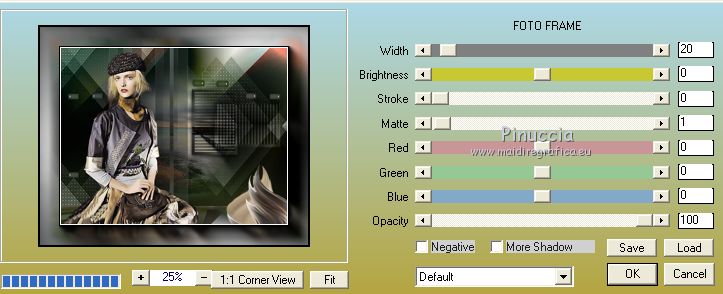
31. Effects>Plugins>AAA Frames - Foto Frame.
32. Image>Resize, 1000 pixels width, resize all layers checked.
33. Sign your work on a new layer.
little note about the watermark:
I don't ask to put watermark on the versions made by my translations.
But if you decide to use the watermark supplied by the author, I would appreciate that my work as translator was also respected.
For that, I added my watermark to the material.
34. Layers>Merge>Merge All and save as jpg
Version with tubes by Anna.br and Gabry
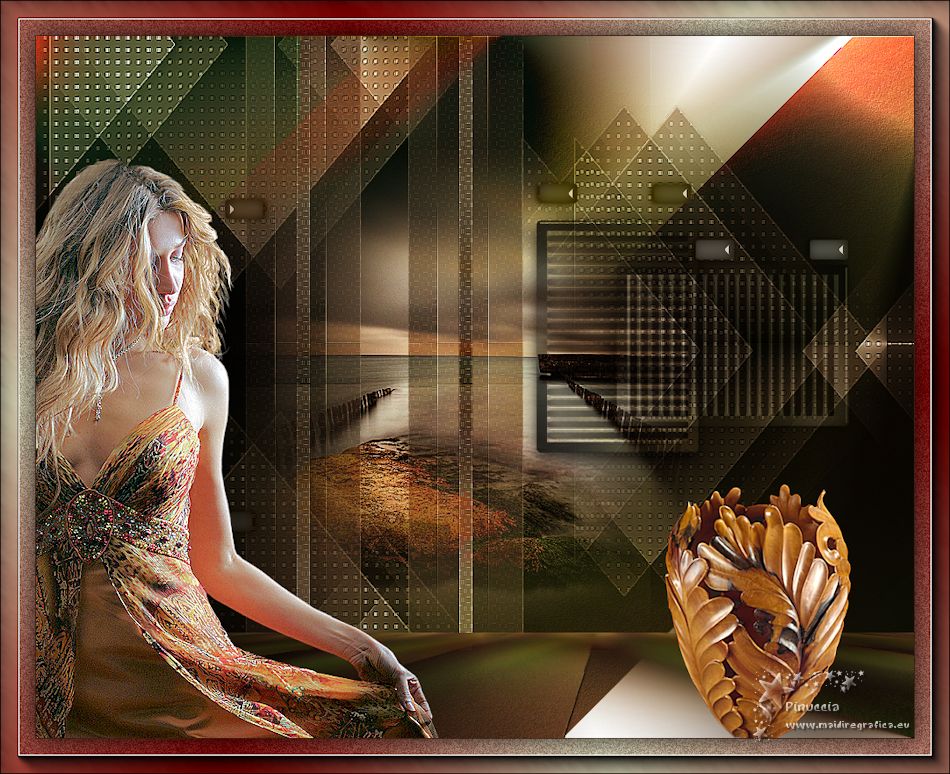
Your versions here

If you have problems or doubts, or you find a not worked link, or only for tell me that you enjoyed this tutorial, write to me.
24 November 2019
|
 ENGLISH VERSION