|
TOP ESSENCE

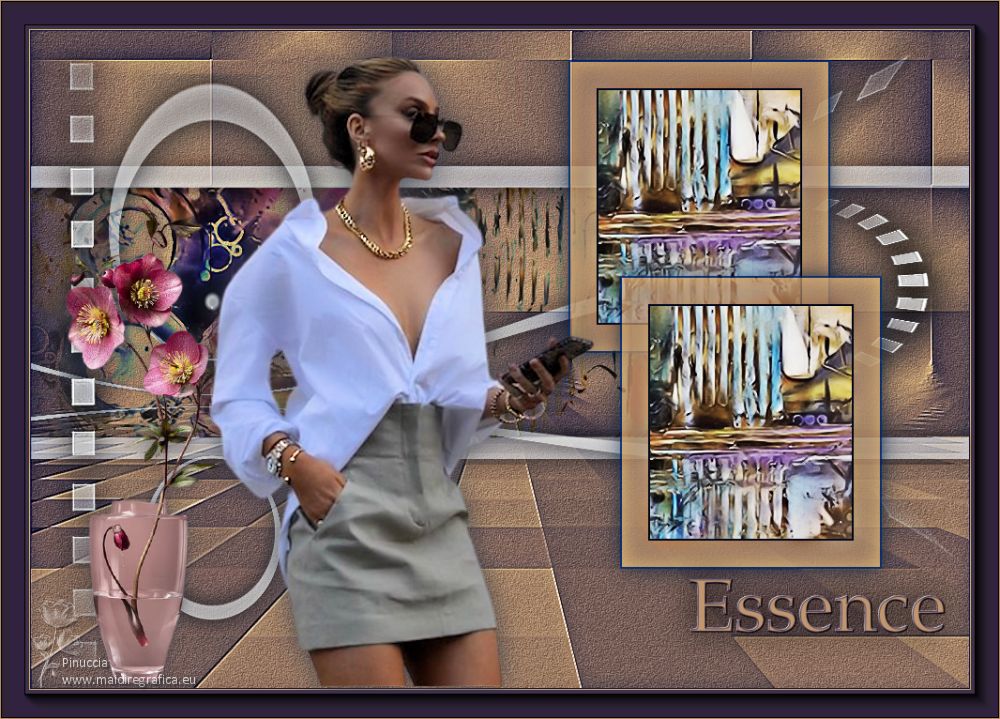
Thanks Lica Cida for your invitation to translate your tutorial

This tutorial was created with PSPX9 and translated with PSPX2 and PSPX3 and PSPX7, but it can also be made using other versions of PSP.
Since version PSP X4, Image>Mirror was replaced with Image>Flip Horizontal,
and Image>Flip with Image>Flip Vertical, there are some variables.
In versions X5 and X6, the functions have been improved by making available the Objects menu.
In the latest version X7 command Image>Mirror and Image>Flip returned, but with new differences.
See my schedule here
 French translation here French translation here
 your versions here your versions here

For this tutorial, you will need:
Material here
Thanks for the tubes Beatriz (3767-woman-LB TUBES), Calli (Callitubes-153flores)
and Tine (misted_abstrait2_tine_07.2020-100).
The rest of the material is by Lica Cida.
(you find here the links to the material authors' sites)
Plugins
consult, if necessary, my filter section here
Filters Unlimited 2.0 here
VM Distortion - Tilomat 2000 here
Frischluft - Mosaic Plane here
FM Tile Tools - Blend Emboss here
AAA Frames - Foto Frame here
Filters VM Instant Art and Simple can be used alone or imported into Filters Unlimited.
(How do, you see here)
If a plugin supplied appears with this icon  it must necessarily be imported into Unlimited it must necessarily be imported into Unlimited

You can change Blend Modes according to your colors.
In the newest versions of PSP, you don't find the foreground/background gradient (Corel_06_029).
You can use the gradients of the older versions.
The Gradient of CorelX here
Copy the preset Emboss 3 in the Presets Folder.
1. Set your foreground color to #3e3149,
and your background color to #c0966f.
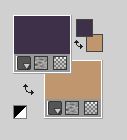
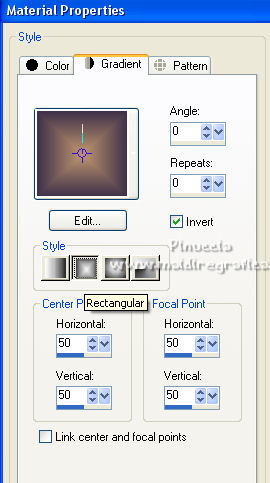
Set your foreground color to a Foreground/Background Gradient, style Rectangular.
Open a new transparent image 1000 x 700 pixels.
Flood Fill  the transparent image with your Gradient. the transparent image with your Gradient.
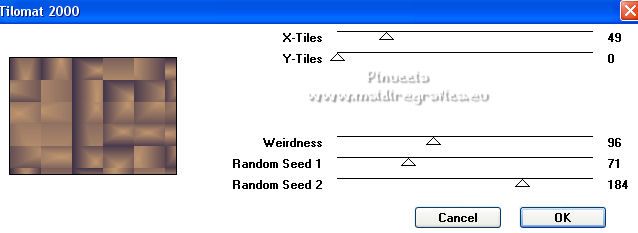
2. Effects>Plugins>VM Distortion - Tilomat 2000, default settings.
3. Effects>Plugins>Frischluft - Mosaic Plane.
if you want to see the result well, increase the percentage of the size
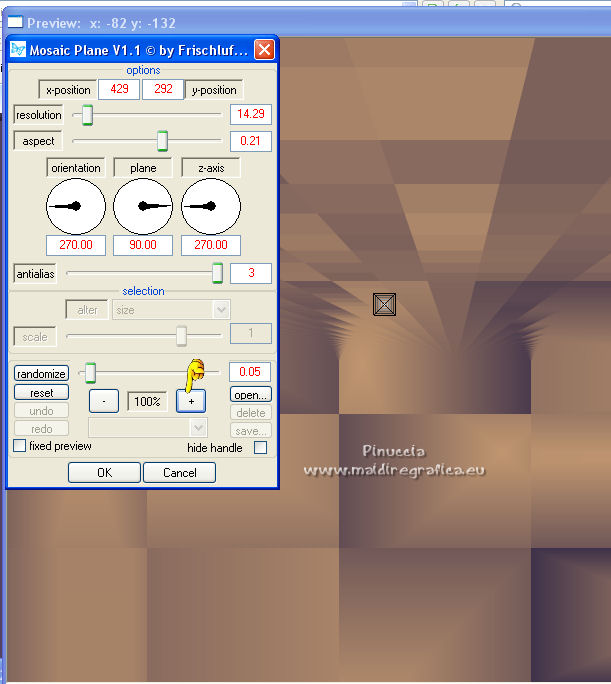
The result of this effect may change according to the PSP version.
On the left, the result with the PSPX2 and X7 versions;
on the right the result with the PSPX3 versions.
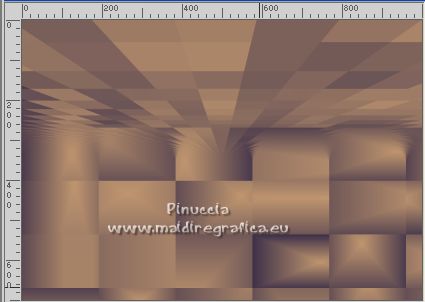 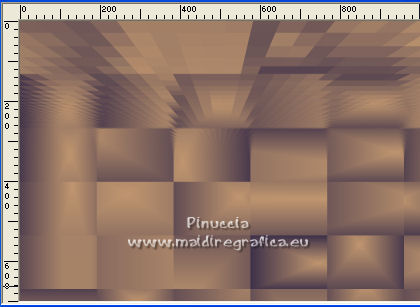
Image>Flip.
Effects>User Defined Filter - select the preset Emboss 3 and ok.

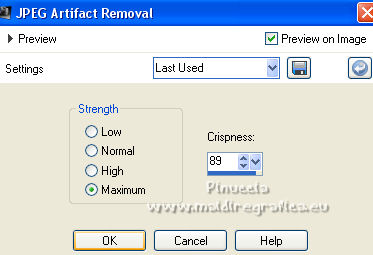
4. Adjust>Add/Remove Noise>Add Noise, JPEG Artifact Removal.
5. Effects>Plugins>FM Tile Tools - Blend Emboss, default settings.

6. Selection Tool 
(no matter the type of selection, because with the custom selection your always get a rectangle)
clic on the Custom Selection 
and set the following settings.
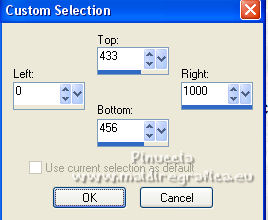
7. Set your foreground color to white #ffffff.
Layers>New Raster Layer.
Reduce the opacity of your Flood Fill Tool to 50%.
Flood Fill  the selection with color #ffffff. the selection with color #ffffff.
Selections>Select None.
8. Layers>Duplicate.
K key on the keyboard to activate your Pick Tool 
keep Position X: 0,00 and set Position Y: 144,00.

M key to deselect the Tool.
Layers>Merge>Merge Down.
Effects>3D Effects>Drop Shadow, color #000000.
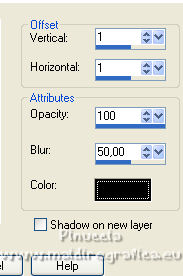
9. Custom Selection 
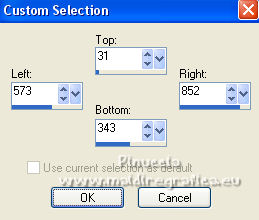
10. Set again your foreground color to #3e3149.
Layers>New Raster Layer.
Set the opacity of your Flood Fill Tool to 80%.
Flood Fill  the layer with your foreground color #3e3149. the layer with your foreground color #3e3149.
11. Selections>Modify>Contract - 2 pixels.
Press CANC on the keyboard 
12. Keep the opacity of your Flood Fill Tool to 80%.
Flood Fill  the selection with your background color #c0966f. the selection with your background color #c0966f.
13. Selections>Modify>Contract - 30 pixels.
14. Open the tube misted_abstrait2_tine_07.2020-100 and go to Edit>Copy.
Go back to your work and go to Edit>Paste as new layer.
Place  the tube on the selection, to your liking. the tube on the selection, to your liking.
Selections>Invert.
Press CANC on the keyboard.
Selections>Invert.
Adjust>Sharpness>Sharpen.
15. Effects>3D Effects>Chisel - foreground color #3e3149.
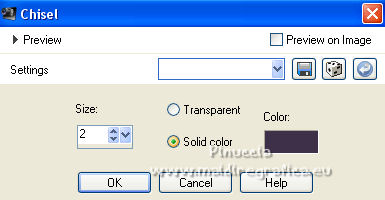
Selections>Select None.
Layers>Merge>Merge Down.
Effects>3D Effects>Drop Shadow, same settings.

16. Layers>Duplicate.
K key to activate your Pick Tool 
and set Position X: 593,00 and Position Y: 230,00.

M key to deselect the Tool.
Layers>Merge>Merge Down.
Set again the opacity of your Flood Fill Tool to 100.
17. Activate the layer below, Raster 2.
Activate your Magic Wand Tool  , tolerance and feather 0, , tolerance and feather 0,
and click between the borders to select it (2-3 click to select well).
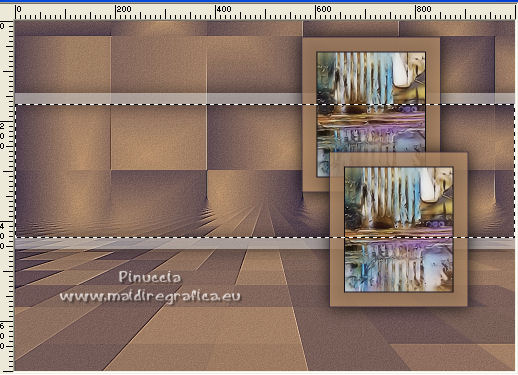
18. Your misted tube is still in memory:
Edit>Paste as new layer.
for my example, before pasting it as a new layer,
I activate the tube and I did Image>Flip.
Move  the tube on the selection to your liking; the tube on the selection to your liking;
for me:
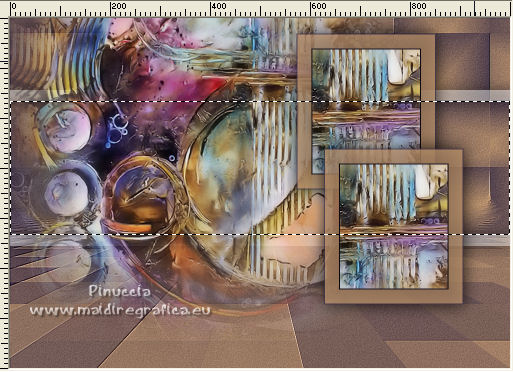
Selections>Invert.
Press CANC on the keyboard.
Selections>Invert.
Adjust>Sharpness>Sharpen.
Selections>Select None.
Change the Blend Mode of this layer to Darken,, or to your liking.
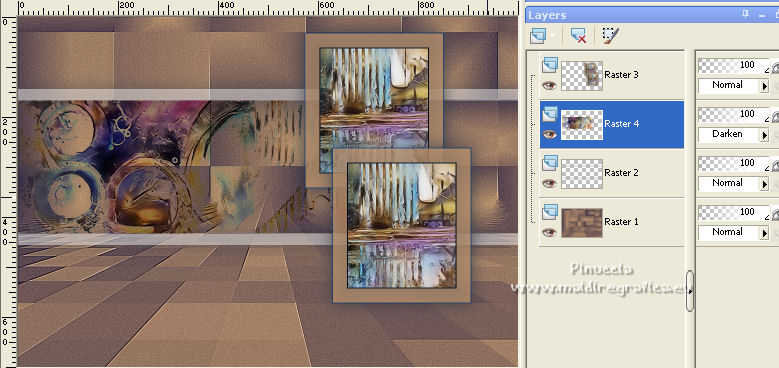
Here below the tag with the different result of filter Frishluft.
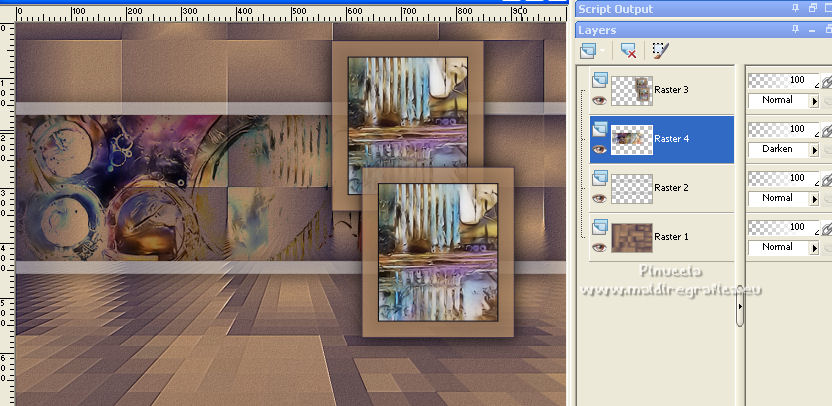
19. Activate again the layer below, Raster 2.
Layers>Duplicate.
Effects>Distortion Effects>Pinch.

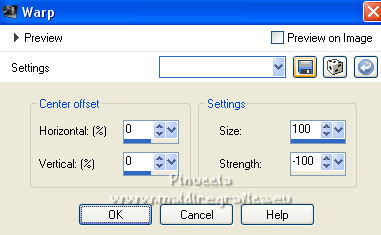
20. Effects>Distortion Effects>Warp
Layers>Arrange>Move Up.
21. K key to activate your Pick Tool 
and set Position X: -307,00 and Position Y: 46,00.

M key to deselect the Tool.
Effects>3D Effects>Drop Shadow, color #000000.

Your tag and the layers - adapt to your liking.
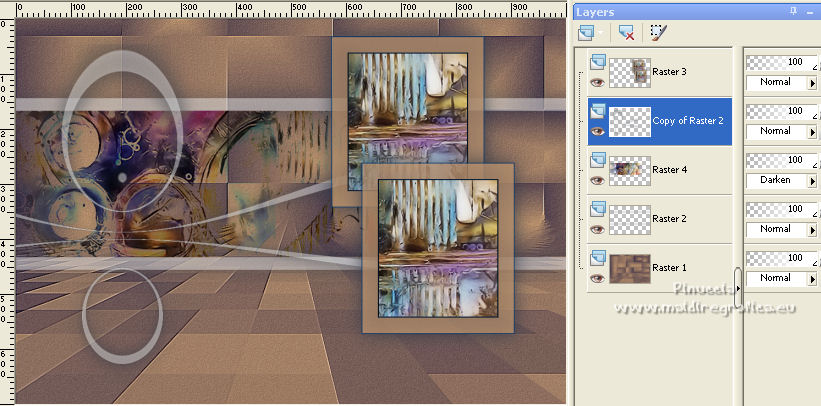
Here below the tag with the different result of filter Frishluft.
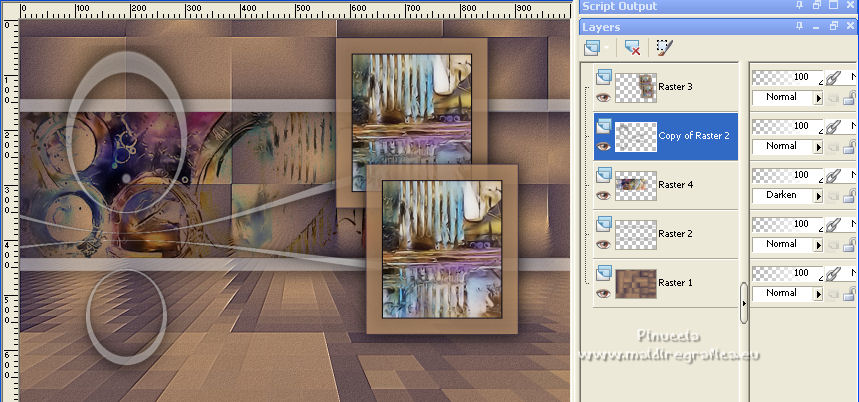
22. Stay on the layer Copy of Raster 2.
Open deco1-lc and go to Edit>Copy.
Go back to your work and go to Edit>Paste as new layer.
23. K key to activate your Pick Tool 
and set Position Y: 670,00 and Position Y: -75,00.

Effects>3D Effects>Drop Shadow, same settings.

24. Open deco2-lc and go to Edit>Copy.
Go back to your work and go to Edit>Paste as new layer.
Set Position X: -41,00 and Position Y: 9,00.

M key to deselect the Tool.
Effects>3D Effects>Drop Shadow, same settings.
25. Image>Add borders, 1 pixel, symmetric, foreground color #3e3149.
Image>Add borders, 1 pixel, symétrique, background color #c0966f.
26. Layers>Duplicate.
Effects>Edge Effects>High Pass.
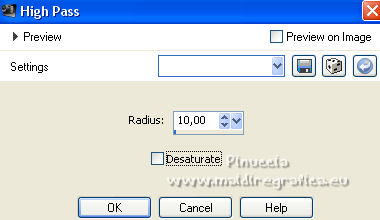
Change the Blend Mode of this layer to Overlay.
Layers>Merge>Merge Down.
27. Open the tube Callitubes-153flores and go to Edit>Copy.
Go back to your work and go to Edit>Paste as new layer.
Move  the tube at the bottom left, or to your liking. the tube at the bottom left, or to your liking.
Effects>3D Effects>Drop Shadow, at your choice.
28. Open the tube 3767-woman-LB TUBES (2) and go to Edit>Copy.
Go back to your work and go to Edit>Paste as new layer.
Image>Mirror.
Move  the tube to your liking. the tube to your liking.
Effects>3D Effects>Drop Shadow, at your choice.
29. Open the texte Titulo Essence bylicacida and go to Edit>Copy.
Go back to your work and go to Edit>Paste as new layer.
Move  the text to the right side, or to your liking. the text to the right side, or to your liking.
30. Image>Add borders, 30 pixels, symmetric, foreground color #3e3149.
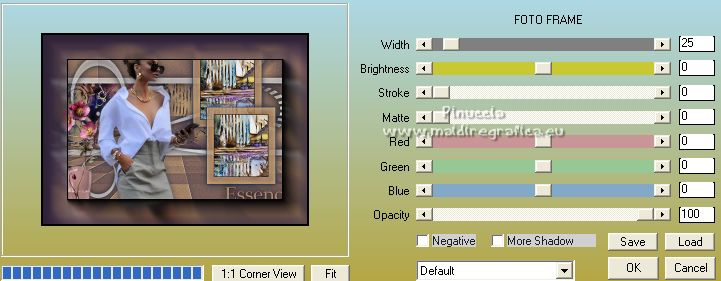
31. Effects>Plugins>AAA Frames - Foto Frame.
32. Image>Add borders, 1 pixel, symmetric, background color #c0966f.
33. Sign your work on a new layer.
Add, if you want, the author's and translator's watermarks.
34. Image>Resize, 1000 pixels width, resize all layers checked.
Save as jpg.
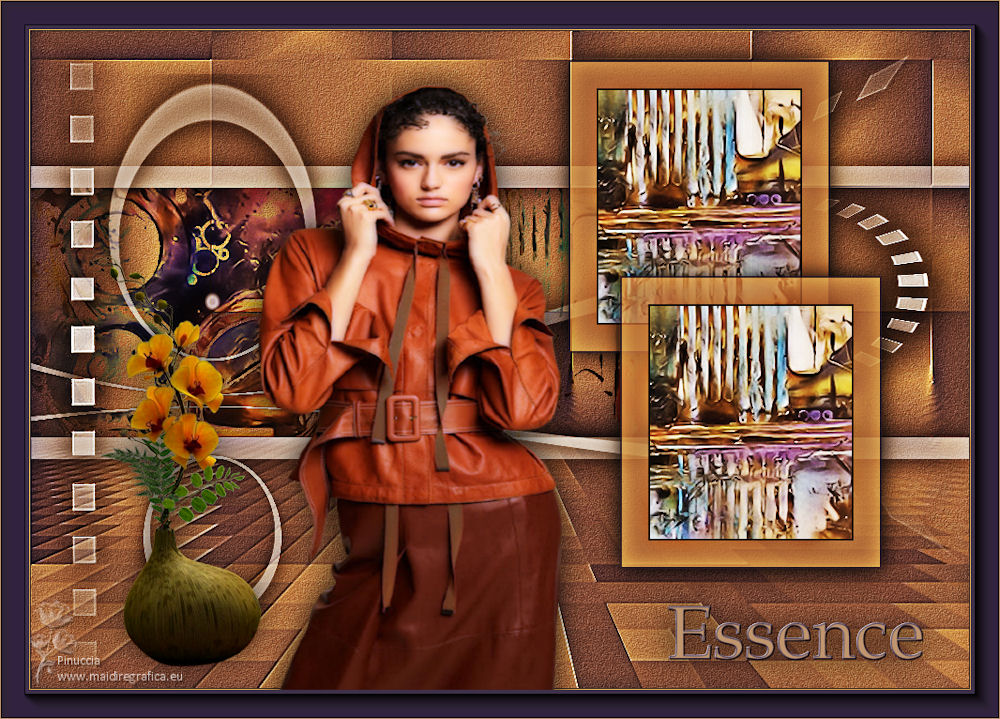
For the tubes of this version thanks Calligraphy and Nena Silva
 Your versions here Your versions here

If you have problems or doubts, or you find a not worked link, or only for tell me that you enjoyed this tutorial, write to me.
9 August 2022

|

