|
TOP DENISE

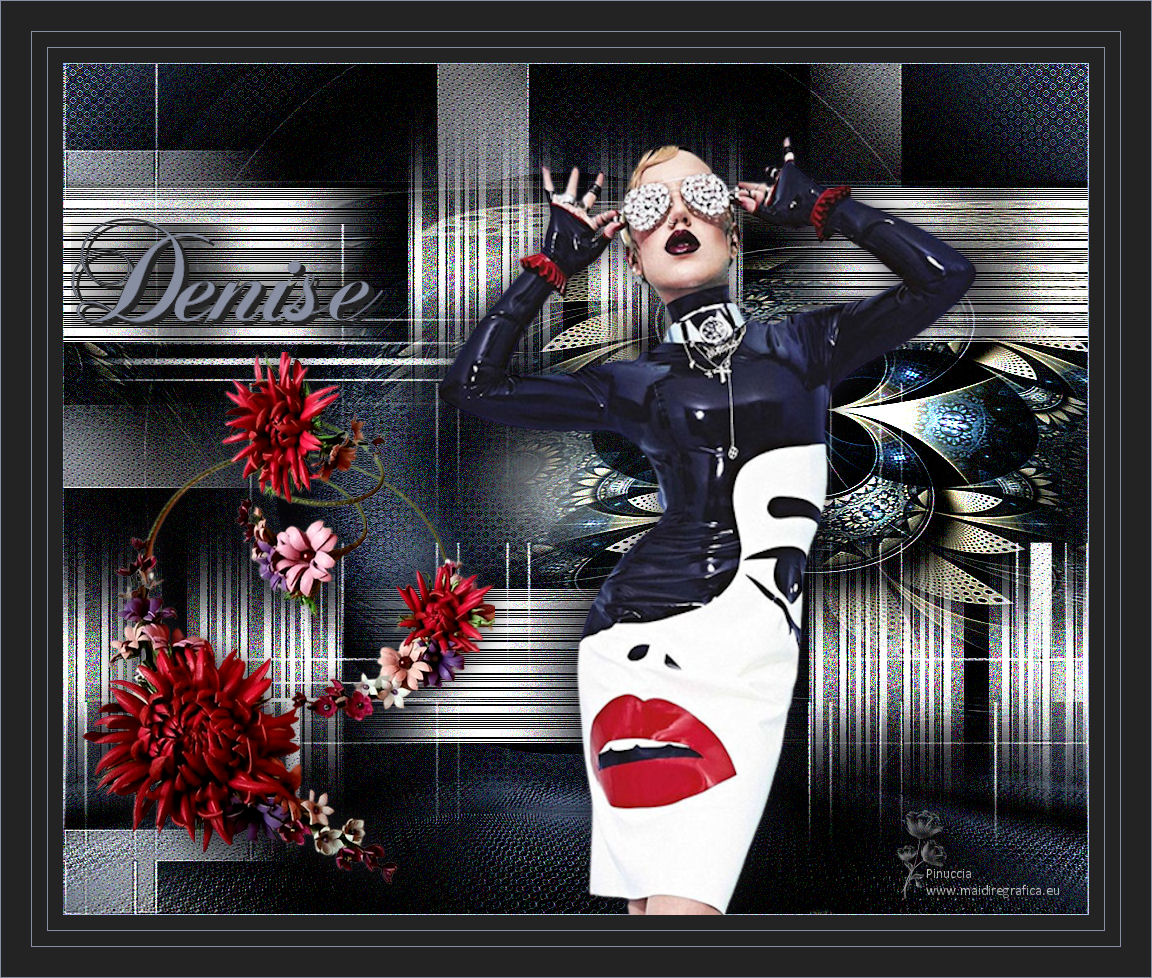
Thanks Lica Cida for your invitation to translate your tutorial

This tutorial was created with PSPX9 and translated with PSPX2 and PSPX3 and PSPX7, but it can also be made using other versions of PSP.
Since version PSP X4, Image>Mirror was replaced with Image>Flip Horizontal,
and Image>Flip with Image>Flip Vertical, there are some variables.
In versions X5 and X6, the functions have been improved by making available the Objects menu.
In the latest version X7 command Image>Mirror and Image>Flip returned, but with new differences.
See my schedule here
 French translation here French translation here
 your versions here your versions here

For this tutorial, you will need:

Thanks: for the tubes PqnaAlice (607MulherByPqnaAlice), Calli (Callitubes-238flores, Callitubes-23fractal),
Naise M (decor_nmcriacoes_126)
The rest of the material is by Lica Cida.
(you find here the links to the material authors' sites)

consult, if necessary, my filter section here
Filters Unlimited 2.0 here
&<Bkg Designer sf10I> - Circus Maximus (à importer dans Unlimited) here
L&K's - L&K's Palmyre here
VM Instant Art - Steel Mesh here
Flaming Pear - Flexify 2 here
Filter Factory Gallery B - Cristal Ball here
Mura's Meister - Perspective Tiling here
Transparency - Eliminate Black here
AAA Filters - Custom here
Filters Transparency, VM Instant Art and Factory Gallery can be used alone or imported into Filters Unlimited.
(How do, you see here)
If a plugin supplied appears with this icon  it must necessarily be imported into Unlimited it must necessarily be imported into Unlimited

You can change Blend Modes according to your colors.
In the newest versions of PSP, you don't find the foreground/background gradient (Corel_06_029).
You can use the gradients of the older versions.
The Gradient of CorelX here

Copy the preset Emboss 3 in the Presets Folder
1. Set your foreground color to #232323,
and your background color #888fa2.
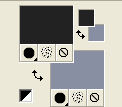
Set your foreground color to a Foreground/Background Gradient, style Sunburst.

2. Open AlphaChannelDeniseby licacida.
Window>Duplicate or, on the keyboard, shift+D to make a copy.

Close the original.
The copy, that will be the basis of your work, is not empty,
but contains a selection saved to alpha channel.
Flood Fill  the transparent image with your Gradient. the transparent image with your Gradient.
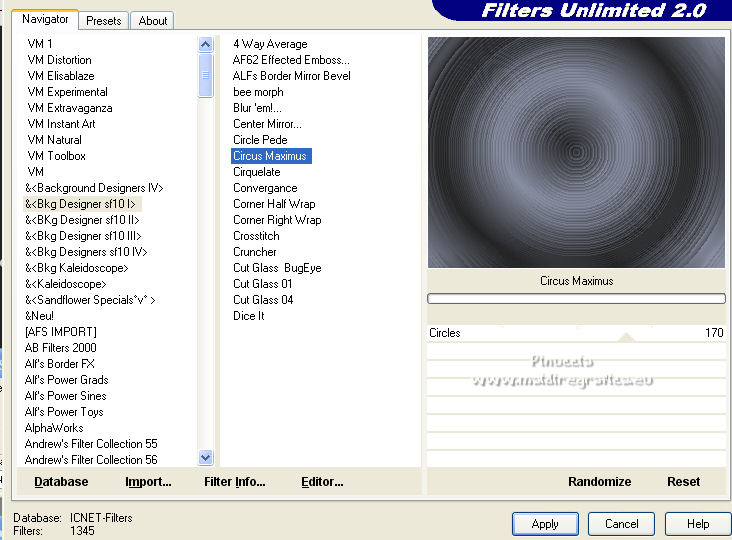
3. Effects>Plugins>Filters Unlimited 2.0 - &<Bkg Designer sf10I> - Circus Maximus, default settings.
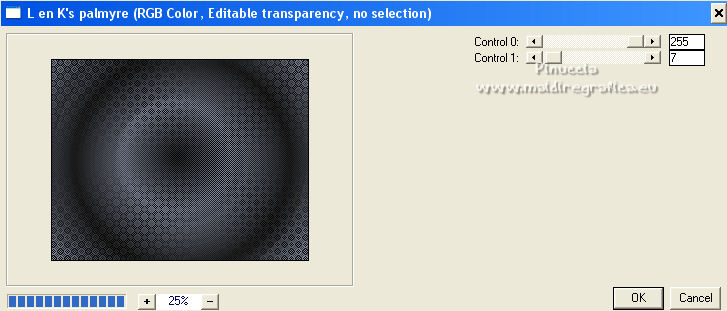
4. Effects>Plugins>L&K's - L&K's - Palmyre, default settings.
5. Layers>New Raster Layer.
Flood Fill  the layer with your Gradient. the layer with your Gradient.
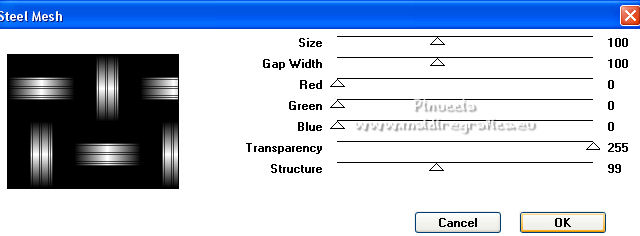
6. Effects>Plugins>VM Instant Art - Steel Mesh.
7. Effects>Plugins>Transparency - Eliminate Black.
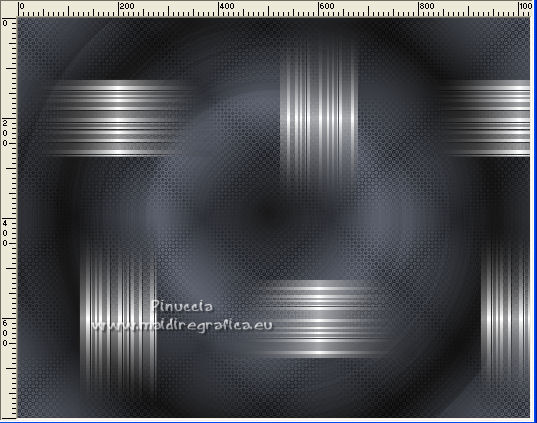
Layers>Duplicate.
Image>Mirror.
Layers>Merge>Merge Down.
Effects>3D Effects>Drop Shadow, at your choice.
8. Activate the layer Raster 1.
Selections>Load/Save Selection>Load Selection from Alpha Channel.
The selection #1 is immediately available. You just have to click Load.

Selections>Promote Selection to layer.
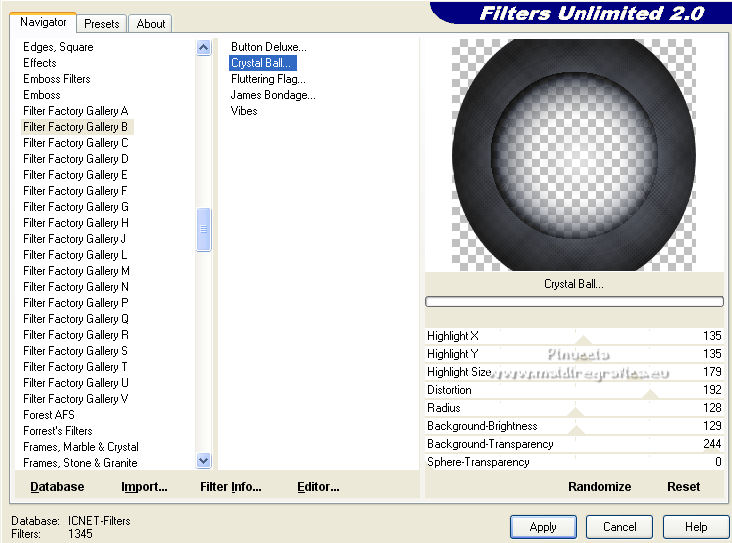
9. Effects>Plugins>Filter Factory Gallery B - Cristal Ball.
Effects>3D Effects>Drop Shadow, at your choice.
Selections>Select None.
10. Open the tube Callitubes-23fractal and go to Edit>Copy.
Go back to your work and go to Edit>Paste as new layer.
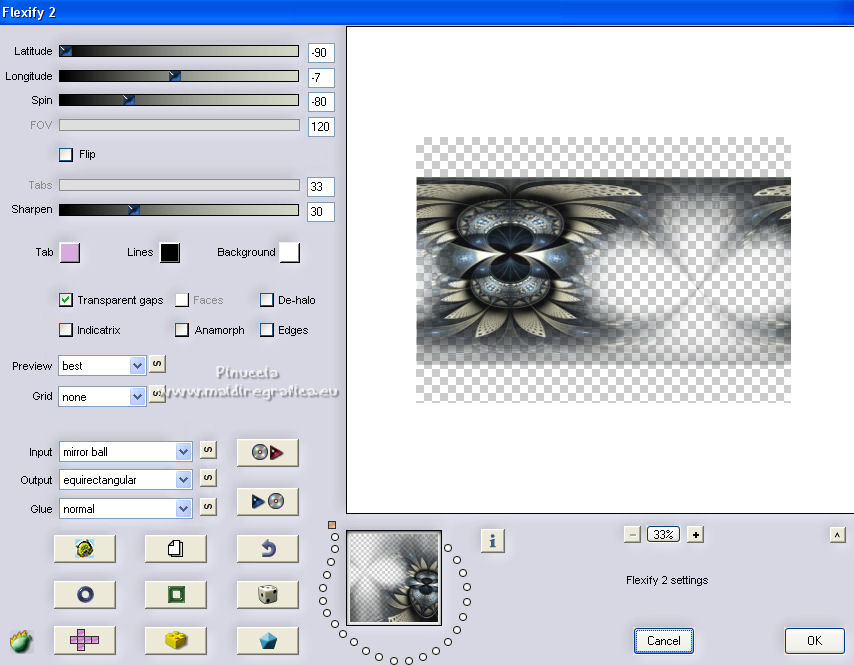
11. Effects>Plugins>Flaming Pear - Flexify 2.
Image>Mirror.
Adjust>Sharpness>Sharpen More.
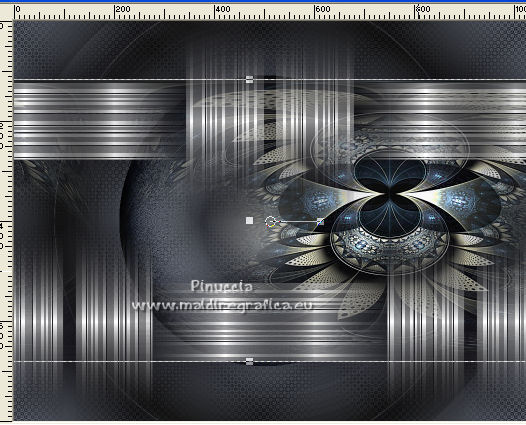
12. K key to activate your Pick Tool 
and set Position X: -92,00 and Position Y: 116,00.

M key to deselect the Tool.
13. Activate the layer Raster 1.
Image>Canvas Size - 1024 x 850 pixels.

14. Layers>Duplicate.
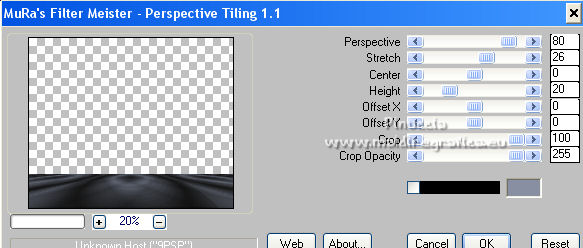
Effects>Plugins>Mura's Meister - Perspective Tiling.
Layers>Arrange>Move Up.
Effects>Reflection Effects>Rotating Mirror.

15. Activate your Magic Wand Tool  , tolerance 0 and feather 60, , tolerance 0 and feather 60,
and click in the transparent part to select it.
Press 7-8 times CANC on the keyboard 
Selections>Select None.
Effects>User Defined Filter - select the preset Emboss 3 and ok.

16. Activate the top layer, Raster 2.
Layers>New Raster Layer.
Selections>Select All.
Open the tube decor_nmcriacoes_126 and go to Edit>Copy.
Go back to your work and go to Edit>Paste into Selection.
Selections>Select None.
17. Effects>Texture Effects>Weave - weave color: foreground color.

Adjust>Sharpness>Sharpen.
Delete  the indicated figures here below the indicated figures here below
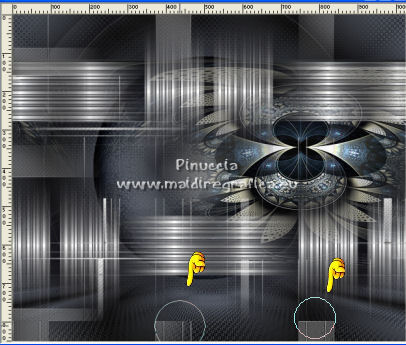
Change the Blend Mode of this layer to Screen and reduce the opacity to 83%
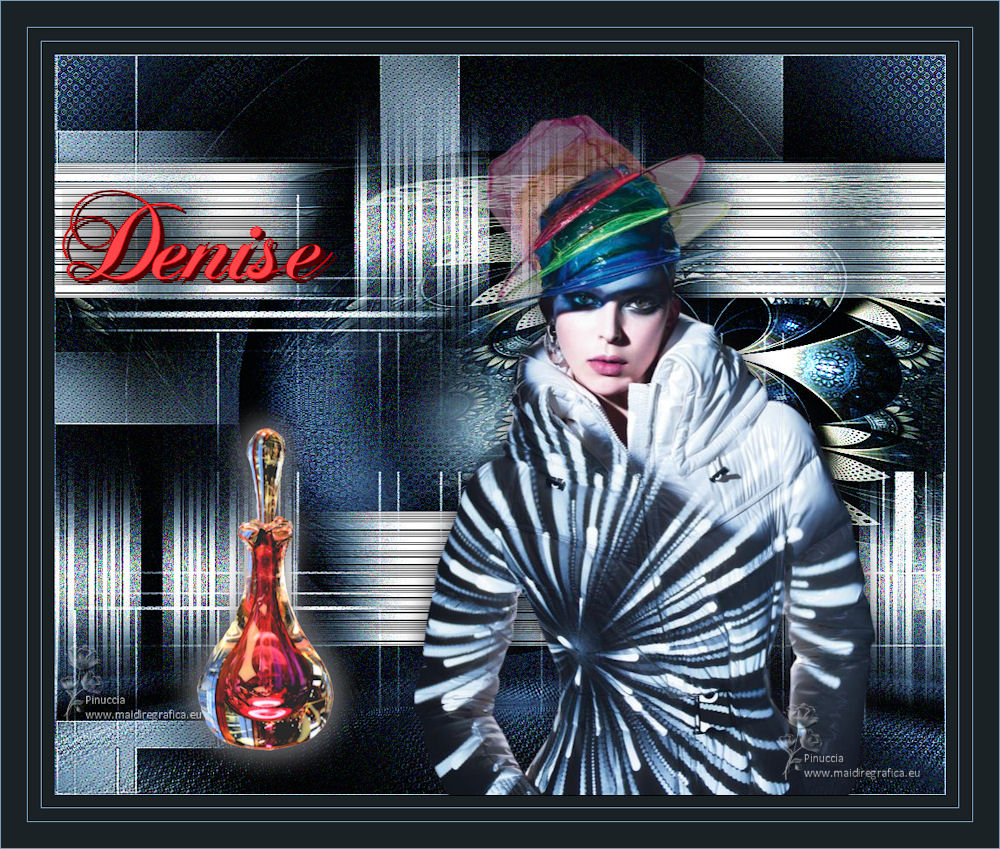
Your tag and the layers - adapt Blend Mode and opacity to your liking.

18. Image>Add borders, 1 pixel, symmetric, light background color.
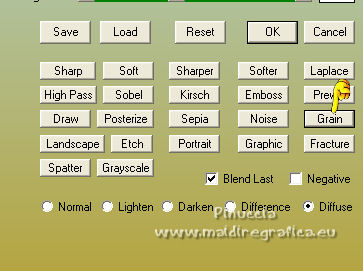
Effects>Plugins>AAA Filters - Custom - cliquer on Sharp and ok.
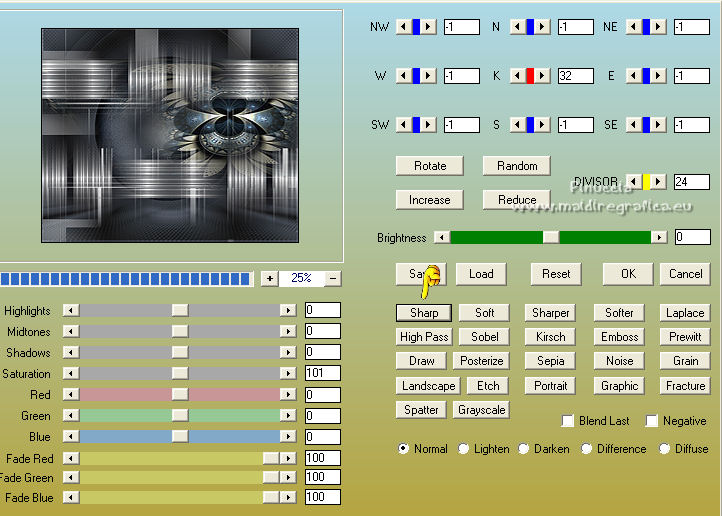
Repeat the Effect Grain checked.
19. Open the tube 607MulherByPqnaAlice and go to Edit>Copy.
Go back to your work and go to Edit>Paste as new layer.
Image>Resize, to 120% (I made another time to 110%), resize all layers not checked.
Move  the tube to your liking. the tube to your liking.
Effects>3D Effects>Drop Shadow, at your choice.
20. Open Callitubes-238flores and go to Edit>Copy.
Go back to your work and go to Edit>Paste as new layer.
Image>Resize, to 80%, resize all layers not checked.
Move  the tube to your liking. the tube to your liking.
Effects>3D Effects>Drop Shadow, at your choice.
21. Open Titulobylicacida and go to Edit>Copy.
Go back to your work and go to Edit>Paste as new layer.
Move  the text at the upper left. the text at the upper left.
22. Image>Add borders, 15 pixels, symmetric, dark foreground color.
Image>Add borders, 1 pixel, symmetric, light background color.
Image>Add borders, 15 pixels, symmetric, dark foreground color.
Image>Add borders, 1 pixel, symmetric, light background color.
Image>Add borders, 30 pixels, symmetric, dark foreground color.
Image>Add borders, 1 pixel, symmetric, light background color.
23. Sign your work on a new layer.
Add, if you want, the author's and translator's watermarks.
Image>Resize, 1024 pixels width, resize all layers checked.
Layers>Merge>Merge All and save as jpg.
For the tubes of this version thanks Nicky and Nena Silva
 Your versions here Your versions here

If you have problems or doubts, or you find a not worked link, or only for tell me that you enjoyed this tutorial, write to me.
22 October 2022

|


