|
TOP ANGELA DAS GRAÇAS
 ENGLISH VERSION ENGLISH VERSION
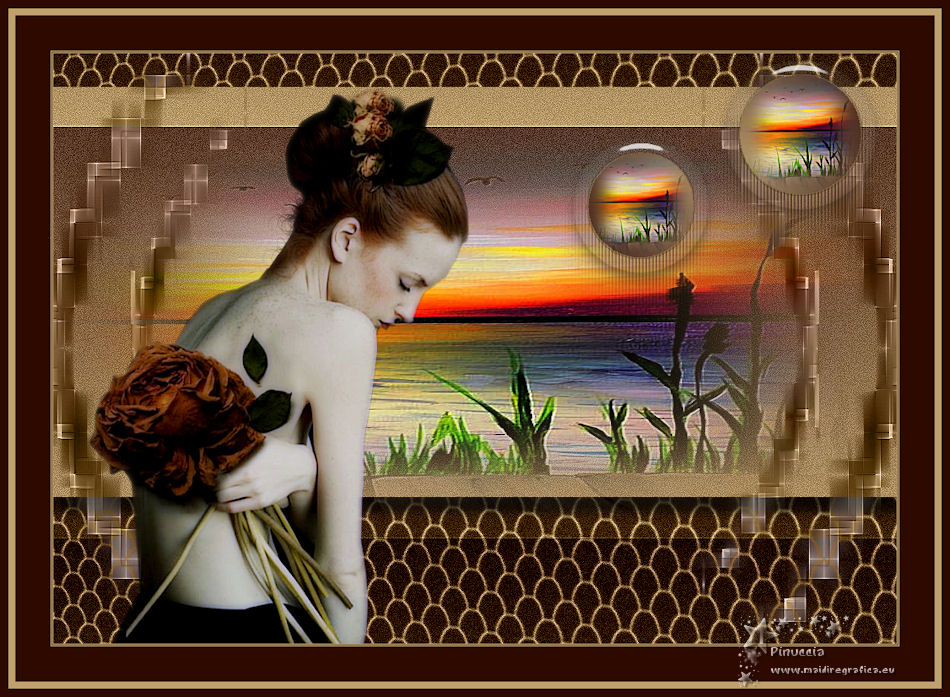
Thanks Lica Cida for your invitation to translate your tutorial

This tutorial was created with PSPX8 and translated with PSPX3, but it can also be made using other versions of PSP.
Since version PSP X4, Image>Mirror was replaced with Image>Flip Horizontal,
and Image>Flip with Image>Flip Vertical, there are some variables.
In versions X5 and X6, the functions have been improved by making available the Objects menu.
In the latest version X7 command Image>Mirror and Image>Flip returned, but with new differences.
See my schedule here
French translation here
your versions ici
For this tutorial, you will need:
Material here
For the tubes thanks Luz Cristina.
(you find here the links to the material authors' sites)
Plugins
consult, if necessary, my filter section here
Richard Rosenman - Solid Border here
Andromeda - Designs here
Adjust - Variations here
FM Tile Tools - Collage Circular here
Alien Skin Eye Candy 5 Impact - Glass here
Optionnel: Xero - Porcelain here

You can change Blend Modes according to your colors.
In the newest versions of PSP, you don't find the foreground/background gradient (Corel_06_029).
You can use the gradients of the older versions.
The Gradient of CorelX here
Copy the preset  in the folder of the plugins Alien Skin Eye Candy 5. in the folder of the plugins Alien Skin Eye Candy 5.
One or two clic on the file (it depends by your settings), automatically the preset will be copied in the right folder.
why one or two clic see here
Copy the Selection in the Selections Folder.
1. Set your foreground color to #c0a16d,
and your background color to #2e0900.
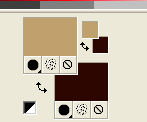
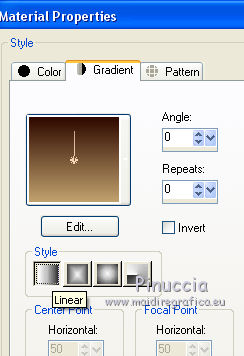
Set your foreground color to a Foreground/Background Gradient, style Linear.
Open a new transparent image 1000 x 700 pixels.
Flood Fill  the transparent image with your Gradient. the transparent image with your Gradient.
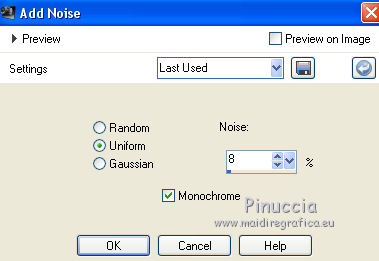
2. Adjust>Add/Remove Noise>Add Noise.
3. Effects>Plugins>FM Tile Tools - Collage circular, default settings.
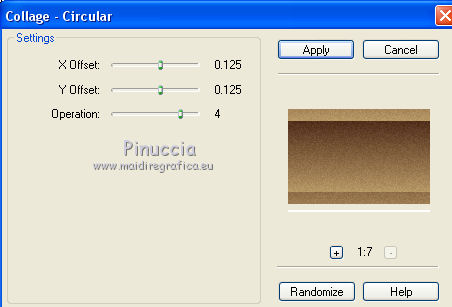
Effects>Edge Effects>Enhance.
4. Selection Tool 
(no matter the type of selection, because with the custom selection your always get a rectangle)
clic on the Custom Selection 
and set the following settings.
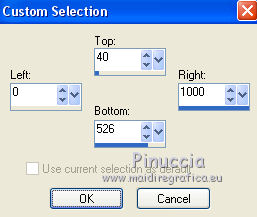
Selections>Promote Selection to layer.
5. Activate the layer Raster 1.
Press CANC on the keyboard 
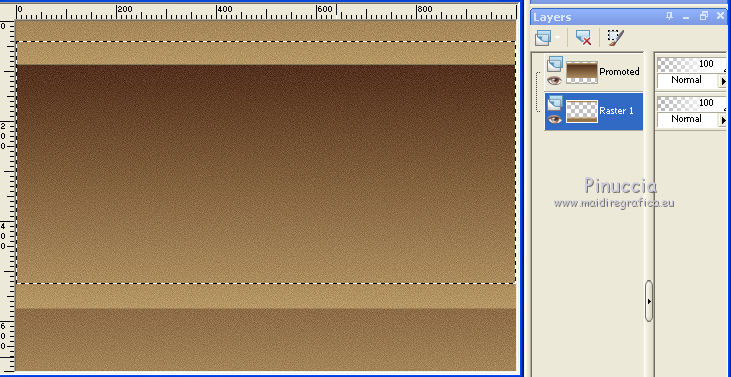
Selections>Select None.
Effects>Plugins>Andromeda - Designs
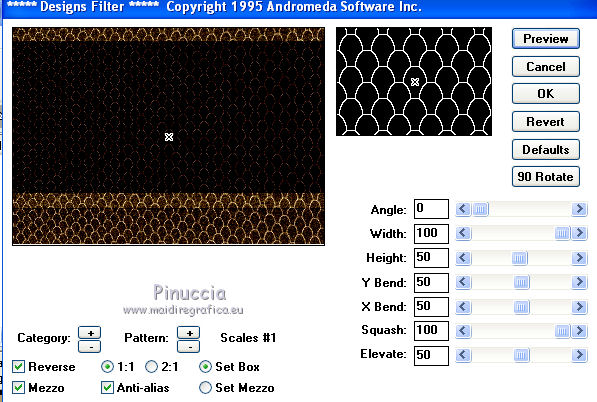
Activate the top layer, Promoted Selection.
Effects>3D Effects>Drop Shadow, color #000000.
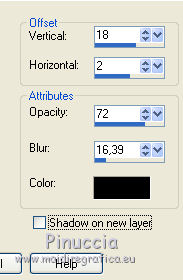
6. Custom Selection 
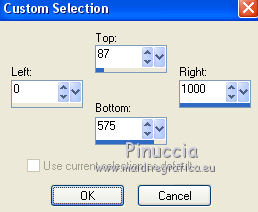
7. Layers>New Raster Layer.
Open the tube 5156-luzcristina and go to Edit>Copy.
Go back to your work and go to Edit>Paste into Selection.
Selections>Select None.
Adjust>Sharpness>Sharpen More.
8. Effects>Plugins>Adjust - Variations
one click on Original to undo any previous settings memorized by the filter,
two click on Darker and ok.
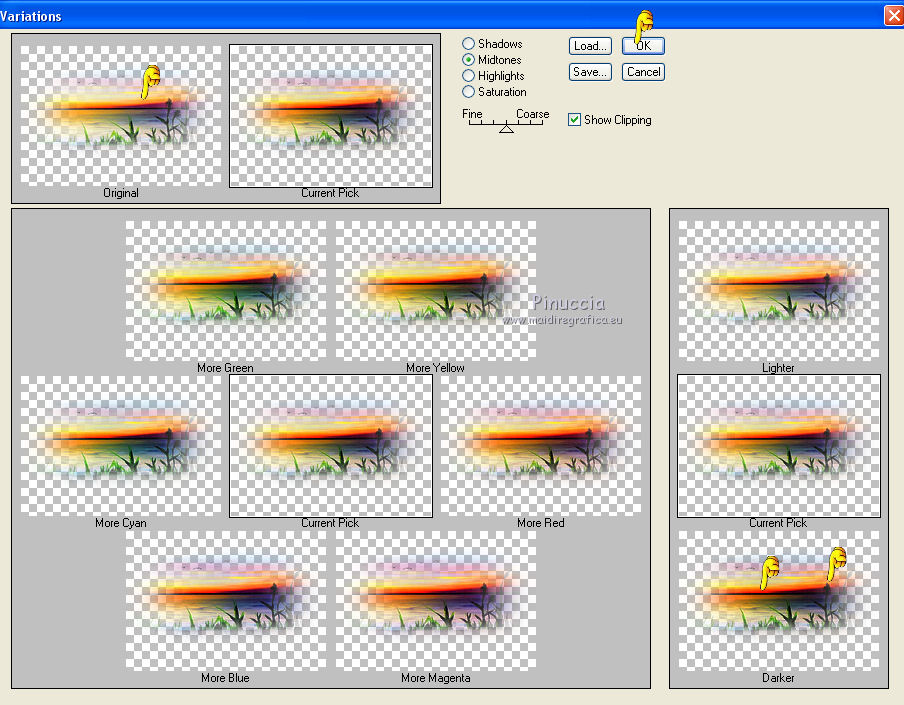
9. Change the Gradient settings, style Sunburst.
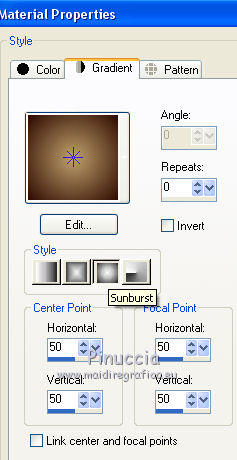
Selections>Load/Save Selection>Load Selection from Disk.
Look for and load the selection circuloslc.
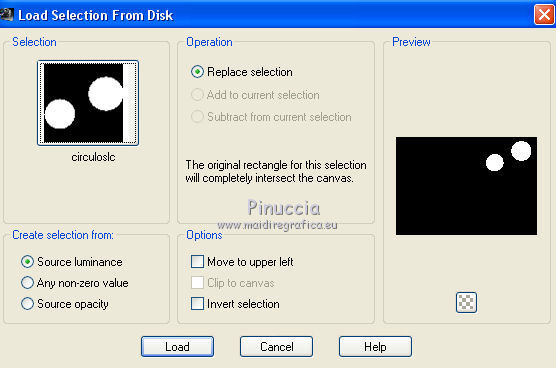
10. Layers>New Raster layer.
Flood Fill  the selection with the Sunburst Gradient. the selection with the Sunburst Gradient.
11. Effects>Plugins>Alien Skin Eye Candy 5 Impact - Glass.
Select the preset flowers and ok.
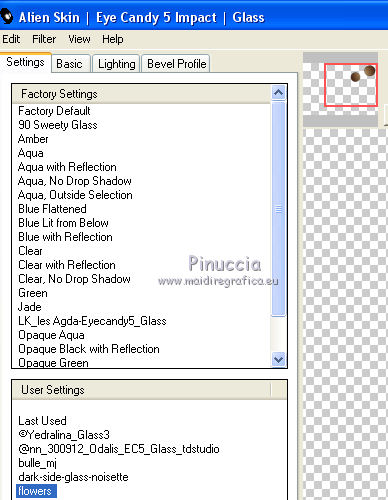
12. Effects>3D Effects>Chisel, foreground color #c0a16d.
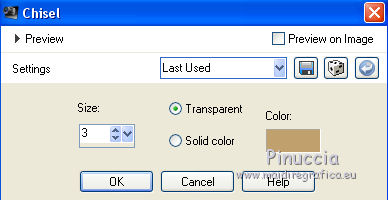
Selections>Select None.
13. Activate your Magic Wand 
tolerance 20-30 and click on the first circle to select it.
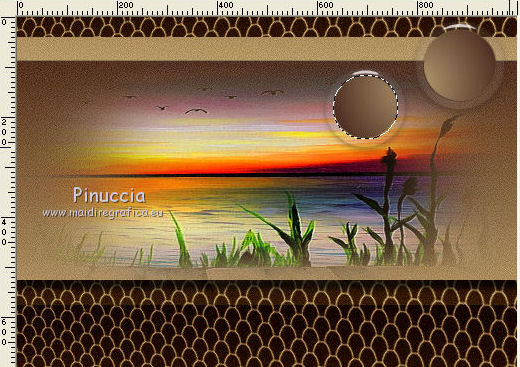
Layers>New Raster Layer.
Edit>Paste into Selection (the tube 5156-luzcristina is still in memory).
Selections>Select None.
Adjust>Sharpness>Sharpen More.
14. Effects>Plugins>Adjust - Variations, same settings (1 Original, 2 Darker).
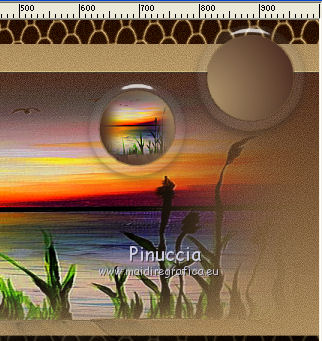
Layers>Merge>Merge Down.
15. Keep the layer Raster 3 selected.
Select the second circle with your Magic Wand Tool 
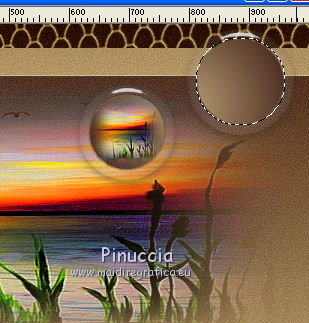
Layers>New Raster Layer.
Edit>Paste into Selection (the tube 5156-luzcristina is always in memory).
Selections>Select None.
Adjust>Sharpness>Sharpen More.
16. Effects>Plugins>Adjust - Variations, same settings (1 Original, 2 Darker).
Layers>Merge>Merge Down.
17. Effects>3D Effects>Drop Shadow, foreground color #c0a16d,
Shadow on new layer checked.
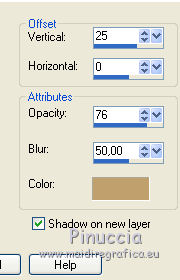
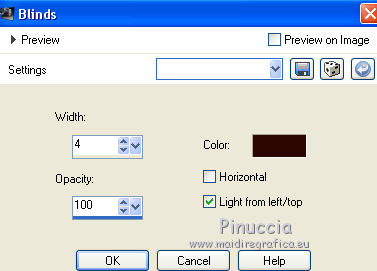
18. Keep the shadow layer selected.
Effects>Texture Effects>Blinds.
Activate the top layer, Raster 3.
Layers>Merge>Merge down.
19. Open the tube deco1lc and go to Edit>Copy.
Go back to your work and go to Edit>Paste as new layer.
Change the Blend Mode of this layer to Luminance (legacy).
Layers>Arrange>Move Down.
20. Keep this layer selected.
Open the tube 5151-luzcristina and go to Edit>Copy.
Go back to your work and go to Edit>Paste as new layer.
Move  the tube to the left side. the tube to the left side.
Adjust>Sharpness>Sharpen More.
(Optional) Effects>Plugins>Xero - Porcelain, default settings.
Your tag and your layers
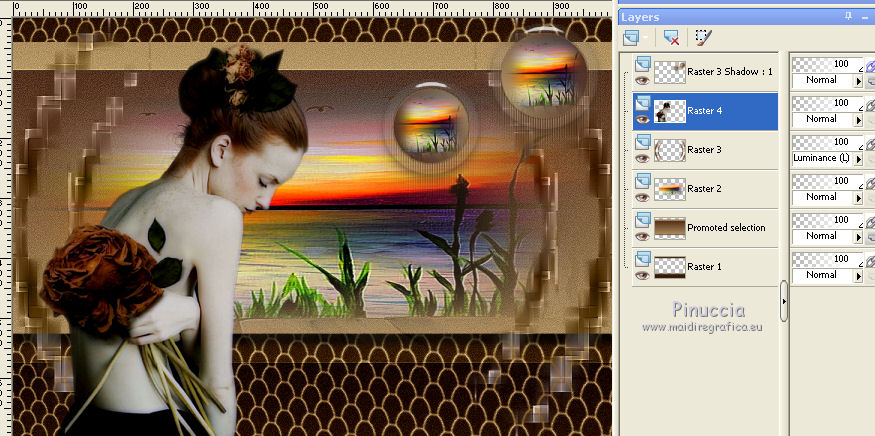
21. Image>Add borders, 1 pixels, symmetric, foreground color #c0a16d.
Image>Add borders, 1 pixel, symmetric, background color #2e0900.
Image>Add borders, 1 pixel, symmetric, foreground color #c0a16d.
Image>Add borders, 50 pixels, symmetric, background color #2e0900.
22. Effects>Plugins>Richard Rosenman - Solid Border - color #2e0900.
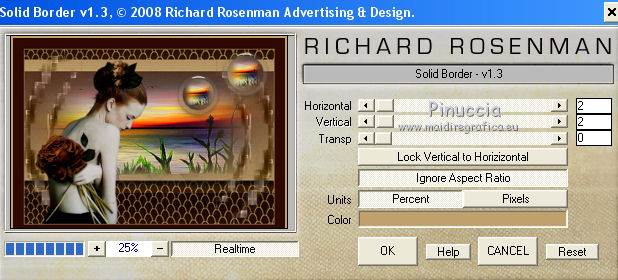
Image>Add borders, 10 pixels, symmetric, background color #2e0900.
23. Image>Resize, 1000 pixels width, resize all layers checked.
Sign your work on a new layer.
little note about the watermark:
I don't ask to put watermark on the versions made by my translations.
But if you decide to use the watermark supplied by the author, I would appreciate that my work as translator was also respected.
For that, I added my watermark to the material (english and french).
21. Layers>Merge>Merge All and save as jpg.
Version with tube by Gabry (landscape not signed)
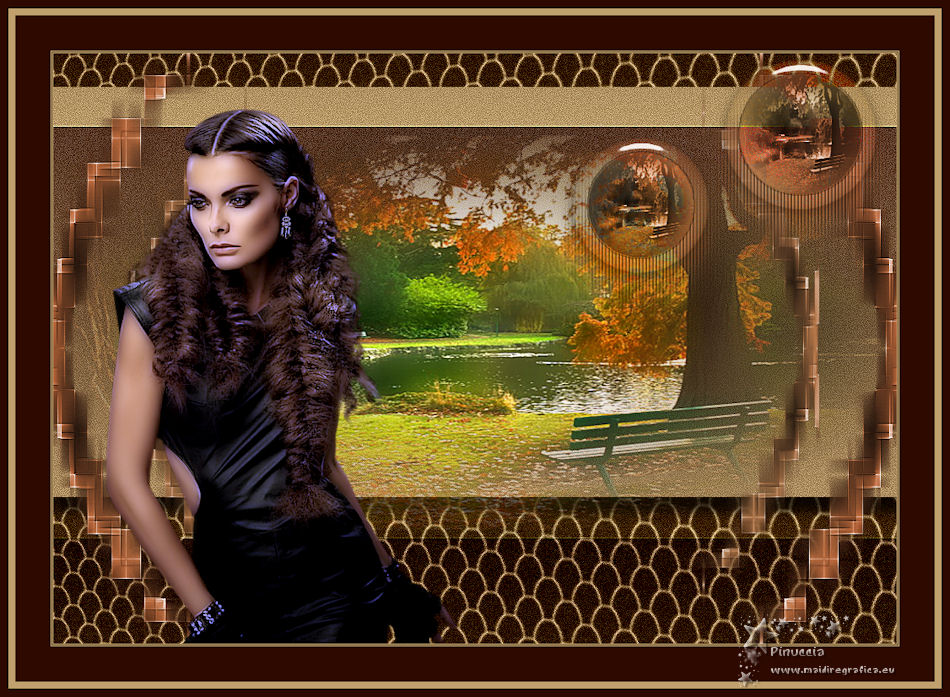
Your versions here

If you have problems or doubts, or you find a not worked link, or only for tell me that you enjoyed this tutorial, write to me.
30 August 2019
|
 ENGLISH VERSION
 ENGLISH VERSION