|
TAG GABRIELA


Thanks Lica Cida for your invitation to translate your tutorial

This tutorial was created with PSPX8 and translated with PSPX3, but it can also be made using other versions of PSP.
Since version PSP X4, Image>Mirror was replaced with Image>Flip Horizontal,
and Image>Flip with Image>Flip Vertical, there are some variables.
In versions X5 and X6, the functions have been improved by making available the Objects menu.
In the latest version X7 command Image>Mirror and Image>Flip returned, but with new differences.
See my schedule here
 French translation here French translation here
 your versions ici your versions ici
For this tutorial, you will need:
Material here
(you find here the links to the material authors' sites)
Plugins
consult, if necessary, my filter section here
Filters Unlimited 2.0 here
Mura's Meister - Copies here
Mura's Meister - Perspective Tiling here
Filter Factory Gallery G - Panel Stripes here
FM Tile Tools - Blend Emboss here
Graphics Plus - Cross shadow here
Filters Graphics Plus and Filter Factory Gallery can be used alone or imported into Filters Unlimited.
(How do, you see here)
If a plugin supplied appears with this icon  it must necessarily be imported into Unlimited it must necessarily be imported into Unlimited

You can change Blend Modes according to your colors.
In the newest versions of PSP, you don't find the foreground/background gradient (Corel_06_029).
You can use the gradients of the older versions.
The Gradient of CorelX here
Copy the preset Lights_lica_gabriela in the Presets Folder.
Copy the sélection in the Selections Folder.
Open the mask in PSP and minimize it with the rest of the material.
1. Open a new transparent image 988 x 600 pixels.

2. Selections>Load/Save Selection>Load Selection from Disk.
Look for and load the selection lcgabriela.

3. Set your foreground color to #39303a,
and your background color to #948789.

Set your foreground color to a Foreground/Background Gradient, style Linear.

Flood Fill  the selection with your Gradient. the selection with your Gradient.
4. Effects>3D Effects>Inner Bevel.

Selections>Select None.
5. Effects>Distortion Effects>Lens Distortion.

6. Effects>Geometric Effects>Skew.

7. Effects>Plugins>Mura's Meister - Copies

8. Layers>Duplicate.
Image>Mirror.
Layers>Merge>Merge Down.
9. Effects>Image Effects>Offset.

10. Layers>New Raster Layer.
Layers>Arrange>Move Down.
Flood Fill  the layer with your Gradient. the layer with your Gradient.
11. Effects>Texture Effects>Texture
select the texture Corel _15_013 (or a texture of yours, if you want).

12. Adjust>Add/Remove Noise>Add Noise

13. Effects>Plugins>FM Tile Tool - Blend Emboss, default settings.

14. Effects>Illumination Effects>Lights - select the preset lica_gabriela

15. Layers>Duplicate.
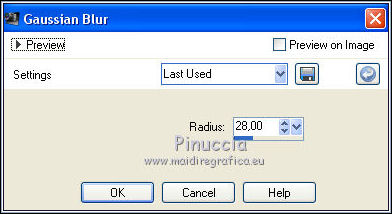
Adjust>Blur>Gaussian Blur - radius 28.

16. Effects>Plugins>Filter Factory Gallery G - Panel Stripes.

17. Effects>Plugins>Mura's Meister - Perspective Tiling.

Activate your Selection Tool 
draw a selection on the bord of the effect

18. Selections>Modify>Feather - 30 pixels.
Press 2 times CANC on the keyboard 
Selections>Select None.
19. Image>Canvas Size - 988 x 650 pixels

Effects>3D Effects>Drop Shadow.

20. Layers>New Raster Layer.
Layers>Arrange>Send to Bottom.
Flood Fill  the layer with your gradient. the layer with your gradient.
21. Activate the layer Raster 2.
Selections>Select All.
Selections>Modify>Contract - 60 pixels.
Press CANC on the keyboard.
22. Effects>3D Effects>Chisel - color #ffffff.

Selections>Select None.
23. Effects>Plugins>Mura's Meister - Perspective Tiling, same settings.

24. Layers>Arrange>Move Up.
Change the Blend Mode of this layer to Screen.
Layers>Duplicate.
25. Activate the layer Raster 3.
Layers>Duplicate.
Layers>New Mask layer>From image
Open the menu under the source window and you'll see all the files open.
Select the mask 20-20.

Layers>Merge>Merge Group.

26. Activate the layer Raster 3.
Repeat the steps 11,12,13:


27. Activate the top layer.
Open the tube of the woman and go to Edit>Copy.
Go back to your work and go to Edit>Paste as new layer.
Image>Resize, to 80%, resize all layers not checked.
Place  correctly the tube. correctly the tube.
Effects>3D Effects>Drop Shadow, at your choice.
Between the layers Raster 3 and the mask layer add the tube of the landscape and your decos.
Resize if it is necessary and adapt the Blend Modes at tubes.
28. Image>Add borders, 2 pixels, symmetric, color #000000.
Image>Add borders, 30 pixels, symmetric, color #fffffff.
Activate your Magic Wand Tool 
and click on the last border to select it.
29. Invert the colors of your gradient

Flood Fill  the selection with your gradient. the selection with your gradient.
30. Effects>Plugins>Graphics Plus - Cross Shadow, par défaut.

31. Sign your work on a new layer.
32. Image>Add borders, 2 pixels, symmetric, color #000000.
Save as jpg.
Version with tube by Luz Cristina

 Your versions here Your versions here

If you have problems or doubts, or you find a not worked link, or only for tell me that you enjoyed this tutorial, write to me.
12 March 2020
|

