Home |
Home |

Mappa sito |
Mappa sito |
Tutorial |
Tutorial |
Tut tecnici |
Tut tecnici |
Links-Banner |
Links-Banner |
Regali-Award |
Regali-Award |
Informatica |
Informatica |
Archivio |
Archivio |
Mail |
Mail |
Privacy policy |
Privacy policy |
Novità |
Novità |
Home |
Home |
Mappa sito |
Mappa sito |
Tutorial |
Tutorial |
Tut tecnici |
Tut tecnici |
Links-Banner |
Links-Banner |
Regali-Award |
Regali-Award |
Informatica |
Informatica |
Archivio |
Archivio |
Mail |
Mail |
Privacy policy |
Privacy policy |
Novità |
Novità |
|
RAIDA  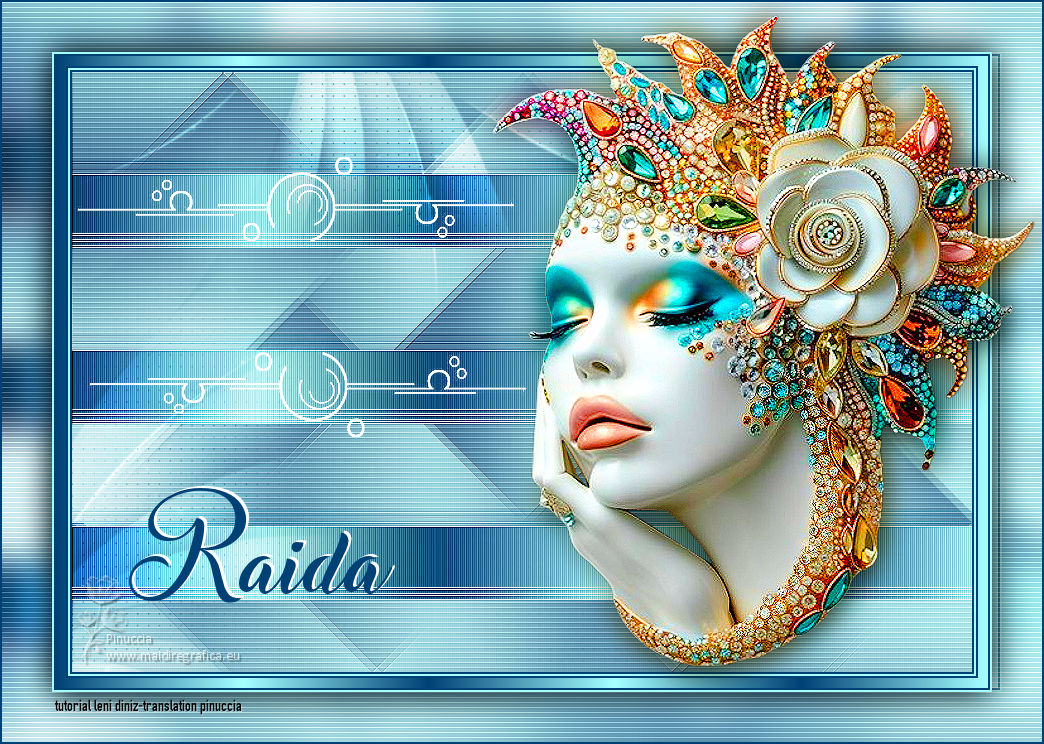
This tutorial was written and translated with Psp2020, but it can also be made using other versions of PSP.
 Filters Unlimited 2.0 here Mehdi - Sorting Tiles Simple - Blintz here Carolaine and Sensibility - CS_Texture here FM Tile Tools - Blend Emboss here It@lian Editors Effect - Effetto TV here Funhouse - Loom here Filters Simple, It@lian Editors and Funhouse can be used alone or imported into Filters Unlimited. (How do, you see here) If a plugin supplied appears with this icon  it must necessarily be imported into Unlimited it must necessarily be imported into Unlimited You can change Blend Modes according to your colors. In the newest versions of PSP, you don't find the foreground/background gradient (Corel_06_029). You can use the gradients of the older versions. The Gradient of CorelX here  1. Set your foreground color to the light color #a5ffff, and your background color to the dark color #004175.  Set your Foreground color to a Foreground/Background Gradient, style Linear.  Open a new transparent image 900 x 600 pixels. Flood fill  the transparent image with your Gradient. the transparent image with your Gradient.2. Adjust>Blur>Gaussian Blur - radius 25.  3. Effects>Plugins>Mehdi - Sorting Tiles 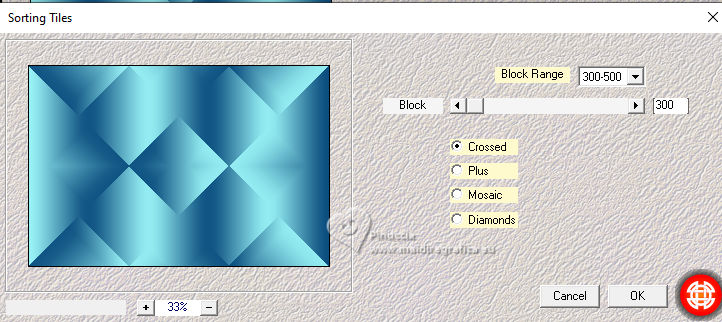 4. Effects>Edge Effects>Enhance. Effects>Plugins>Simple - Blintz. This Effect works without window. Result 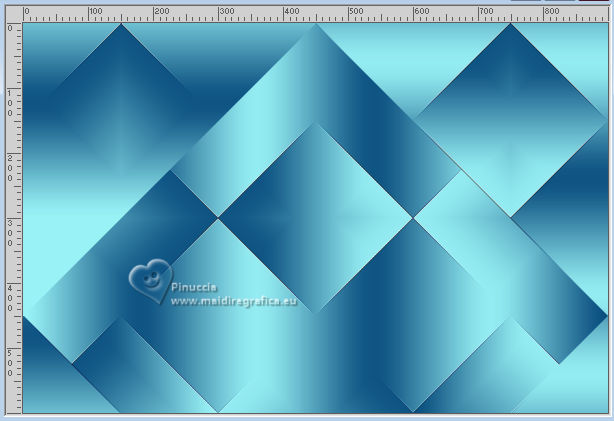 5. Effects>Plugins>Carolaine and Sensibility - Cs_texture, default settings 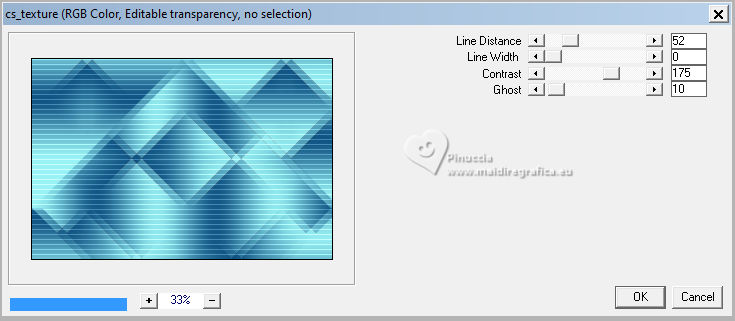 6. Effects>Plugins>FM Tile Tools - Blend Emboss, default settings 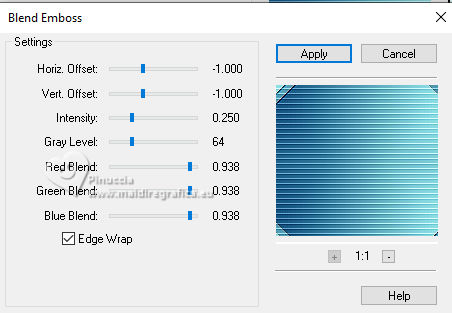 7. Layers>New Raster Layer. Change the settings of your Gradient, and check Invert  Flood Fill the layer with your Gradient.8. Effects>Plugins>It@lian Editors Effect - Effetto Tv 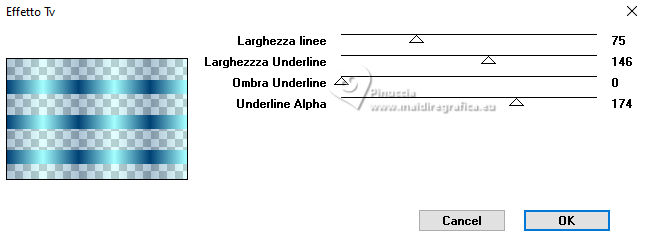 9. Effects>Plugins>Filters Unlimited - Funhouse - Loom 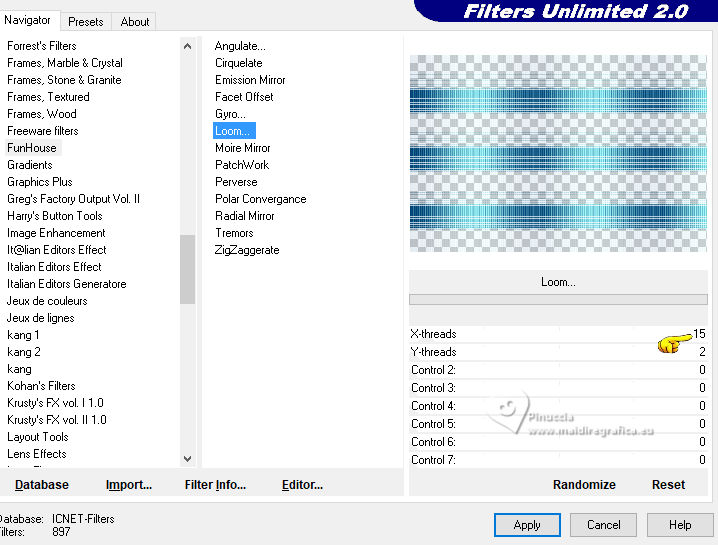 10. Effects>Plugins>FM Tile Tools - Blend Emboss, default settings. 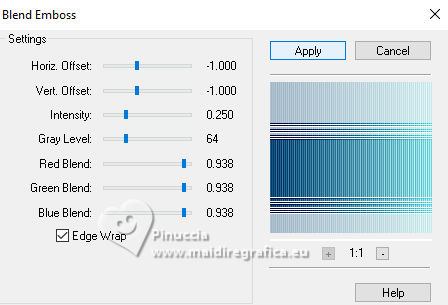 11. Open decor_leni_raida-2 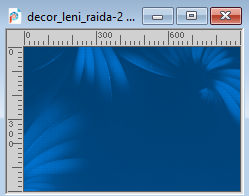 Edit>Copy. Keep the Blend Mode of this layer to Overlay 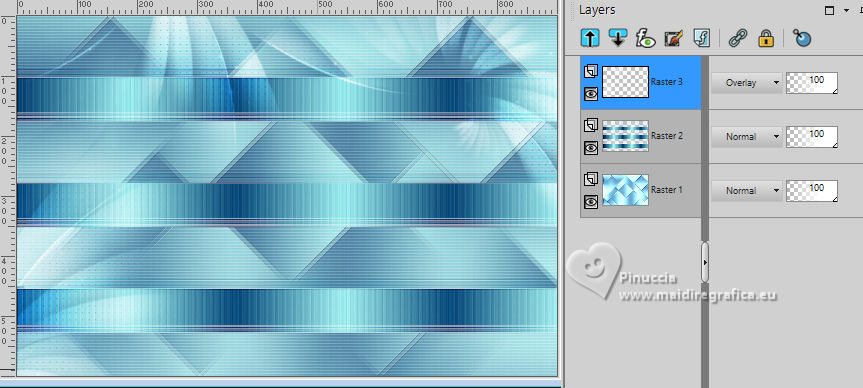 12. Open decor_leni_raida 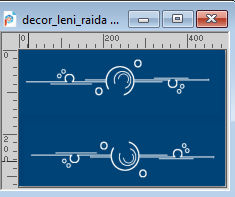 Edit>Copy. Go back to your work and go to Edit>Paste as New Layer. K key to activate your Pick Tool  Position X: -11,00 - Position Y: 62,00. 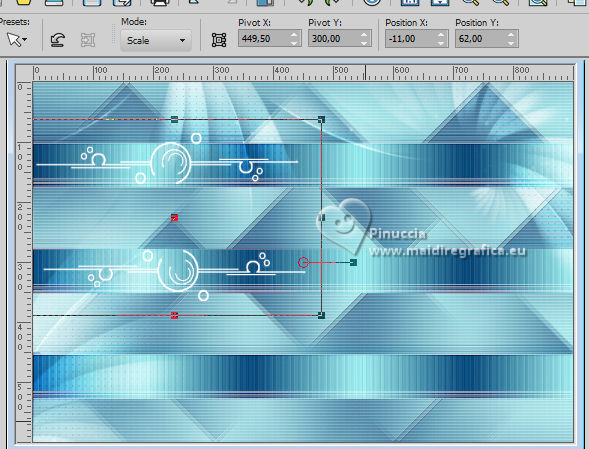 Adjust>Sharpness>Sharpen. Keep the Blend Mode of this layer to Screen. 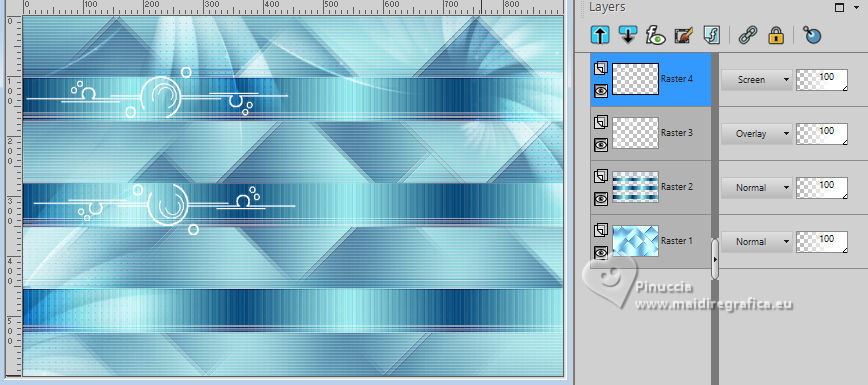 13. If you want, you can apply: Effects>3D Effects>Drop Shadow, color #000000 (optional) 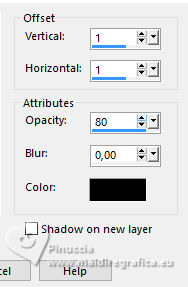 14. Edit>Copy Special>Copy Merged 15. Image>Add Borders, 2 pixels, symmetric, dark background color #004175. Image>Add Borders, 2 pixels, symmetric, light foreground color #a5ffff. Image>Add Borders, 2 pixels, symmetric, dark background color #004175. 16. Selections>Select All. Image>Add borders, 10 pixels, symmetric, whatever color. Selection>Invert. Flood Fill the selection with the last Gradient.Selections>Select None. 17. Image>Add Borders, 2 pixels, symmetric, dark background color #004175. Image>Add Borders, 2 pixels, symmetric, light foreground color #a5ffff. 18. Selections>Select All. Image>Add borders, 50 pixels, symmetric, whatever color. Selection>Invert. Edit>Paste into Selection 19. Adjust>Blur>Gaussian Blur - radius 15.  Effects>Plugins>Carolaine and Sensibility - Cs_texture, default settings  20. Adjust>Sharpness>Sharpen. Selection>Invert. Effects>3D Effects>Drop Shadow, color #000000.  Selection>None. 21. Open your main tube LeniDiniz-1742mulheres 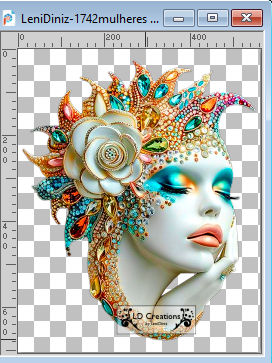 Edit>Copy. Go back to your work and go to Edit>Paste as new layer. Image>Mirror>Mirror horizontal. Image>Resize, if necessary - for the supplied tube it is not. Move  the tube to the right side. the tube to the right side.Effects>3D Effects>Drop Shadow, to your liking. 22. You can also made this: Layers>Duplicate. Adjust>Blur>Gaussian Blur - radius 14. 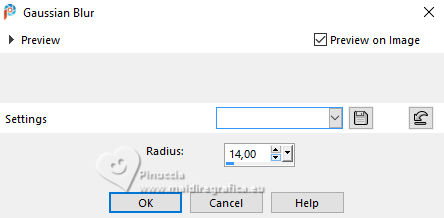 (in my second version I did 21). Change the Blend Mode of this layer to Multiply. Layers>Arrange>Move Down. 23. Open título_leni_raida 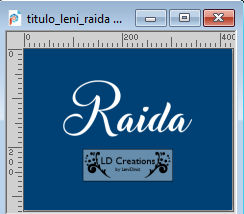 Edit>Copy. Go back to your work and go to Edit>Paste as New Layer. Move the text to the left as in the final tag.Effects>3D Effects>Drop Shadow, at your choice. 24. If you want, you can do this: First text in white color: Pick Tool: Position X: 130,00 - Position Y: 484,00. 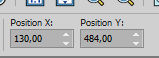 25. After second text in blue color  Pick Tool: Position X: 127,00 - Position Y: 486,00.  If you use other color, colorize with your Color Changer Tool  Tolerance 30, Edge Softness 100.  26. Image>Add borders, 2 pixels, symmetric, dark background color #004175. 27. Sign your work and save as jpg. For the tube of this version thanks Renée 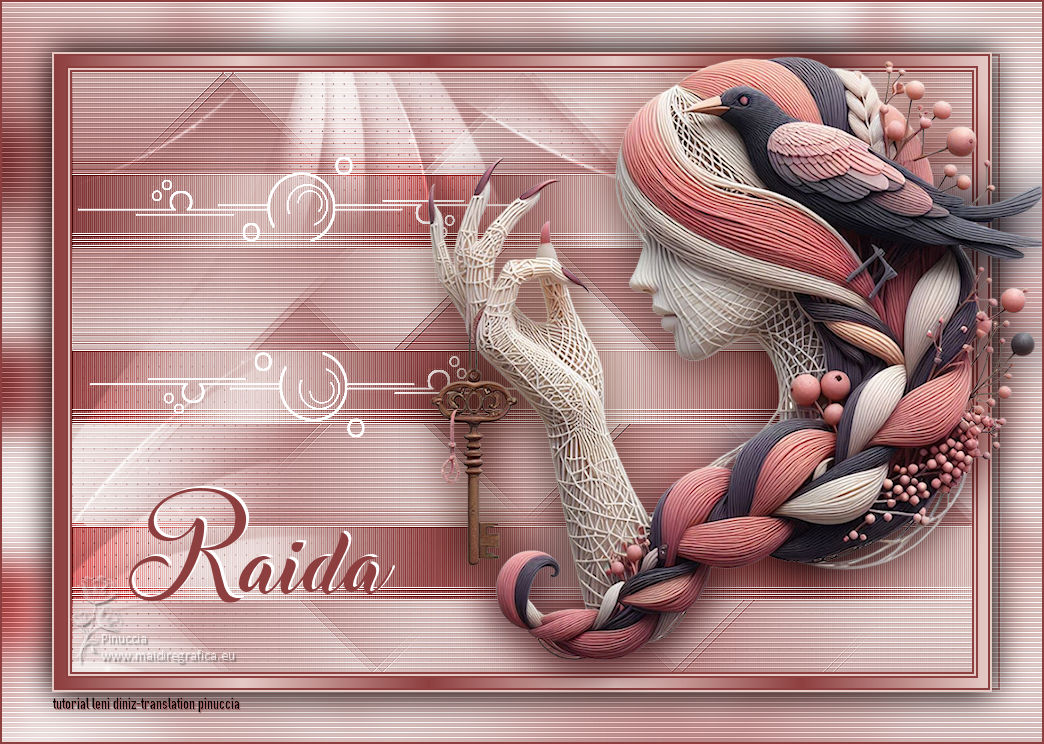   Your versions.Thanks Your versions.Thanks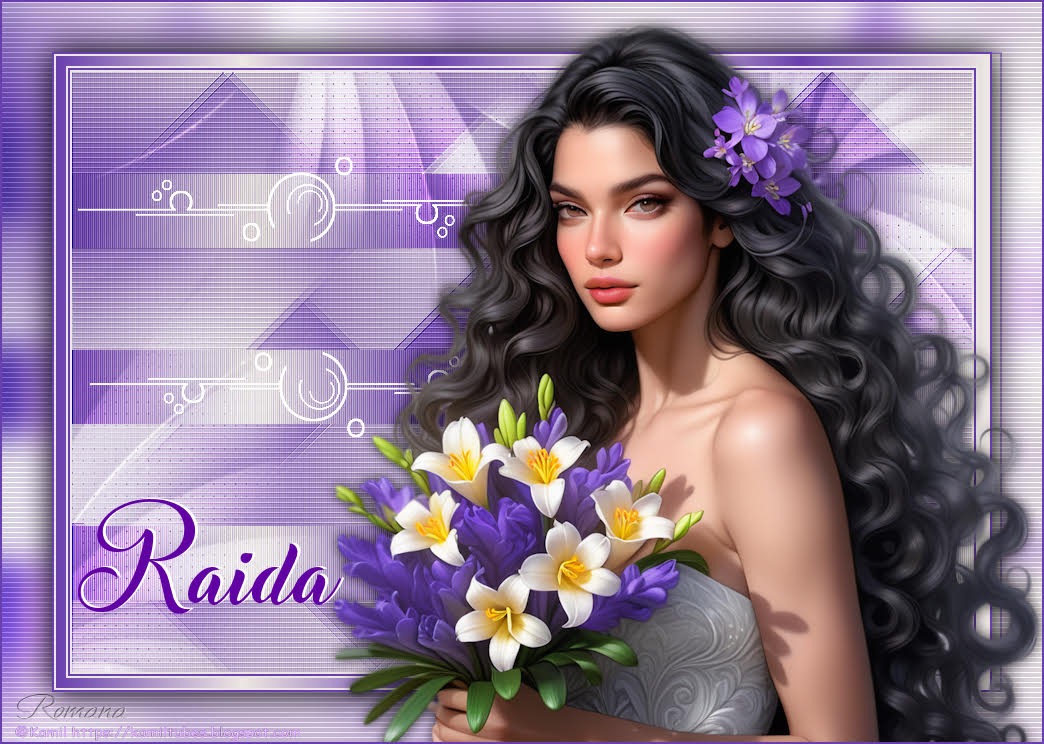 Romana  If you have problems or doubts, or you find a not worked link, or only for tell me that you enjoyed this tutorial, write to me. 25 August 2024 |


