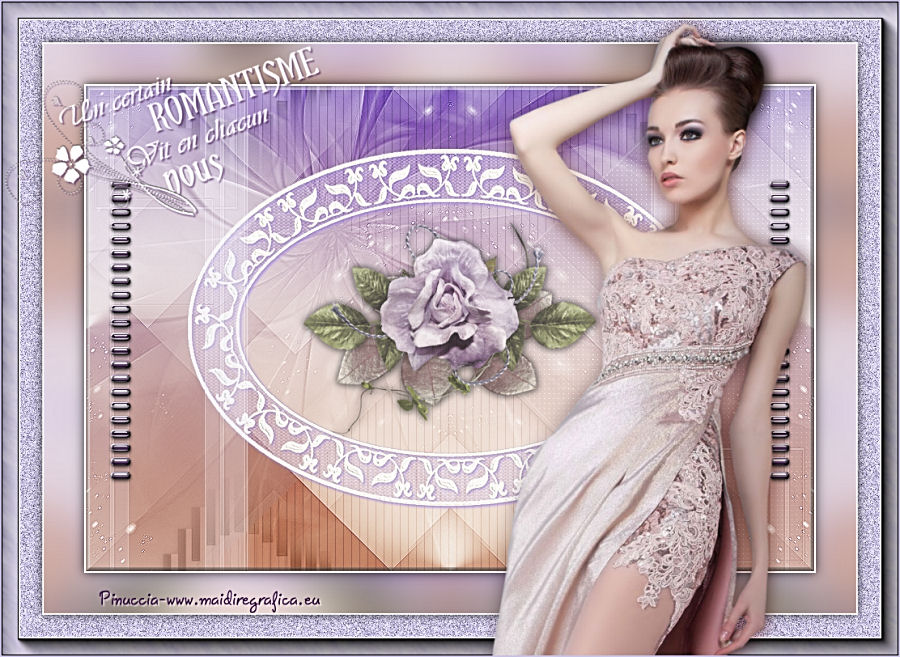
|
KIONA

english version

Here you find the original of this tutorial:

This tutorial was written with CorelX19 and translated with CorelX12, but it can also be made using other versions of PSP.
Since version PSP X4, Image>Mirror was replaced with Image>Flip Horizontal,
and Image>Flip with Image>Flip Vertical, there are some variables.
In versions X5 and X6, the functions have been improved by making available the Objects menu.
In the latest version X7 command Image>Mirror and Image>Flip returned, but with new differences.
See my schedule here
italian translation here
your versions here
Material here
For the tube thanks Babette
The rest of the material is by Laurette
(The links of the tubemakers here).
Plugins:
consult, if necessary, my filter section here
Filters Unlimited 2.0 here
VM Instant Art - Tripolis here
AP Lines - Lines SilverLining here
Nik Software - Color Efex Pro here
Carolaine and Sensibility - CS-LDots here
Mura's Seamless - Emboss at Arch here
Simple - Diamonds here
AAA Frames - Foto Frame here
Alien Skin Eye Candy 5 Impact - Glass here
Filters VM Instant Art, Simple and Mura's Seamless can be used alone or imported into Filters Unlimited.
(How do, you see here)
If a plugin supplied appears with this icon  it must necessarily be imported into Unlimited it must necessarily be imported into Unlimited

You can change Blend Modes according to your colors.
In the newest versions of PSP, you don't find the foreground/background gradient (Corel_06_029).
You can use the gradients of the older versions.
The Gradient of CorelX here
Copy the Brush in the Brushes Folder.
Attention, please, the brush is composed by two files.
You must copy both the files in the Folder.
Copy the Selection in the Selections Folder.
Open the masks in PSP and minimize them with the rest of the material.
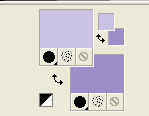
1. Set your foreground color to light color #c9c2e3,
set your background color to dark color #9d8ec7.
Open a new transparent image 900 x 600 pixels.
Flood Fill  the transparent image with your background color. the transparent image with your background color.
Layers>New Raster Layer.
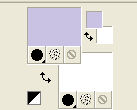
Set your background color to white
Flood Fill  the layer with color white. the layer with color white.
Layers>New Mask layer>From image
Open the menu under the source window and you'll see all the files open.
Select the mask masque_49_franiemargot.
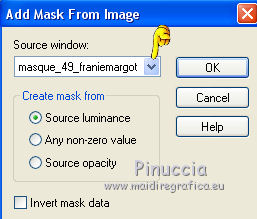
Adjust>Sharpness>Sharpen.
Layers>Merge>Merge Group.
Layers>Merge>Merge visible.
2. Effects>Plugins>Simple - Diamonds.
Effects>Image Effects>Seamless Tiling, default settings.

Effects>Edge Effects>Enhance.
Effects>Reflection Effects>Rotating Mirror.

Layers>Duplicate.
Change the Blend mode of this layer to Overlay and reduce the opacity to 50%.
Layers>Merge>Merge Down.
3. Layers>New Raster Layer.
Flood Fill  the layer with color white. the layer with color white.
Layers>New Mask layer>From image
Open the menu under the source window and select the mask masque_73_franiemargot.
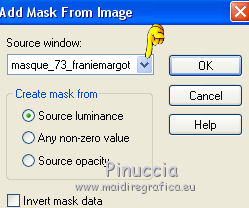
Effects>Edge Effects>Enhance.
Adjust>Sharpness>Sharpen.
Layers>Merge>Merge Group.
Image>Mirror.
Image>Flip.
Effects>3D Effects>Drop Shadow, color #9d8ec7,
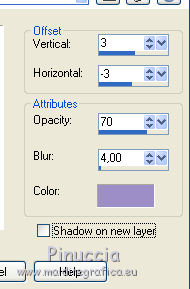
Layers>Merge>Merge Down.
4. Effects>Plugins>Nik Software - Color Efex Pro
select Bi-Color User Defined and ok
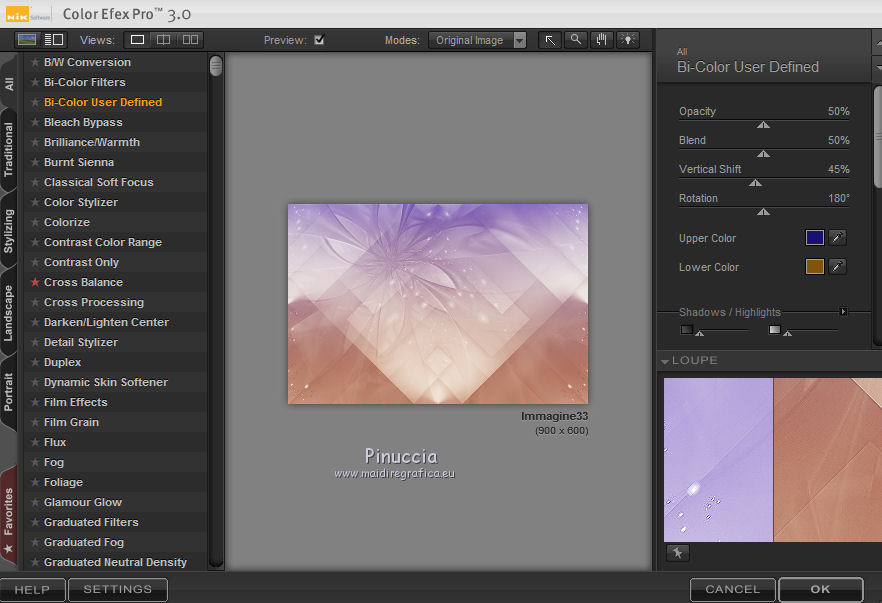
Layers>Duplicate.
Selections>Load/Save Selection>Load Selection from Disk.
Look for and load the selection 1CL triangle.
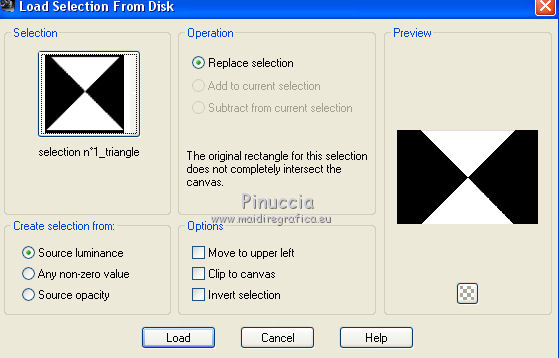
Selections>Promote Selection to Layer.
Effects>Plugins>AP Lines - Lines SilverLining.
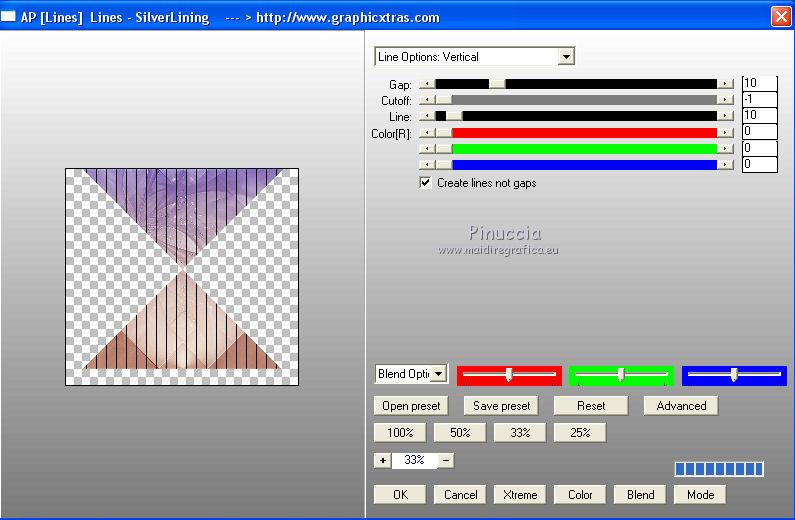
Change the Blend Mode of this layer to Soft Light and reduce the opacity to 50%.
Calques>Duplicate.
Layers>Merge>Merge Down.
Selections>Select None.
You should have this
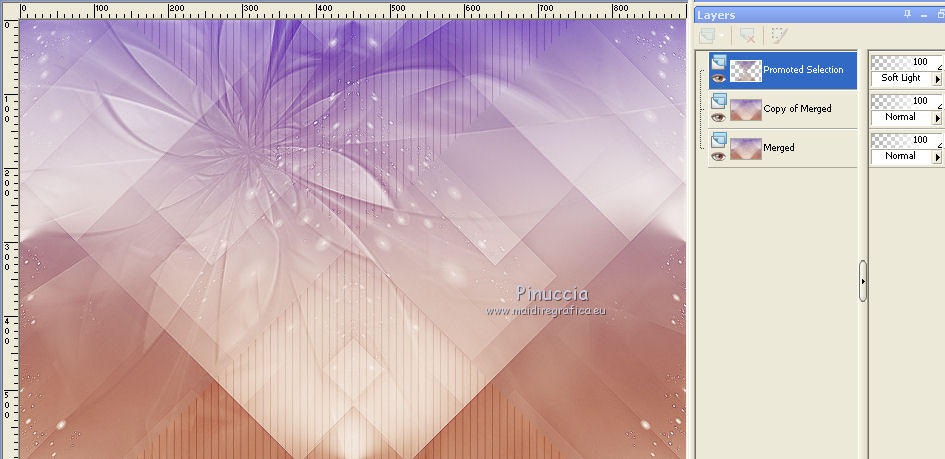
Layers>Merge>Merge visible.
5. Selections>Load/Save Selection>Load Selection from Disk.
Look for and load the selection Kiona 2.
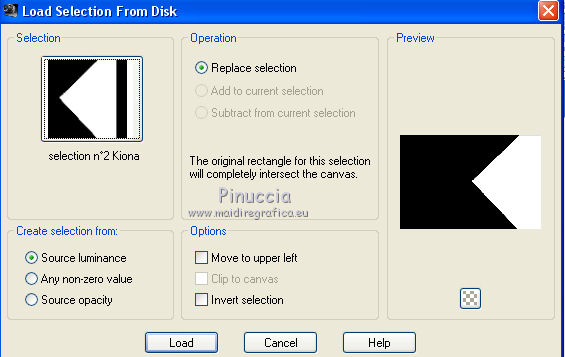
Selections>Promote selection to layer.
Selections>Select None.
Effects>Plugins>Carolaine and Sensibility - CS-LDots
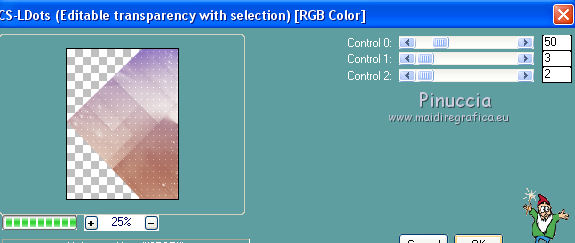
Effects>3D Effects>Drop Shadow, color white.
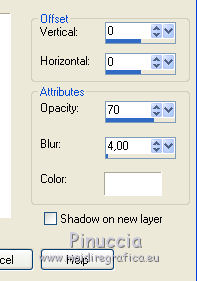
Layers>Merge>Merge Down.
6. Open the tube déco_kiona00 - Edit>Copy.
Go back to your work and go to Edit>Paste as new layer.
Move  the tube over the bottom bord. the tube over the bottom bord.
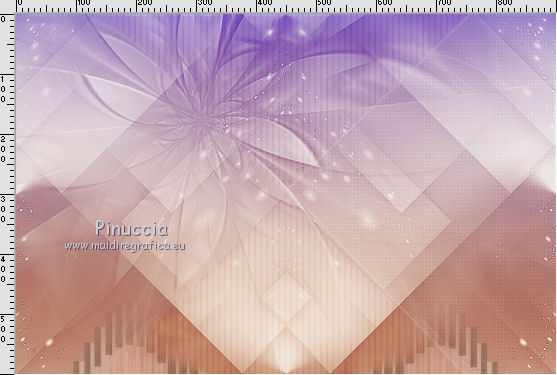
Layers>Duplicate.
Image>Flip.
Layers>Merge>Merge Down.
Effects>3D Effects>Drop Shadow, color black.
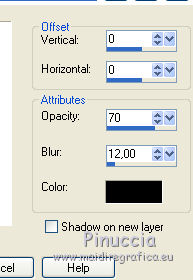
Change the Blend Mode of this layer to Luminance (legacy).
7. Open the tube Déco_Fond CL.kiona 02 - Edit>Copy.
Go back to your work and go to Edit>Paste as new layer.
Reduce the opacity of this layer to 80%.
8. Open the tube Cadre dentelle kiona03 - Edit>Copy.
Go back to your work and go to Edit>Paste as new layer.
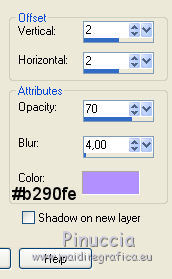
Effects>3D Effects>Drop Shadow, color #b289fe.
Open the tube vintage cluster - Edit>Copy.
Go back to your work and go to Edit>Paste as new layer.
Image>Resize, to 75%, resize all layers not checked.
Reduce the opacity of this layer to 75%.
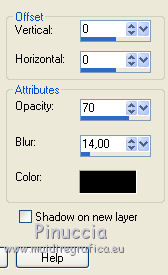
Effects>3D Effects>Drop Shadow, color black.
10. Layers>New Raster Layer.
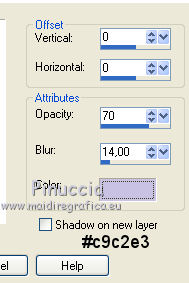
Reduce the opacity of the Flood Fill Tool to 70

Flood Fill  the layer with color white. the layer with color white.
Set again the opacity of Flood Fill Tool to 100.
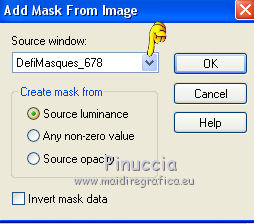
Layers>New Mask layer>From image
Open the menu under the source window
and select the mask DefitMasque_678.
Effects>Edge Effects>Enhance.
Layers>Duplicate.
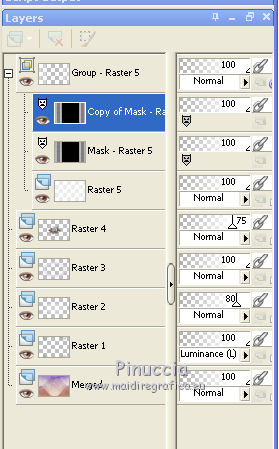
Layers>Merge>Merge Group.
Reduce the opacity of this layer to 75%.
Effects>3D Effects>Drop Shadow, foreground color #c9c2e3.
Your should have this
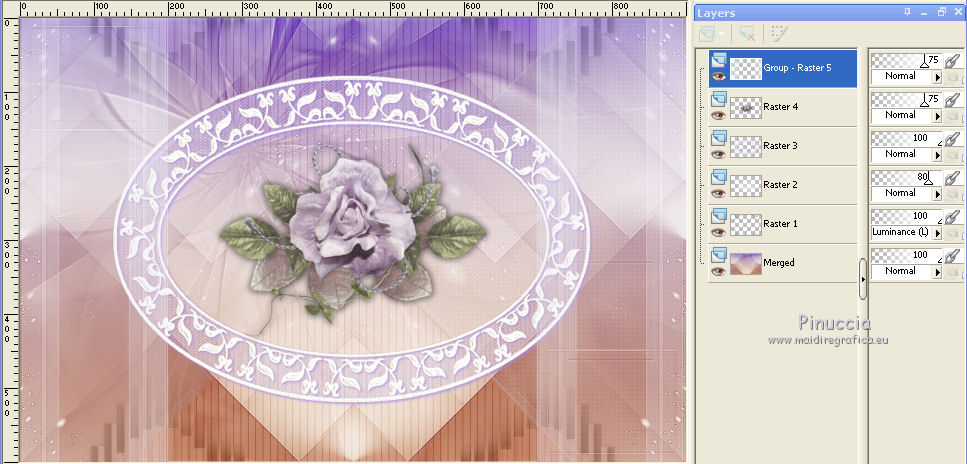
Layers>Merge>Merge All.
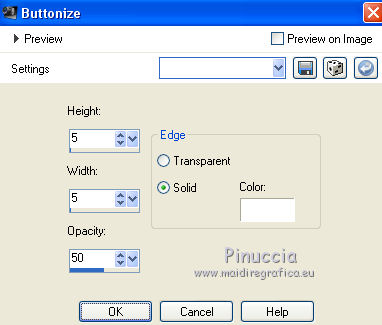
11. Effects>3D Effects>Buttonize.
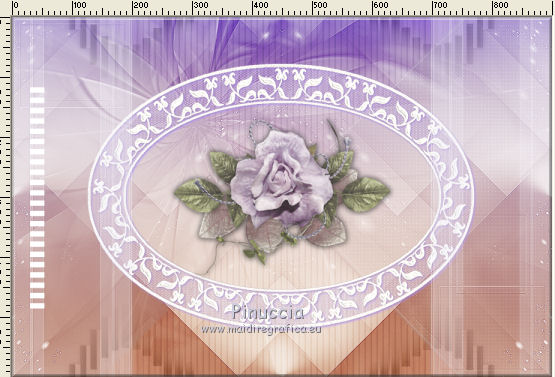
Activate the Brush Tool 
look for and select the brush pinceau claurette

Layers>New Raster Layer.
apply the brush to the left side, with the right clic of the mouse,
to use the background white color.
12. Selections>Select All.
Selection>Float.
Selections>Defloat.
Effects>Texture Effects>Blinds, color #450e59.
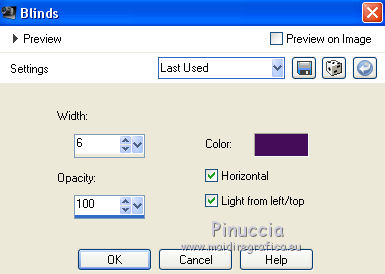
Selections>Select None.
Layers>Duplicate.
Image>Mirror.
Layers>Merge>Merge Down.
Effects>Plugins>Alien Skin Eye Candy 5 Impact - Glass
select the preset preset Clear and ok.

Effects>Plugins>Mura's Seamless - Emboss at Alpha.
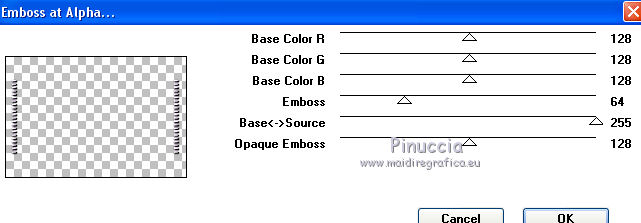
Effects>3D Effects>Drop Shadow, color black.
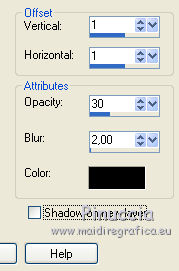
Layers>Merge>Merge visible.
13. Image>Add borders, 2 pixels, symmetric, color white.
Edit>Copy.
Selections>Select All.
Image>Add borders, 50 pixels, symmetric, foreground light color.
Selections>Invert.
Edit>Paste into Selection.
Effects>Plugins>VM Instant Art - Tripolis.
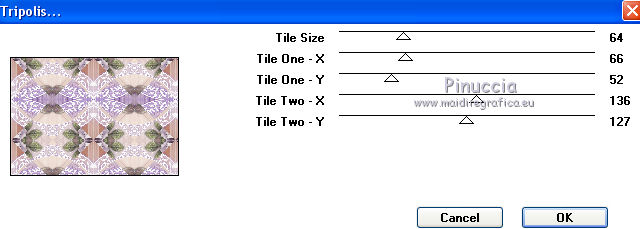
Adjust>Blur>Gaussian Blur - radius 25.

Selections>Promote Selection to layer.
Image>Flip.
Layers>Merge>Merge visible.
Selections>Invert.
Effects>3D Effects>Drop Shadow, color black.
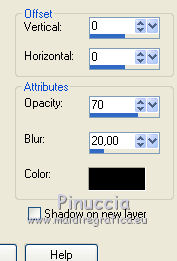
Selections>Select None.
14. Image>Add borders, 2 pixels, symmetric, colore white.
Image>Add borders, 50 pixels, symmetric, foreground light color.
Activate the Magic Wand Tool 
and click on the light border to select it.
Réglage>Add/Remove Noise>Add Noise.
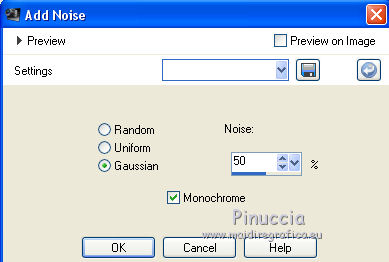
Selections>Invert.
Effects>3D Effects>Drop Shadow, same settings.
Selections>Select None.
Effects>Plugins>AAA Frames - Foto Frame.
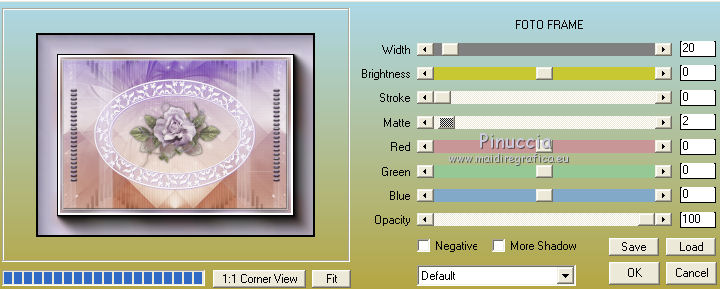
15. Open the tube of the woman by Babette and go to Edit>Copy.
Go back to your work and go to Edit>Paste as new layer.
Image>Resize, 1 time to 75% and 1 time to 80%, resize all layers not checked.
Move  the tube to the right side, or where you want. the tube to the right side, or where you want.
Layers>Duplicate.
Adjust>Blur>Gaussian blur, radius 10

Change the Blend Mode of this layer to Multiply.
Layers>Arrange>Move Down.
16. Open the wordart CL and go to Edit>Copy.
Go back to your work and go to Edit>Paste as new layer.
Image>Free Rotate - 20 degrees to left.

Place  the wordart where you like, or see my example. the wordart where you like, or see my example.
Image>Negative Image.
Effects>3D Effects>Drop Shadow, color #450e59.
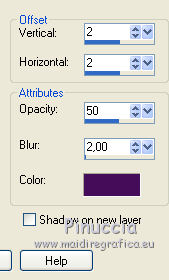
Sign your work on a new layer.
Layers>Merge>Merge All.
Image>Add borders, 2 pixels, symmetric, foreground color #c9c2e3.
Image>Resize, 900 pixels width, resize all layer checked.
Adjust>Sharpness>Unsharp Mask.
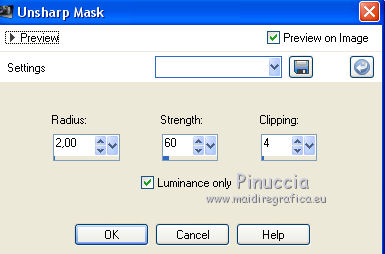
Save as jpg.
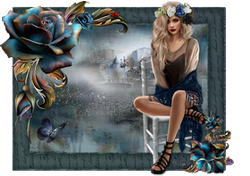
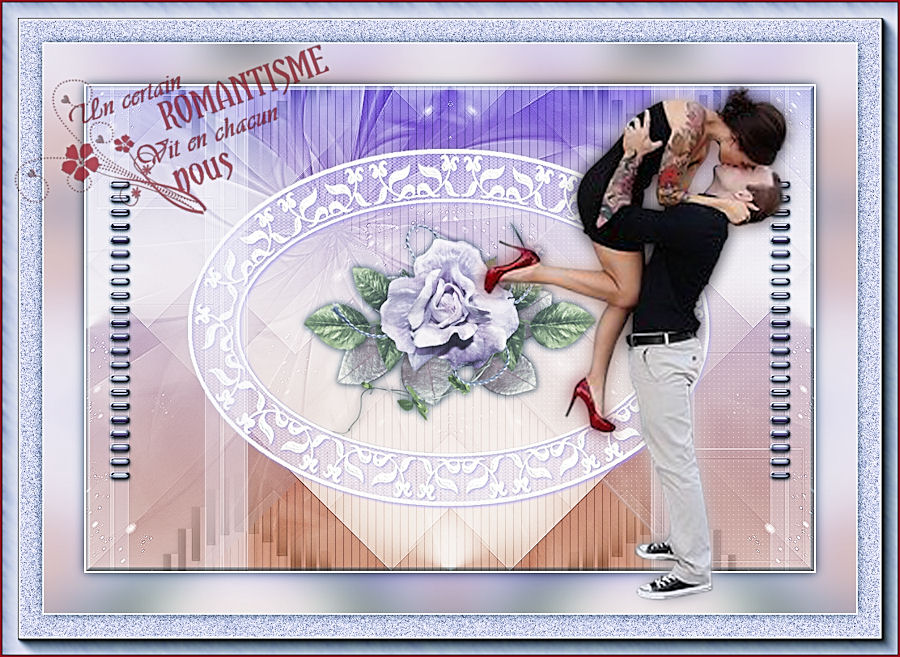
The tube of this version is by Beatriz

If you have problems or doubts, or you find a not worked link,
or only for tell me that you enjoyed this tutorial, write to me.
9 March 2018
|

