|
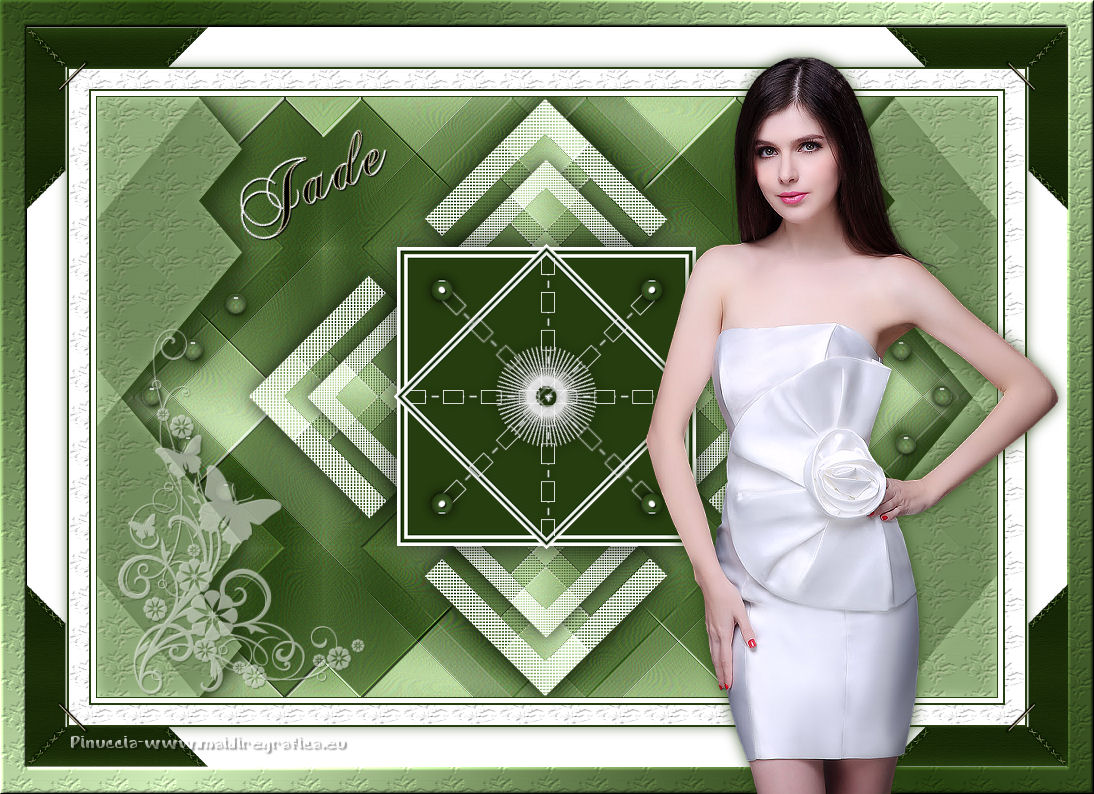
JADE

english version

Here you find the original of this tutorial:

This tutorial was written with CorelX8 and translated with CorelX3, but it can also be made using other versions of PSP.
Since version PSP X4, Image>Mirror was replaced with Image>Flip Horizontal,
and Image>Flip with Image>Flip Vertical, there are some variables.
In versions X5 and X6, the functions have been improved by making available the Objects menu.
In the latest version X7 command Image>Mirror and Image>Flip returned, but with new differences.
See my schedule here
italian translation here
your versions here
Material here
For the woman tube thanks Babette.
(The links of the tubemakers here).
Plugins
consult, if necessary, my filter section here
Filters Unlimited 2.0 here
&<Background Designer IV> - sf10 Slide N Dice (da importare in Unlimited) here
CPK Designs - Mirror here
L&K's - L&K's Katharina here
Simple - Zoom out and flip, Top Left Mirror here
Filters Factory Gallery, Toadies, Funhouse, Simple and VM Toolbox can be used alone or imported into Filters Unlimited.
(How do, you see here)
If a plugin supplied appears with this icon  it must necessarily be imported into Unlimited it must necessarily be imported into Unlimited

In the newest versions of PSP, you don't find the foreground/background gradient (Corel_06_029).
You can use the gradients of the older versions.
The Gradient of CorelX here
Place the brush in the Brushes folder. Attention, please, the brush is composed by two files, you must place both the files in the folder.
See my notes about Brushes here
Copy the Preset Emboss 3 in the Presets Folder.
Copy the texture natfl007 in the Textures Folder.
Copy the selections in the Selections Folder.
1. Open a new transparent image 900 x 600 pixels.
Set your foreground color to #cce8b5,
and your background color to #263e0f.
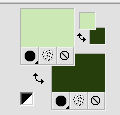
Set your foreground color to a Foreground/Background Gradient, style Radial.

Flood Fill  the transparent image with your Gradient. the transparent image with your Gradient.
Adjust>Blur>Gaussian Blur - radius 30.

Effects>Plugins>Filters Unlimited 2.0 - &<Background designers IV> - sf10 Slice N Dice.
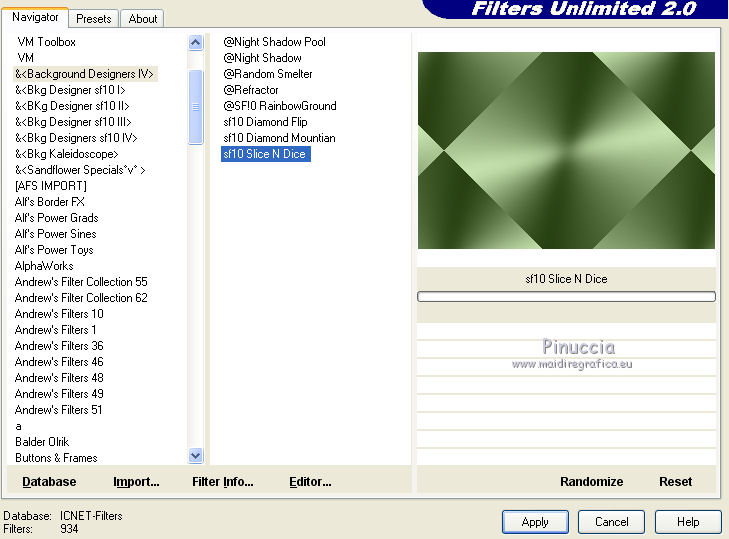
Adjust>Sharpness>Sharpen.
Effects>Edge Effects>Enhance.
2. Layers>Duplicate.
Effects>Plugins>Filters Unlimited 2.0 - CPK Designs - Mirror.
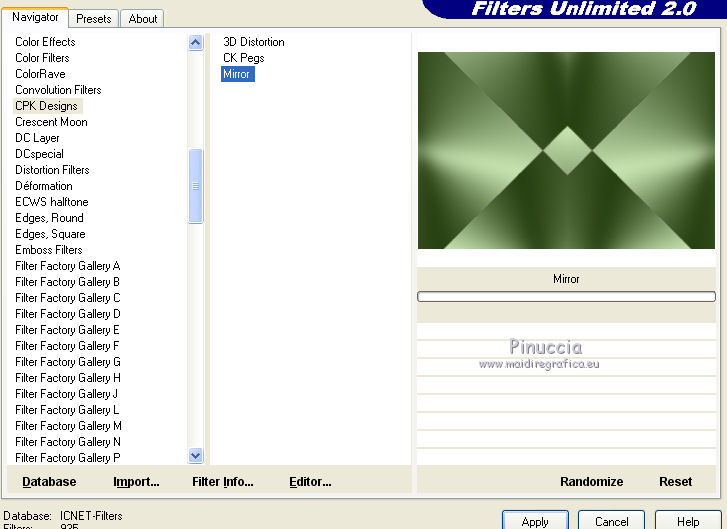
Change the Blend Mode of this layer to Soft Light, opacity 50%.
Layers>Merge>Merge Down.
3. Layers>Duplicate.
Effects>Plugins>Simple - Zoom out and flip.
Reduce the opacity of this layer to 65%.
Effects>User Defined Filter - select the preset Emboss 3 and ok.

Layers>Merge>Merge Down.
4. Set your foreground color to color white.
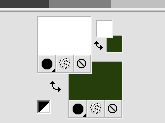
Selections>Load/Save Selection>Load Selection from Disk.
Look for and load the selection ©Jade0.

Selections>Promote Selection to Layer.
Selections>Select None.
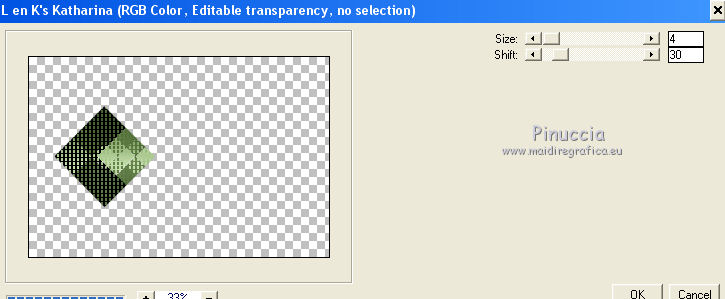
5. Effects>Plugins>L&K's - L&K's Katharina.
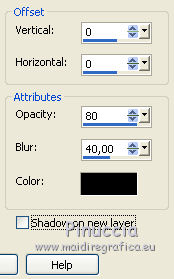
Effects>3D Effects>Drop Shadow, color black.
Layers>Duplicate.
Image>Miroir.
Layers>Merge>Merge Down.
6. Again Layers>Duplicate.
Image>Free Rotate - 90 degrees to left.

Image>Resize, to 80%, resize all layers not checked.
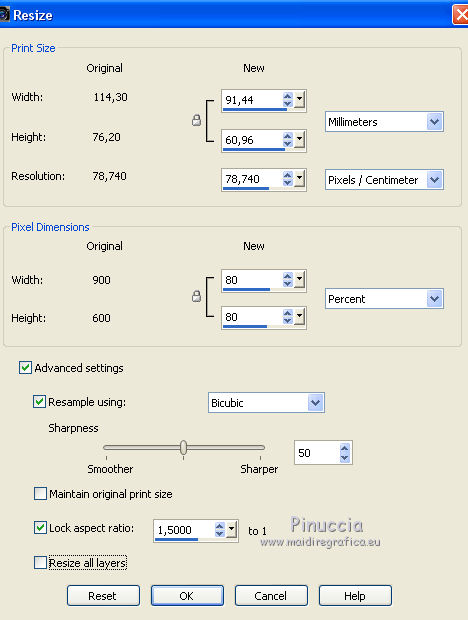
Again Image>Free Rotate - 90 degrees to left.

Layers>Merge>Merge Down.
7. Layers>Duplicate.
Again Image>Free Rotate - 90 degrees to left.
Image>Resize, to 80%, resize all layers not checked.
8. Activate the layer below.

Image>Resize, to 80%, resize all layers not checked.
Layers>Merge>Merge Visible.
9. Layers>New Raster Layer.
Selections>Load/Save Selection>Load Selection from Disk.
Look for and load the selection ©Jade 1.

Flood Fill  the selection with color white. the selection with color white.
Selections>Modify>Contract - 3 pixels.
10. Flood Fill  with your dark color. with your dark color.
Selections>Modify>Contract - 3 pixels.
Flood Fill  with color white. with color white.
Selections>Modify>Contract - 3 pixels.
Flood Fill  with your dark color. with your dark color.
Selections>Select None.
11. Image>Resize, to 120%, resize all layers not checked.
Objects>Align>Center in Canvas.
ou K key to activate the Pick Tool 
and set Position X: 300.00 and Position Y: 150,00

12. Open the tube Déco Jade 1 and go to Edit>Copy.
Go back to your work and go to Edit>Paste as new layer.
Don't move it. It is rightly placed.
If you want to change color, use the Color changer Tool 
and click with your chosen color.
Effects>3D Effects>Drop Shadow, same settings.

Layers>Merge>Merge Down.
13. Layers>Duplicate.
Image>Resize, to 72%, resize all layers not checked.
Image>Free Rotate, 45 degrees to left.
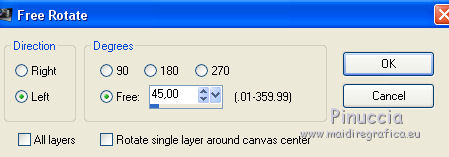
Layers>Merge>Merge Down.
Effects>3D Effects>Drop Shadow, same settings.
14. Open the tube Déco Jade 2 and go to Edit>Copy.
Go back to your work and go to Edit>Paste as new layer.
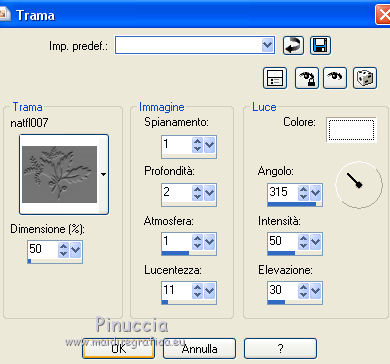
Effects>Texture Effects>Texture - select the texture natfl007, light color #cce8b5.

Effects>3D Effects>Drop Shadow, dark color.

Repeat Drop Shadow, but vertical and horizontal -5.
Layers>Duplicate.
Layers>Merge>Merge Down.
Effects>3D Effects>Drop Shadow, color black.

15. Open the tube Déco Jade 3 and go to Edit>Copy.
Go back to your work and go to Edit>Paste as new layer.
On the keyboard K key to activate the Pick Tool 
and set Position Posizione X: 39,00 and Position Y: 193,00.

M key to deselect the Tool.
Layers>Duplicate.
Image>Miroir.
Layers>Merge>Merge Down.
16. Open the tube Déco Jade 4 and go to Edit>Copy.
Go back to your work and go to Edit>Paste as new layer.
Don't move it.
Effects>3D Effects>Drop Shadow, color black.

Layers>Merge>Merge Visible.
17. Layers>New Raster Layer.
Activate the Brush Tool 
look for and select the brush pinceau_jade, size 420, opacity 70

Apply the brush at the bottom left,
clicking with your left botton, to use your foreground color white.
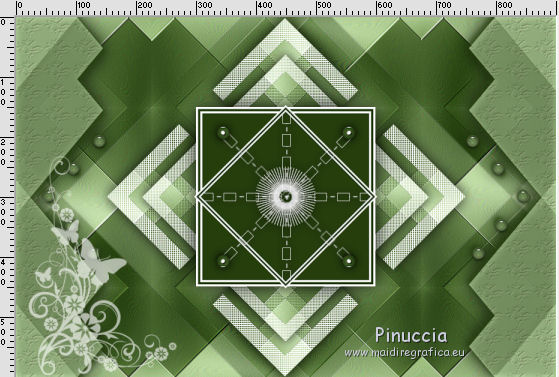
Effects>3D Effects>Drop Shadow, dark color.

18. Image>Add borders, 1 pixel, symmetric, background color.
Image>Add borders, 5 pixels, symmetric, color white.
Image>Add borders, 2 pixels, symmetric, background color.
Selections>Select All.
Image>Add borders, 20 pixels, symmetric, color white.
Selections>Invert.
Effects>Texture Effects>Texture, same settings, but with color white.
19. Selections>Select All.
Image>Add borders, 2 pixels, symmetric, background color.
Image>Add borders, 40 pixels, symmetric, color white.
Effects>3D Effects>Drop Shadow, background color.

Selections>Select All.
Image>Add borders, 2 pixels, symmetric, background color.
Image>Add borders, 25 pixels, symmetric, color white.
Selection>Invert.
Set again your foreground color to light color (#cce8b5) and Radial Gradient.
 
Flood Fill  the selection with your Gradient. the selection with your Gradient.
Effects>Texture Effects>Texture, same settings.

Effects>3D Effects>Inner Bevel.

Selections>Select None.
20. Open the tube coin and go to Edit>Copy.
Go back to your work and go to Edit>Paste as new layer.
Image>Resize, to 75%, resize all layers not checked.
K key to activate the Pick Tool 
and set Position X: 25,00 and Position Y: 25,00.

M key to deselect the tool.
Effects>Plugins>Simple - Top Left Mirror.
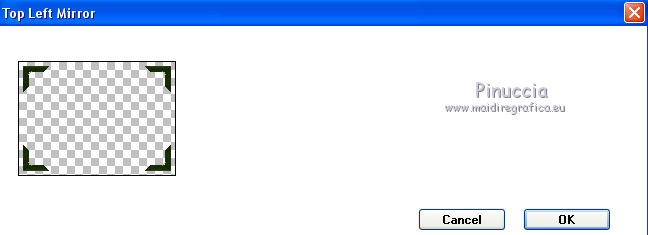
Layers>Merge>Merge Visible.
21. Open the wordart Jade and go to Edit>Copy.
Go back to your work and go to Edit>Paste as new layer.
Colorize, or write your text with the supplied font.
Move  the text at the upper left. the text at the upper left.
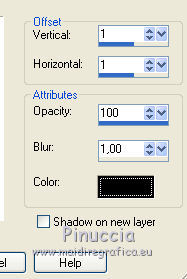
Effects>3D Effects>Drop Shadow, color black.
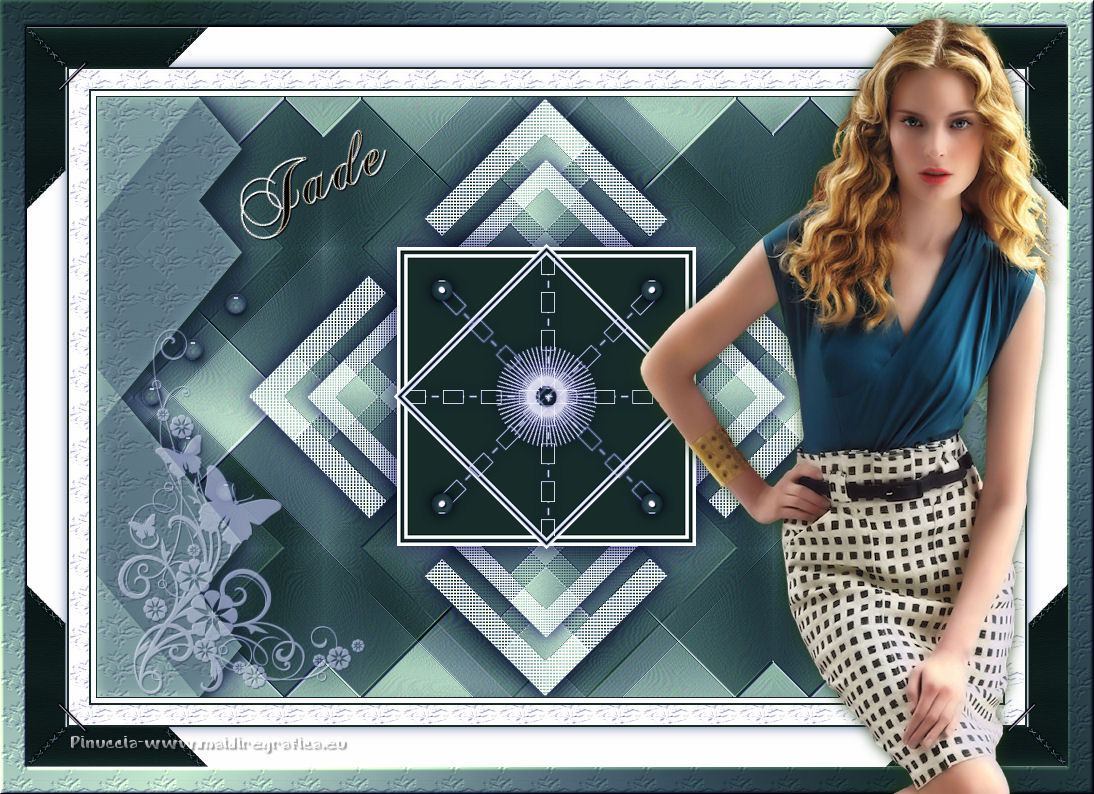
22. Open the woman tube by Babette, erase the watermark, and go to Edit>Copy.
Go back to your work and go to Edit>Paste as new layer.
Image>Resize, 2 times to 80%, resize all layers not checked.
Adjust>Sharpness>Sharpen.
Place  rightly the tube. rightly the tube.
Effects>3D Effects>Drop Shadow, background color.

23. Sign your work on a new layer.
Image>Add borders, 1 pixel, symmetric, background color.
Save as jpg.
The tube of this version is by Azalée

If you have problems or doubts, or you find a not worked link,
or only for tell me that you enjoyed this tutorial, write to me.
21 June 2018
|

