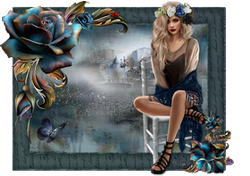
|
CASSANDRA

english version

Here you find the original of this tutorial:

This tutorial was written with CorelX9 and translated with Corel X7 and CorelX3, but it can also be made using other versions of PSP.
Since version PSP X4, Image>Mirror was replaced with Image>Flip Horizontal,
and Image>Flip with Image>Flip Vertical, there are some variables.
In versions X5 and X6, the functions have been improved by making available the Objects menu.
In the latest version X7 command Image>Mirror and Image>Flip returned, but with new differences.
See my schedule here
italian translation here
le vostre versioni/your versions qui/here
Tube of yours
The rest of the material here
For the tubes not supplied thanks Tocha
The rest of the material is by Laurette.
(The links of the tubemakers here).
Plugins
consult, if necessary, my filter section here
Filters Unlimited 2.0 here
Simple - Pizza Slice Mirror here
I-Decay - Accident here
Mura's Seamless - Emboss at alpha here
Mehdi - Wavy Lab 1.1 here
Alien Skin Eye Candy 5 Impact - Glass here
Graphics Plus - Cross Shadow here
Filters I-Decay, Simple and Graphics Plus can be used alone or imported into Filters Unlimited.
(How do, you see here)
If a plugin supplied appears with this icon  it must necessarily be imported into Unlimited it must necessarily be imported into Unlimited

You can change Blend Modes according to your colors.
In the newest versions of PSP, you don't find the foreground/background gradient (Corel_06_029).
You can use the gradients of the older versions.
The Gradient of CorelX here
Copy the brushes in Brush folder. Attention, please, every brush is composed by two files, you must place both the files in the folder.
See my notes about Brushes here
In the material, you find the brushes in jpg (to export as custom brush), and png (to copy/paste as new layer), if you have problems with the brushes.
Copy the Texture in the Textures Folder.
Copy the Selections in the Selections Folder (if you want to use them instead of the alpha channel)
Open the masks in PSP and minimize them with the rest of the material.
Colors used

Set your foreground color to color 1 #d09d00,
and your background color to color 2 #fceead.
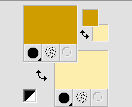
Prepare your foreground color to a Foreground/Background Gradient, style Linear.
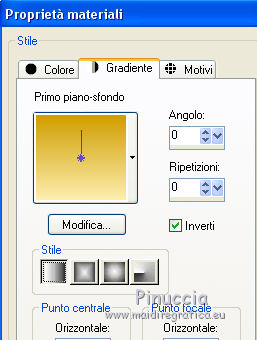
Keep the foreground color to Color.
1. Open canal_alpha_Cassandra
Window>Duplicate, or on the keyboard shift+D, to make a copy.
Close the original.
The copy, that will be the basis of your work, is not empty,
but contains the selections saved on the alpha channel.
(if you prefer: open a new transparent image 900 x 600 pixels)
Flood Fill  the transparent image with your foreground color. the transparent image with your foreground color.
Layers>New Raster Layer.
Selections>Select all.
Open the tube of the woman and go to Edit>Copy.
Go back to your work and go to Edit>Paste into Selection.
Selections>Select None.
2. Effects>Image Effects>Seamless Tiling, default settings.

Adjust>Blur>Radial blur

Again Effects>Image Effects>Seamless Tiling, default settings.

Effects>Reflection Effects>Rotating Mirror.
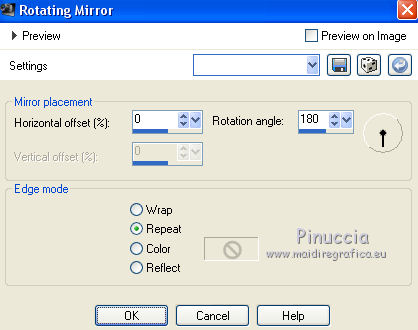
Layers>Merge>Merge visible.
3. Effects>Plugins>Simple - Pizza Slice Mirror.
Effects>Image Effects>Seamless Tiling, default settings.

Effects>Reflection Effects>Rotating Mirror, same settings.

Effects>Plugins>Filters Unlimited 2.0 - I-Decay - Accident, default settings.
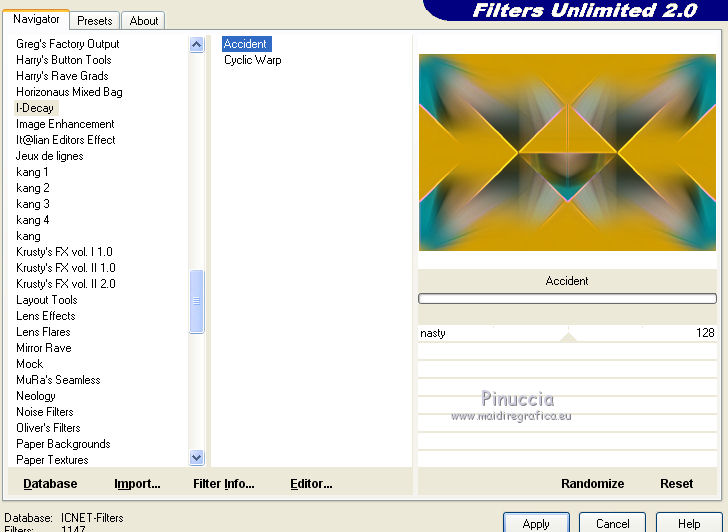
4. Selections>Select All.
Selections>Modify>Contract - 3 pixels.
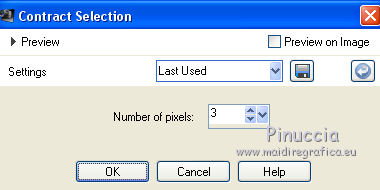
Selections>Invert.
Press CANC on the keyboard 
Layers>New Raster Layer.
Flood Fill  with your foreground color. with your foreground color.
Effects>Plugins>Graphics Plus - Cross Shadow, default settings.

Selections>Select None.
Layers>Merge>Merge Down.
5. Layers>New Raster Layer.
Flood Fill  with your background color (color 2). with your background color (color 2).
Layers>New Mask layer>From image
Open the menu under the source window and you'll see all the files open.
Select the mask sg_beaded-wave

Adjust>Sharpness>Sharpen.
Layers>Merge>Merge Group.
Effects>3D Effects>Drop Shadow, foreground color (color 1).

Layers>Merge>Merge Down.
6. Selections>Load/Save Selection>Load Selection from disk.
The selection sélection#1 is immediately available.
You just have to click Load.

if your like better, you can do Load Selection from Disk and load the selection sel perso 1

Layers>New Raster Layer.
Selections>Modify>Select Selection Borders.

Flood Fill  with your foreground color (color 1). with your foreground color (color 1).
Effects>3D Effects>Inner Bevel.

Selections>Select None.
Layers>Merge>Merge visible.
7. Layers>New Raster Layer.
Selection Tool 
(no matter the type of selection, because with the custom selection your always get a rectangle)
clic on the Custom Selection 
and set the following settings.

Selections>Modify>Contract - 3 pixels.

Flood Fill  with your foreground color (color 1). with your foreground color (color 1).
Selections>Modify>Contract - 15 pixels.
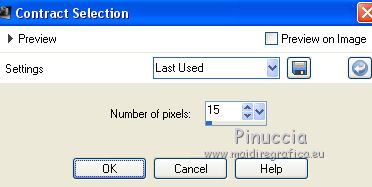
Selections>Invert.
Effects>Plugins>Graphics Plus - Cross Shadow, default settings.

Again Selections>Invert.
Set your foreground color to the Gradient.
Flood Fill  the selection with your Gradient. the selection with your Gradient.
Effects>Texture Effects>Texture - select the texture rose-quadrillé

Layers>New Raster Layer.
Open the landscape "paysage" - Edit>Copy.
Go back to your work and go to Edit>Paste into selection.
Selections>Select None.
Layers>Merge>Merge Down.
8. Stay on the top layer.
Open the tube déco-dentelle-CL - Edit>Copy.
Go back to your work and go to Edit>Paste as new layer.
Effects>Image Effects>Offset.

Effects>3D Effects>Drop Shadow, foreground color (color 1),
shadow on a new layer selected

Stay on the shadow layer and change the Blend Mode to Multiply.
Layers>Duplicate.
Layers>Merge>Merge Down (to merge the two shadow layers)

9. Activate the bottom layer.
Selections>Load/Save Selection>Load Selection from disk.
Open the selections menu and load selection#2.

Selections
Layers>Arrange>Bring to Top.
Flood Fill  the selection with your Gradient. the selection with your Gradient.
Effects>Texture Effect>Texture, same settings.

Effects>3D Effects>Drop Shadow, color black.

Selections>Select None.
Layers>Merge>Merge visible.
Minimize your work for a moment; we'll go to make the frames.
*****
1. Open a new transparent image 200 x 100 pixels.

Selections>Select All.
Set your foreground color to white.
Flood Fill  with color white. with color white.
Selections>Modify>Contract - 3 pixels.

Press CANC on the keyboard.
2. Reduce the opacity of your Flood Fill Tool to 50%.

Flood Fill  again with color white. again with color white.
Selections>Modify>Contract - 6 pixels.

Set again the opacity of your Flood Fill Tool to 100
Flood Fill  with color white. with color white.
Selections>Modify>Contract - 3 pixels.

Press CANC on the keyboard.
3. Set again your foreground color to color 1 and to Gradient.
 
Flood Fill  the selection with your Gradient. the selection with your Gradient.
Activate again the landscape - Edit>Copy.
Go back to your work and go to Edit>Paste into selection.
Effects>Plugins>Alien Skin Eye Candy 5 Impact - Glass,
select the preset Clear and ok.

Selections>Select None.
4. Image>Resize, to 85%, resize all layers checked.

Edit>Copy.
*****
10. Activate your work waiting from step 9,
and go to Edit>Paste as new layer.
K key on the keyboard to activate your Pick Tool 
and set Position X: 25,00 and Position Y: 12,00.

11. Layers>Duplicate.
Image>Resize, to 75%, resize all layers not checked.

Set Position X: 25,00 and Position Y: 120,00.

12. Layers>Duplicate.
Image>Resize, to 75%, resize all layers not checked.
Set Position X: 25,00 and Position Y: 206,00.

M key to deselect the tool.
Layers>Merge>Merge Down - 2 times.
Effects>3D Effects>Drop Shadow, color black.

13. Activate the bottom layer.
Selections>Load/Save Selection>Load Selection from disk.
Open the selections menu and load again selection#2.

Selections>Modify>Select Selection Borders.

Layers>New Raster Layer.
Set your foreground color to Color (color 1).

Flood Fill  the selection with your foreground color (color 1). the selection with your foreground color (color 1).
Selections>Select None.
Effects>Plugins>Mura's Seamless - Emboss at Alpha, default settings.
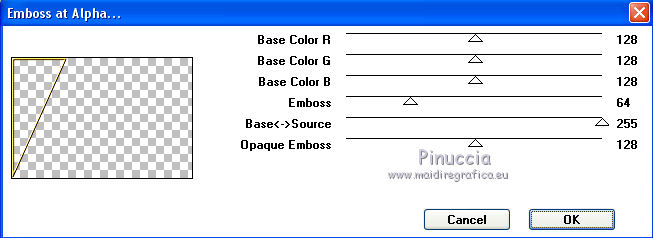
Layers>Merge>Merge visible.
15. Set your foreground color to white.
Layers>New Raster Layer.
Activate your Brush Tool 
look for and select the brush pinceau papillons

Apply the brush to the left side with color white.
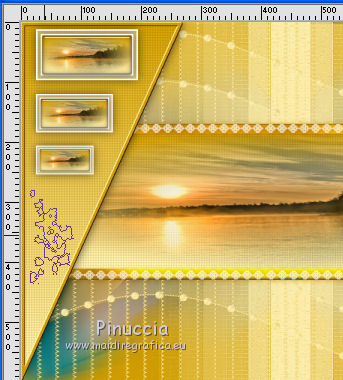
If you have problems with brushes, you have two options:
open the brush in jpg format and go to File>Export>Custom brush, give a name to the brush and ok.
Or copy/paste as new layer the brush in png, and after go to Image>Negative image to have the white brush.
Effects>3D Effects>Drop Shadow, color 1 #d09d00.

Layers>Merge>Merge visible.
15. Layers>New Raster Layer.
Flood Fill  with color white. with color white.
Layers>New Mask layer>From image
Open the menu under the source window and select the mask masque2

Layers>Merge>Merge Group.
Effects>Image Effects>Offset.

Change the Blend Mode of this layer to Luminance (legacy).
Layers>Merge>Merge visible.
16. Image>Add borders, 2 pixels, symmetric, color white.
Image>Add borders, 1 pixel, symmetric, color 1 #d09d00.
Selections>Select All.
Image>Add borders, 20 pixels, symmetric, color white.
Selections>Invert.
Effects>Plugins>Mehdi - Wavy Lab 1.1.
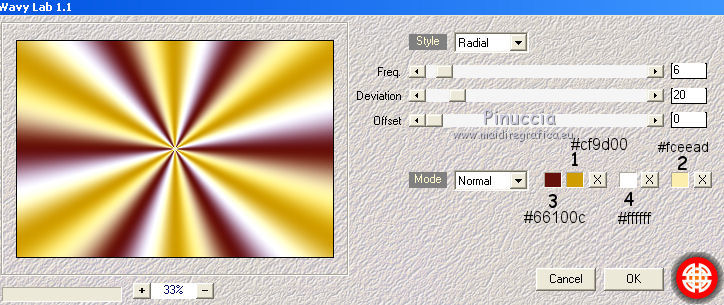
Adjust>Blur>Gaussian Blur - radius 20.

Selections>Invert.
Effects>3D Effects>Drop Shadow, color black.

Selections>Select None.
17. Image>Add borders, 2 pixels, symmetric, background color (color 2).
Selections>Select All.
Image>Add borders, 45 pixels, symmetric, color white.
Effects>3D Effects>Drop Shadow, color black.

Selections>Select None.
18. Set your foreground color to color 1 #d09d00.
Image>Add borders, 2 pixels, symmetric, foreground color (color 1).
Layers>New Raster Layer.
Activate your Brush Tool 
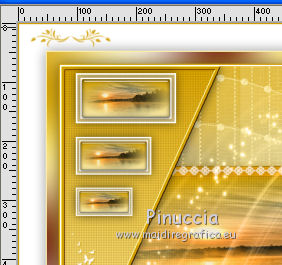
look for and select the brush pinceau coin

Apply the brush at the upper left with your foreground color (color 1)
Layers>Duplicate.
Layers>Merge>Merge Down.
Layers>Duplicate.
Image>Mirror.
Image>Flip.
Layers>Merge>Merge Down.
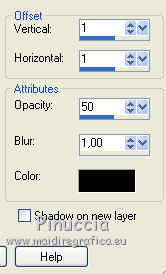
Effects>3D Effects>Drop Shadow, color black.
19. Set your foreground color to a color at your choice, white or black.
Layers>New Raster Layer.
Look for and select the brush wordart cl.

Apply the brush at the upper right, with your color.
Effects>3D Effects>Drop Shadow, color black.

20. Open your tube - Edit>Copy.
Go back to your work and go to Edit>Paste as new layer.
Image>Resize, if necessary, resize all layers not checked.
Place  rightly the tube. rightly the tube.
Effects>3D Effects>Drop Shadow, color black.

21. Sign your work on a new layer.
Layers>Merge>Merge All.
Image>Resize, 950 pixels width, resize all layers cheched.
Save as jpg.
Version with an image instead of the landscape; the tube is by Tocha


If you have problems or doubts, or you find a not worked link, or only for tell me that you enjoyed this tutorial, write to me.
18 March 2019
|


