|
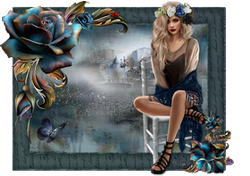
BONNE FÊTE MAMAN

english version

Here you find the original of this tutorial:

This tutorial was written with CorelX9 and translated with CorelX3, but it can also be made using other versions of PSP.
Since version PSP X4, Image>Mirror was replaced with Image>Flip Horizontal,
and Image>Flip with Image>Flip Vertical, there are some variables.
In versions X5 and X6, the functions have been improved by making available the Objects menu.
In the latest version X7 command Image>Mirror and Image>Flip returned, but with new differences.
See my schedule here
italian translation here
Material here
For the woman tube thanks Lady Bird.
(The links of the tubemakers here).
Plugins
consult, if necessary, my filter section here
Filter Factory Gallery M - Faceter here
Simple - Top Left Mirror here
VM Toolbox - Instant Tile here
AAA Frames - Foto Frame here
FM Tile Tools - Blend Emboss here
Mura's Seamless - Emboss at Alpha here
Filters Unlimited 2.0 here
Filters VM Toolbox, Toadies and Mura's Seamless can be used alone or imported into Filters Unlimited.
(How do, you see here)
If a plugin supplied appears with this icon  it must necessarily be imported into Unlimited it must necessarily be imported into Unlimited

In the newest versions of PSP, you don't find the foreground/background gradient (Corel_06_029).
You can use the gradients of the older versions.
The Gradient of CorelX here
Place the brush in the Brushes folder. Attention, please, the brush is composed by two files, you must place both the files in the folder.
See my notes about Brushes here
The texture Grain long profond is standard in PSP: it is Grain long deep, or Corel_15_017 in the newest versions.
If you don't find it in your PSP, copy the supplied texture in the Textures Folder.
Copy the selections in the Selections Folder.
Open the mask in PSP and minimize them with the rest of the material.
Used colors

1. Open a new transparent image 900 x 600 pixels.
Set your foreground color to dark color #0056d6,
and your background color to light color #91bcff.

Set your foreground color to a Foreground/Background Gradiente, style Linear.

Flood Fill  the transparente image with your Gradient. the transparente image with your Gradient.
2. Effects>Texture Effects>Texture - select the texture Grain long deep or Corel_15_017.

3. Set your foreground color to white.
Layers>New Raster Layer.
Flood Fill  the layer with color white. the layer with color white.
4. Layers>New Mask layer>From image
Open the menu under the source window and you'll see all the files open.
Select the mask masque du net 000.
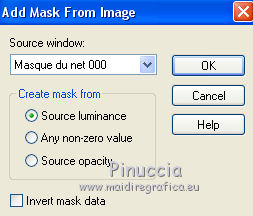
Adjust>Sharpness>Sharpen.
Effects>Edge Effects>Enhance.
Layers>Merge>Merge Group.
5. Effects>Plugins>FM Tile Tools - Blend Emboss, default settings - 2 times.

6. Effects>Plugins>Mura's Seamless - Emboss at Alpha.

7. Layers>New Raster Layer.
Selections>Load/Save Selection>Load Selection from disk.
Look for and load the Selection ©maman3.

Set again your foreground color to the dark color #0056d6.

Flood Fill  the selection with your dark foreground color #0056d6. the selection with your dark foreground color #0056d6.
Selections>Modify>Contract - 2 pixels.
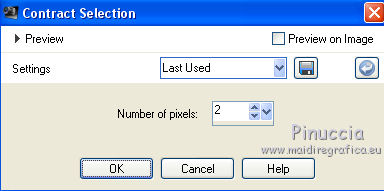
Set again your foreground color to Gradient.

Flood Fill  the selection with your Gradient. the selection with your Gradient.
8. Effects>Texture Effects>Weave
the two colors: white #ffffff

Keep selected.
9. Open the image coeur de rose, colorize according to your colors, and go to Edit>Copy.
Go back to your work and go to Edit>Paste into selection.
10. Layers>New Raster layer.
Activate the Brush Tool 
look for and select the brush pinceau ecriture CL

apply the brush in the middle, clicking with right clic,
to use your light background color #91bcff (if you prefer, you can use the color white).

Layers>Merge>Merge Down.
11. Effects>3D Effects>Inner Bevel.

Selections>Select None.
Image>Resize, to 105% resize all layers not checked.
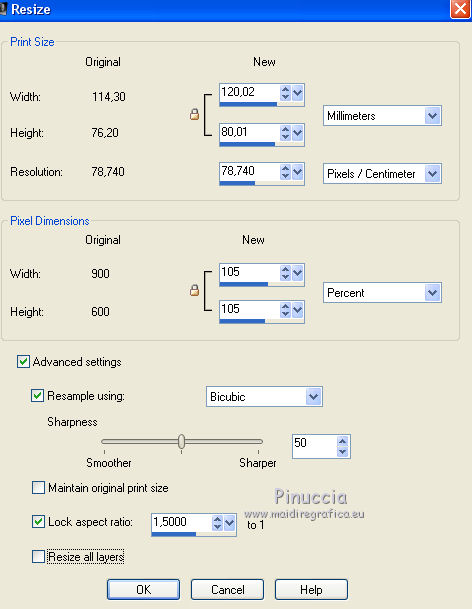
12. Effects>3D Effects>Drop Shadow, color black.
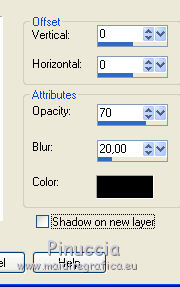
13. Layers>Merge>Merge visible.
14. Layers>New Raster Layer.
Selections>Load/Save Selection>Load Selection from disk.
Look for and load the Selection ©maman01.

Set your foreground color to Color.
Flood Fill  with your foreground color #0056d6. with your foreground color #0056d6.
Selections>Modify>Contract - 1 pixel.
Set again your foreground color to Gradient.
Flood Fill  the selection with your Gradient. the selection with your Gradient.
15. Effects>Texture Effects>Weave, same settings.
Effects>3D Effects>Inner Bevel, same settings.
Selections>Select None.
16. Image>Resize, to 105%, resize all layer not checked.
Effects>Image Effects>Offset.
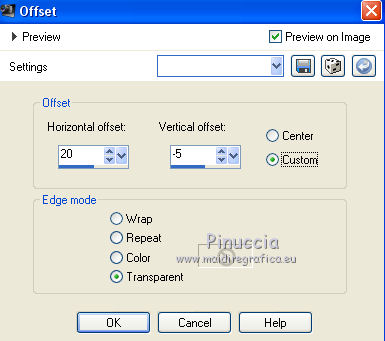
17. Effects>Plugins>Simple - Top left mirror.
Layers>Duplicate.
Effects>Image Effects>Offset.

18. Layers>Duplicate.
Image>Flip.
Layers>Merge>Merge Down - 2 times.
19. Effects>3D Effects>Drop Shadow, color black.

20. Open the tube Bouton CL and go to Edit>Copy.
Go back to your work and go to Edit>Paste as new layer.
Effects>Image Effects>Offset.

Effects>Plugins>Simple - Top Left Mirror.
Effects>3D Effects>Drop Shadow, same settings.

21. Open the tube déco CL dentelle and go to Edit>Copy.
Go back to your work and go to Edit>Paste as new layer.
If it is necessary, colorize with the Change to Target Tool 
Before applying the Tool, set your foreground color with the chosen color.
22. Effects>3D Effects>Drop Shadow, foreground color #0056d6.

23. Image>Add borders, 1 pixel, symmetric, light background color #91bcff.
Image>Add borders, 3 pixels, symmetric, color white.
Image>Add borders, 3 pixels, symmetric, dark foreground color #0056d6.
Selections>Select All.
Image>Add borders, 30 pixels, symmetric, color white.
Selections>Invert.
Flood Fill  the selection with your Gradient. the selection with your Gradient.
24. Effects>Plugins>Filters Unlimited 2.0 - Filter Factory Gallery M - Faceter, default settings.

Effects>3D Effects>Inner Bevel, same settings.
Selections>Select None.
25. Image>Add borders, 2 pixels, symmetric, color white.
Image>Add borders, 3 pixels, symmetric, dark color #0056d6.
Image>Add borders, 20 pixels, symmetric, color white.
26. Image>Add borders, 3 pixels, symmetric, dark color #0056d6.
Image>Add borders, 2 pixels, symmetric, color white.
Image>Add borders, 45 pixels, symmetric, light color #91bcff.
Activate the Magic Wand Tool 
and click on the 45 pixels border to select it.
27. Effects>Plugins>VM Toolbox - Instant Tile, default settings.

28. Selections>Select All.
Image>Add borders, 45 pixels, symmetric, color white.
Effects>3D Effects>Drop Shadow, color black.

Selections>Select None.
29. Open the tube Enfant and go to Edit>Copy.
Go back to your work and go to Edit>Paste as new layer.
Effects>3D Effects>Drop Shadow, color black.

30. Open WordArt CL and go to Edit>Copy.
Go back to your work and go to Edit>Paste as new layer.
Move  the tube at the upper left. the tube at the upper left.
Effects>3D Effects>Drop Shadow, color black.
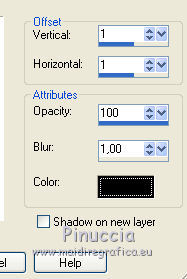
31. LayerS>Merge>Merge All.
Effects>Plugins>AAA Frames - Foto Frame.

32. Image>Resize, 900 pixels width, resize all layers checked.
Sign your work and save as jpg.
The tube of this version is by Cibi-Bijoux


If you have problems or doubts, or you find a not worked link,
or only for tell me that you enjoyed this tutorial, write to me.
2 June 2018
|


