Home |
Home |

Mappa sito |
Mappa sito |
Tutorial |
Tutorial |
Tut tecnici |
Tut tecnici |
Links-Banner |
Links-Banner |
Regali-Award |
Regali-Award |
Informatica |
Informatica |
Archivio |
Archivio |
Mail |
Mail |
Privacy policy |
Privacy policy |
Novità |
Novità |
Home |
Home |
Mappa sito |
Mappa sito |
Tutorial |
Tutorial |
Tut tecnici |
Tut tecnici |
Links-Banner |
Links-Banner |
Regali-Award |
Regali-Award |
Informatica |
Informatica |
Archivio |
Archivio |
Mail |
Mail |
Privacy policy |
Privacy policy |
Novità |
Novità |
|
MOULIN ROUGE 

This tutorial, created with PSPX9 has been translated with PSPX2 and PSPX3, but it can also be made using other versions of PSP. For this tutorial, you will need:  Thanks for the tube Drevers. The rest of the material is by Lady Tess. (you find here the links to the material authors' sites)  consult, if necessary, my filter section here Carolaine and Sensibility - CS-Texture here Mehdi - Wavy Lab 1.1 here FM Tile Tools - Blend Emboss here Mura's Meister - Copies here AAA Frames - Foto Frame here Animation Shop here  You can change Blend Modes according to your colors.  Copy the Selections in the Selections Folder. Open in PSP the image image_entrada, which will serve as a mask. 1. Set your foreground color to #870001 and your background color to #292725.  2. Open a new transparent image 900 x 550 pixels. Effects>Plugins>Mehdi - Wavy Lab 1.1 This filter creates gradients with the colors of your Materials palette. The first is your background color, the second is your foreground color. Change the last colors created by the filtre: the third color with #bc0004 and the fourth with #ff151a.  Layers>Duplicate. Adjust>Blur>Gaussian Blur - radius 80.  3. Layers>New Raster Layer. Flood Fill  the layer with your foreground color #870001. the layer with your foreground color #870001.Layers>New Mask layer>From image Open the menu under the source window and you'll see all the files open. Select the image Image_entrada  Layers>Merge>Merge Group. 4.Effects>Edge Effects>Enhance More. Effects>3D Effects>Drop Shadow, color #000000. 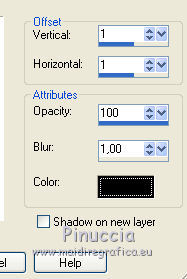 Edit>Repeat Drop Shadow. 5. You should have this.  6. Activate the layer below, Copy of Raster 1. Set your foreground color to a Foreground/Background Gradient, style Linear.  Calques>Nouveau calque raster. Selections>Load/Save Selection>Load Selection from Disk. Look for and load the Selection MoulinRouge_sel_2  7. Flood Fill the layer with your Gradient.Adjust>Blur>Gaussian Blur - radius 40. 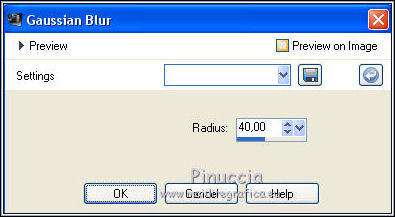 Effects>Plugins>Caroline and Sensibility - CS-Textures.  Adjust>Sharpness>Sharpen More. Selections>Select None. 8. Ouvrir moulinrouge  Edit>Copy. Go back to your work and go to Edit>Paste as new layer. Image>Resize, to 60%, resize all layers not checked. Layers>Arrange>Bring to Top. K key to activate your Pick Tool  and set Position X: 10,00 and Position Y: 90,00.  M key to deselect the Tool. 9. Change the Blend Mode of this layer to Hard Light. Effects>Plugins>FM Tile Tools - Blend Emboss, default settings. 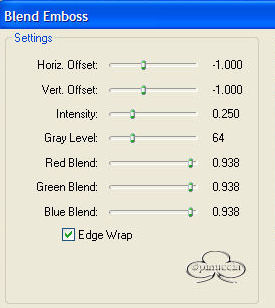 Effects>3D Effects>Drop Shadow, color #ff151a.  10. You should have this.  11. Open dancers_MR  Edit>Copy. Go back to your work and go to Edit>Paste as new layer. Image>Resize, to 55%, resize all layers not checked. Pick Tool and set Position X: -2,00 and Position Y: 320,00.  Layers>Arrange>Move Down. 12. Adjust>Sharpness>Sharpen. Effects>Plugins>Mura's Meister - Copies.  Activer l'outil Sélection  , rectangle, , rectangle,and draw a rectangle like in the example.  Press CANC on the keyboard  We delete if a small black dot remains. Selections>Select None. 13. Effects>3D Effects>Drop Shadow, same settings. Result  Selections>Load/Save Selection>Load Selection from Disk. Look for and load the Selection MoulinRouge_sel_1  Activate the layer Raster 1. Selections>Promote Selection to layer. Layers>Arrange>Bring to Top. 14. Adjust>Blur>Gaussian Blur - radius 80.  Layers>New Raster Layer. Open the image image_dancers  Edit>Copy. Go back to your work and go to Edit>Paste into Selection. Selections>Select None. 15. Adjust>Sharpness>Sharpen More. Activate the layer below, Promoted Selection.  Effects>Plugins>Carolaine & Sensibility - Cs-Texture, same settings.  Adjust>Sharpness>Sharpen. 16. Activate the top layer. Layers>Merge>Merge Down. Layers>Arrange>Move Down - 2 times.  Selections>Load/Save Selection>Load Selection from Disk. Look for and load the Selection MoulinRouge_sel_3  Press CANC on the keyboard. Selections>Select None. 17. You should have this. 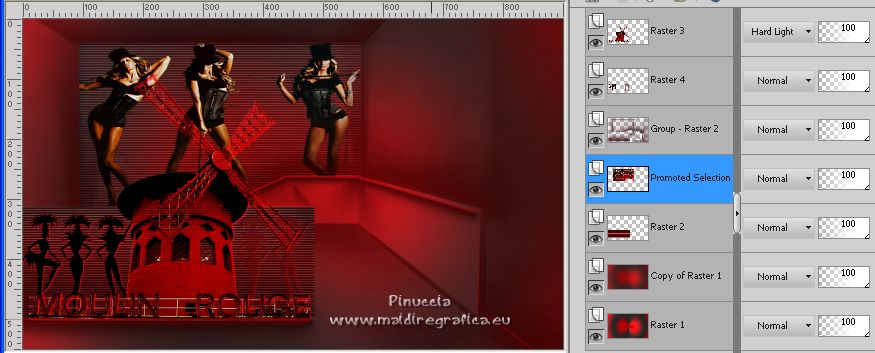 18. Stay in this layer, Promoted Selection. Open Drevers_woman_26  Edit>Copy. Go back to your work and go to Edit>Paste as new layer. Image>Resize, to 90%, resize all layers not checked. Pick Tool Set Position X: 338,00 and keep Position Y: 0,00.  Change the Blend Mode of this layer to Overlay and reduce the opacity to 73%. 19. Activate the layer Raster 1. Edit>Copy. Edit>Paste as new image. Go back to your work. Image>Add borders, 1 pixel, symmetric, color #000000. 20. Selections>Select All. Image>Add borders, 50 pixels, symmetric, color #ffffff. Selections>Invert. Edit>Paste into Selection (the image minimized is in memory). 21. Effects>Texture Effects>Weave. weave color #870001 - gap color #580002.  Adjust>Sharpness>Sharpen More. Effects>Plugins>AAA Frames - Foto Frame.  Selections>Select None. 22. Open GlamourQueen-Cabaret  Edit>Copy. Go back to your work and go to Edit>Paste as new layer. Image>Resize, to 95%, resize all layers not checked. Pick Tool and set Position X: 637,00 and Position Y: 47,00.  Adjust>Sharpness>Sharpen More. 23. Open LTDStudio_MoulinRouge_deco  Edit>Copy. Go back to your work and go to Edit>Paste as new layer. Layers>Arrange>Move Down. Pick Tool and set Position X: 51,00 and Position Y: 59,00.  24. Sign your work on a new layer. Add the author and translator's watermarks. Layers>Merge>Merge all. I resize my work to 900 pixels width. Save as jpg.  If you want realize the animation, go to Edit>Copy. Animation 1. Open Animation Shop. Edit>Paste>Paste as new animation Edit>Duplicate and repeat until you have an animation composed by 16 frames. Click on the first frame to select it and go to Edit>Select All. 2. Open the animation SimoneAni-LightningSpecial-01, also composed by 16 frames. Edit>Select All. Edit>Copy. Activate your work and go to Edit>Paste>Paste into selected frame Place the animation in the center of the wheel and when you are sure you have found the correct position click the left mouse button  Check the result clicking on View animation  and save as gif. For the tubes of this versions thank Guismo and Yoka    If you have problems or doubts, or you find a not worked link, or only for tell me that you enjoyed this tutorial, write to me. 26 Janvier 2023 |


