Home |
Home |

Mappa sito |
Mappa sito |
Tutorial |
Tutorial |
Tut tecnici |
Tut tecnici |
Links-Banner |
Links-Banner |
Regali-Award |
Regali-Award |
Informatica |
Informatica |
Archivio |
Archivio |
Mail |
Mail |
Privacy policy |
Privacy policy |
Novità |
Novità |
Home |
Home |
Mappa sito |
Mappa sito |
Tutorial |
Tutorial |
Tut tecnici |
Tut tecnici |
Links-Banner |
Links-Banner |
Regali-Award |
Regali-Award |
Informatica |
Informatica |
Archivio |
Archivio |
Mail |
Mail |
Privacy policy |
Privacy policy |
Novità |
Novità |
|
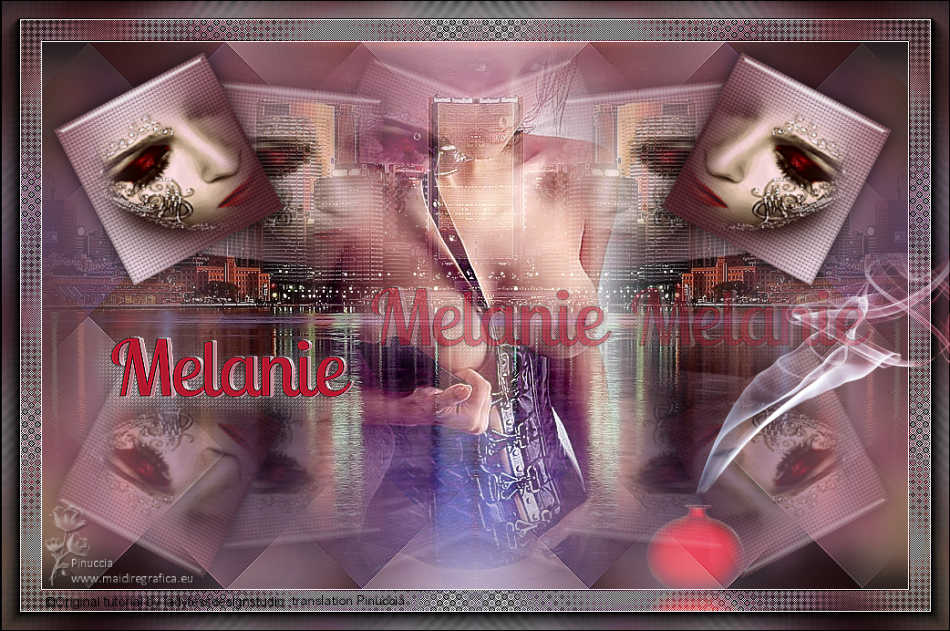
MELANIE 

This tutorial, was created with PSPX9 and translated with PSP2020, but it can also be made using other versions of PSP.
For this tutorial, you will need:  Thanks for the tubes Nikita, Drevers and Eugenia Clo. (you find here the links to the material authors' sites)  consult, if necessary, my filter section here Mura's Meister - Copies here Mehdi - Wavy Lab, Sorting Tiles here Alien Skin Eye Candy 5 Impact - Glass here L&K's - L&K's Palmyre here AAA Frames - Foto Frame here  You can change Blend Modes according to your colors.  Copy the Selection in the Selection Folder. Copy the texture silverbead in the Textures Folder. 1. Set your foreground color to #e9e1ec and your background color to #3a2025.  2. Open a new transparent image 950 x 600 pixels. Effects>Plugins>Mehdi - Wavy Lab This filter creates gradients with the colors of your Materials palette. The first is your background color, the second is your foreground color. Change the last color created by the filtre width #79434d 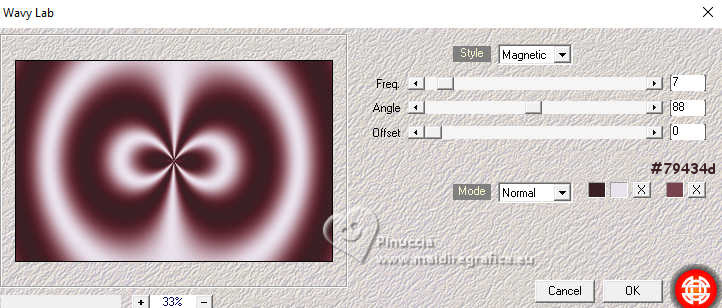 Layers>Duplicate. Adjust>Blur>Gaussian Blur - radius 50.  3. Layers>New Raster Layer. Selections>Select All. Open Sydney_byClo  Edit>Copy. Go back to your work and go to Edit>Paste into Selection. Selections>Select None. 4. Effects>Image Effects>Seamless Tiling, default settings.  Layers>Merge>Merge Down. Adjust>Blur>Gaussian Blur - radius 20.  Effects>Plugins>Mehdi - Sorting Tiles. 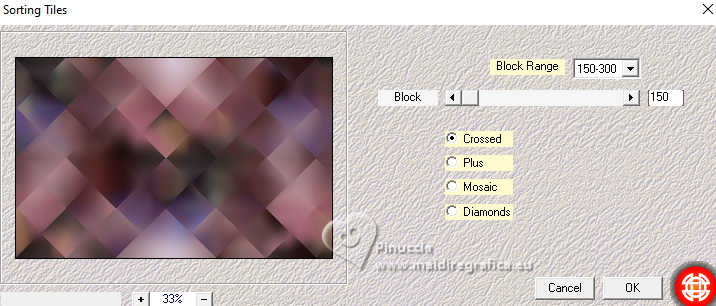 5. Effects>Reflection Effects>Rotating Mirror, default settings.  Effects>Edge Effects>Enhance. Edit>Paste as new layer - the tube Sydney_byClo is still in memory. Effects>Reflection Effects>Rotating Mirror, same settings. K key to activate your Pick Tool  keep Position X: -72,00 - Position Y: -173,00. 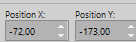 M key to deselect the Tool. 6. We have this 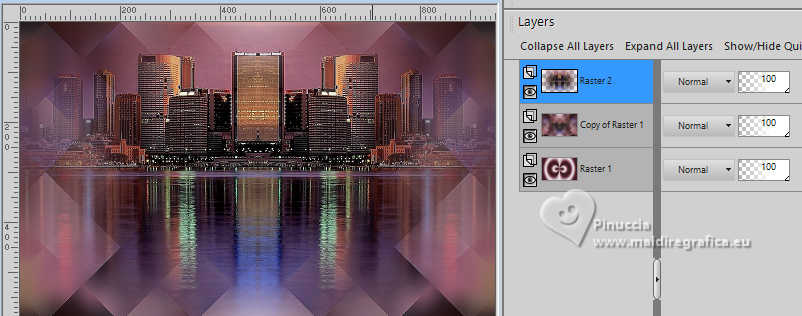 7. Selections>Load/Save selection>Load Selection from Disk. Look for and load the selection Melanie_sel_1 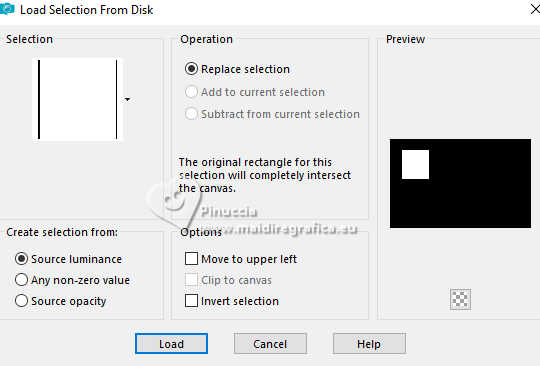 Activate the layer Raster 1. Selections>Promote Selection to Layer. Layers>Arrange>Bring to Top. 8. Adjust>Blur>Gaussian Blur - radius 40. 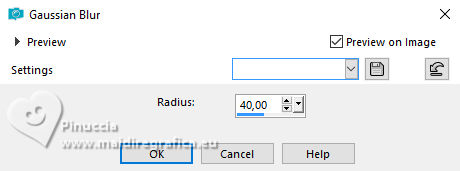 Effects>Texture Effects>Texture - select the texture silverbeads  Adjust>Sharpness>Sharpen. Selections>Select None. 9. Effects>3D Effects>Drop Shadow, color #000000. 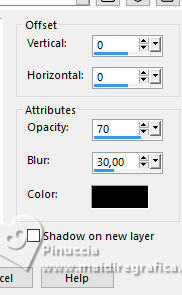 Selections>Load/Save Selection>Load Selection from Disk. Load again the selection Melanie_sel_1 Layers>New Raster Layer. Open 1379434227_corps_nikita 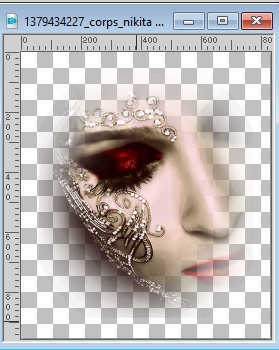 Edit>Copy. Go back to your work and go to Edit>Paste into Selection. 10. Adjust>Sharpness>Sharpen More. Layers>Merge>Merge Down. Effects>Plugins>Alien Skin Eye Candy 5 Impact - Glass Preser Clear with there settings. 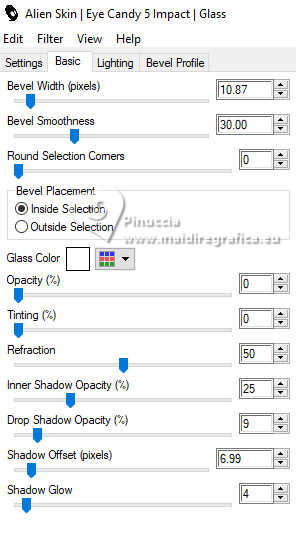 Selections>Select None. 11. Effects>Plugins>Mura's Meister - Copies. 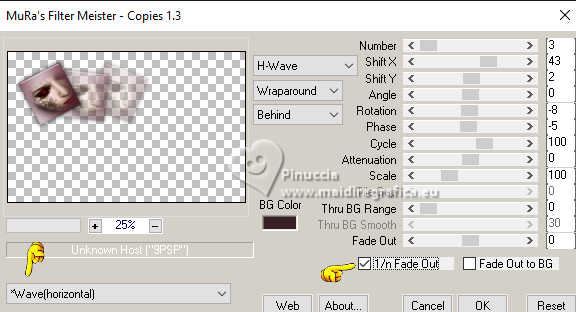 K key to activate your Pick Tool Position X: -6,00 - Position Y: -8,00 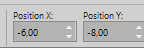 Effects>Reflection Effects>Rotating Mirror.  12. Layers>Duplicate. Image>Mirror>Mirror Vertical. Reduce the opacity of this layer to 40%. 13. We have this 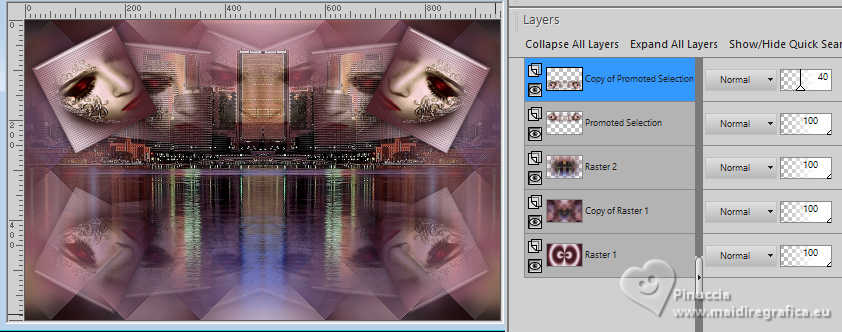 14. Edit>Copy Special>Copy Merged. Edit>Paste as new image, and minimize this image. Go back to your work. Image>Add borders, 1 pixel, symmetric, color #ffffff. 15. Selections>Select All. Image>Add borders, 45 pixels, symmetric, color #ffffff. Selections>Invert. Edit>Paste into Selection - the image minimized at step 14 is still in memory. 15. Adjust>Blur>Gaussian Blur - radius 20. Effects>Plugins>L&K's - L&K's Palmyre, default settings. 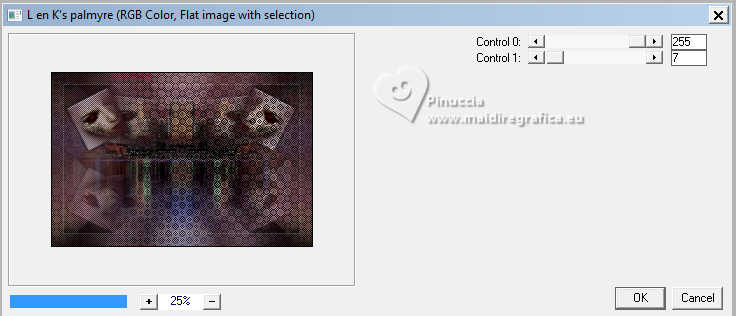 Effects>Edge Effects>Enhance. 16. Effects>Plugins>AAA Frames - Foto Frame. 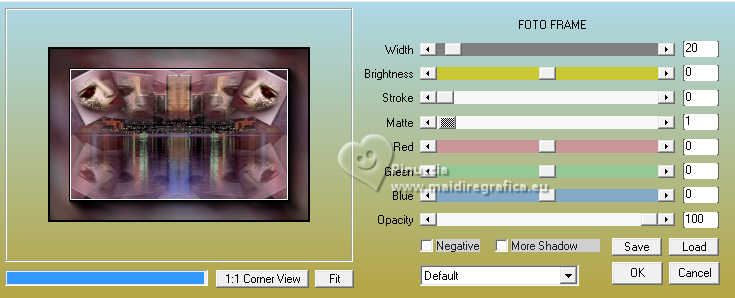 Effects>Reflection Effects>Rotating Mirror, default settings. Selections>Select None. 17. Open Drevers_misted_woman_180 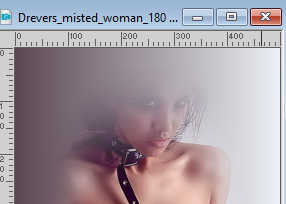 Edit>Copy. Go back to your work and go to Edit>Paste as new layer. Change the Blend Mode of this layer to Screen. Adjust>Sharpness>Sharpen More. 18. Open Drevers_deco_47 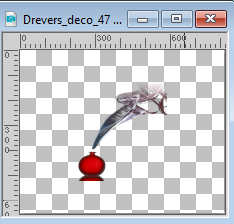 Edit>Copy. Go back to your work and go to Edit>Paste as new layer. K key to activate your Pick Tool Position X: 706,00 - Position Y: 278,00. 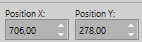 M key to deselect the Tool. Change the Blend Mode of this layer to Screen. 20. Open LTDStudio_Melanie_Texto 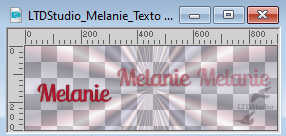 Edit>Copy. Go back to your work and go to Edit>Paste as new layer. Place  the text to your liking. the text to your liking.Sign your work. Add the author and the translator's watermarks. Layers>Merge>Merge All and save as jpg. For the tubes of this version thanks Silvina Vanesa Orsi and Cibi-Bijoux (the landscape is mine)   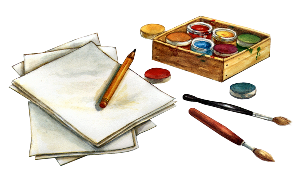 Your versions. Thanks Your versions. Thanks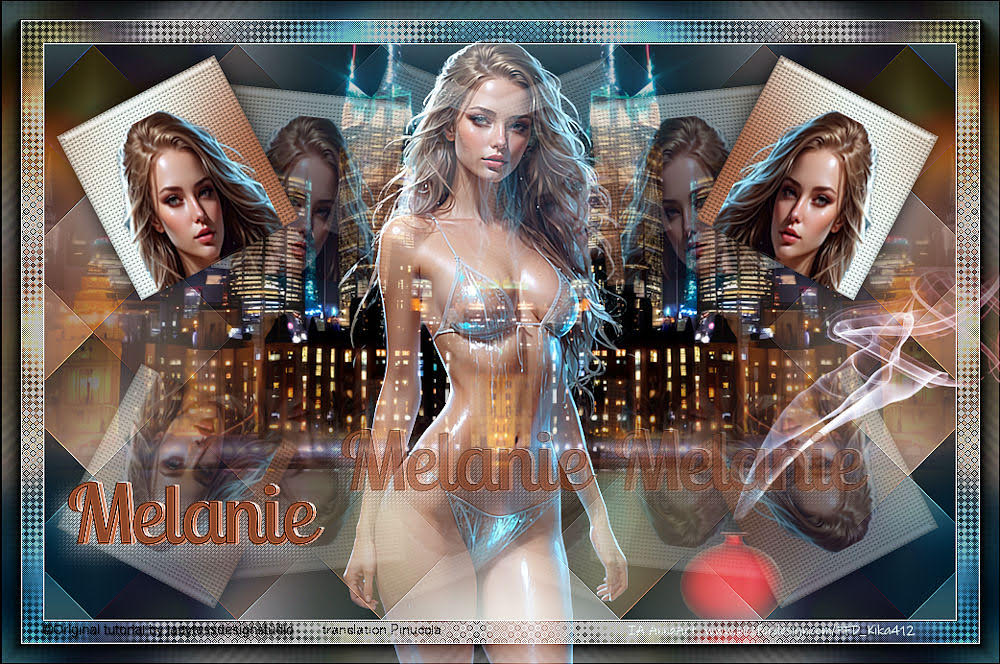 Kika If you have problems or doubts, or you find a not worked link, or only for tell me that you enjoyed this tutorial, write to me. 31 July 2024 |